Dahlia Saving Part 2
Congratulations: you’ve dug, washed, and dried your dahlia tubers!
Now it’s time to divide and pack them away for next year :)
Some folks don’t divide until spring but I prefer (at least for now) to divide before I pack for storing. This saves space and then I can inventory now so I know how many I’ll have come planting time.
Follow these easy steps to divide and save your tubers!
The first step is to grab your tuber bunch and cut it in half. This will make the whole job more manageable. Sometimes it’s hard to know where to start! Once you make that first cut, it is a little easier to see each tuber individually.
I like to use a sharp knife or a pair of felco snips for cutting. You can try both to see which one works best for you.
Don’t worry if you destroy a few tubers in this process. You will still have plenty to work with.
Once you’ve broken down the tuber bunch it’s time to start dividing individual tubers.
Here’s the most important part: for each intact tuber body you need to have an intact “neck” (the place between the tuber body and the place where the “eye” has formed), and and eye. If you don’t have these components, your tuber will not sprout in the spring
If you’re not sure what a dahlia eye looks like I'm pointing one out here with my pencil. Eyes are either slightly green/yellow (like above) or a purple/red color (like below).
This picture is showing the proper cut to give you the three key components: 1) tuber body, 2) intact neck and 3) eye (you're looking at the cut at the center of the photo. Disregard the broken tuber!).
Once my tubers are cut I dip the cut end in cinnamon (a natural, anti-fungal to ward off mold and rot) and lightly sprinkle in cinnamon.
To store my tubers for the winter I take a paper or plastic bag and put a layer of wood shavings, then a layer of tubers, then a layer of shavings, etc.
Make sure to label your varieties! I leave a plastic label in the bag AND label the paper bag.
All my bags then go in plastic totes with lids and get stored in my crawlspace (which is roughly 40-50 degrees).
Be sure to check your tubers monthly until planting time to make sure they are not drying out too much or rotting!
I hope this helps you save all your gorgeous tubers for next year! Know that for each tuber you plant in the spring you will get 5-15 new tubers for next year. Soon you will be rich in dahlias. They make great gifts or you can trade your neighbors for fun new varieties.
Also, note that you can save the entire tuber bundle intact without dividing. It takes up more space but if you’re only saving a few varieties this might be the way to go. It will save you lots of time!
Please post any questions below. I’m happy to problem-solve with you.
Dahlia Saving Part 1
It’s time to dig and save your dahlias!
Each dahlia plant you have will produce at least 5-10 more tubers underground each year. This means that soon you will be RICH in tubers.
I’m here to walk you through the how-to of dahlia saving. Follow the pictures below for the first few steps in saving your dahlia tubers:
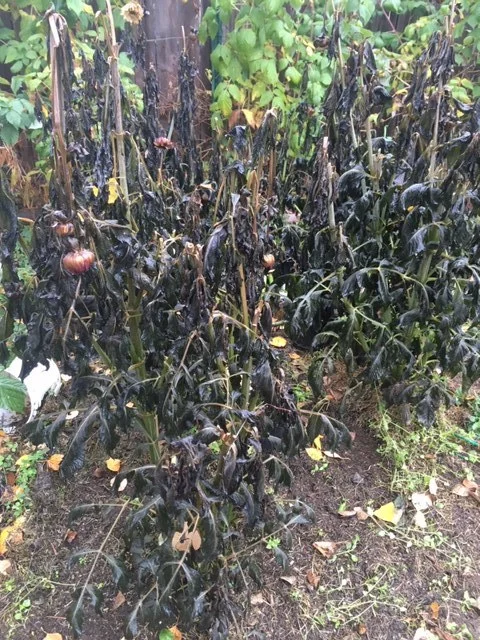
Wait until after the first hard frost to dig your tubers. You’ll know when its time when the plants look completely dead! The stems will still have some green in them but the leaves will look awful. (Quite possibly the ugliest photo I’ll post on my blog!)
Cut off the stems right above soil level and then gently pry up the tubers with a shovel or a pitchfork. The tubers are rather delicate, so pry gently! Use your hand to carefully dust off the biggest clumps of soil.
At this point, it’s important to make sure all your varieties are properly labeled. They can quickly get all scrambled up once they come out of the soil!
Use a hose to spray the tuber clump clean!
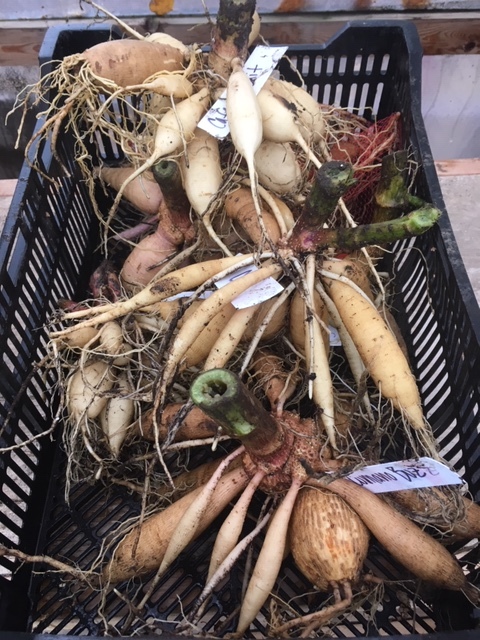
Look how many tubers I got on this baby!!! If they all save beautifully, this one plant will give me about 15-20 tubers for next year :)
Again, make sure you label your tubers so you know what you’re getting next year.
Place them somewhere to dry for 2-3 days. Mine are in my hoophouse and in my shed, gently stacked in bulb crates or hung from the ceiling.
If drying in an outbuilding or outside, don’t let them freeze!
Be sure to also read “Dahlia Saving Part 2” to learn all about dividing, packing and storing your tubers.


