Grow Your Own Cutting Garden: 10 Cut Flowers for the Intermediate Gardener
Add a little challenge to your home cutting garden with these 10 varieties.
If you’ve already mastered some of the beginner cut flowers I reference here in my last blog, you’re ready to add a few more challenging flowers to your garden.
I classify these as more intermediate because each of these varieties may have one or more needs:
the need to be started earlier and usually indoors
more time babying them inside
particular needs when harvesting
the need for succession planting
For greater ease in growing any of these, skip the succession planting for now and just do one planting of each during the last seeding week I mention for each variety.
If you want to test your skills further, pick a few to succession seed for a longer blooming garden.
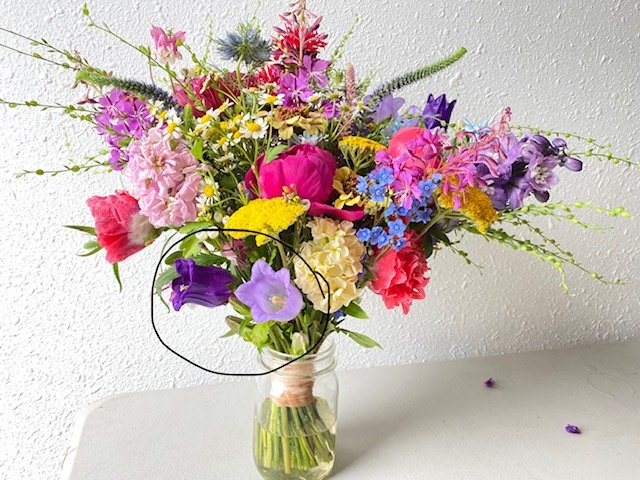
Campanula
These are fun and delicate blooms that look fabulous in the garden.
I also use them consistently in my wedding work.
In the vase they lasted a good 1-2 weeks in good condition.
This is an all round excellent flower.
Cut these for the vase when the first flower opens up as the other buds will continue to open in the vase.
Cosmos
Cosmos is a staple of mine every year. Varieties I love are: Rubenza, Double Click Varieties and Cupcakes.
I plant mine in two successions, one starting week 15 and another starting week 18. The varieties I plant in week 18 are usually more fall themed colors like Rubenza and Double Click Cranberries.
Pinch these when 4-6 inches tall to get the most blooms per plant.
These flowers are delicate and ephemeral. They look stunning and full in the garden and marvelous in the vase.
Part of their joy is that they can’t be shipped since they are so delicate.
You can only have these in your vase if you grow them yourself or buy from a local farm.
Harvest when just beginning to open for longest vase life.
Double Click Cosmos in the Turnstone Farm Gardens
Dianthus
I fell in love with the “Sweet” varieties last year and am growing three different colors from this line.
My seeding will occur during week 13 and 15.
Harvest for the vase when the florets are 10-20% open. They will continue to open in the vase giving a solid 2 weeks of vase life.
Godetia
While this one didn’t make my initial “best of” list I’m still listing it here for the home gardener. “Grace Mix” gives you a nice variety of colors for your garden.
I’m giving this one more go this coming year to see if I can get a bit more length to the stems.
I’m seeding these in week 15 and 18.
Godetia will last forever in the garden and in the vase - florets just keep opening up. It is short and sturdy for garden beds.
The petals are easily damaged by rain. Although we had an exceptionally rainy summer in 2022 which was my first year growing these.
Phlox
Cherry Caramel, Dulce de Leche and Sugar Stars are what I grow each year.
I start these in week 14, 17 and 19.
These are delicate blooms that have a solid vase life. Harvest when the flower just begins to show color. If you cut before they are fully open they will open in the vase.
This is a solid cut and come again flower and the more you cut, the more blooming stems will grow.
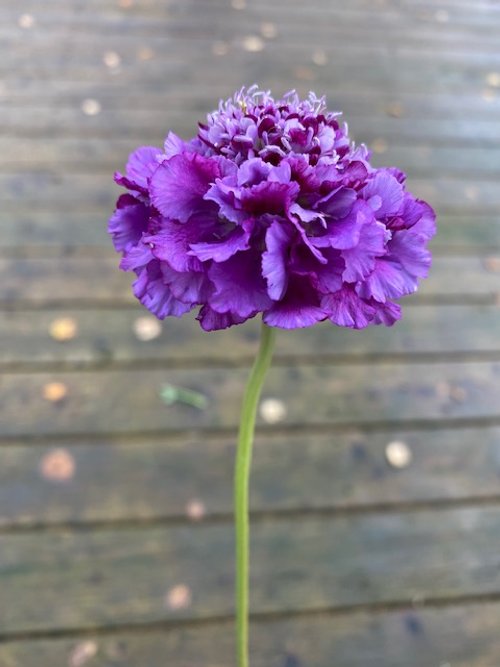
Scabiosa
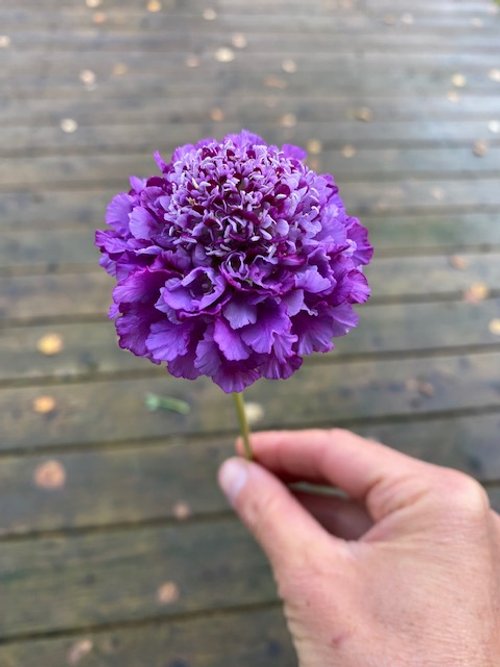
This is a tall plant with long strong stems.
I love “Black Knight”, “Oxford Blue” and “Fire King” but there are many more fabulous varieties.
Start in week 13 and week 16.
Scabiosa looks whimsical and lively in the garden or you can cut it just when the first florets begin to open. When cut at this time it will last a solid 1-2 weeks in the vase.
Scabiosa loves cooler temperatures so does better in our cooler Alaskan summers.
Black Knight Scabiosa
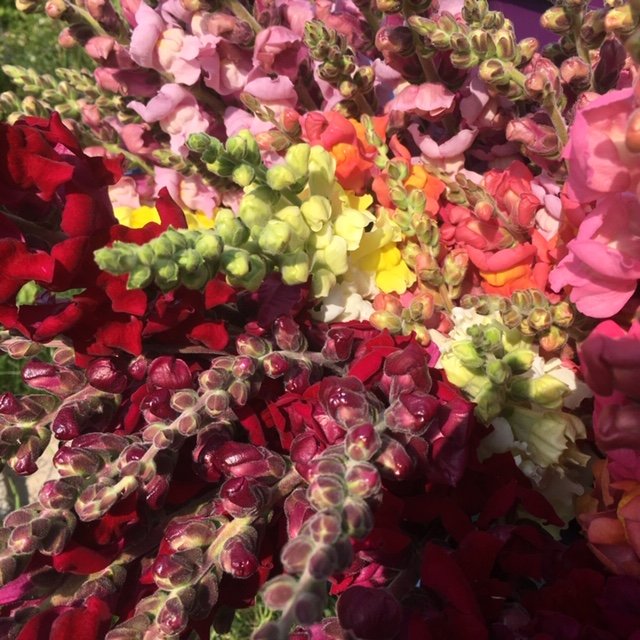
Snapdragons
My go to variety is any color in the “Potomac” variety family. They are strong and sturdy with fabulous blooms.
If you want something more unique try “Madame Butterfly” varieties or “Chantilly”. These two types have the most unique florets but are much more delicate and break fairly easy. If you’re just bringing them from garden to your house, they should do fabulous.
This is one of the earliest flowers I plant and I start these in week 11 and week 14. They grow slow and you can put them in the garden extra early since they can weather a few light frosts.
Harvest for the vase when 1/3 of the florets have started to open.
Me netting a bed of snapdragons in the original Turnstone Farm Flower fields in Southern Wisconsin.
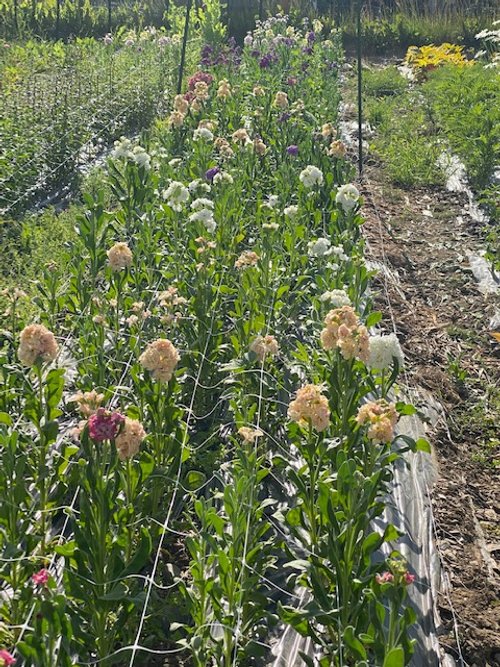
Statice
These are great for a long lasting cut flower or for drying.
They come in a variety of colors but my favorite is QIS Apricot.
I start these by seed in week 12 and week 14.
Cut when most of the flowers are fully open and showing color.
Sunflowers
Although these are relatively easy to grow, I put them here for a couple reasons. The first being that they are good practice for succession planting. I plant these in weeks 18, 20 and 22.
Varieties I’m growing this year include the Sunrich series and the Procut series. I grow these each year and then will add in one fun and new variety each year.
You can succession plant sunflowers a couple ways: plant the same variety every 2-3 weeks for 3 successions. OR plant different varieties (that each have a different DTM) at the same time. Then repeat this once or twice.
You can also play with growing them close together to get the perfect sized sunflower for the vase. I space mine 4-6” apart for best results.
Harvest for the vase when petals are just beginning to unfurl but are fully colored.
Space your sunflowers 4-6” apart to create the best size flowers for your vase.
Rudbeckia
I love the Cherokee Sunset, Indian Summer and Prairie Sun varieties.
I start these by seed in week 13. I don’t find it necessary to succession seed as these are cut and come again flowers. You cut them and they keep growing new stems!
Harvest when the stems pass the wiggle test. Simple grab onto a stem and wiggle back and forth. If the bloom wobbles on a floppy stem, wait to cut until the stem has matured further. Once the flowers are fully open I check daily for a nicely rigid stem
Look at this freaking beauty!!!! Rudbeckia is stunning in the cut flower garden.
I hope this gave you new ideas for your home cutting garden this year. Start with 1-5 new varieties and see how they do!
Best of 2022: My Favorite Flowers from the Cutting Garden
Fall is time to dig out all the garden notes you’ve been taking and put that data to good use.
I’ve been reviewing my notes and I’m here to tell you what I absolutely LOVED in my cutting garden this year.
These are all annuals, grown specifically for my cutting garden.
I will follow this post with a blog on perennials. As they become a bigger part of my cutting garden, they deserve their very own article.
So without further ado, here are my top 9 Cutting Annuals for 2022:
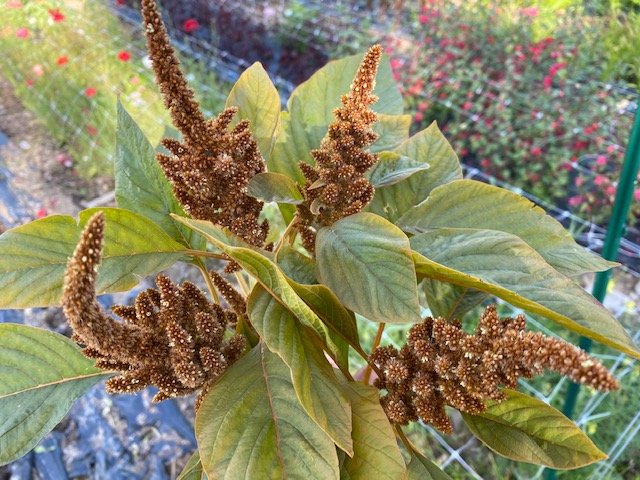
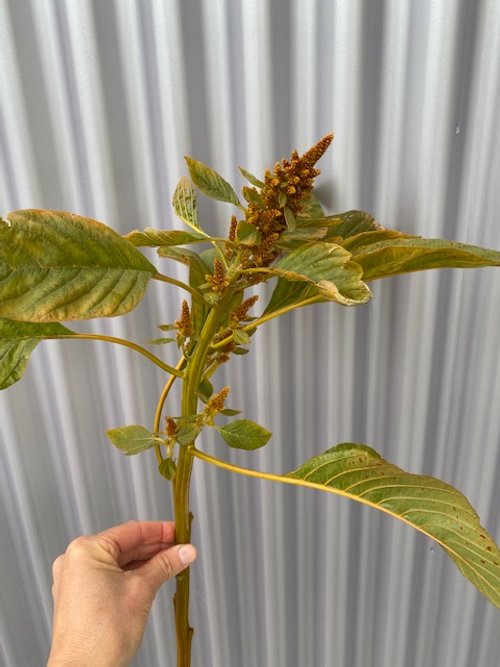
Hot Biscuits Amaranth
Amaranth is a beautiful grain that has gorgeous foliage and stunning inflorescence.
Hot biscuits consistently out-produced all the other Amaranth varieties I grew in height and size. It was such an amazing fall-colored addition to bouquets.
I looks full and interesting in the garden and does amazing in the vase. I consistently had it in the vase for 2 + weeks.
In addition, you can hang it to dry for an everlasting bouquet.
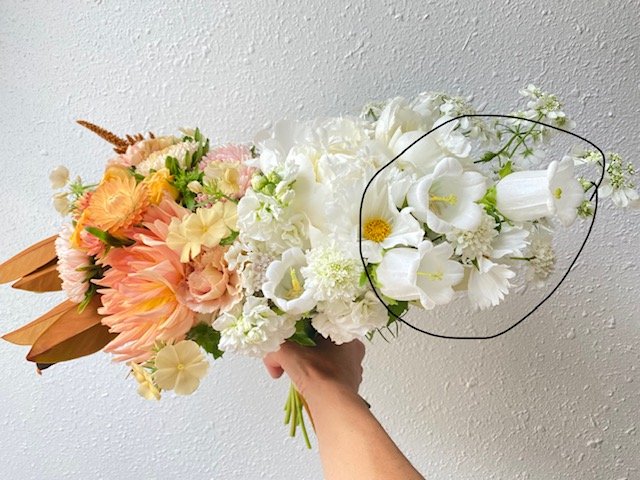
Campanula
These are fun and delicate blooms that look fabulous in the garden.
I also used them consistently in wedding work this year. See above bridal bouquets!
In the vase they also lasted a good 1-2 weeks in good condition.
This is an all round excellent flower.
Cut these for the vase when the first flower opens up as the other buds will continue to open in the vase.
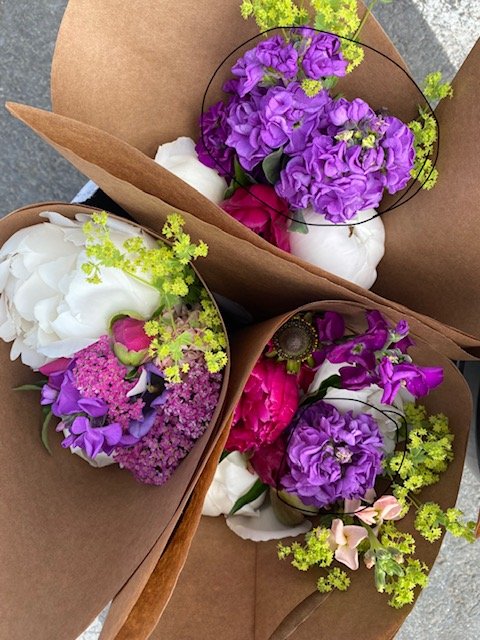
Vintage Brown and Iron Varieties Stock
Stock is an early season bloomer and helps fill the gap between tulips and all the other garden varieties.
Its smell cannot be beat.
The flowers are edible.
It lasts for a solid week + in the vase.
It comes in a variety of colors: white, apricot, purple, light and bright pink and yellow.
While a more challenging flower to grow as it must be started earlier, dislikes dry conditions (spring 2022 anyone!), and dislikes heat, it is well worth the challenge.
Salmon Frosted Breadseed Poppy
This one was a show stopper this year.
These were like little explosions in the vase. I cut them just as they start opening up and then they poof out into big fluffy balls of color.
While all poppies have a short vase life, this one did a little better than most. I got a solid 3+ days of blooming time in the vase.
That’s good news y’all!
Some flowers are more ephemeral than others.
Giant Orange Marigold
This flower makes my favorites list every year.
Here’s why:
It has a stunning and cheery color.
It smells heavenly.
It dries well.
It can last up to 3 weeks in the vase.
One plant pumps out blooms almost all summer long.
It’s easy to grow.
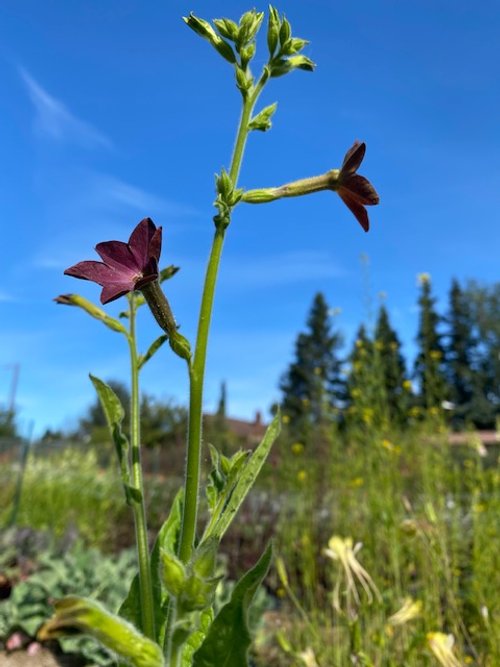
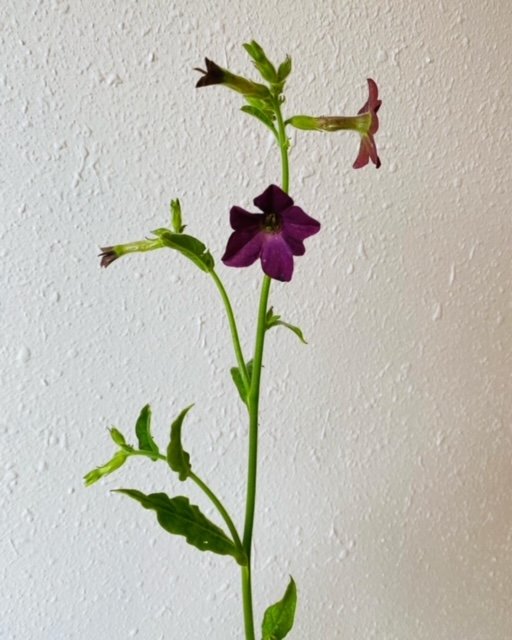
Bronze Queen Nicotiana
I LOVED this flower. It is delicate and whimsical and was the perfect addition to most of my bouquets.
As a garden flower it adds interest and texture but is a little sparse. It is not big, showy or bright.
In the vase is really where it shines.
It has a long vase life and it is so fun to look at those delicate little trumpet flowers!
Godetia
While this one didn’t make my initial “best of” list I’m listing it here for the home gardener.
I have not decided if I’m growing it again next year for my cutting garden but I would highly recommend it as an addition to any flower gardeners repertoire.
The pros: it lasts forever in the garden and in the vase - florets just keep opening up. It is short and sturdy for garden beds. It does well in shorter vases.
The cons: it is too short to use in most bouquets. The petals are easily damaged by rain.
Try it and see if you like it!
Rubenza Cosmos
Cosmos is a staple of mine every year.
These flowers are delicate and ephemeral. They look stunning and full in the garden and marvelous in the vase.
Part of their joy is that they can’t be shipped since they are so delicate.
You can only have these in your vase if you grow them yourself or buy from a local farm.
Rubenza is a magical deep maroon color with a vibrant yellow center. I find myself marveling at it’s beauty EVERY time I see it.
Oxford Blue Scabiosa
This is a tall plant with long strong stems.
It looks gorgeous and lively in the garden or you can cut it just when the first florets begin to open. When cut at this time it will last a solid 1-2 weeks in the vase.
Scabiosa loves cooler temperatures so does better in our cooler Alaskan summers.
Container Gardening for EVERYONE
I know that for some folks, space is a huge issue when it comes to gardening.
I spent years gardening on my front porch in any vessel that would hold soil. Fortunately, I now own a home with a modest lot and manage an entire vacant lot to grow on - YES, I am blessed.
That being said there are a few reasons I still love growing cut flowers in containers:
1) It increases the amount of space I can cultivate. Even with all my gardening space, I still feel a little greedy in this department - I want more!
2) You can line a porch or patio with them, creating cozy outdoor “rooms”.
3) They are inexpensive to start.
4) They bring your gardens and flowers closer to your home, creating beauty you can view from inside your home (I love positioning all my gardens within view of key windows).
5) If arranged in a sheltered area around your home, you can often plant earlier and harvest later since they are growing in a warmer microclimate (the potted dahlias that I grow on my porch usually get a solid 2 weeks of additional bloom time in the fall.
Grow your dahlias and eat too! Kale planted next to dahlias is both beautiful and utilitarian.
Not sure what to grow in pots?
Here are some of my favorite varieties to pop in a planter:
Calendula
Ammi
Dahlias
mini Sunflowers ( I love growing these en masse in a large container. This is any single stem sunflower, they are simply spaced 4 inches apart in the container. The close proximity will keep them small)
Bachelor buttons
Snapdragons
Cosmos
Borage
Lavender
Nasturtium
Poppies
Sweet Peas
Salad mixes
Greens (kale, collards, etc)
Radishes
Cucumbers
Tomatoes
Pumpkins
Herbs
Space everything a little closer than you would in the garden.
I try to squeeze as many plants into a container as possible. Just remember that overcrowding can lead to less than robust plants. In general, space most plants 6-8 inches apart. If growing dahlias, they need 5 gallons each as a minimum.
So what kinds of planters do you need?
The sky really is the limit, but to get you started here are some ideas. Half whisky barrels, large containers from the garden store. In general anything around 2 gallons and larger. Single herb plants will thrive in a gallon container, but that’s the smallest I ever go.
If using old whisky or wine barrels, ask the garden store if you should line them. Sometimes this is needed if there is alcohol residue in the wood - this will leach into the soil and kill your plants.
Make sure any planters you are using have good drainage. If not, drill small drain holes in the bottom.
Once you’ve got your containers, you’re ready get dirty and fill em up!
Here’s what I fill my containers with: 1/3 garden soil, 1/3 compost, 1/3 potting mix. You can re-use your soil year after year, just treat it like your garden soil and amend it with compost and organic fertilizers every year.
When can you plant?
The great thing about growing in containers is that if you position planters in a warm and sheltered place in your yard (usually close to your house), the soil thaws out quickly each year.
You can often plant earlier than you can in your in-ground beds.
I start my early-season salad mix in April (my last frost date hovers around May 15th). Warmer season crops I still wait until there is no chance of frost.
With this planting schedule, I can easily squeeze two crops into the same container: first my cool-season salad (planted in April and harvested through May), then my warm-season dahlias (planted at the end of May and harvested through September).
Final notes.
The main downside of container growing is the time committed to watering. During a warm summer, when plants are mature, you can plan to water at least once per day, sometimes more.
In addition, any cut flower will grow tall and beautiful. Don’t let a windstorm ruin all your hard work. Stake and support your flowers early. Check them periodically to make sure they’re secure!
Itching to learn more? My online course, The IncrEdible Garden, starts in February 2022!
If you’re not already, YOU MUST GO HERE TO GET ON MY EMAIL LIST FOR FIRST DIBS.
Tried & True Garden Varieties
Giant Orange Marigolds.
In order to get you growing an amazing and fail-proof garden, I want to get you started with some of my tried and true varieties.
Since I’m a flower LOVER and flower grower this list will be flower heavy. BUT I also want you to have some of my favorite varieties for your veggie garden.
Over the years I’ve rubbed shoulders with vegetable farmers (quite literally - my husband managed a large vegetable CSA at the same time I started my flower farm) and tested different varieties myself.
Often just choosing the right varieties will set you up for success in the garden. And with SO many fun and beautiful varieties out there - how do you know what to choose?
By putting your ear to the ground and being committed to experimenting!
Wiser growers than I have told me to commit 20% of my farm to new varieties. I’m recommending this to you now too.
Don’t go overboard with new stuff - then you risk wasting too much valuable garden space to varieties that you’re not actually sure will produce well. Stick to tried and true varieties and dip your metaphorical toe into fun and exciting new ones each year.
So now on to my tried and true varieties that I know, you’ll love.
First, for the flower garden:
Ammobiom
Ammobium aka Winged Everlasting.
Centaurea - Classic Magic, Blue Boy OR Black Button
Calendula - Orange Button
Cosmos - any Double Click Variety
Cynoglossum - Chinese Forget-me-not OR Firmament
Dill - Bouquet
Ornamental Grass - Frosted Explosion
Marigold - Giant Orange
Nasturtium - Trailing
Nigella - Albion Black Pod
Poppy - Breadseed OR Shirley
Shirley Poppy.
Rudbeckia - Cherokee Sunset
Saponaria - Pink Beauty
Scabiosa - Black Knight
Snapdragon - Potomoc varieties OR Madame Butterfly varieties
Bunches of Potomac Snapdragons.
Strawflowers - Copper Red OR Purple Red
Sunflowers - Procut varieties OR Sunrich varieties
Now for the veggie patch:
Beets - Touchstone Gold & Chiogga
Broccoli - Belstar
Belstar Broccoli just starting to grow crowns.
Carrot - Yaya
Cilantro - Calypso OR Cruiser
Cucumber - Diva OR Socrates
Kale - Red Russian OR Lacinato (also called Dinosaur or Black)
Red Russian Kale co-housed with Dahlias.
Peas - Sugar Ann OR Sugar Snap
Pumpkin - Cinnamon Girl
Spinach - Corvair
Tomato - Sun Gold
Zucchini - Dunja OR Blck Beauty
There you have it! This is by no means a comprehensive list but it’s meant to get you on the right track to a highly productive garden this season.
So now on to ordering seeds! GO HERE to read all about my favorite places to place your order.
Time to Plant Garlic
I’m a flower farmer but the one thing that I also let into my commercial garden is garlic. I LOVE garlic. It is easy and SO FUN to grow. Plus, once you’ve tried it fresh from your garden there is no going back to store-bought.
Freshly harvested garlic from the Turnstone Farm gardens.
Hopefully, after reading through these easy steps, you too will find BIG success with growing garlic.
But before we begin let’s do a brief garlic primer! So that we’re all on the same page, here are some basic garlic definitions.
A HEAD of garlic is the entire bundle that is made up of 2+ cloves.
A CLOVE is the individual piece of garlic that you would peel before cooking.
SOFTNECK garlic is a variety typically grown in more southern climates. Each head has many cloves and it is easily braided together into those quintessential garlic braids (maybe you’ve seen these at markets or in your grandma’s kitchen!?).
HARDNECK garlic is the best variety for Alaskan growing. It tends to produce fewer but larger cloves than softneck.
Garlic emerging in the early summer.
Ok, now on to the fun stuff. Here are 4 easy steps to successful garlic growing:
1) Prep your site: I like to start by clearing any old garden remnants and weeds, then adding any amendments like compost or soil nutrients that you may need. A comprehensive soil test will give you all the necessary info here. Loosen the soil with a broadfork or pitchfork.
2) Make your rows. I plant 4 rows to a 2.5ft wide bed. Dig a shallow trench about 3-4 inches deep with a flat-ended shovel.
3) Plant garlic. Place garlic cloves in the ground, about 3 inches deep with the pointy side pointing up. There is no need to peel the garlic clove but you do need to separate it from the garlic head (each head holds 2+ cloves).
4) Mulch. Mulching will protect the garlic cloves from any freeze-thaw action that occurs in the fall or spring.
NOTE, if you ordered seed garlic and it’s not here yet, don’t despair! MULCH your beds now to keep the soil insulated until you’re ready to plant.
Easy, right?! Now go do some planting. Your future self will thank you :)
In general, you will have the most success planting at any point from mid-September through mid-October. Although I have planted in early November in a pinch.
Lush garlic plants in the Turnstone Farm garden.


