

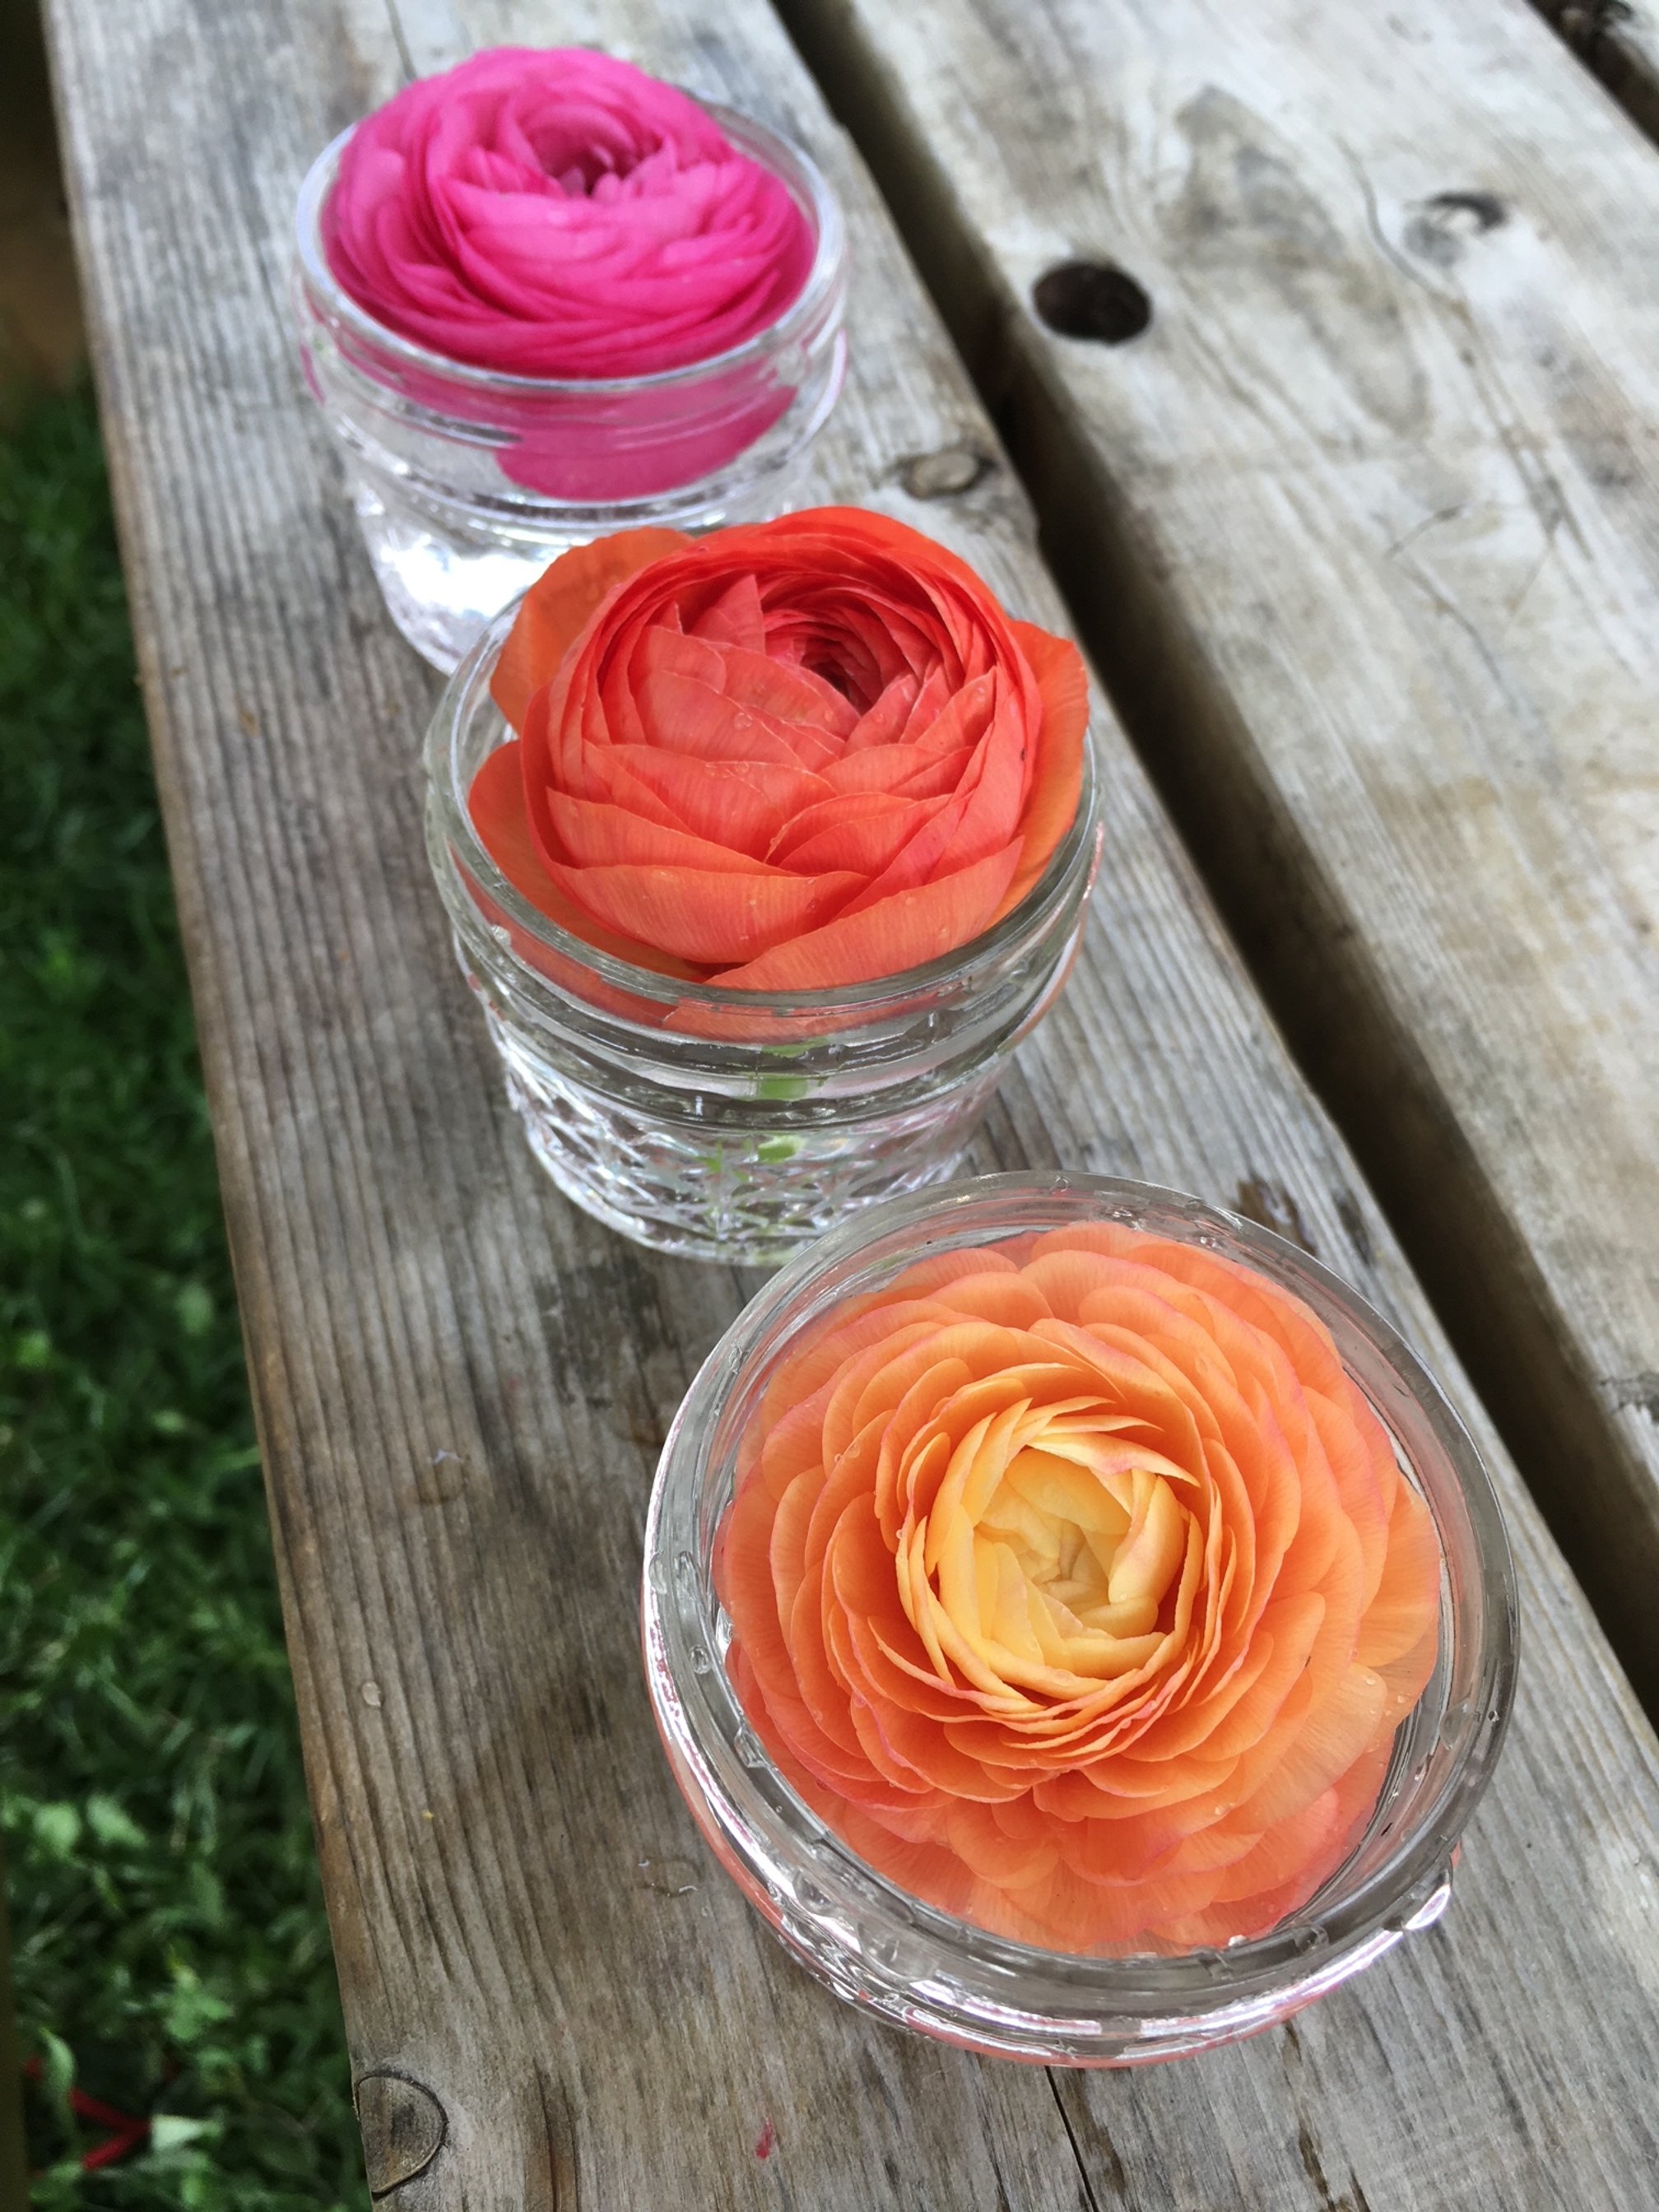
Grow a multi-purpose pollinator garden
Grow plants that are edible, look great in a vase and provide habitat for pollinators.
Pollinators, including bees, butterflies, and hummingbirds, play a crucial role in our ecosystem by helping to fertilize plants and ensure their reproduction.
Unfortunately, many pollinator populations are in decline due to habitat loss, pesticide use, and other factors. One way that you can help support native pollinators is by creating a pollinator garden, which provides a habitat for these important creatures to thrive.
Adding culinary herbs to a pollinator garden not only benefits the pollinators but also provides fresh ingredients for the kitchen.
Plus, some of these fabulous culinary plants do triple whammy by looking great in the vase!
Why Grow a Pollinator Garden?
Pollinator gardens are not only beneficial for the pollinators themselves but also for the environment as a whole. By providing a habitat for pollinators, you help to maintain the biodiversity of our planet. Thank you gardening friend!
Additionally, pollinators are responsible for fertilizing a large percentage of our food crops, so by supporting their populations, we are also supporting our own food systems.
You can’t grow a garden without pollinators!
Many pollinator-friendly plants are also beautiful additions to your garden. And, as mentioned earlier, adding culinary herbs to a pollinator garden can provide both beauty and practical benefits.
Choosing the Right Plants for your Pollinator Garden
When selecting plants for a pollinator garden, it is important to choose varieties that are attractive to pollinators. This typically includes plants with brightly colored flowers that are easy for pollinators to access. Native plants are often a great option, as they have evolved alongside the local pollinator populations and are well-suited to their needs.
When choosing culinary herbs to include in a pollinator garden, there are several options to consider. Many herbs have flowers that are attractive to pollinators, while others have foliage that can provide shelter for them.
Some popular culinary herbs that pollinators love include the following:
Addition #1 for your multi-purpose pollinator garden: Basil
Basil is a popular culinary herb that also has flowers that are attractive to bees and other pollinators.
It is an annual plant that grows well in warm weather. When planting basil in a pollinator garden, be sure to space the plants at least 12 inches apart to allow room for growth.
Basil can be trickier to grow in northern climates. I grow mine exclusively in a hoop house. In warmer climates it does well outdoors. The variety I love for cooking is Genovese. If growing for the vase, shop for varieties with deep purple leaves - they are amazing.
Any variety will produce interesting flowers for you and for your pollinators.
Addition #2 for your multi-purpose pollinator garden: Thyme
Thyme is a low-growing perennial herb that has small, fragrant flowers that are attractive to bees and butterflies.
It’s a great option for a pollinator garden because it can grow in a variety of soils and is drought-tolerant.
Thyme can be started from seed early in the season. It’s a perennial in northern climates although I plant extra each year in case I lose some over the winter.
Addition #3 for your multi-purpose pollinator garden: Cilantro
Cilantro/coriander is a fabulous fresh annual herb.
Since cilantro will bolt in the summer, I grow mine for culinary uses in the early summer and then let it bolt (go to flower).
Cilantro flowers smell heavenly - pollinators love them and they are a great filler flower for the vase.
Let a few of the flower heads go to seed. This seed is coriander! You can save it for planting next year or harvest for some super cool bouquet elements.
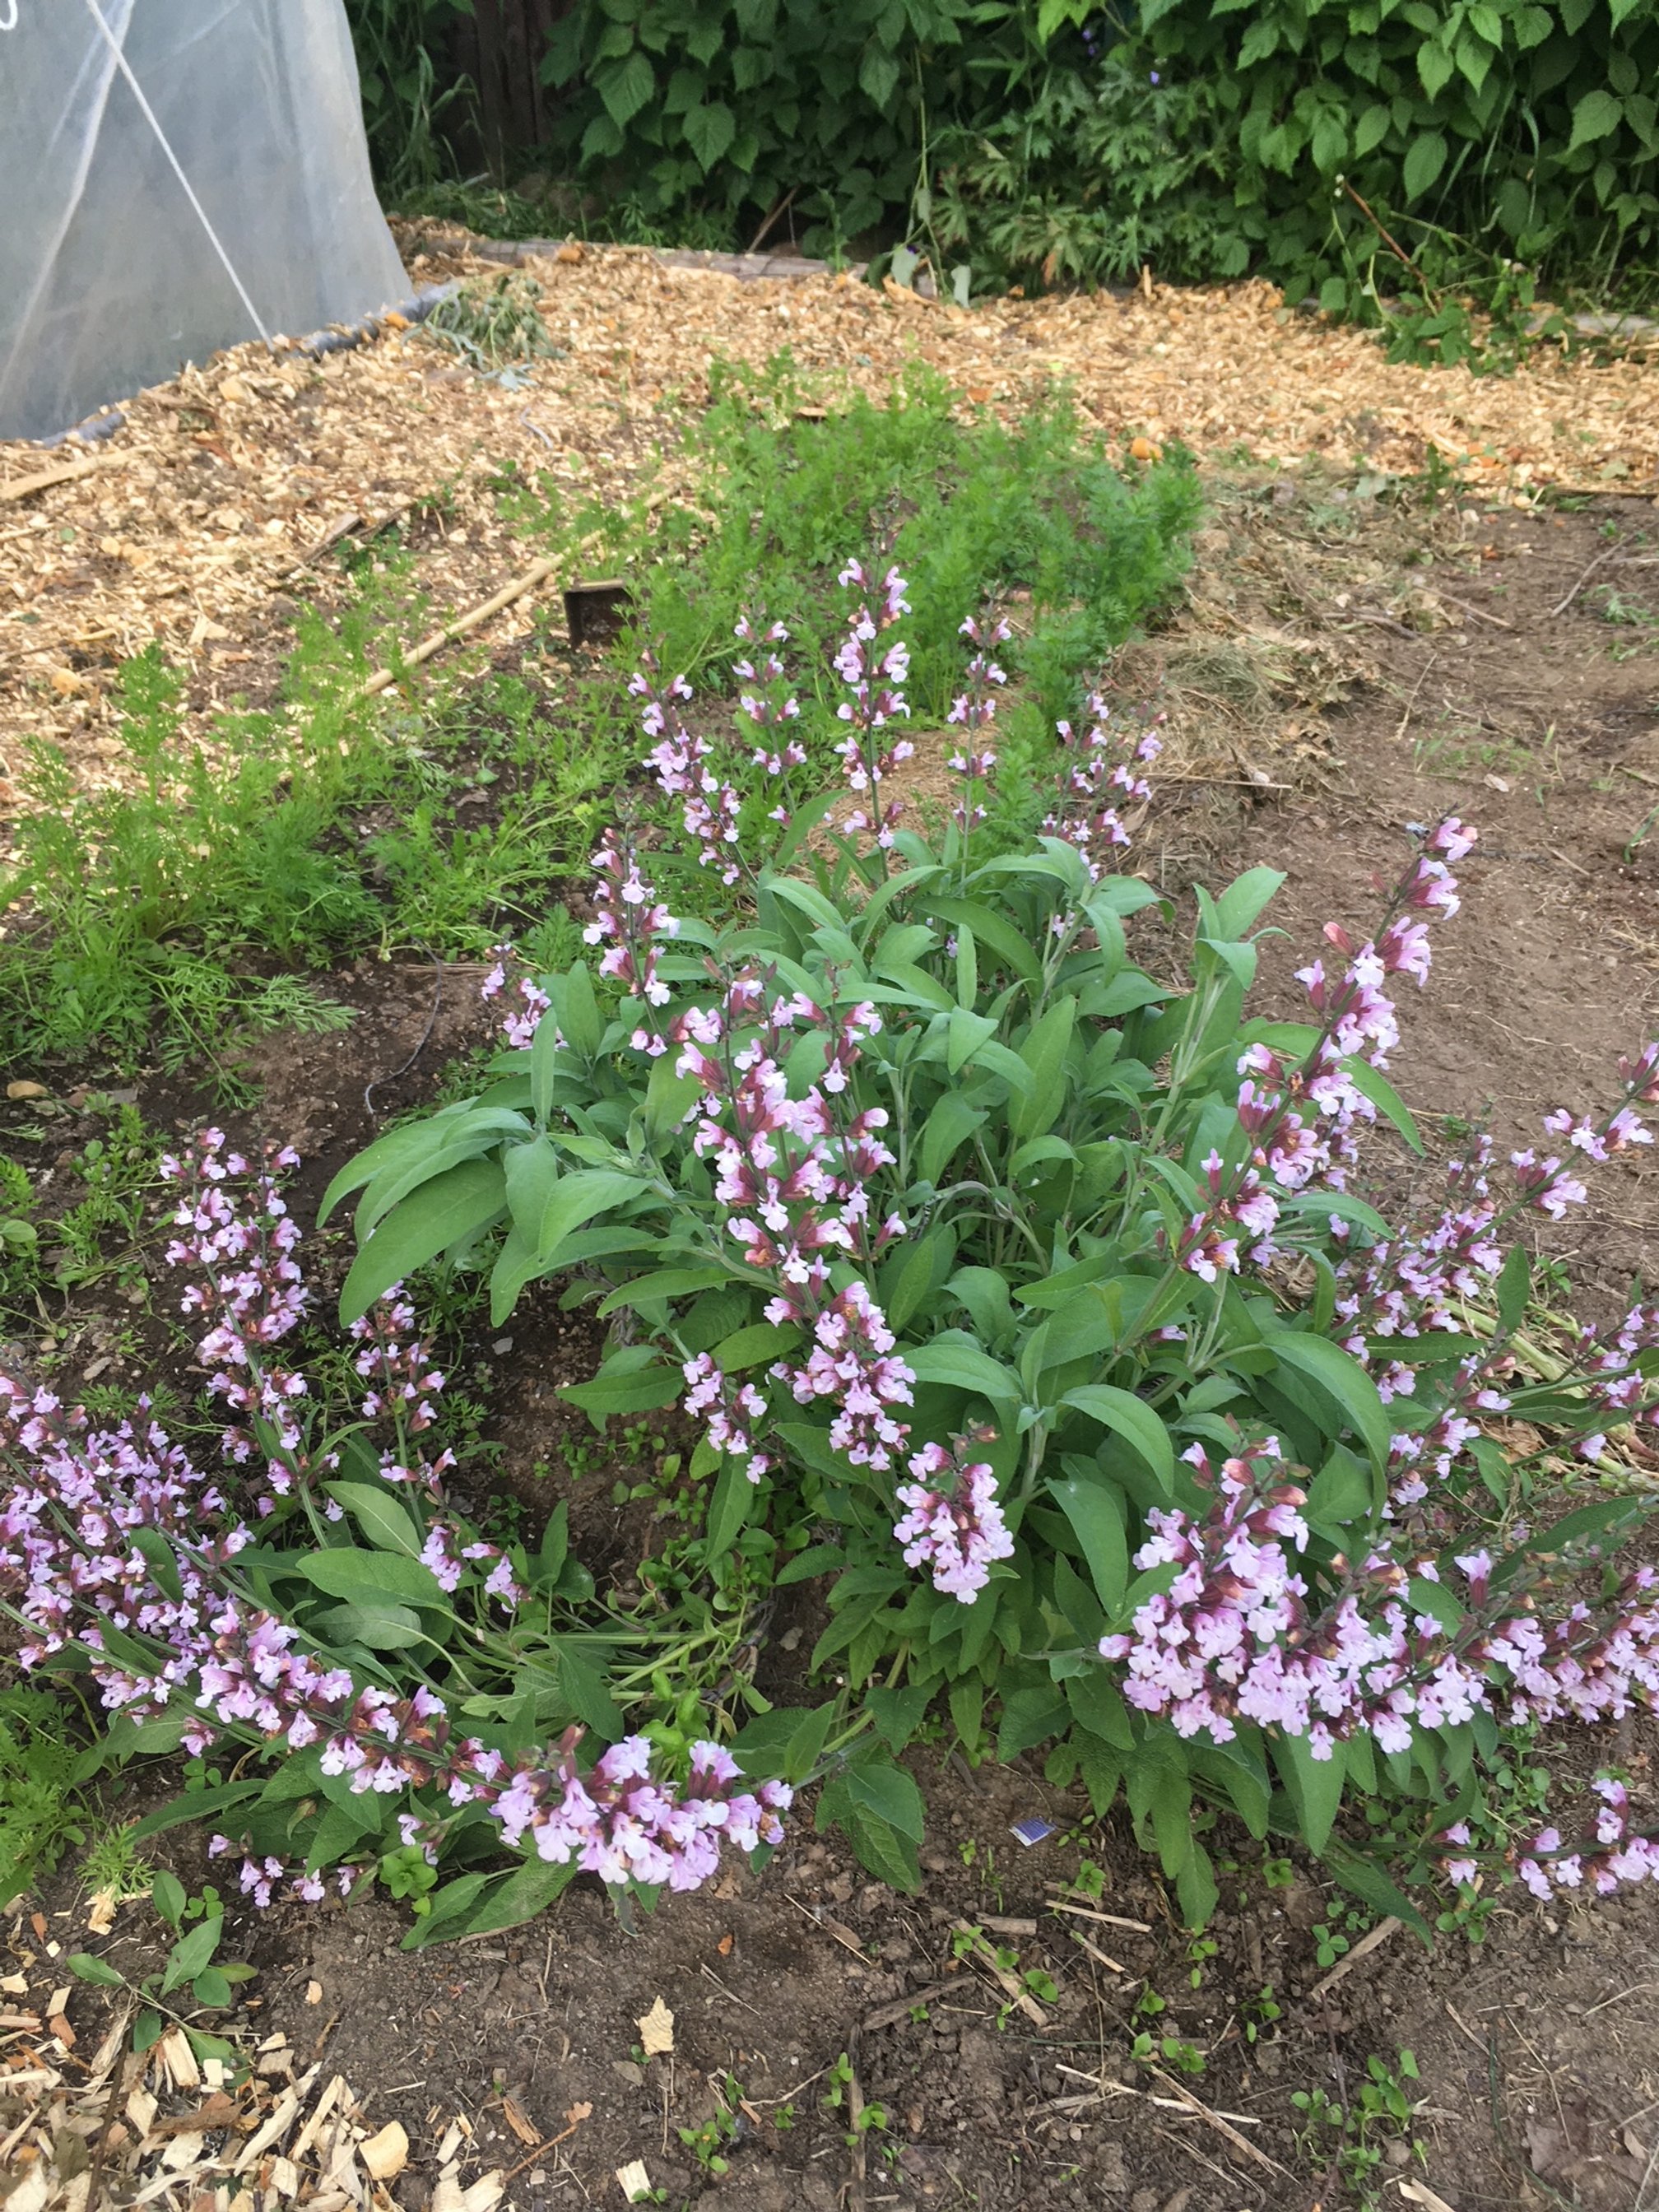
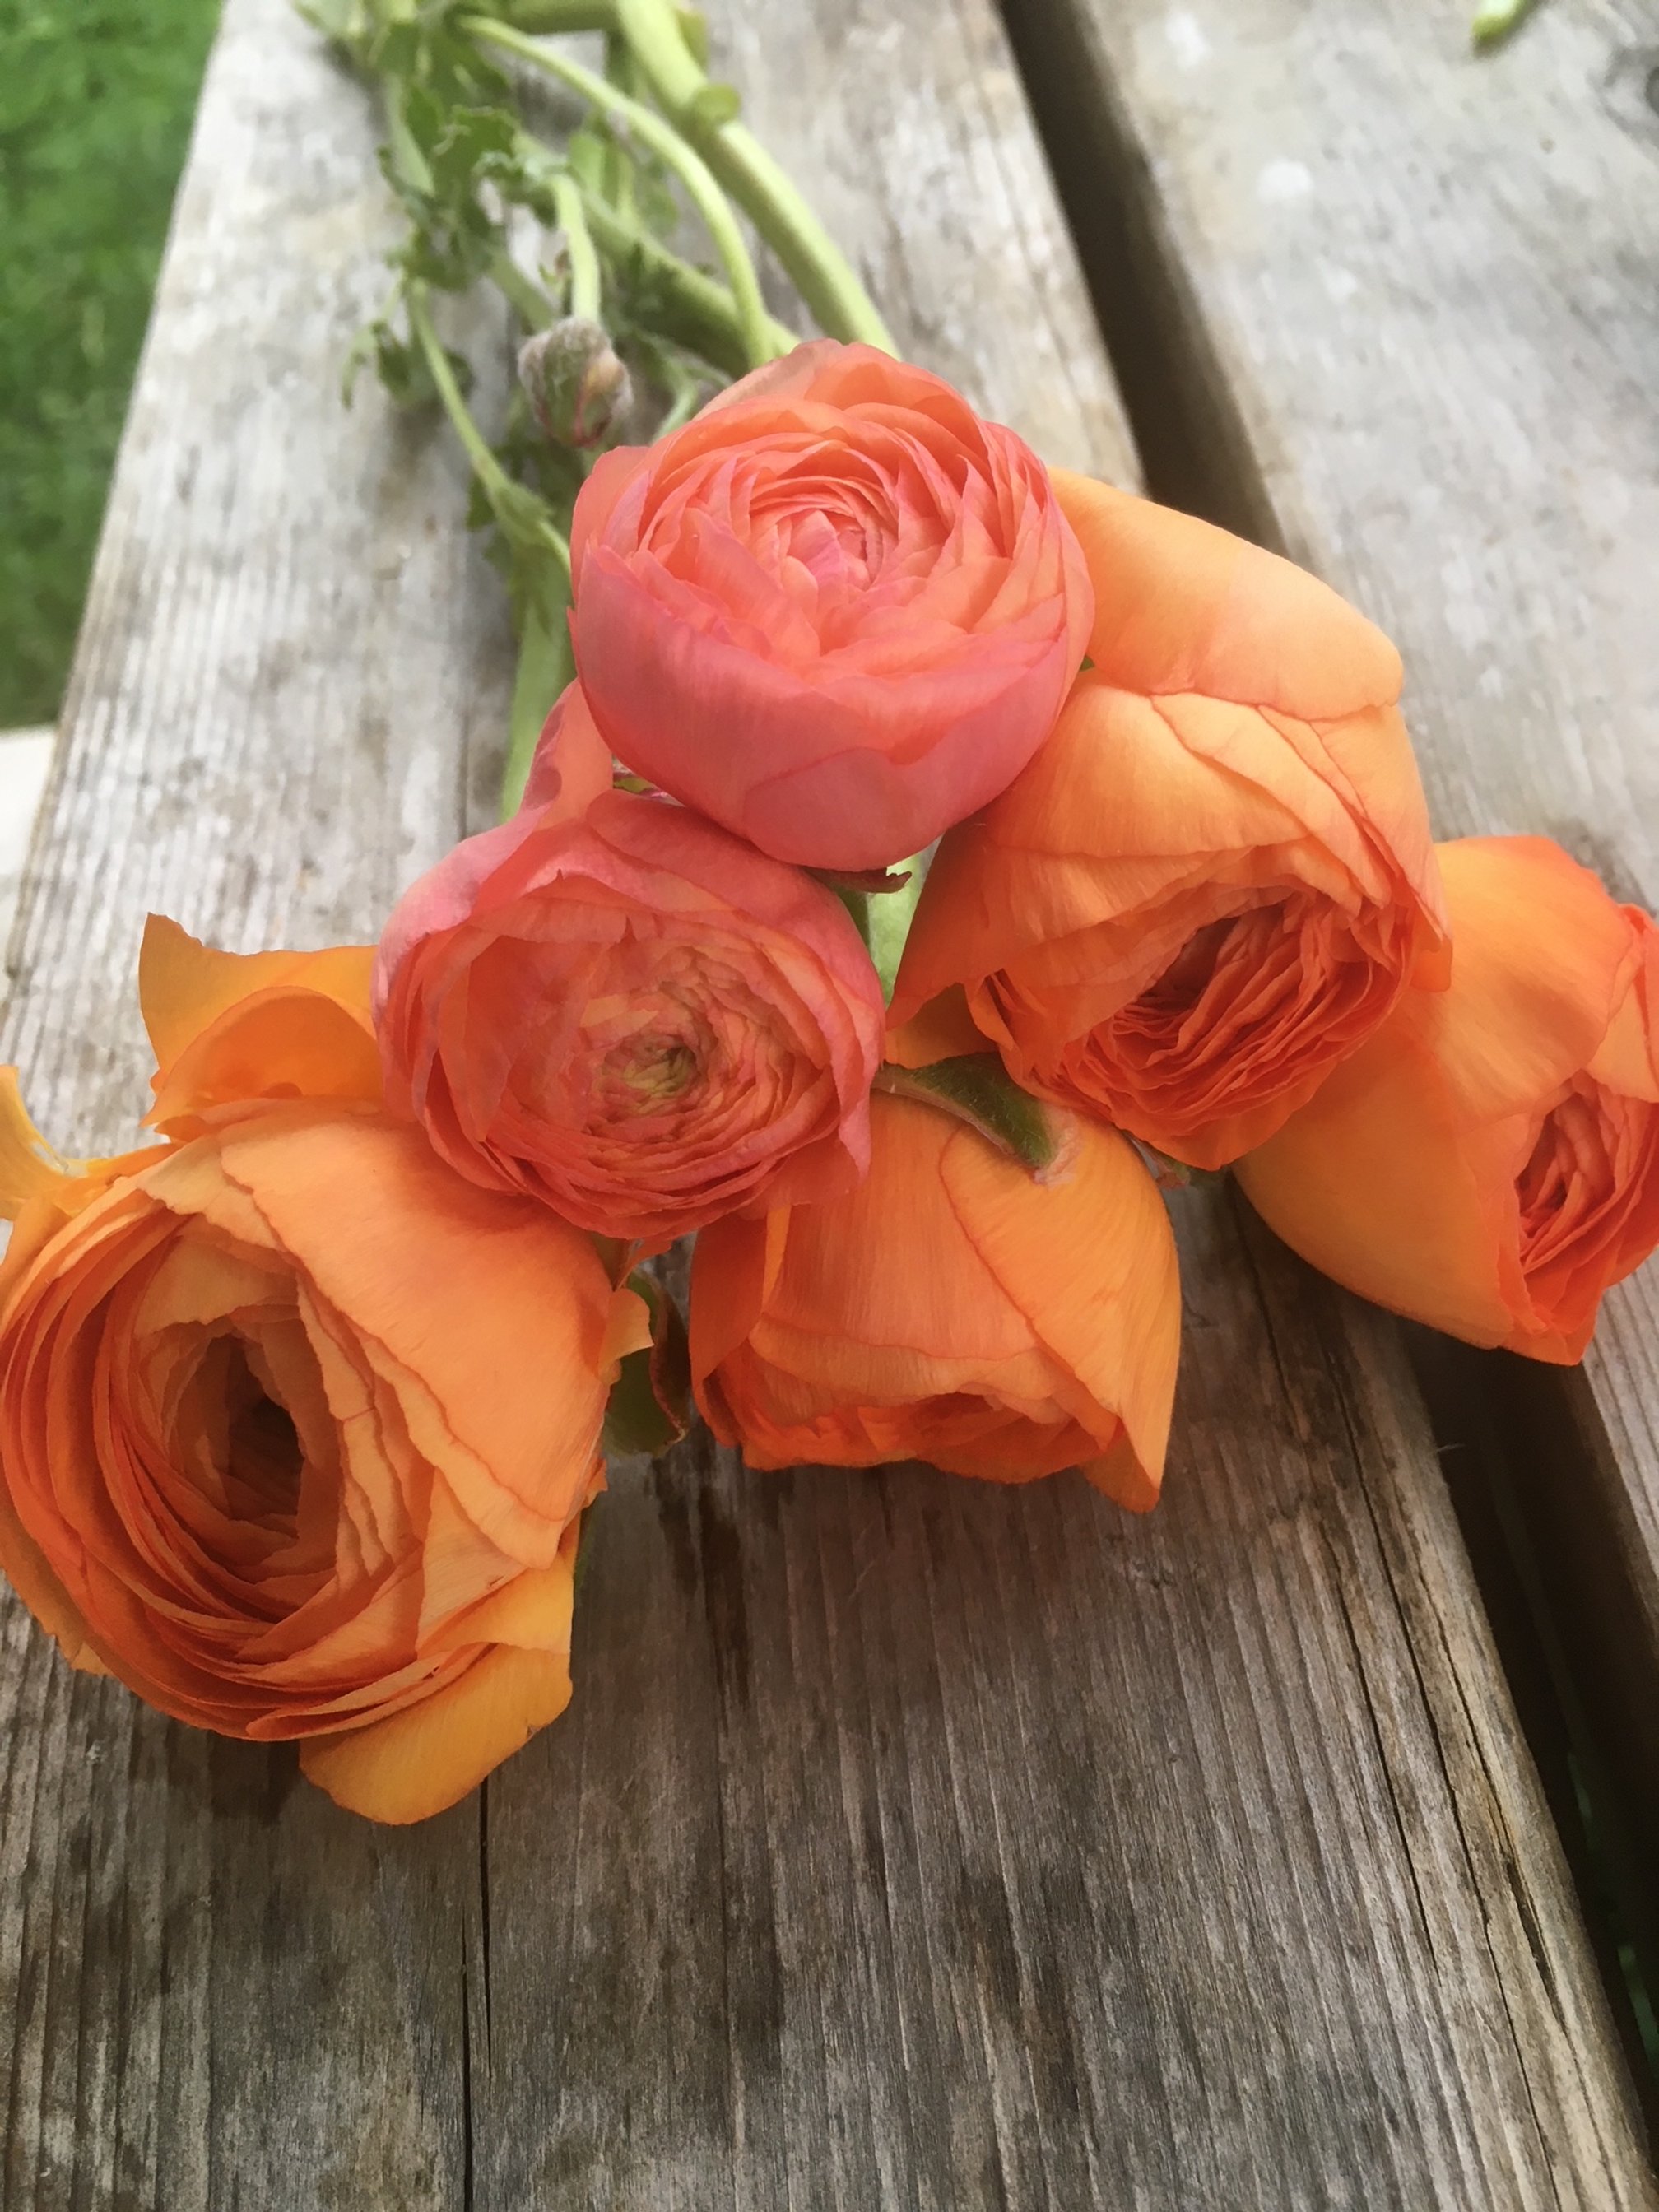
Addition #4 for your multi-purpose pollinator garden: Sage
Sage is a culinary herb that also has attractive flowers that are popular with pollinators.
It’s a perennial plant that prefers well-draining soil and can be grown easily from seed. In my experience it survives 2-3 years and then dies back. Flowers usually develop in the second year. You can use the foliage and flowers to fill out your home arrangements.
Sage, flowering in it’s second year in my backyard garden.
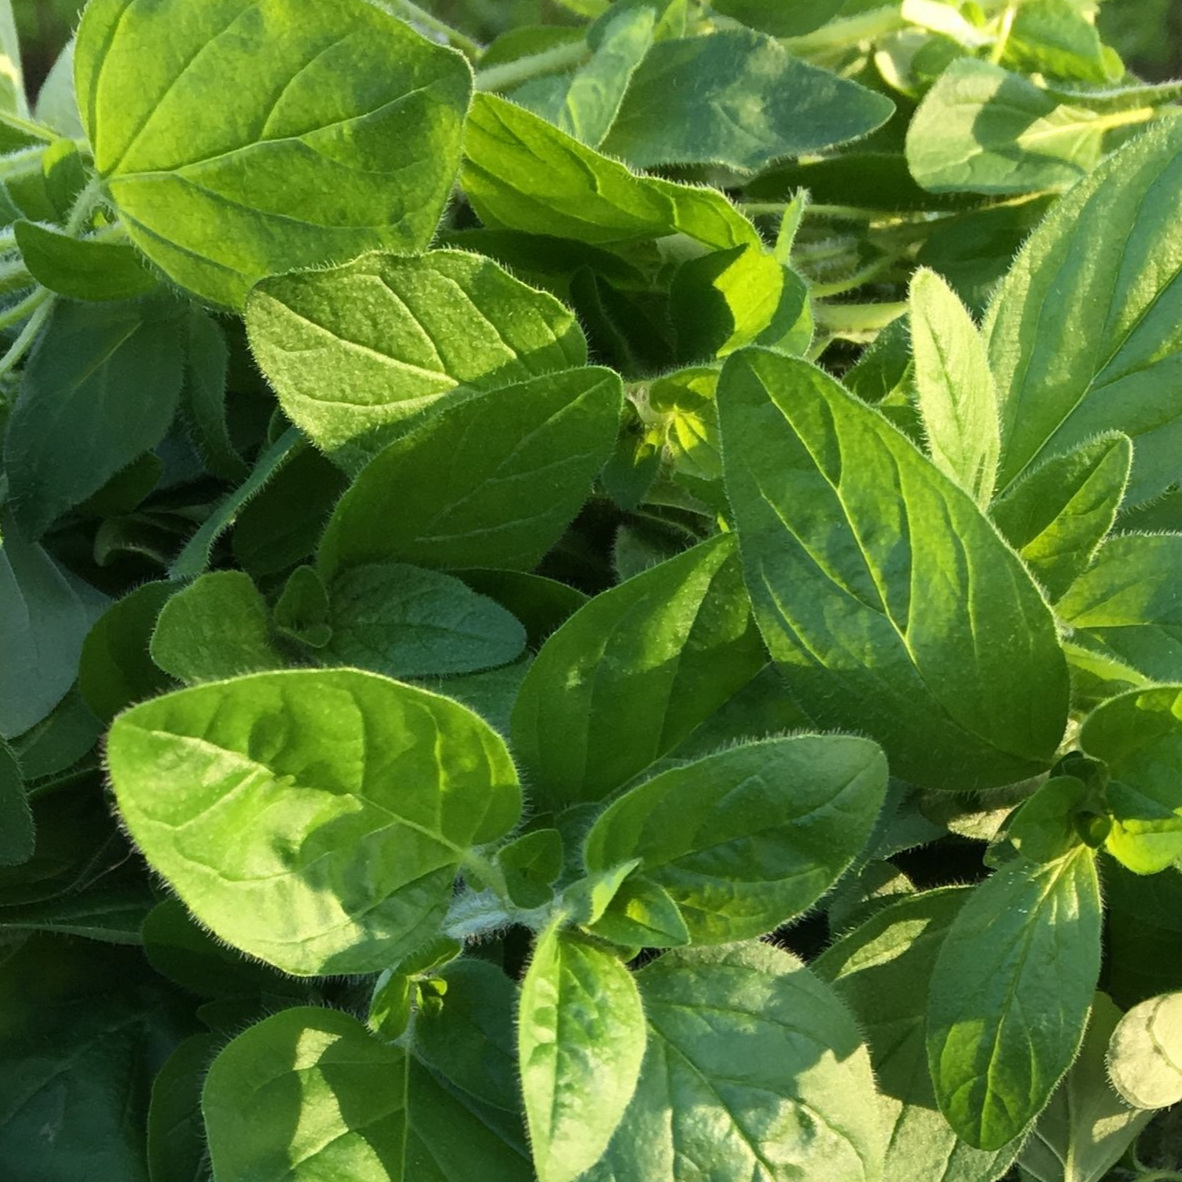
Addition #5 for your multi-purpose pollinator garden: Oregano
Oregano is a perennial herb that is commonly used in Italian and Mediterranean cuisine.
It produces small, pink or purple flowers in the summer, which are a great source of nectar for bees and other pollinators.
Oregano is also known to repel some garden pests, making it a great companion plant. I love popping oregano into a bouquet - it’s purple flowers make a nicely scented filler.
Addition #6 for your multi-purpose pollinator garden: Mint
Mint is a hardy herb that is easy to grow and has a refreshing scent.
It produces small, white or purple flowers in the summer, which are a great source of nectar for pollinators.
Mint spreads enthusiastically, so it is best to plant it in a container or a designated area of the garden. You will have extra plants to dig up and give away or compost every year.
Addition #7 for your multi-purpose pollinator garden: Chives
Chives are another easy-to-grow herb that can be used in pollinator gardens.
They produce pretty pink or purple flowers in the summer, which are a great source of nectar for bees and other pollinators.
Chives are also known to repel some garden pests, making them a great companion plant. Every year they grow into bigger clumps that can then be divided and spread out or given away to your neighbors. The flowers are edible, look great in a vase and dry well hung upside down.
Chives are a fabulous herb, attract pollinators and look great in a vase.
Maintaining your Pollinator Garden
Once you’ve established your culinary-pollinator-cutting-garden, maintain it properly to ensure that it continues to provide a habitat for pollinators.
This includes watering the plants regularly, fertilizing as needed (with organic fertilizers and compost) and frequently cutting flowers for your bouquets so the plants keep producing more stems.
Remember to avoid the use of pesticides (natural and conventional) in a pollinator garden, as you will kill not only the bad bugs but the good bugs too. This is the reason I’ve never sprayed anything in my garden. Even some of the natural and organic sprays will kill the beneficial bugs.
Creating a pollinator garden with culinary herbs is a great way to support pollinator populations while also providing a source of food and flavor for yourself and super cool additions to your home grown bouquets.
By following the tips outlined here, you can create a beautiful and functional pollinator garden that will benefit both pollinators and humans alike.
Storage Notes:
I keep all the herbs I cut from my garden in a small jar of water on the counter.
Some dislike the fridge (basil) and will often get lost in the crisper.
No one likes to discover rotten home-grown herbs weeks later in the bottom of the crisper!

8 Best Perennials for the Alaskan Cutting Garden
Here are 8 fabulous perennials for the Alaskan cut flower garden.
There are so many benefits to adding perennials to your cut flower garden.
Once established, they are super hardy.
They spread each year, leading to a greater number of stems every summer.
They often bloom earlier than annuals, thus filling the gap between spring blooming bulbs and annual flowers.
Pollinators love the early-season blooms.
Many of them are truly extra unique.
Perennials can be expensive to purchase from the nursery. But with patience and curiosity you can start most of these perennials from seed for almost nothing.
Some perennials need to be seeded a full year before they flower, but don’t be discouraged.
The best time to start a perennial by seed was last year. The next best time is this spring.
Commit to picking 3 varieties to try from the list below and grow 10 plants of each variety. You’ll have extra in case some die off OR you’ll have extra to give to your neighbor.
Columbine - Barlow Mix, Pink Petticoat and McKana Giant Mix.
Plant in the spring for flowering the following year.
After only a couple years Columbine forms a lush and full bushy plant with many stems. It is one of the earliest to bloom in the garden, which is a huge bonus for the cut flower patch.
Cut for the vase when half the florets on the stem are open. After cutting one round from a plant, watch and wait as I’ll often get a second flush of blooms a couple weeks later.

Pink Petticoat Columbine (bottom left) in an early summer Turnstone Farm bouquet.
Echinacea - There are a few varieties in different colors, just pick your favorite!
These need to be started the year before they flower. I start mine first thing in the spring, usually in week 11 or 12.
Once established, they are hardy and tall.
Harvest fresh for the vase when the petals have opened. Harvest for drying once the cone has started to turn golden.

Echinacea Cone in a Turnstone Farm Boutonniere
Eryngium - Blue Glitter and White Glitter.
Plant in week 11 or 12 for flowering the following year.
This plant gets a top score for cool looks! It has attractive thistle-like blooms with a metallic shine.
Eryngium is a hardy perennial with long, sturdy stems.
It does well in hot, sunny locations. But also tolerates a wide variety of conditions. Expect flowers during the second year of growth and in subsequent years (although mine bloomed the first year!). Great for bees, beneficial flies and wasps. Also known as plains eryngo and flat sea holly.
This is an excellent long lasting cut flower and dries well.
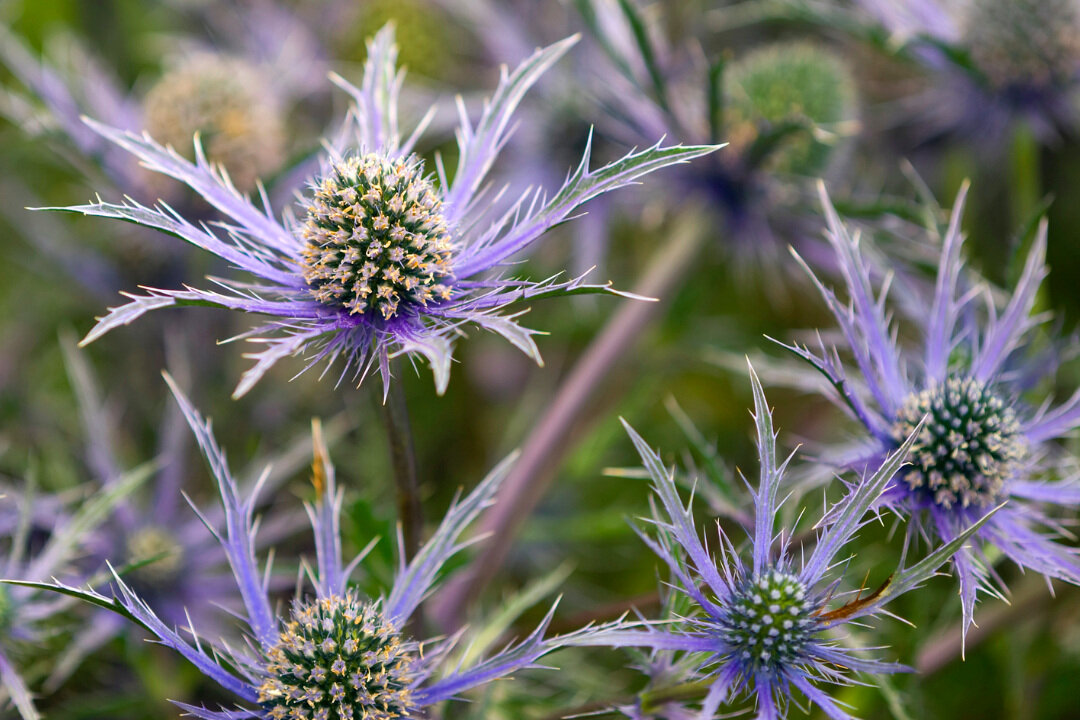
Blue Glitter Eryngium
Heliopsis - Burning Hearts
Sow in the early spring for flowering the following year. I start any new plantings in week 12 or 13.
These are slower to establish but offer delicate and stunning flowers.
Harvest for the vase when flowers are fully open.

Burning Hearts Heliopsis in the Turnstone Farm Garden
Monarda - Red Shades, Panorama Mix or Wild Bergamot.
Seed these in the early spring (week 12 or 13) for flowering the following year.
Monarda is a favorite for pollinators. My patch is always swarming with native pollinators and honey bees.
Plants grow tall and lush in the garden, which make a nice border for a garden room or as a living privacy screen.
Harvest when all the petals are almost fully open. Pop in a vase or hang to dry.

Red Shades Monarda (circled) in a Turnstone Farm Bouquet Subscription
Yarrow - Cloth of Gold and Summer Pastels.
Plant early in the spring for flowering the same season. I usually start a new variety in week 12 or 13.
Each year yarrow expands, so you have to be wary if you don’t want it to spread.
Yarrow is considered a “cool flower” and can withstand a light frost.
Harvest for the vase when pollen is visible on the flowers. If you cut too early, the florets will wilt. Sometimes it’s hard to get this right, so be patient! You can also harvest at this same stage and hang to dry. Yarrow dries excellent and holds its color well.

Yarrow is a fabulous perennial for the Alaskan garden
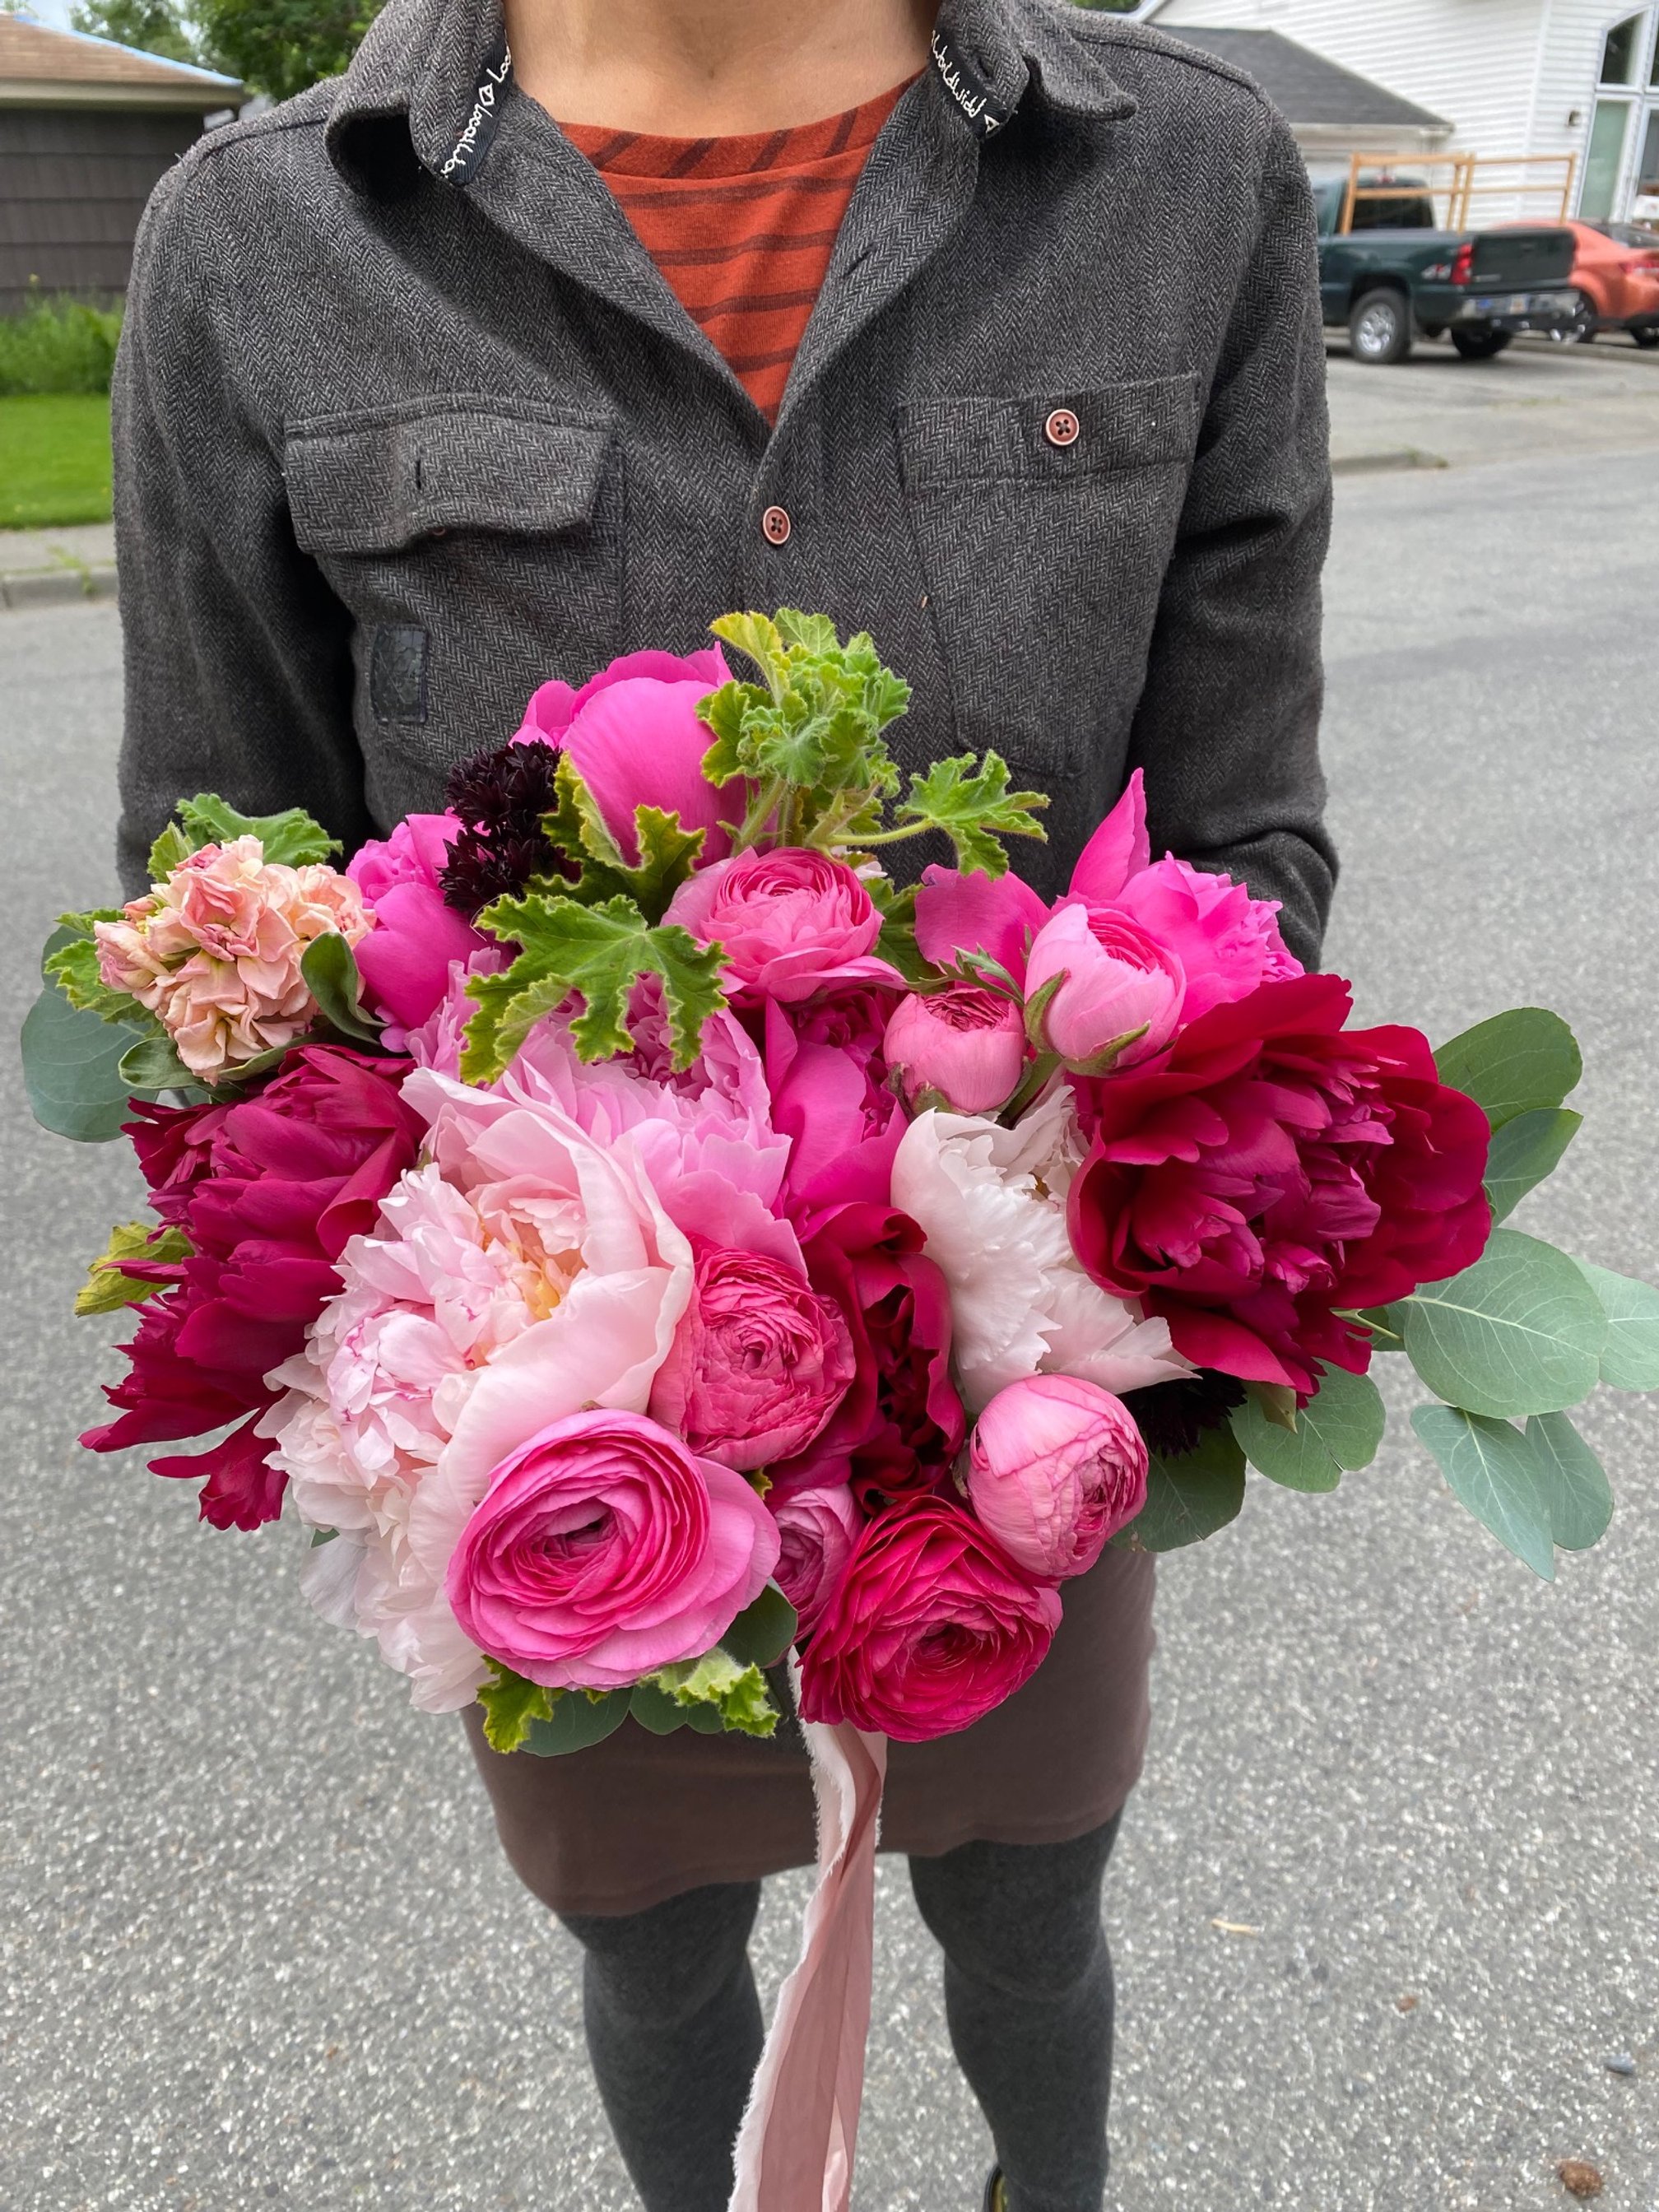
Peony - so many fabulous varieties!
While Peonies can be started from seeds, like apples, they will not be true to their parent plant.
I am going to try this in 2023 and will give you an update in a following blog.
If you’d like to try your hand at starting a NEW peony variety from seed here are the steps:
Collect seed pods from a couple of plants.
Dry the seed pods.
Once the seeds start to ripen the pods will crack open.
Prepare a space in your garden and plant the seeds in the fall. Mark them well so you know where they are in the spring.
In the spring monitor and care for the plants that have come up.
You should get your first bloom in year 3 and many more in year 4 and 5.
Since most of us don’t want to wait 5 years for a bunch of blooms, peonies are most commonly started from root stock or purchased from a nursery.

A beautiful peony in the Turnstone Farm Garden.
I hope you are now inspired to start a few new perennials by seed this year!
Cannot wait to hear about your 2023 flower gardens.

5 Cut Flowers for the Advanced Gardener
Try these 5 cut flowers for the advanced grower.
If you’re ready for more challenge in your garden, you are going to love these 5 cut flower!
They are a staple in my commercial cutting garden year after year. And while they take a bit more care that easier varieties, with practice you will have great success.
Dahlias
While dahlias are not hard to grow, they offer more challenges than just planting a seed.
To read more in depth on growing dahlias go here to read my blog: https://www.turnstonefarmalaska.com/garden-blog/how-to-grow-dahlias
There are hundreds of dahlias varieties that are great for the garden and the vase. Go here to read up on dahlia varieties: https://www.turnstonefarmalaska.com/garden-blog/choosing-dahlia-varieties
Harvest when the flower has fully opened but before the petals on the back side have started to wither. Dahlias do not last long in the vase but you should get a solid 3-5 days of beauty on your dining room table.

Cornel and Dreamcatcher dahlias tucked into a Turnstone Farm wedding flower arch. Photo courtesy of Lauren Roberts
Nigella
I’m planting nigella in week 16 and 19.
Varieties I love include: Black Albion Pod, Love-in-a-mist and Delft Blue.
While these aren’t officially a hard flower to grow, mine seem to take special care. In fact I wrote in my notes section next to my planting date: “take special care!”.
Nigella prefers to be direct seeded and since I don’t direct seed anything besides salad greens in my garden I think they suffer a little when transplanted.
This is a fun and super unique flower that can be harvested for the flower and for the pod. The pod dries great for everlasting bouquets.

Nigella pod in a Turnstone Farm boutonniere. Photo courtesy of Lauren Roberts
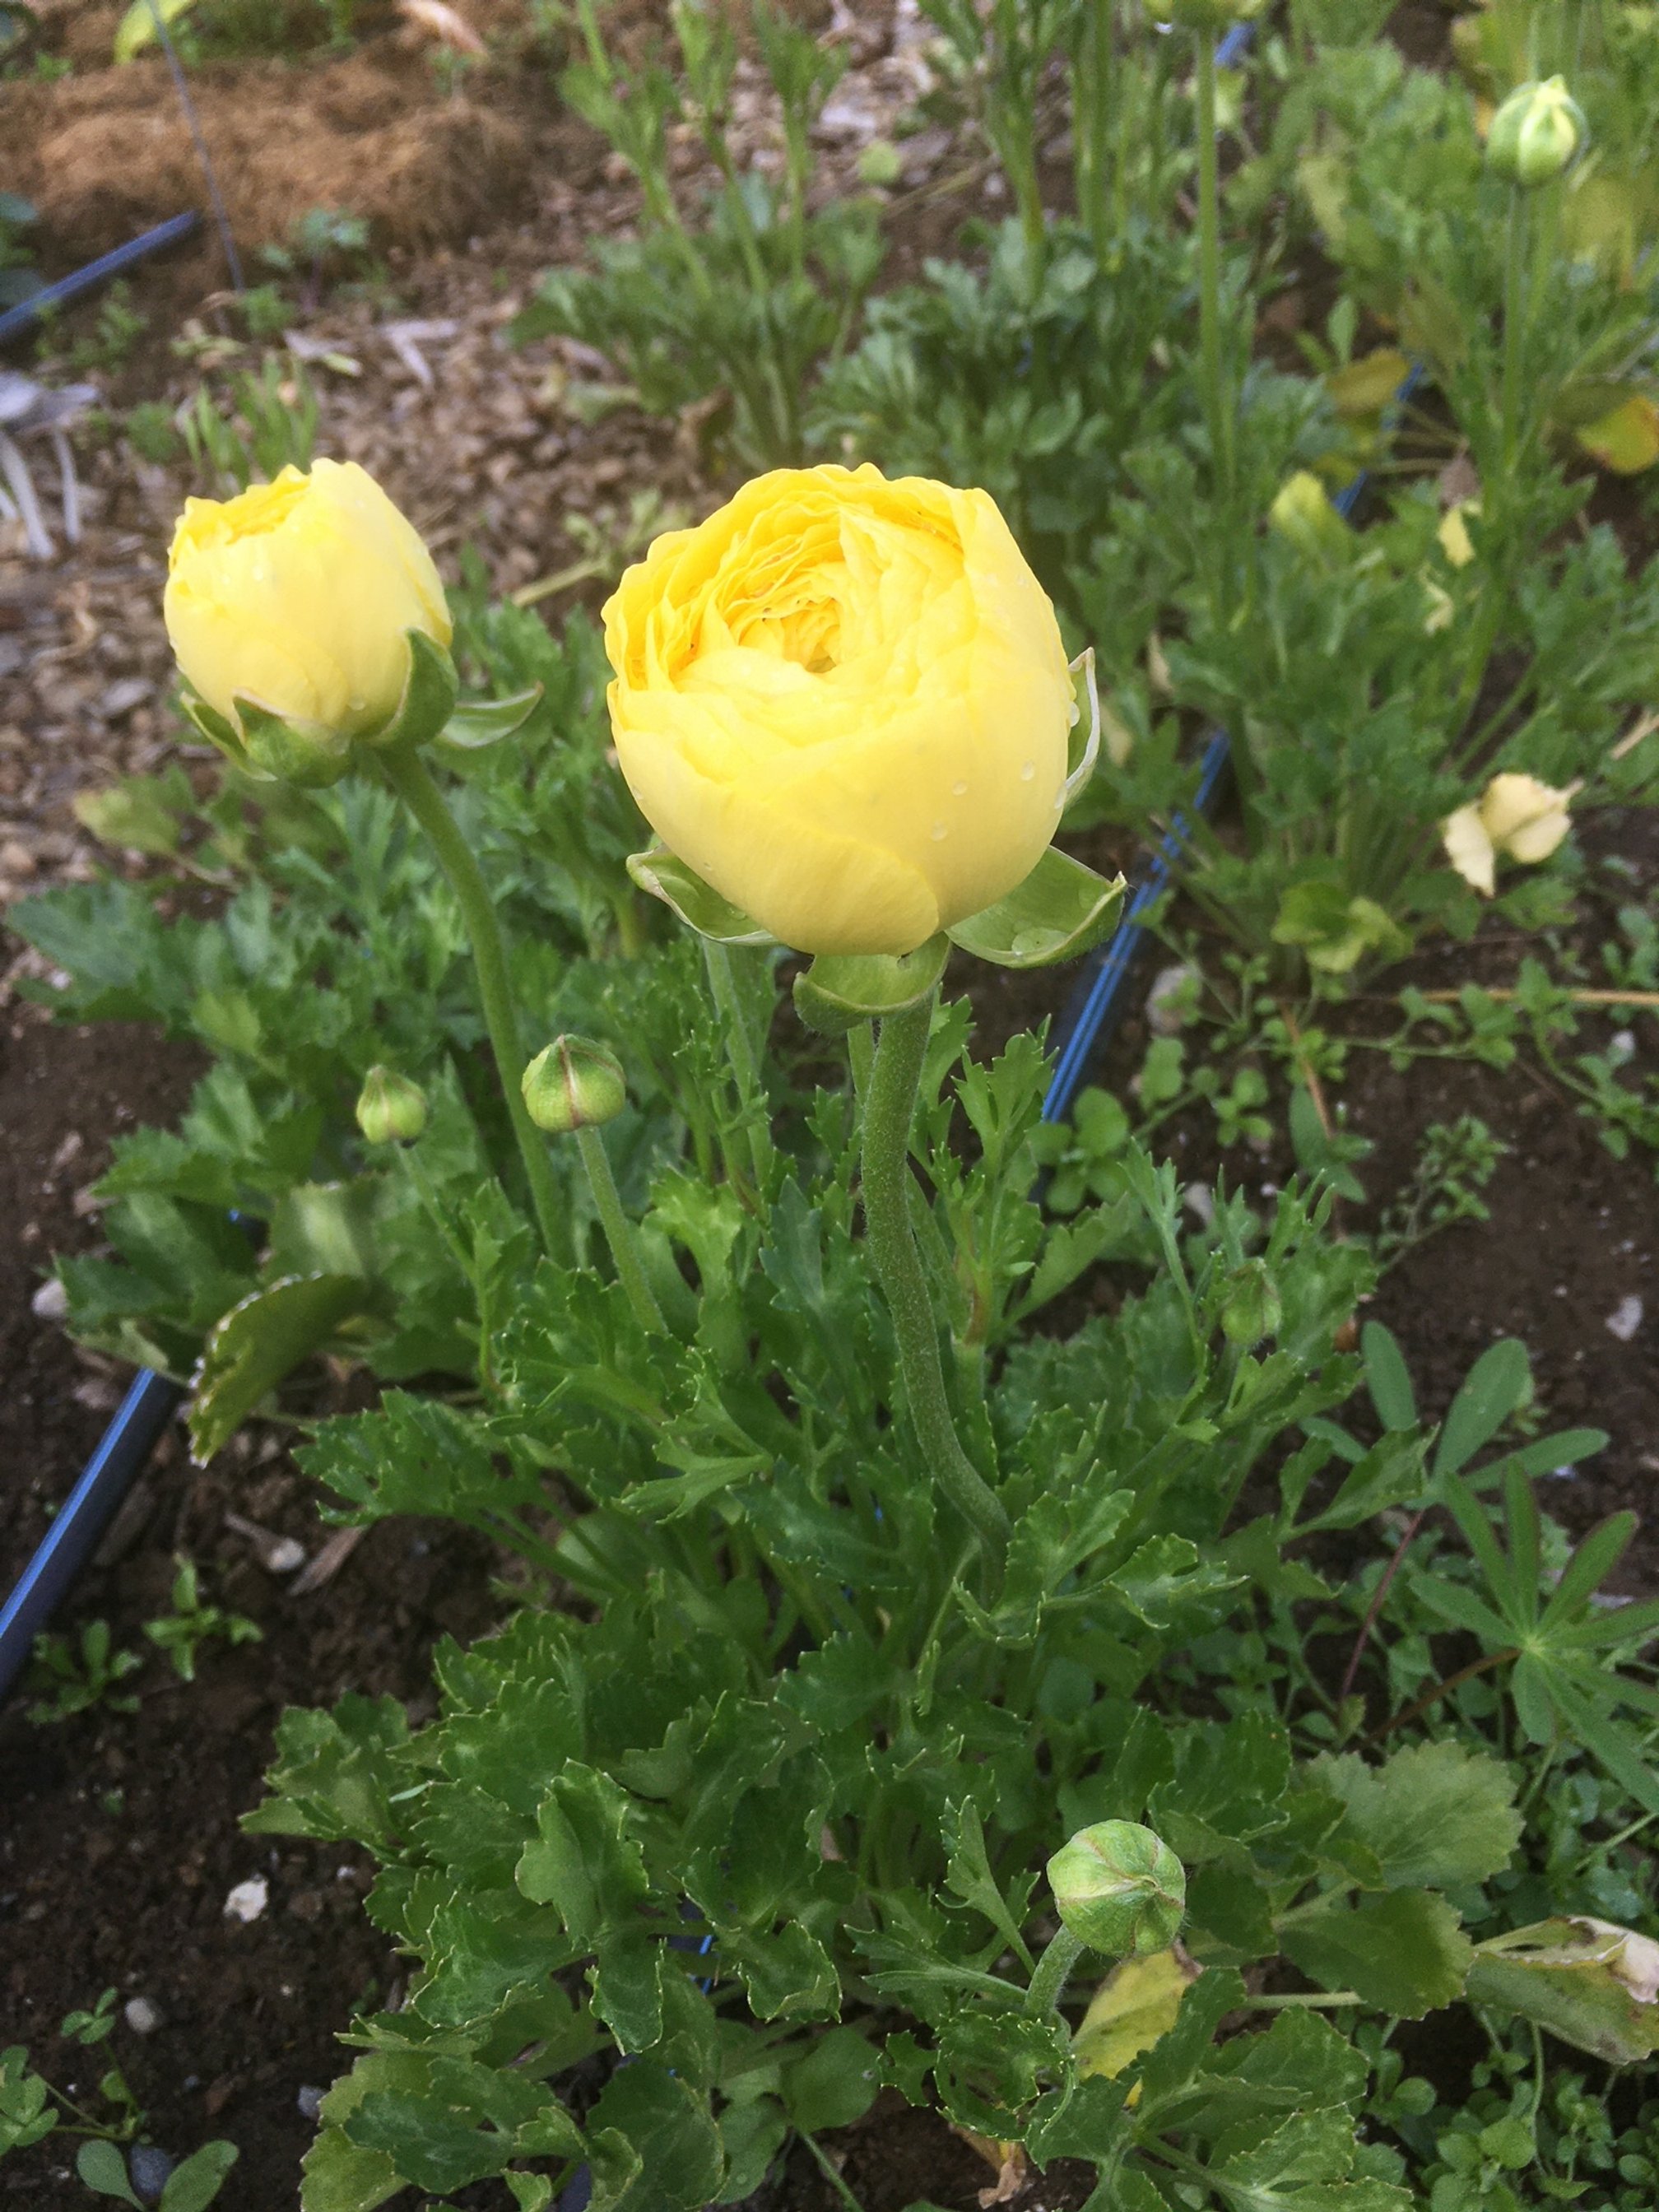
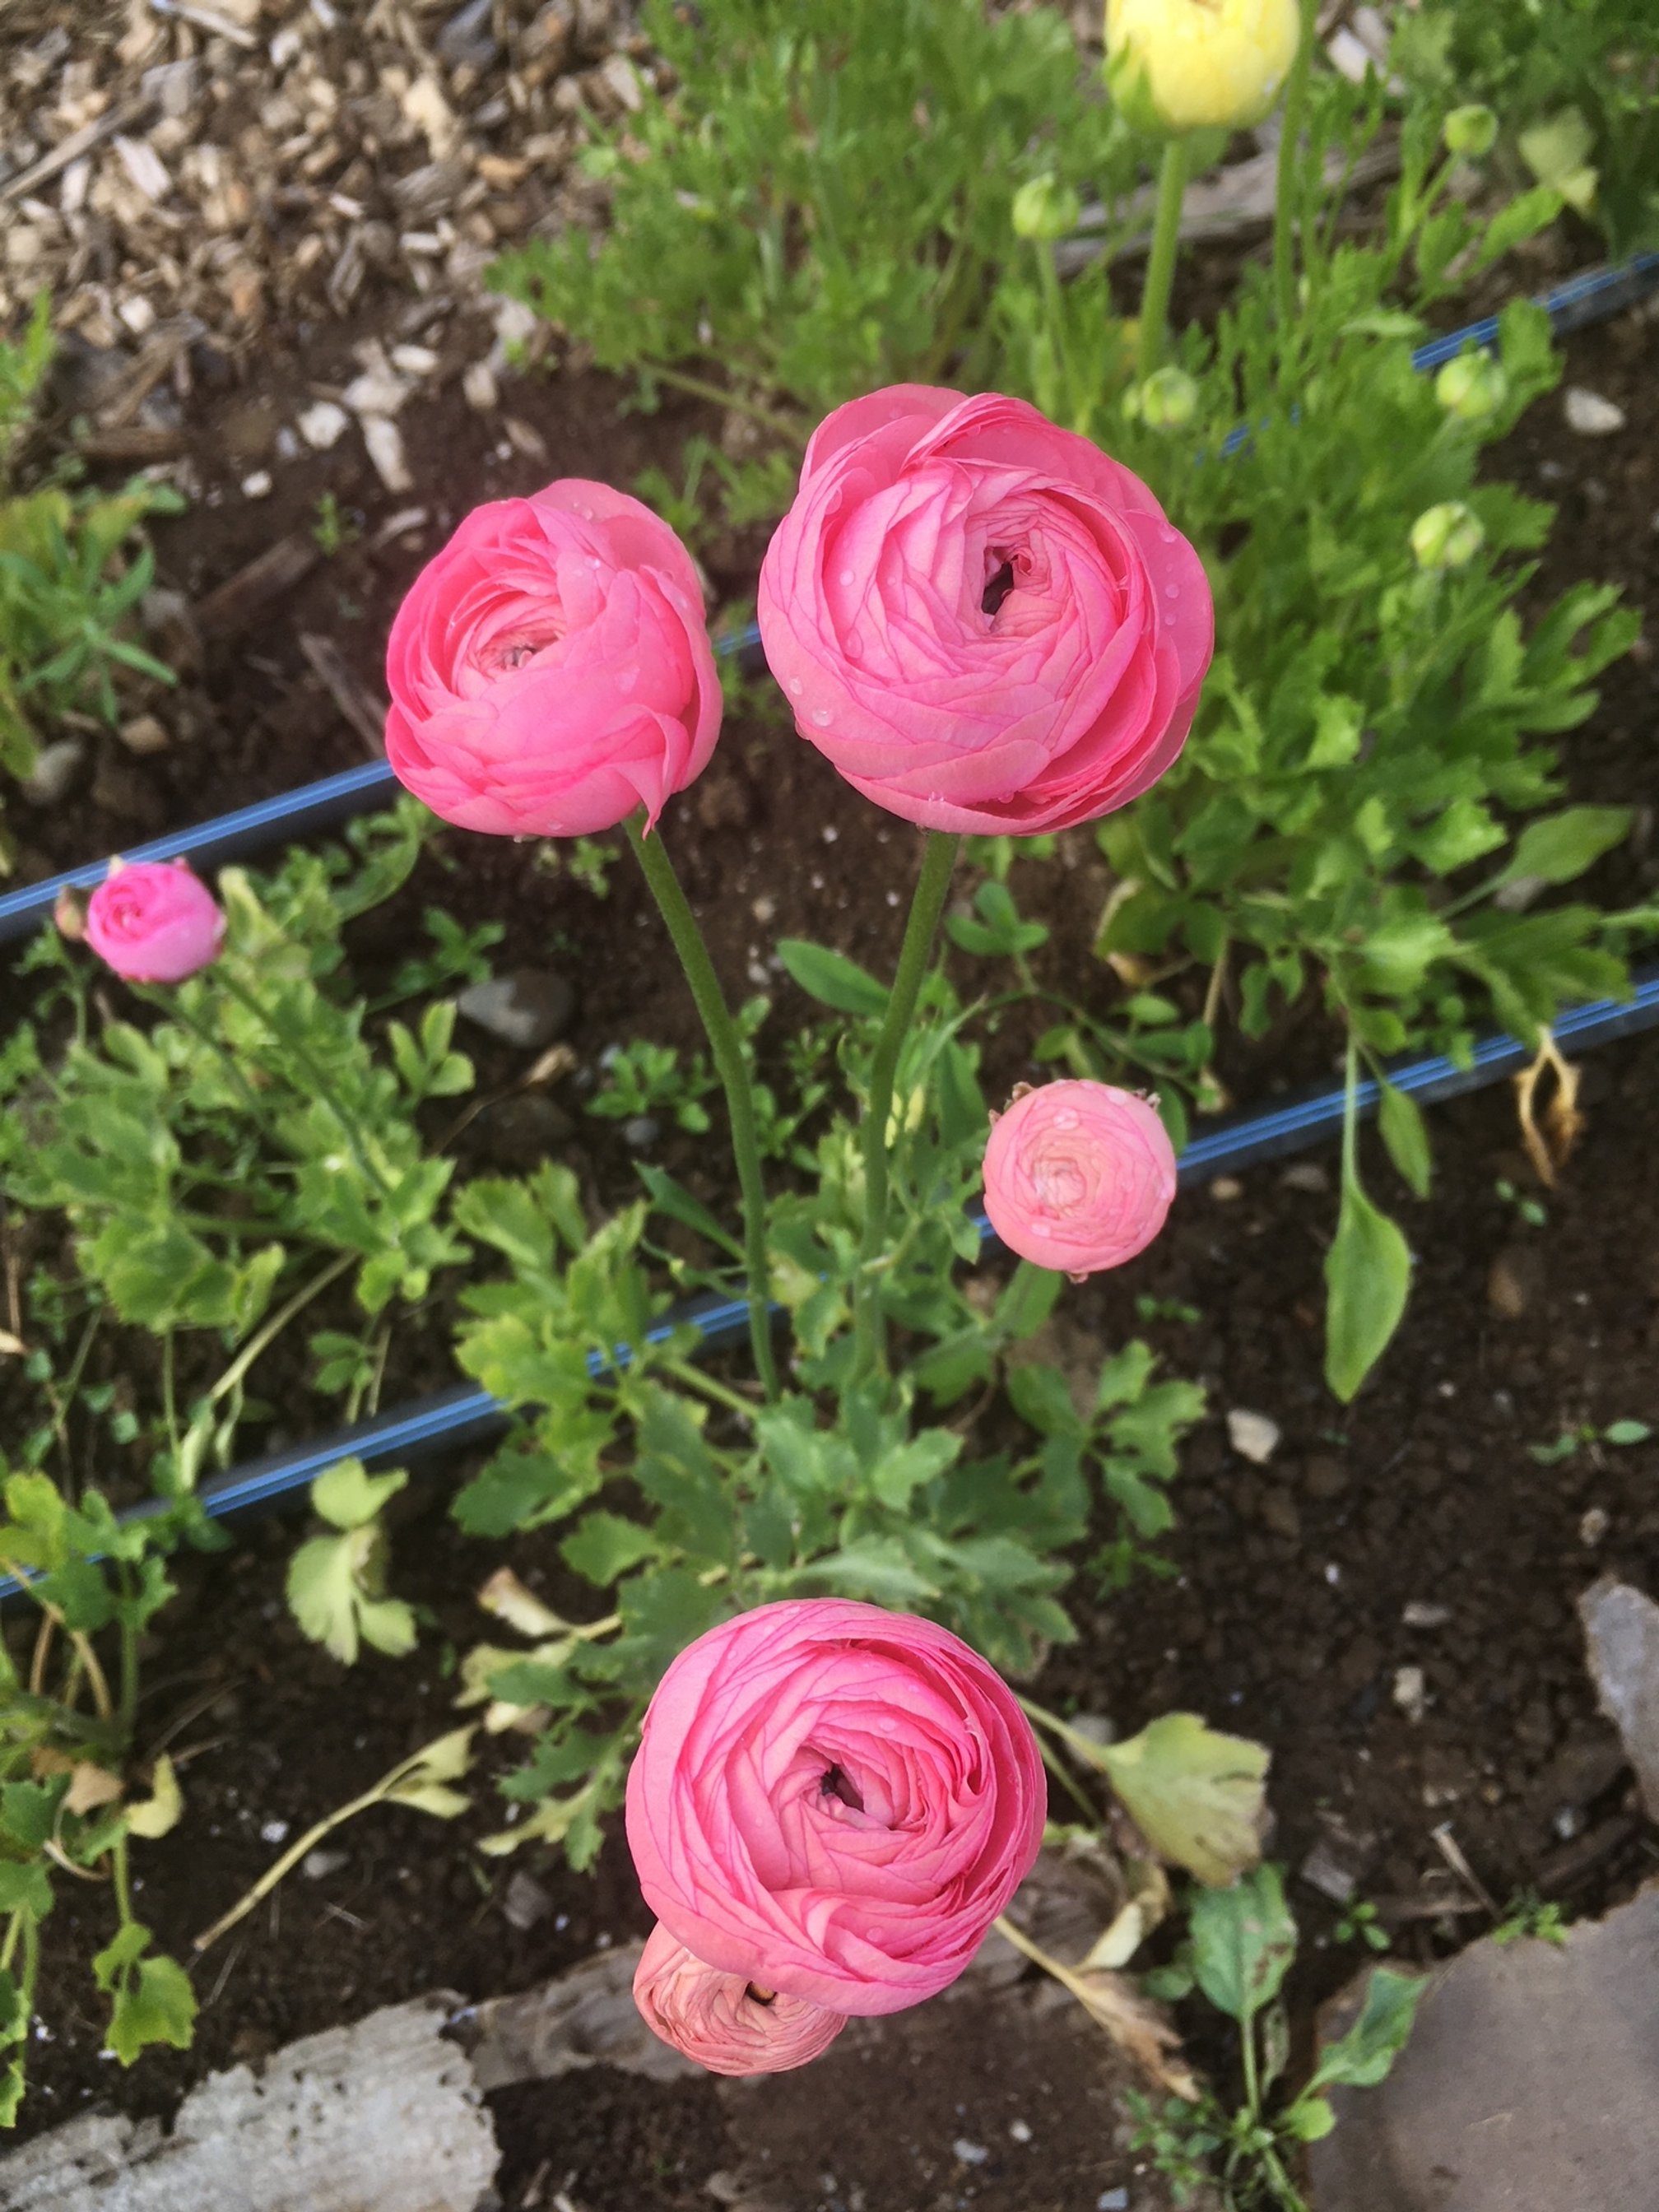
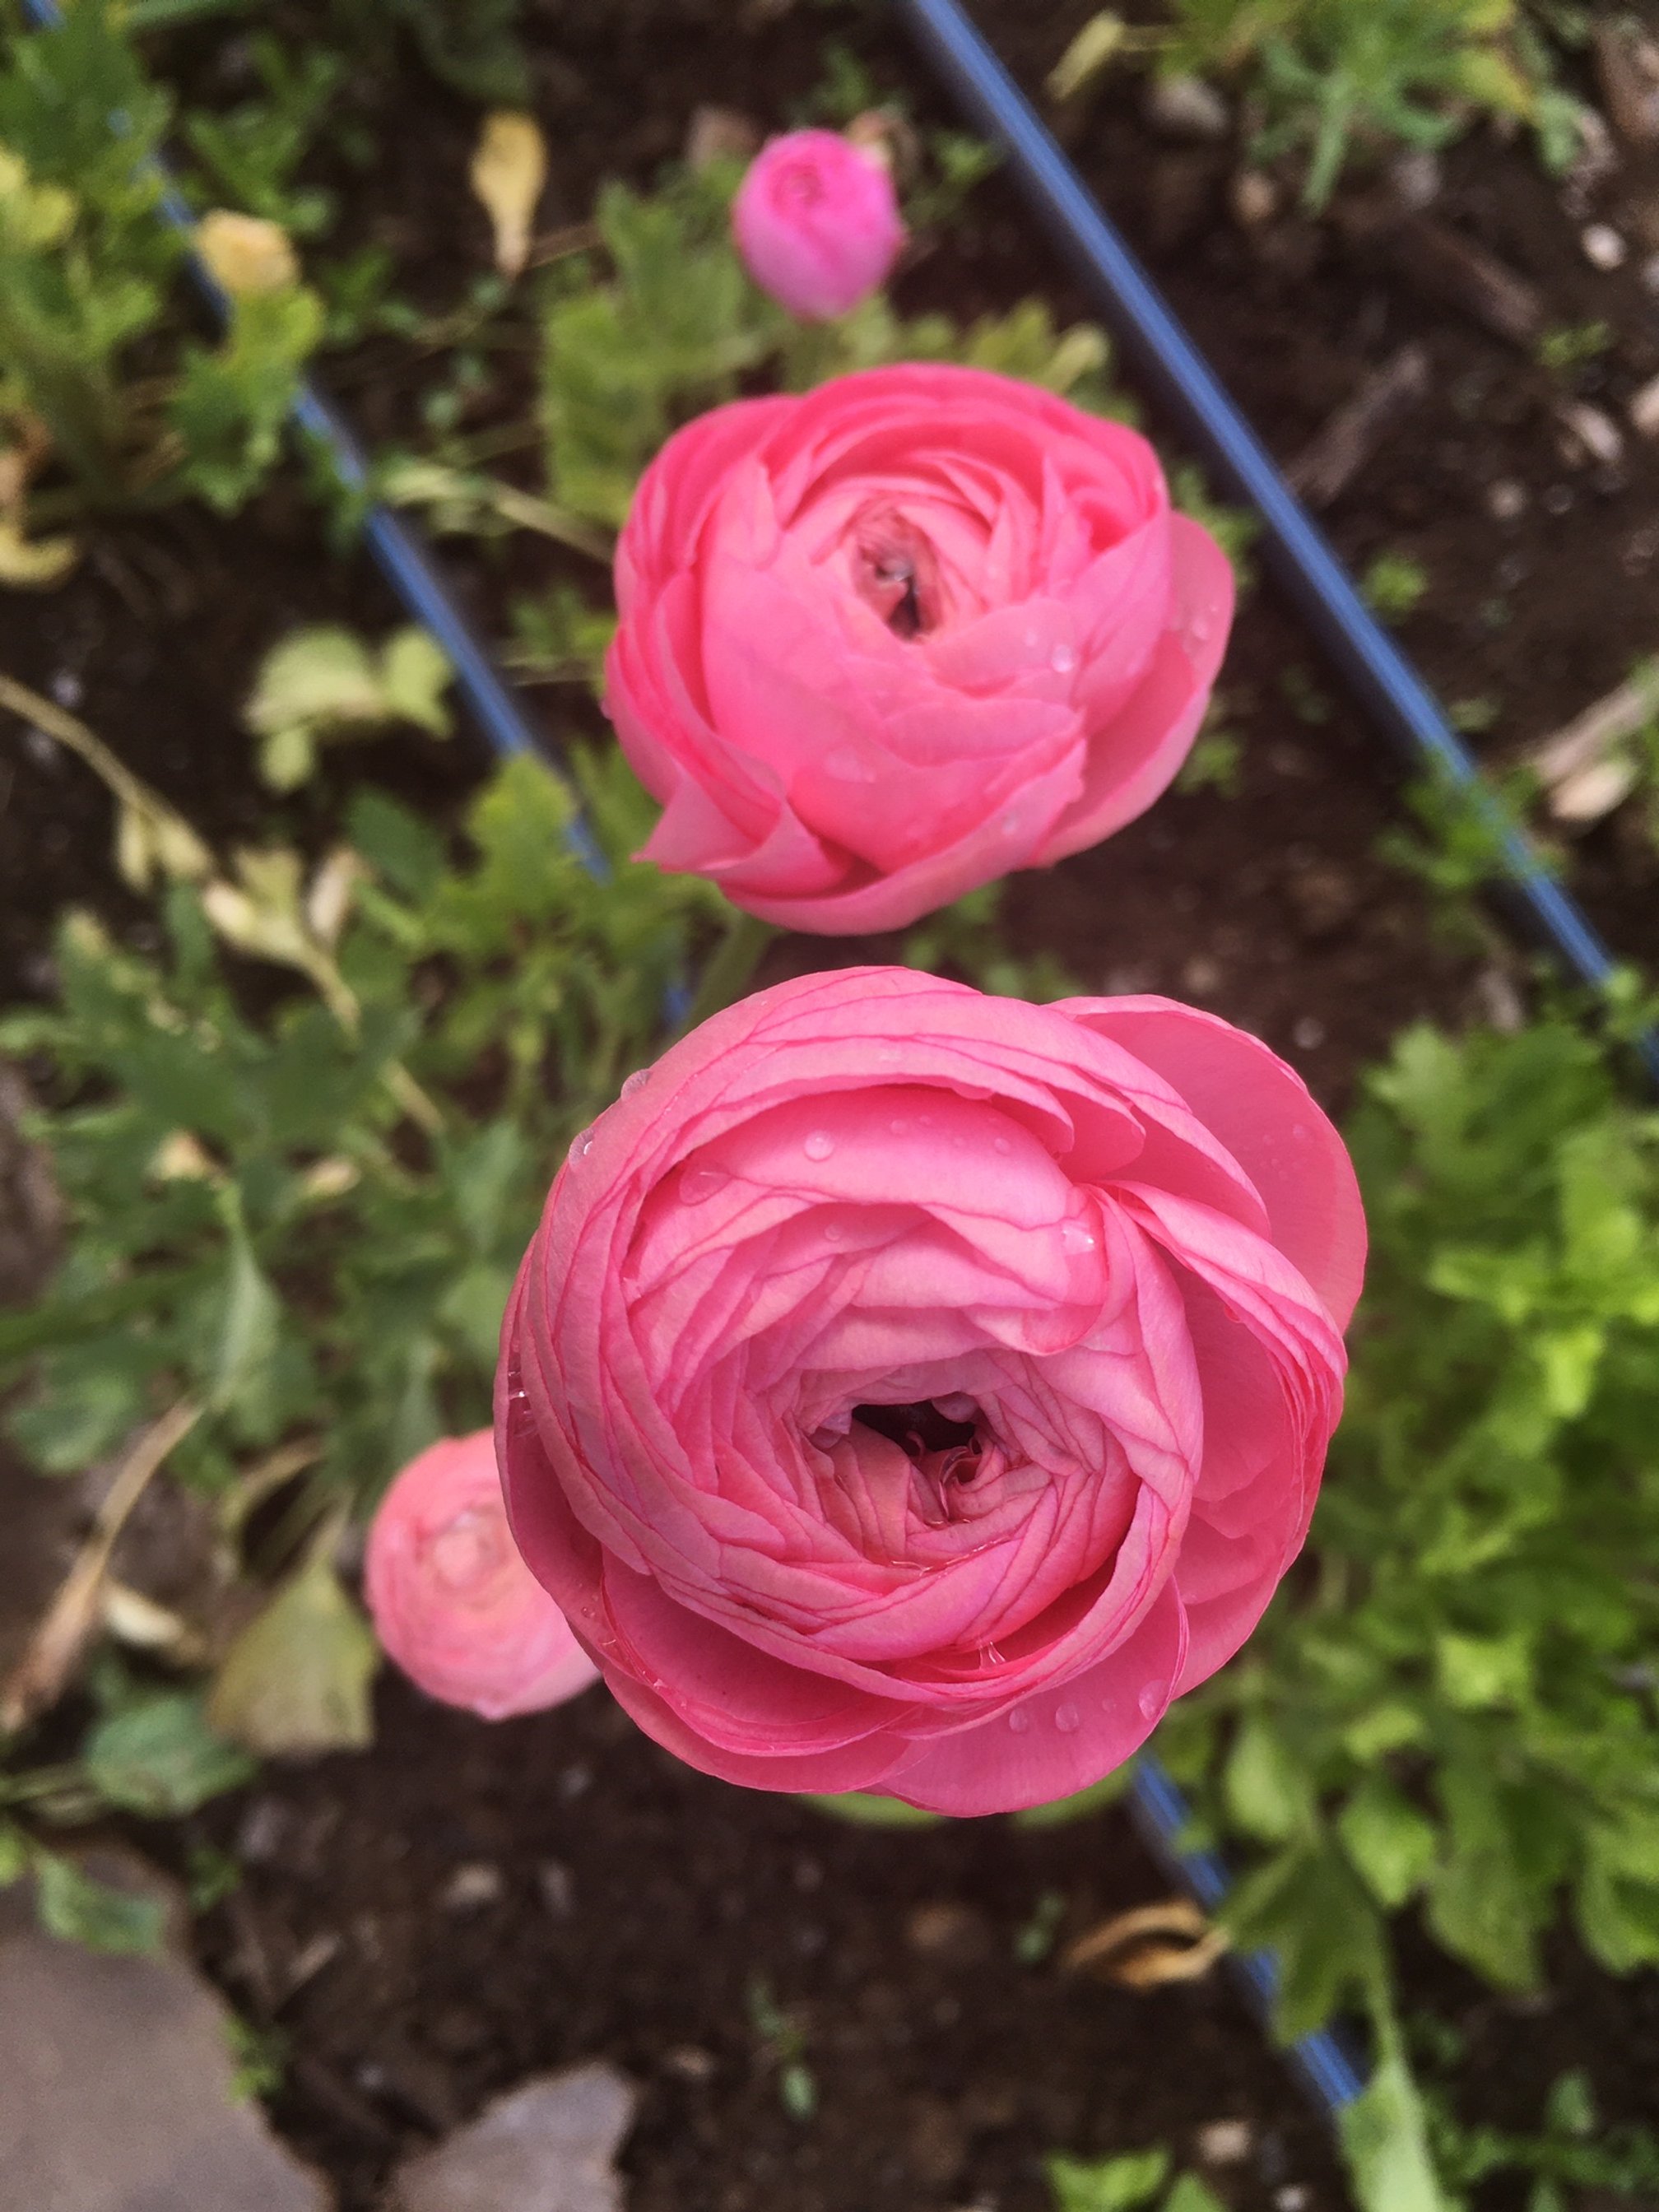
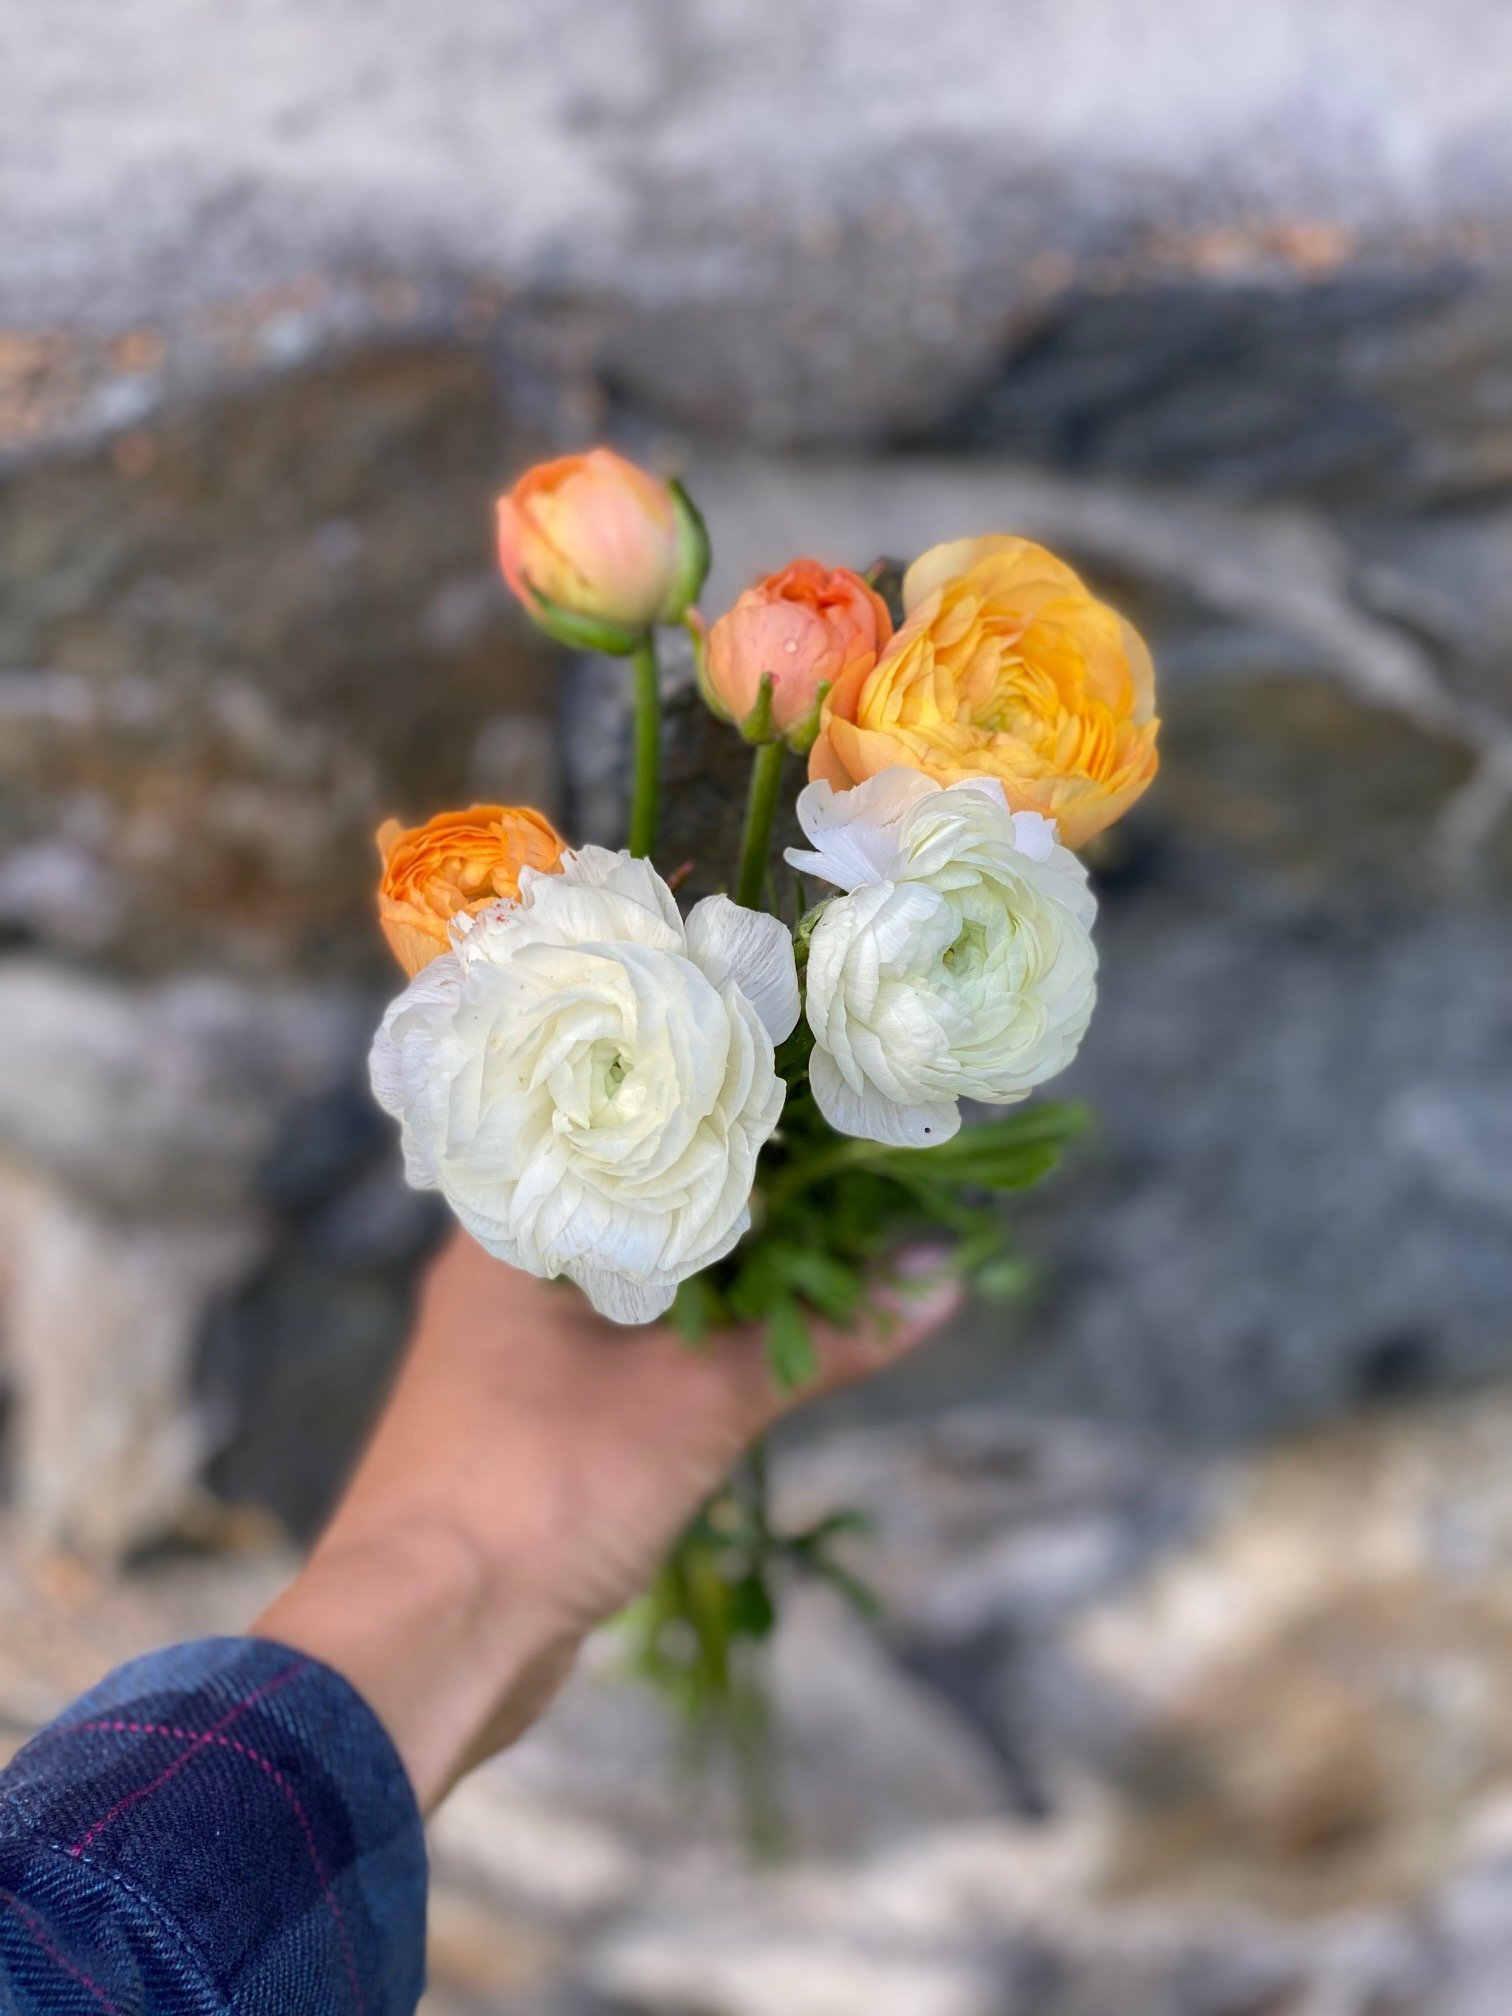
Ranunculus
I start ranunculus by corms in week 16. There is a special process for planting these so be sure to read up by clicking the link below.
Ranunculus loves cool weather. That’s why they are a great flower for northern growers. Most growers plant one round of ranunculus for spring and early summer blooms.
I recently learned how to also get in a fall crop by planting a second round in week 20. This can be a bit of a gamble because if we have a warm summer they will not thrive. But it’s worth the effort! The past two years I’ve gotten a fall harvest although the blooms seem to be smaller than my spring crop.
These can be cut for harvest as soon as the buds feel like soft marshmallows. The more stems you cut, the more blooms you get per plant.
For a more in depth look at growing ranunculus GO HERE to read my blog: “How To Grow Ranunculus”
Yellow ranunculus is a luxurious and wildly popular wedding flower. Photo credit Corrine Graves
Anemones
Anemones are one of my absolute favorite flowers. I grow different varieties each year, so just search around for colors that look amazing to you. I’m starting mine in week 13 only.
These are started very much like ranunculus. Follow the instructions for planting ranunculus here: https://www.turnstonefarmalaska.com/garden-blog/how-to-grow-ranunculus
Ideally you’ll harvest these for the vase after the flower has fully opened once and closed once (they close at night). This is just about impossible to keep track of, so I just harvest when the flower is almost fully open.
Anemones have a fabulous vase life. They don’t ship well so you will almost never see good looking ones anywhere but in your garden, at a farmers market or in your Turnstone Farm bouquet.

Anemones from the Turnstone Farm garden.
Stock
I’m starting all my stock in week 13. This is considered a one and done flower, meaning you grow one plant for one bloom and then the plant is done.
Because of this, I would usually plant 2-3 successions. But because stock dislikes heat I stick to only one early season planting. It would be worth testing a planting that’s mature in time for fall. Perhaps I’ll try a few this year to see how they fare!
Stock is an early season bloomer that helps fill the gap between tulips and all the other garden varieties.
Its smell cannot be beat and the flowers are edible.
It lasts for a solid week to two in the vase and the dried petals can make a heavenly smelling potpourri once dried.
It comes in a variety of colors: white, apricot, purple, light and bright pink and yellow.
While a more challenging flower to grow as it must be started earlier, dislikes dry conditions (spring 2022 anyone!), and dislikes heat, it is well worth the challenge.
Purple stock helps fill out these early season Turnstone Farm bouquets.

Don't Start Your Seeds too Early!
It’s January and I know very soon, I’m going to be itching to plant my seeds indoors. This is such a joyful time of hope and anticipation.
I know, you’re itching to start your garden too. But hold on to your horses…
One of the most common mistakes you can make is starting crops too early inside.
Why is this a problem?
Nothing stresses a plant more than being confined for too long.
They deplete resources from the potting mix and they start to grow their roots in circles, becoming root-bound in their tiny pots.
Unless you have A LOT of space and plenty of lights, it’s best to practice restraint and start your seeds a bit later.

Here’s how to figure out planting dates for your garden plants.
Figure out your last frost date.
Read the back of your seed packet or look up your specific variety in a seed catalog. It should give recommendations on when to plant indoors. They will say something like: plant 6-8 weeks before the last frost. For this specific example, I’d go with the 6-week start date.
If they recommend to direct seed, start indoors only 2 weeks before planting out OR just direct seed. These plants usually don’t appreciate root disturbance.
Write down on your calendar what you’re starting and when.
Take notes as you go, throughout the growing season. If something gets really root-bound and is sluggish to grow after you pop it in the garden, make a note. You might try to start a week later the following year. Your garden journal is your biggest friend. If you don’t have one, start one NOW.
So, you might be wondering what I’m starting first?
By the way, I’m starting seeding a full week later than last year.
In 2022, all my cool season crops were spot on in regard to planting time. But all my warm loving crops could have benefited from getting started a week (or two) later.
Just for you, here’s a sneak peek at my first week of seed starting, which is coming up fast folks!
Turnstone Farm seed starting the week of March 12th:
Oregano
Sage
Rosemary
Thyme
Snapdragon - Potomac Varieties. These guys grow relatively slow and love the cool spring temps. I try to start these as early as I can because they can be planted before the last frost.
If I was starting perennials that I may want to bloom the first year, I’d start them now too.
Thats it for my first week of planting.
Happy garden planning!
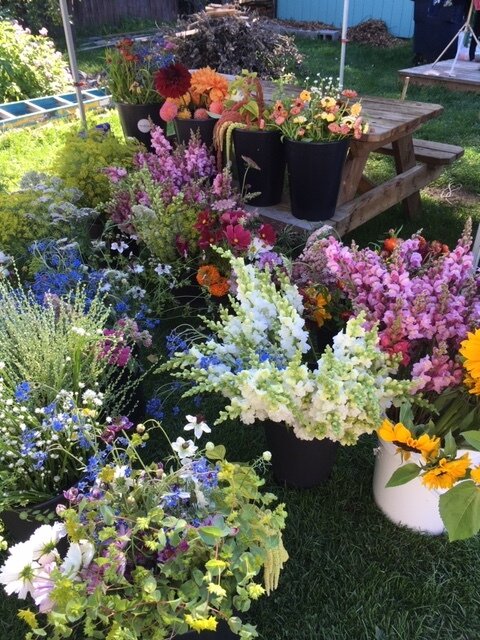
Best of 2022: My Favorite Flowers from the Cutting Garden
Fall is time to dig out all the garden notes you’ve been taking and put that data to good use.
I’ve been reviewing my notes and I’m here to tell you what I absolutely LOVED in my cutting garden this year.
These are all annuals, grown specifically for my cutting garden.
I will follow this post with a blog on perennials. As they become a bigger part of my cutting garden, they deserve their very own article.
So without further ado, here are my top 9 Cutting Annuals for 2022:
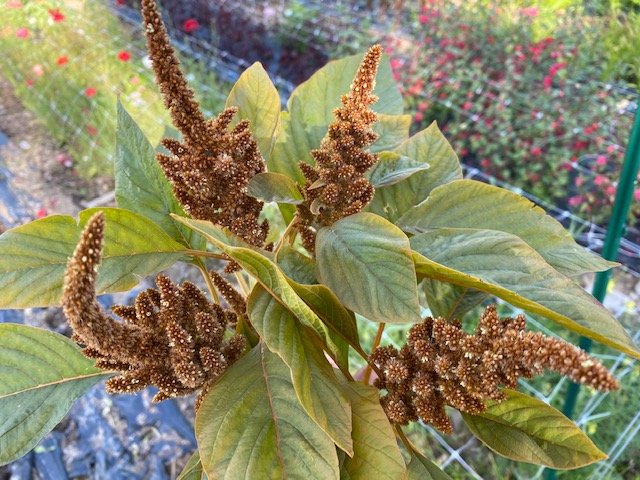
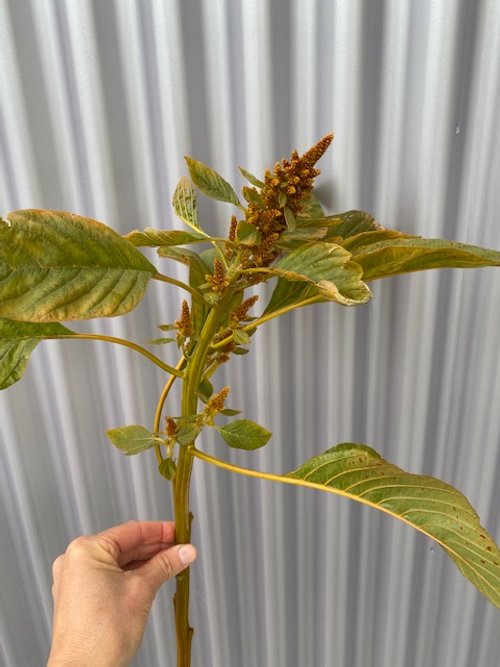
Hot Biscuits Amaranth
Amaranth is a beautiful grain that has gorgeous foliage and stunning inflorescence.
Hot biscuits consistently out-produced all the other Amaranth varieties I grew in height and size. It was such an amazing fall-colored addition to bouquets.
I looks full and interesting in the garden and does amazing in the vase. I consistently had it in the vase for 2 + weeks.
In addition, you can hang it to dry for an everlasting bouquet.
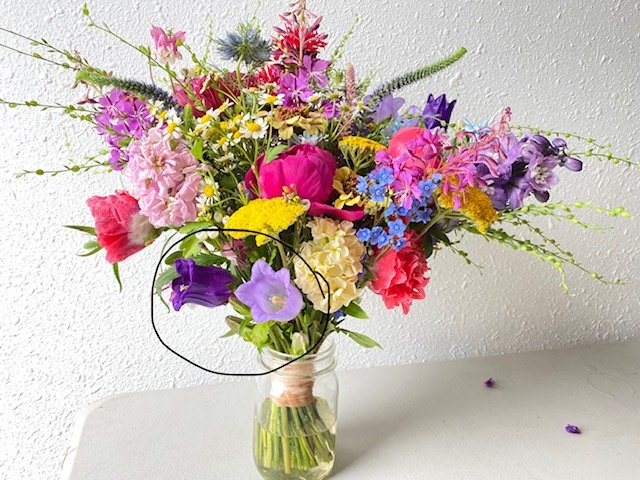
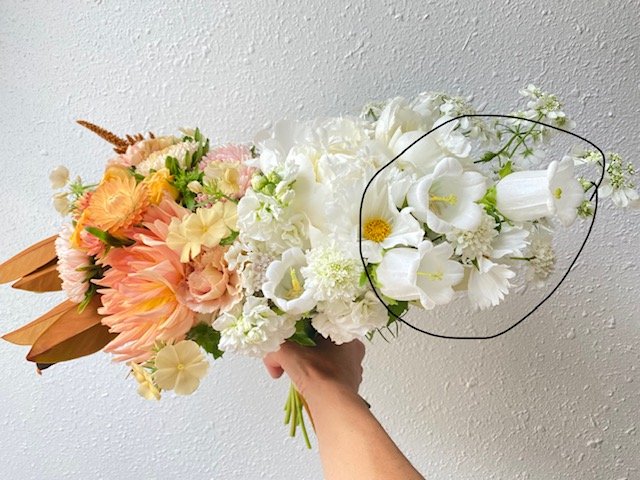
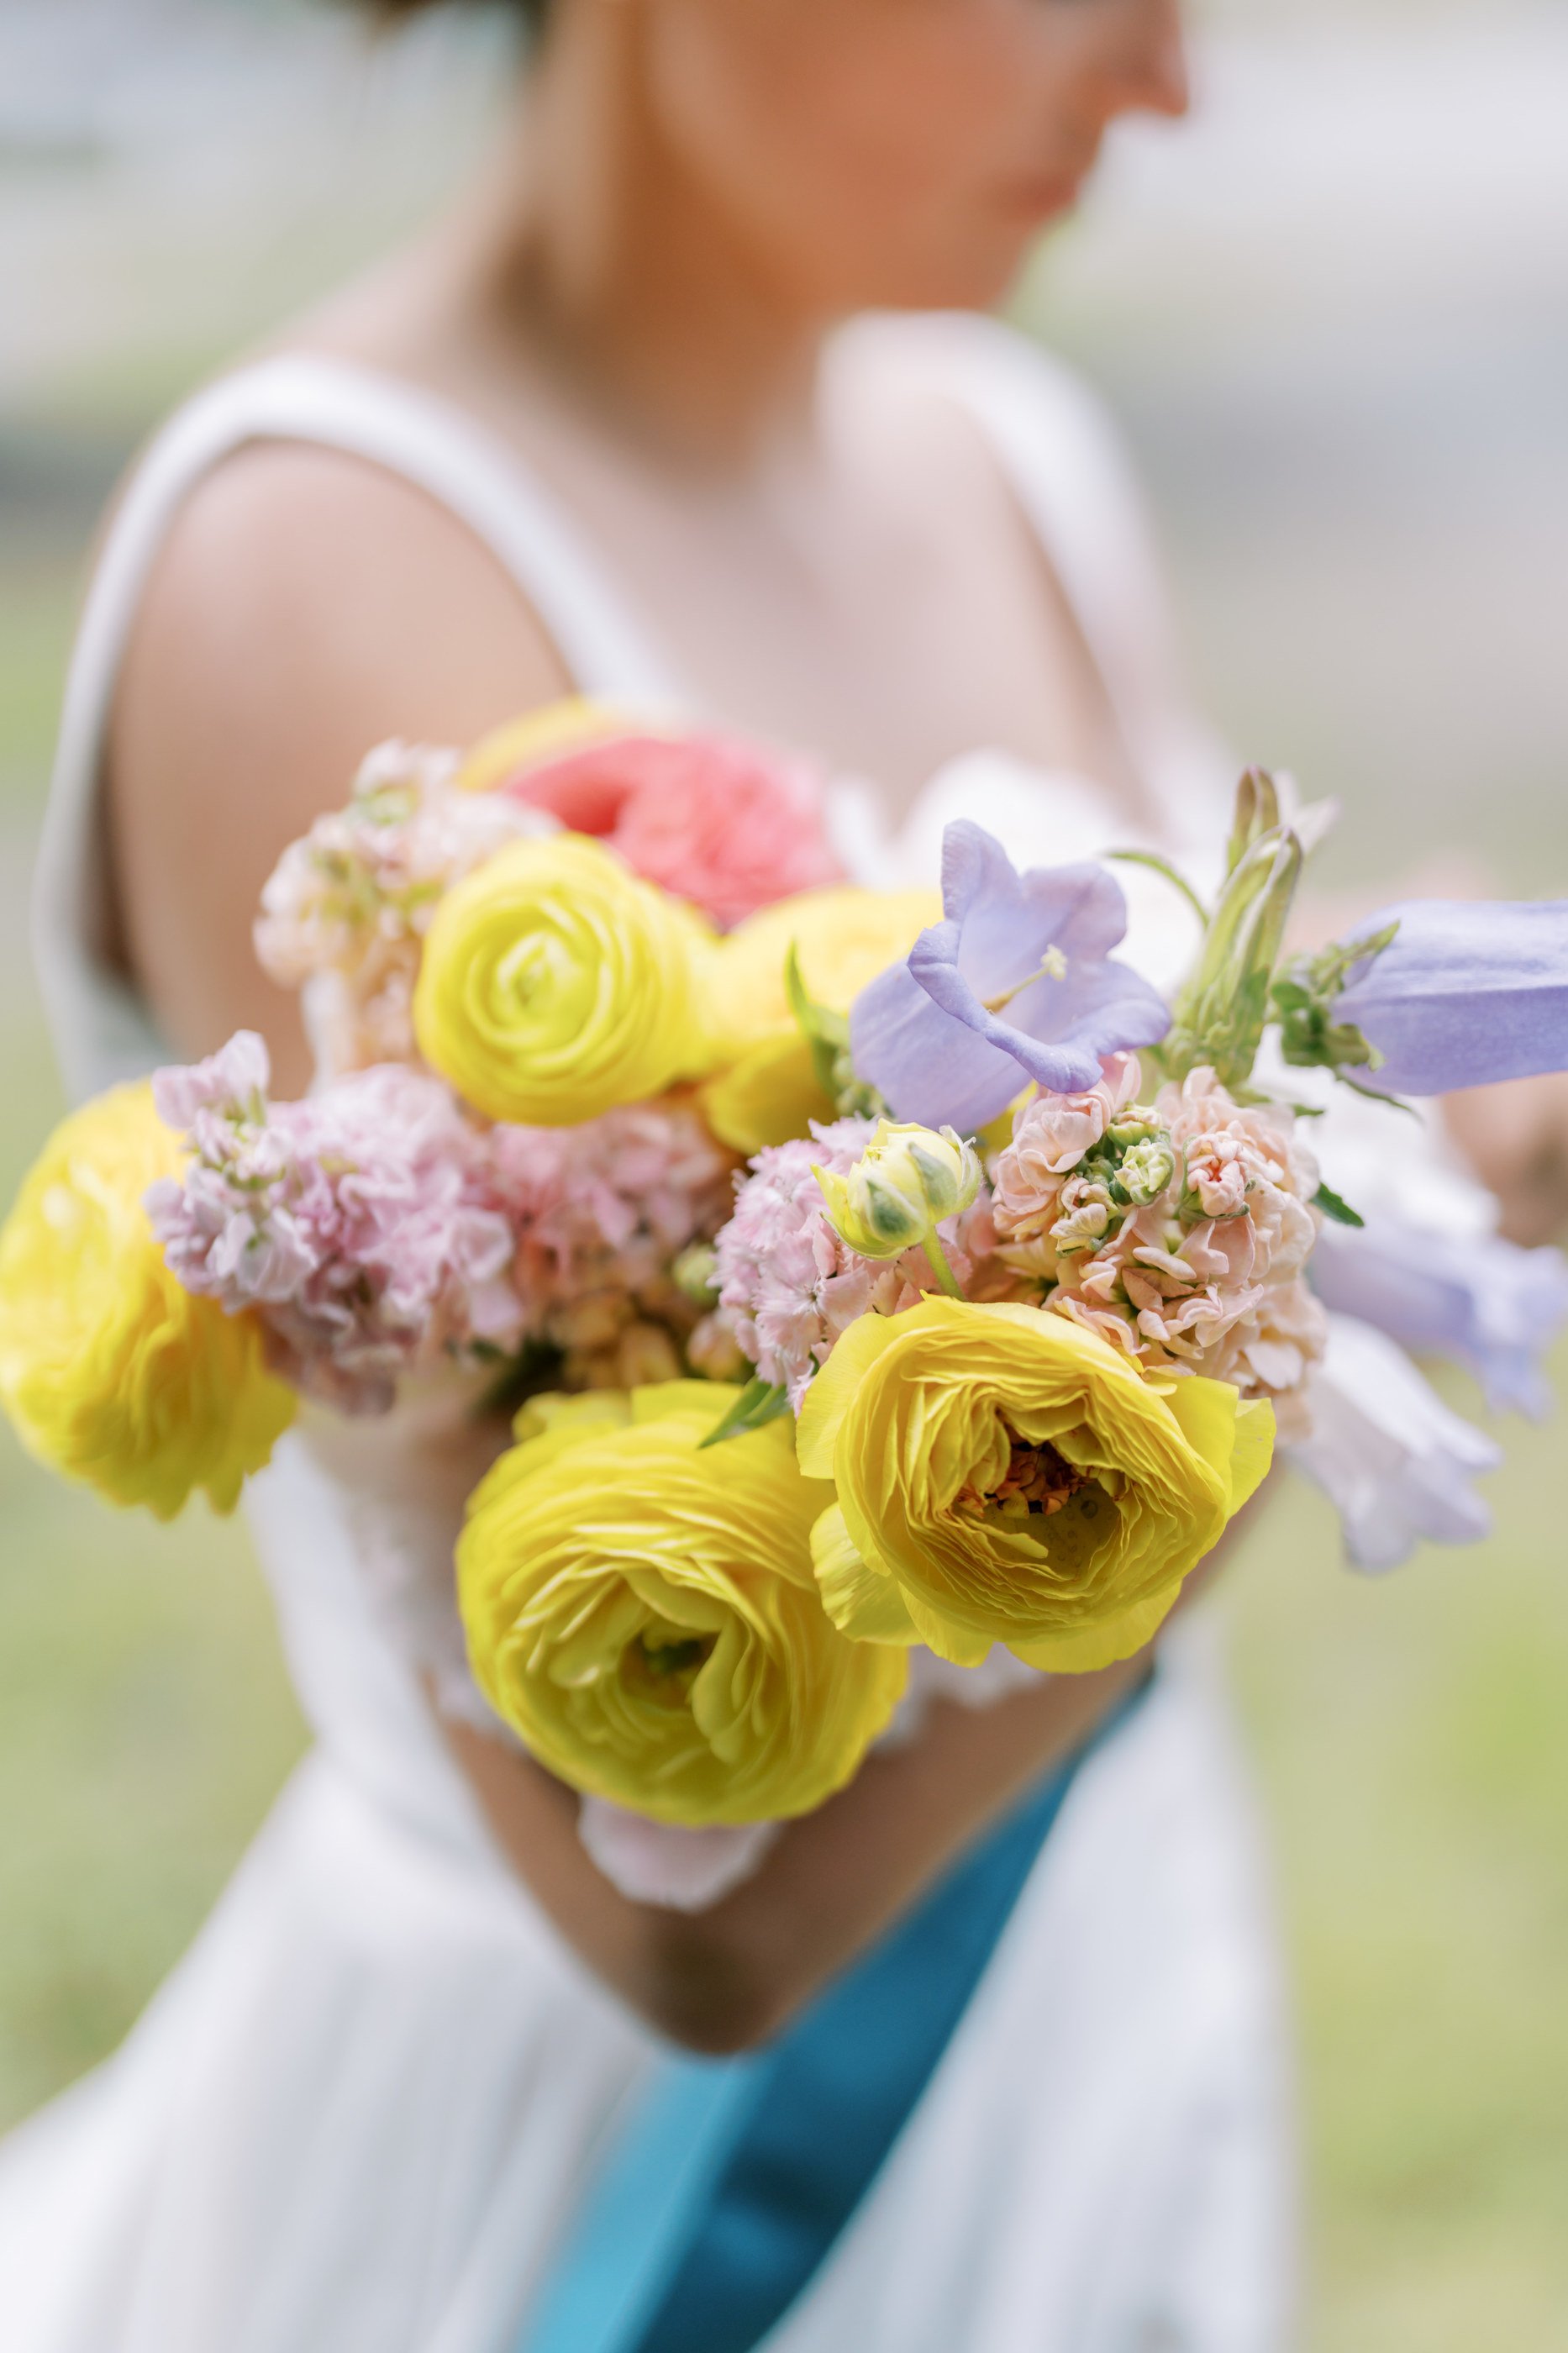
Campanula
These are fun and delicate blooms that look fabulous in the garden.
I also used them consistently in wedding work this year. See above bridal bouquets!
In the vase they also lasted a good 1-2 weeks in good condition.
This is an all round excellent flower.
Cut these for the vase when the first flower opens up as the other buds will continue to open in the vase.

Vintage Brown and Iron Varieties Stock
Stock is an early season bloomer and helps fill the gap between tulips and all the other garden varieties.
Its smell cannot be beat.
The flowers are edible.
It lasts for a solid week + in the vase.
It comes in a variety of colors: white, apricot, purple, light and bright pink and yellow.
While a more challenging flower to grow as it must be started earlier, dislikes dry conditions (spring 2022 anyone!), and dislikes heat, it is well worth the challenge.

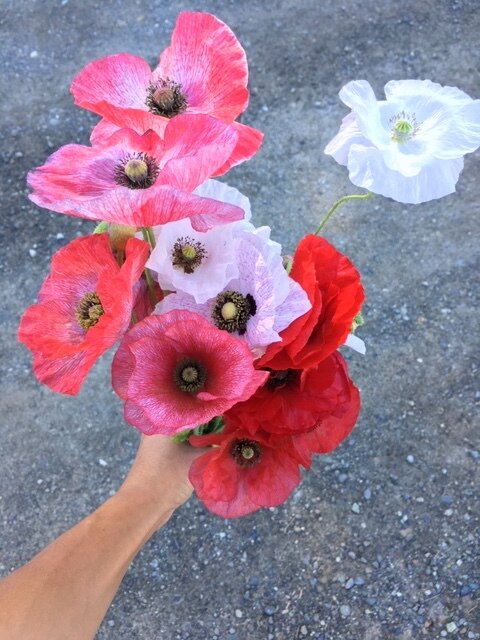
Salmon Frosted Breadseed Poppy
This one was a show stopper this year.
These were like little explosions in the vase. I cut them just as they start opening up and then they poof out into big fluffy balls of color.
While all poppies have a short vase life, this one did a little better than most. I got a solid 3+ days of blooming time in the vase.
That’s good news y’all!
Some flowers are more ephemeral than others.

Giant Orange Marigold
This flower makes my favorites list every year.
Here’s why:
It has a stunning and cheery color.
It smells heavenly.
It dries well.
It can last up to 3 weeks in the vase.
One plant pumps out blooms almost all summer long.
It’s easy to grow.
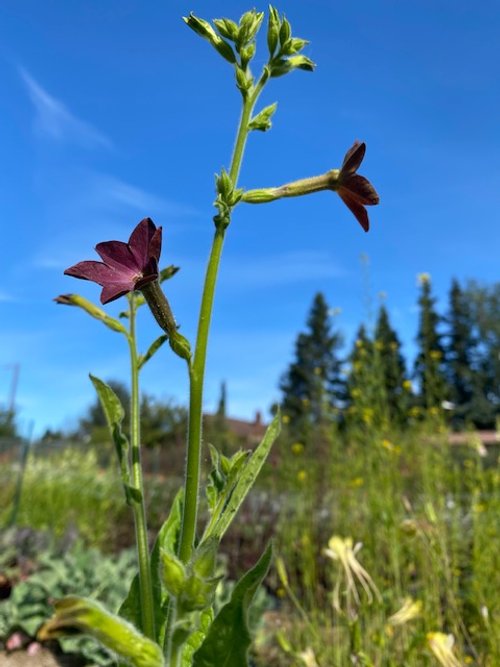
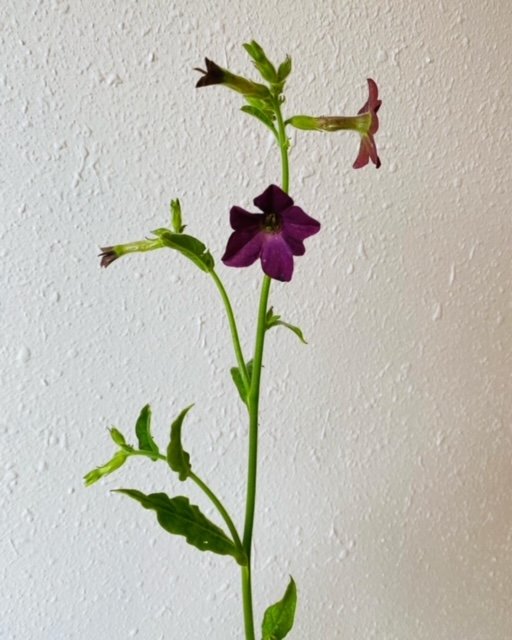
Bronze Queen Nicotiana
I LOVED this flower. It is delicate and whimsical and was the perfect addition to most of my bouquets.
As a garden flower it adds interest and texture but is a little sparse. It is not big, showy or bright.
In the vase is really where it shines.
It has a long vase life and it is so fun to look at those delicate little trumpet flowers!

Godetia
While this one didn’t make my initial “best of” list I’m listing it here for the home gardener.
I have not decided if I’m growing it again next year for my cutting garden but I would highly recommend it as an addition to any flower gardeners repertoire.
The pros: it lasts forever in the garden and in the vase - florets just keep opening up. It is short and sturdy for garden beds. It does well in shorter vases.
The cons: it is too short to use in most bouquets. The petals are easily damaged by rain.
Try it and see if you like it!

Rubenza Cosmos
Cosmos is a staple of mine every year.
These flowers are delicate and ephemeral. They look stunning and full in the garden and marvelous in the vase.
Part of their joy is that they can’t be shipped since they are so delicate.
You can only have these in your vase if you grow them yourself or buy from a local farm.
Rubenza is a magical deep maroon color with a vibrant yellow center. I find myself marveling at it’s beauty EVERY time I see it.
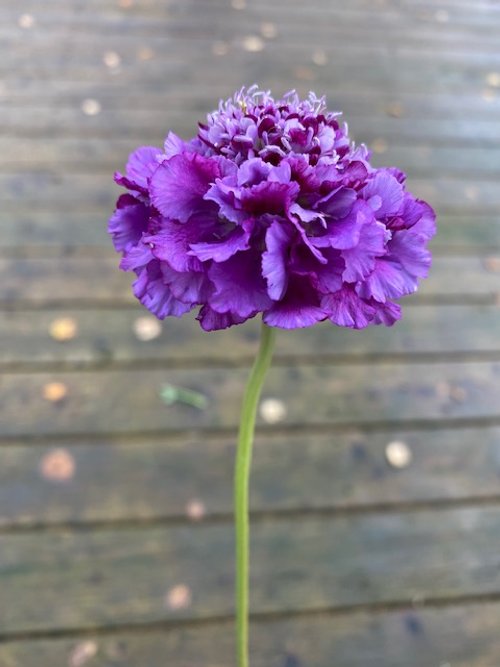
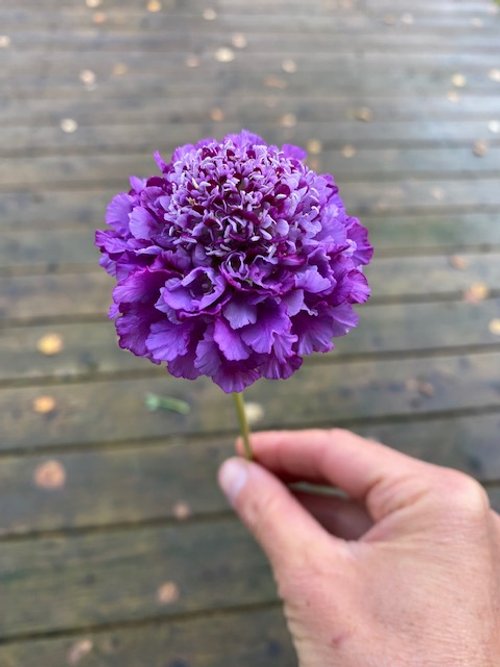
Oxford Blue Scabiosa
This is a tall plant with long strong stems.
It looks gorgeous and lively in the garden or you can cut it just when the first florets begin to open. When cut at this time it will last a solid 1-2 weeks in the vase.
Scabiosa loves cooler temperatures so does better in our cooler Alaskan summers.
How to harden off your plants
One of the most important parts of growing a successful garden is getting your plats hardened off.
What plants do you need to harden off?
Not all plants need hardening.
If you’re growing in a greenhouse, any plants going in there don’t need to go through this process.
Direct seeded plants don’t need hardening (maybe this is obvious). If you’re seeding directly into your garden beds, your seedlings will pop up all ready to deal head-on with the elements. This is a big benefit of direct seeding.
ALL other plants will need some hardening off.

Stock, snapdragons and other cool-hardy flowers getting hardened off under shade cloth.
Plants need some sort of gradual adjustment to outdoor conditions. After being cozy and warm indoors for their entire lives, it can be stressful to get popped directly outdoors.
The first plants I harden off in the spring are all the “cool-hardy’s”. These are plants that can survive a light frost and include the following:
Most salad greens
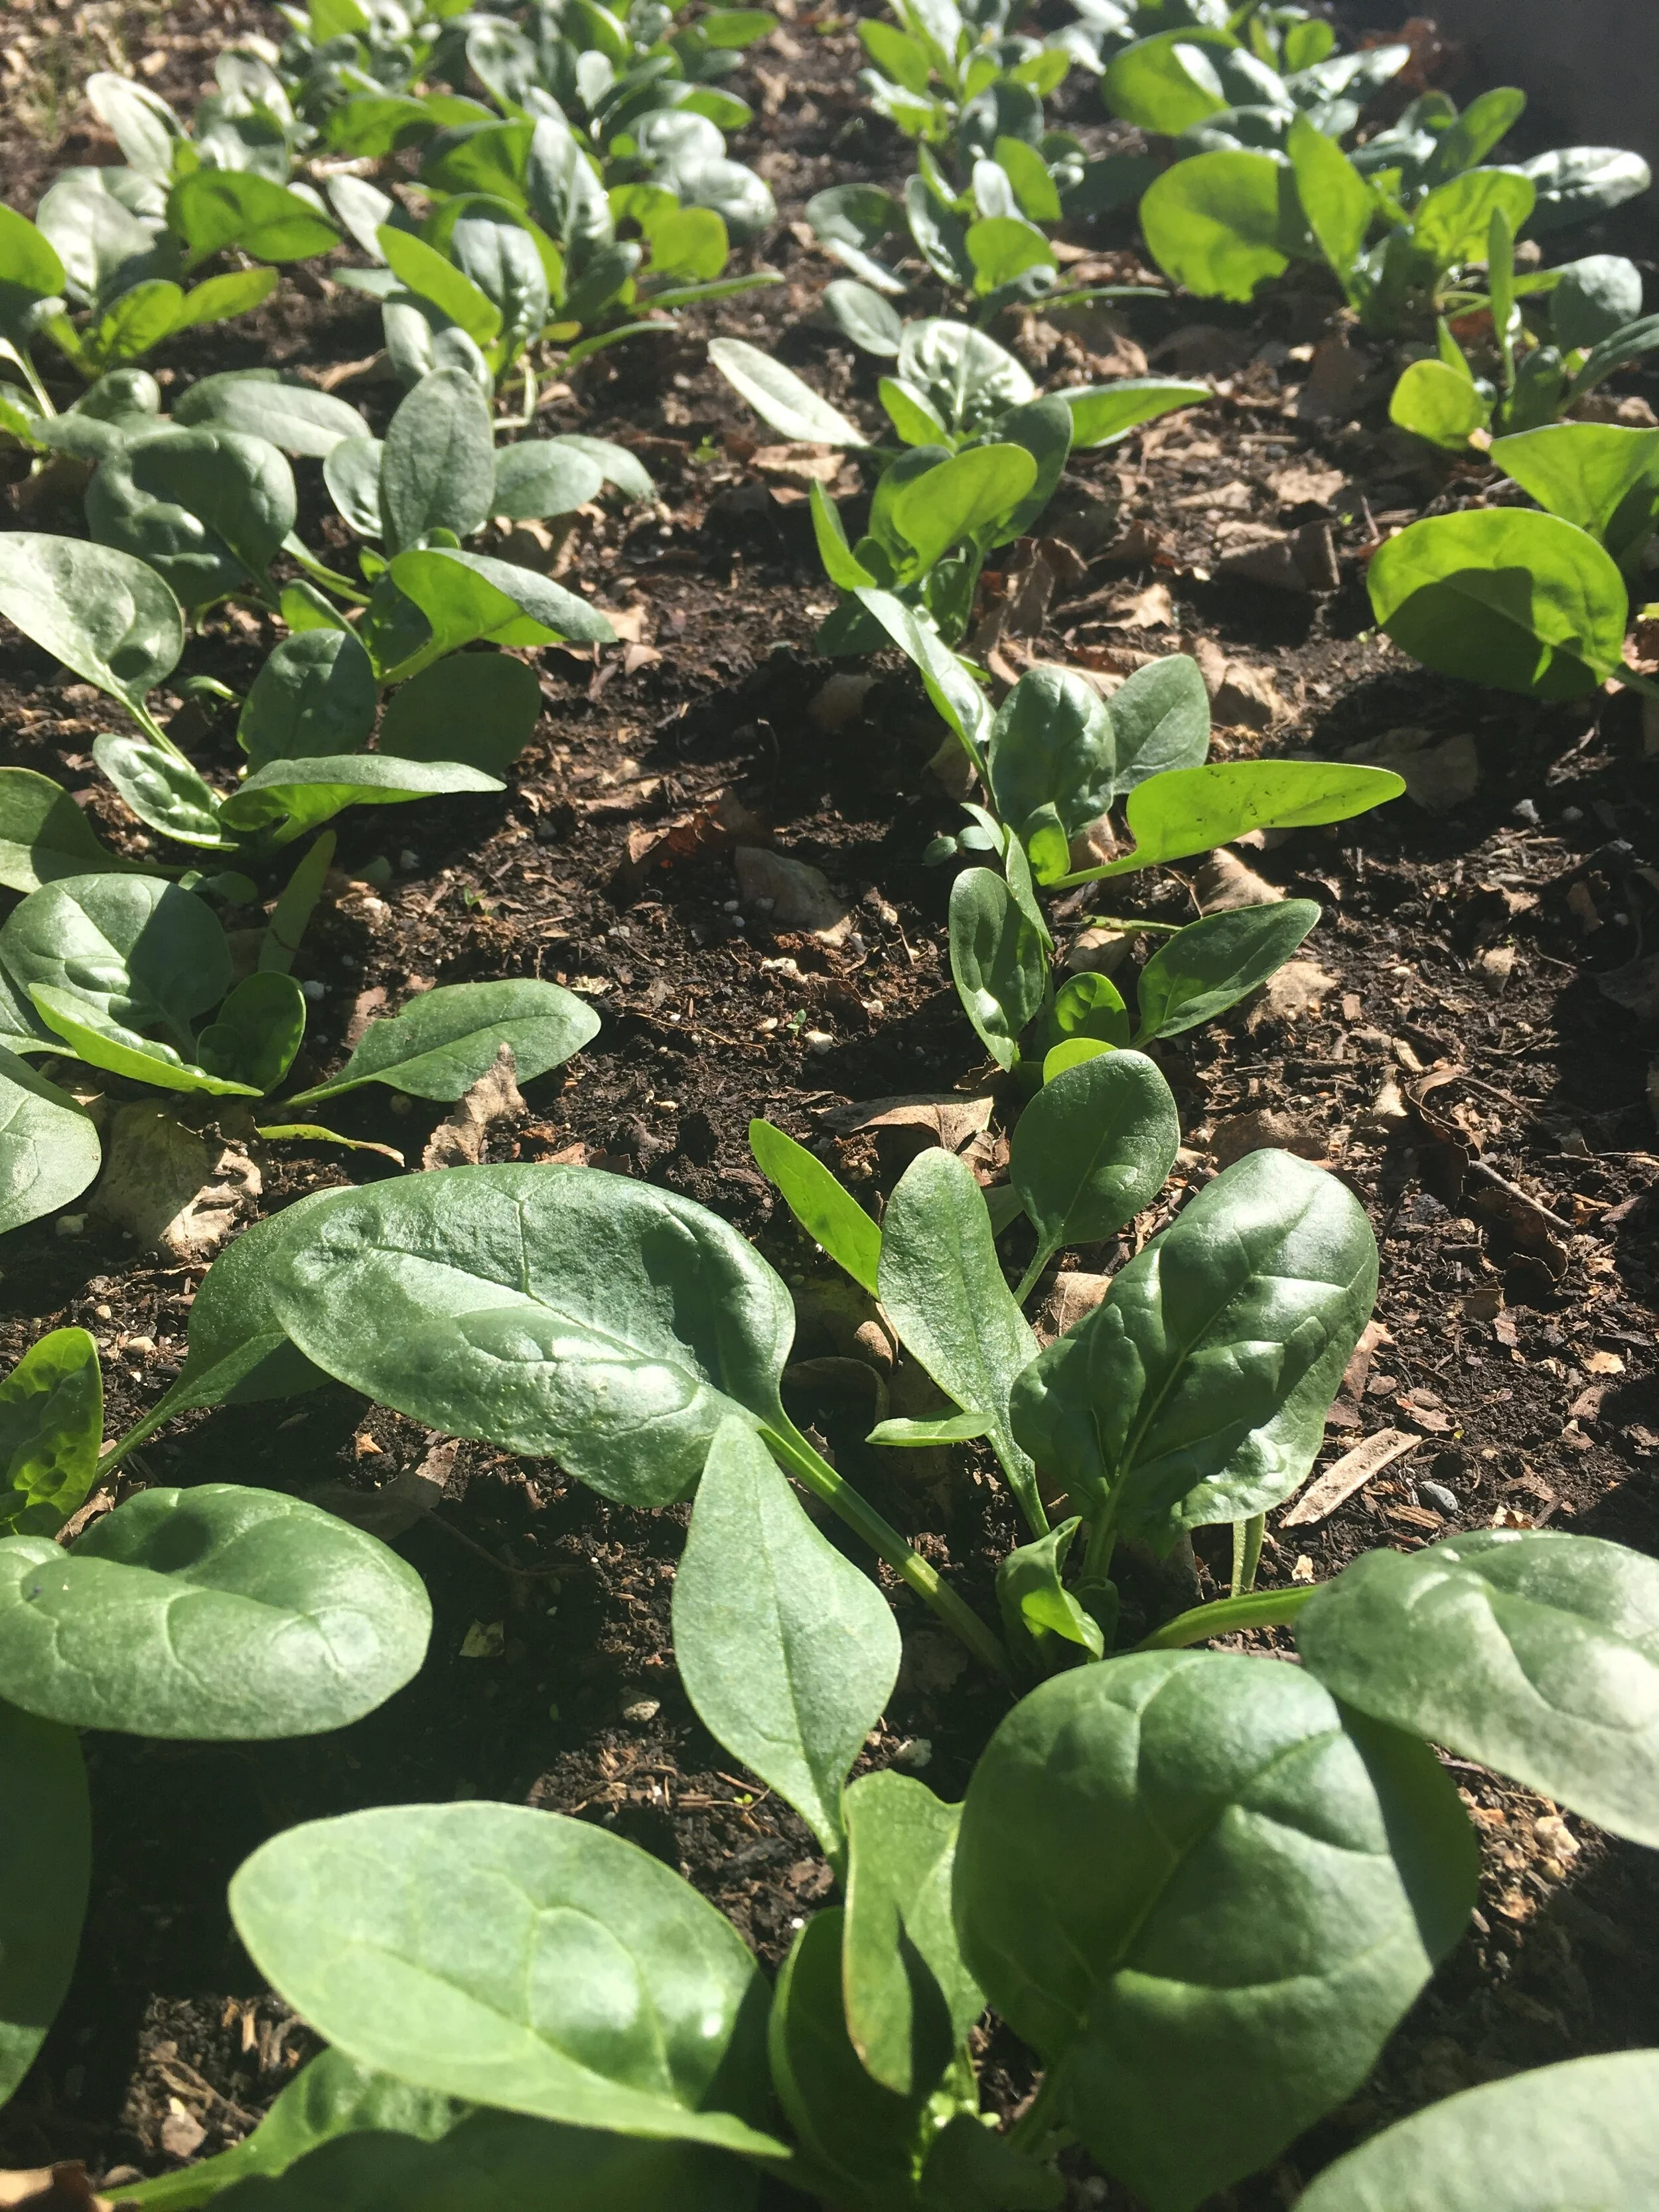
Spinach
Kale
Broccoli
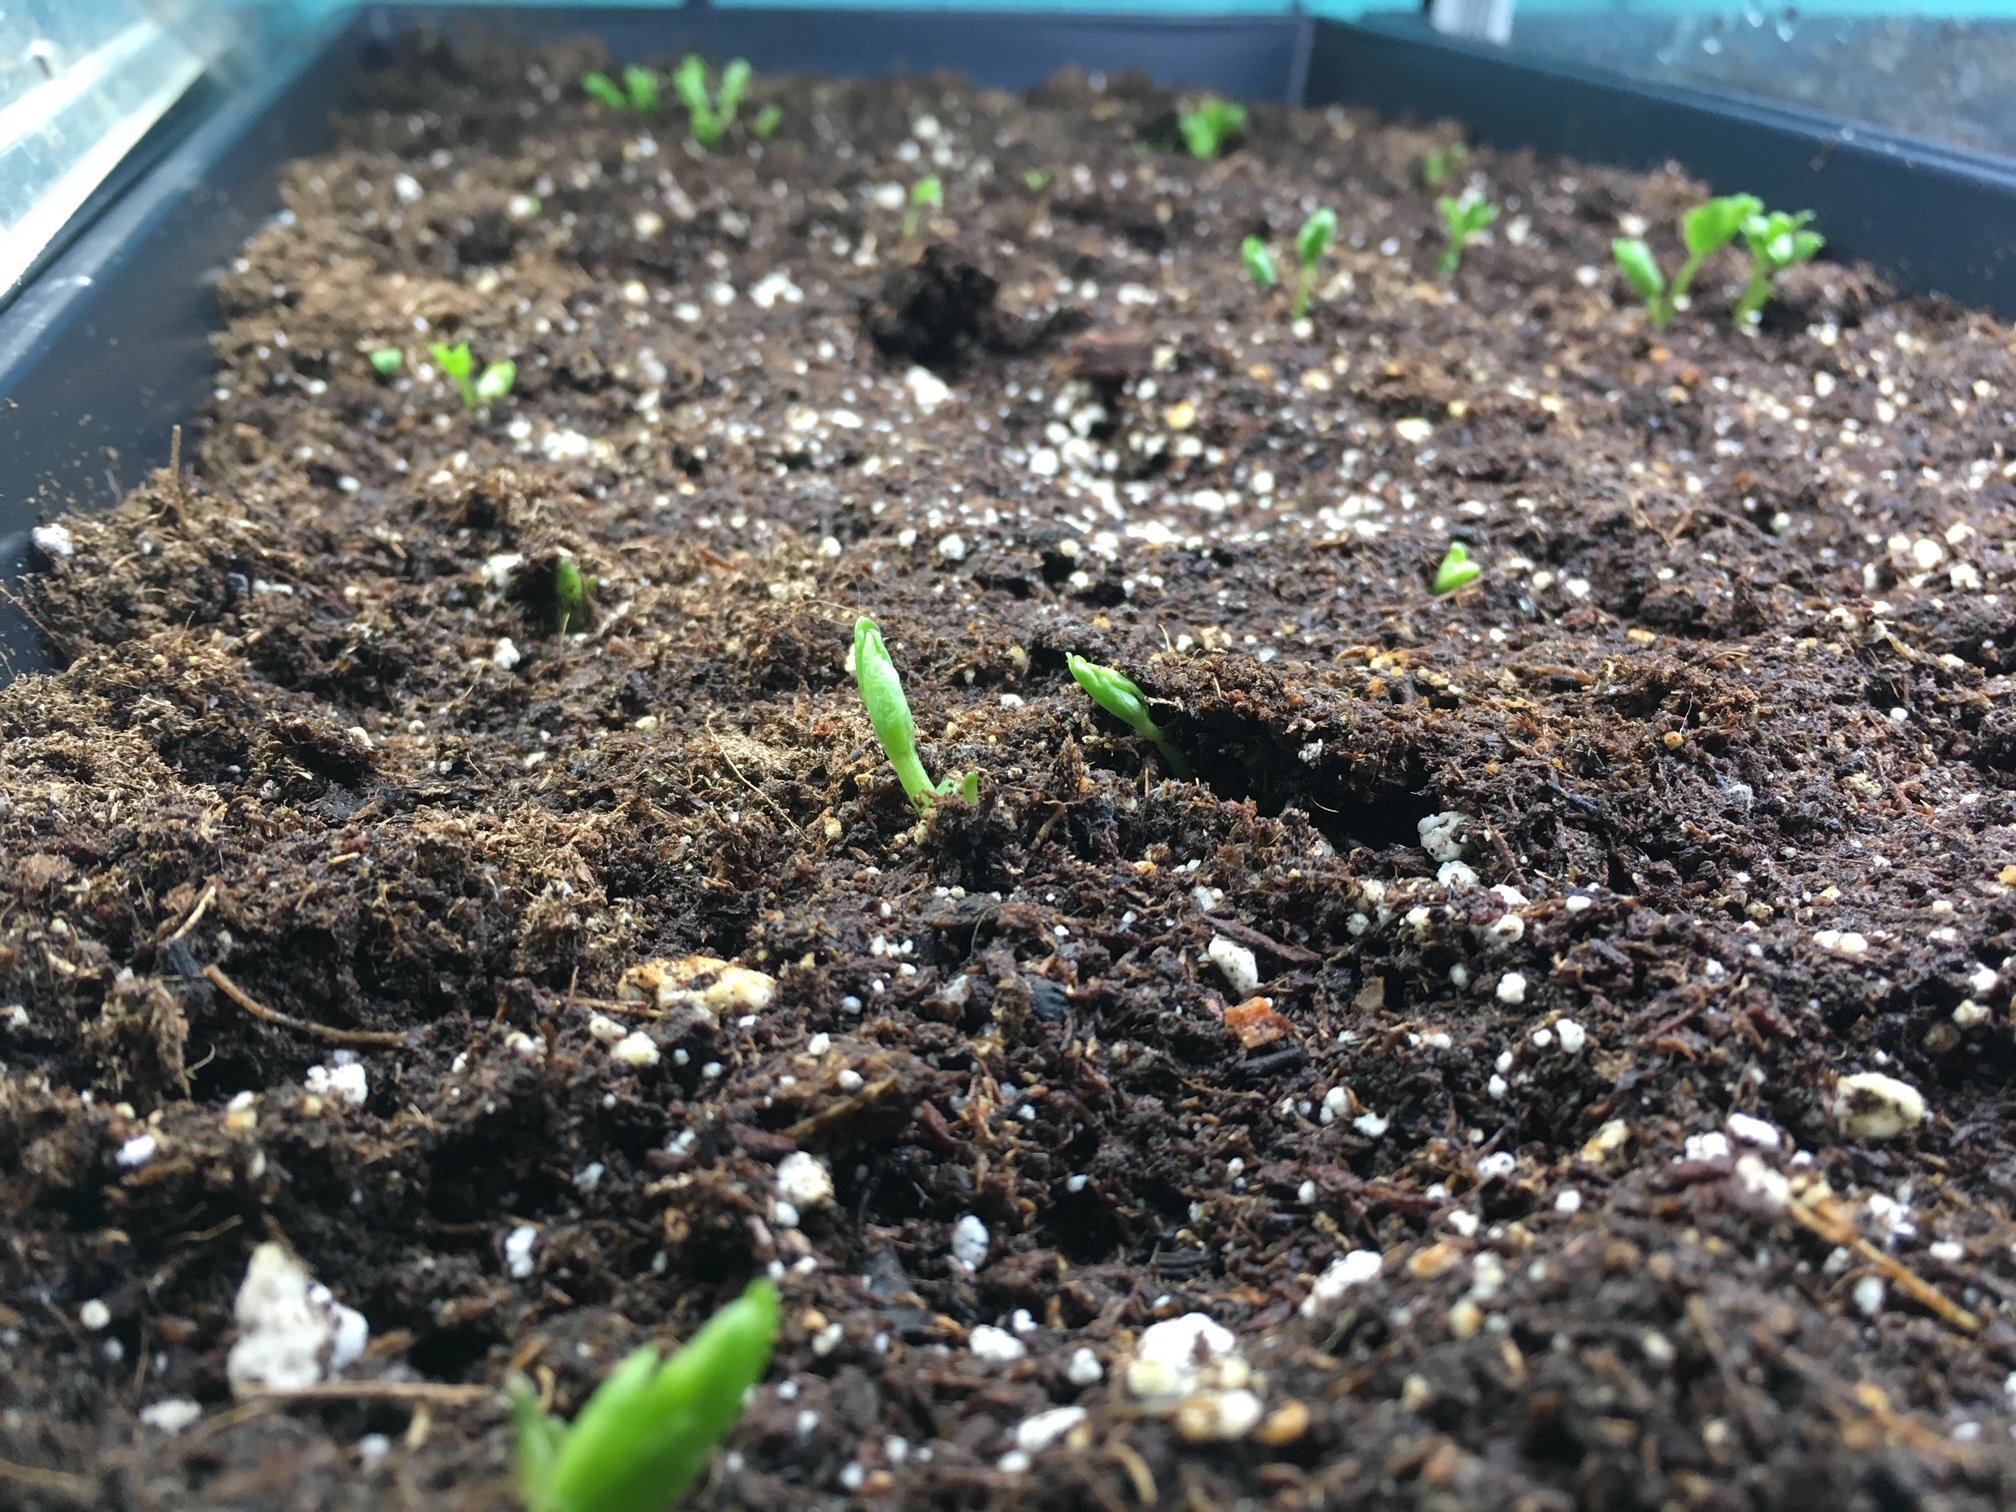
Peas
Onions
Snapdragons
Bupleurum
Poppies
Rudbeckia
Calendula
Ammi
Strawflower
Campanula
Nigella
Most perennial flowers that are suited to your zone.
In general, to get fully hardened off, plants need about 3-5 days in the shade.
When nighttime temps are steadily in the 30s, the above varieties can be set out in a shady spot. In previous years I was moving my plants all over the place, from shady spot to shady spot.
This year I finally streamlined my process and started using hoops (made of thick wire and then stuck in the ground) and draping 30% shade cloth over the top.
My cool loving plants go in here and in 3-5 days we’re good for planting!
For warm-season plants, I’m a little more cautious. Ideally, before hardening these crops, our night temperatures would be in the 45 + zone. In Alaska, this can be a tall order!
So for these, I watch the weather and put them in their shade hoop when temps are in the 40s or higher. Using past last frost dates can work but since each spring is so different sometimes it’s hard to predict.
To help any early-planting anxiety you may have about cold temps, you can always add extra protection by putting a layer of Agribon over the hoop as well.
In fact, this would have helped me this season as I pushed it a little with a few varieties and killed off a few trays during a spotty frost that struck our neighborhood last week.
(sigh)
I guess it’s just a good reminder that a good fail is always the best way to be successful in the end!

30% shade cloth hooped over my cool-hardy flowers.

7 aromatic herbs that also look great in a vase!
I grow lots of herbs. Most are easy to grow and have many multi-purpose benefits for the home gardener and flower farmer.
In this blog, I want to introduce you to 7 herbs I grow every year that not only do culinary wonders but also look great in a vase.
In addition to being a fun addition to the vase, here are some additional benefits of growing herbs:
If you have a tiny garden, growing herbs maximizes your space since you’ll be growing a plant for both culinary and cut flower purposes. I’m all about the multi-purpose plant!
If you don’t have much space to grow, most herbs do great in planters on your porch. In fact, since I like to keep mine close at hand I often grow them in pots just so I can quickly pop out to the porch to pick them.
Once gone to flower, herbs attract and nourish beneficial insects which help keep away the insects you don’t want around.
Fresh herbs are often hard to find and can be expensive at the grocery store. Lucky for you, they are best from the garden anyway!
Picking herbs and keeping a small jar of herbs on your kitchen counter is the best way to keep them once harvested (don’t let them rot in the crisper). My husband and I joke that the crisper is where veggies go to die. This will give you super easy access to them the next time you cook and will bring a nice pop of greenery into your kitchen.
So here are 7 herbs you must add to your home garden.
Chive: Chives, while not easy to start from seed are easy to grow once established. They spread steadily, so every few years you’ll have to dig and replant or give away a clump. The flowers on chives are SO delicious and do great in a vase.
Cilantro: Calypso is a slow to bolt variety great for growing in any northern climate. Use this culinary herb in your favorite dishes. I love a good homemade salsa with lots of cilantro.
Once it has gone to flower, harvest for an aromatic bouquet. The seed heads are also a lovely and fun addition in a bouquet.
Dill: Bouquet variety is specifically for the cutting garden but is also edible so it’s a win-win! This is a super fast grower. You can use the flower or seed head once fully open. The seed heads are also great for drying.
Fennel: Bronze leaf is a beautiful variety. It produces gorgeous flowers and seed heads. Harvest flowers once they are beginning to bloom or use foliage to add texture and a unique color.
Mint: both Common and Mountain varieties are fantastic. Common mint is a rapid spreader so make sure to plant in pots or be prepared to cut it back every year.
Mountain mint is not a spreading variety but in my experience, is very slow to grow and doesn’t always come back year after year. If I plant 10 plants I may get 2-3 to come back again the following year.
Oregano: Greek variety is a best bet. My oregano comes back year after year but even so, I usually start a few plants every spring just in case.
I love letting these go to flower before I cut for the vase. They are long lasting in the vase and fill in an arrangement nicely. Oregano leaves dry well for later use.
Sage: Common sage is a perennial that will flower the second year. Use foliage in culinary dishes, dry for use all winter or use foliage or flowers as greenery in a bouquet.
In my garden, sage will come back for 2 to 3 years and then die out. Because of this, I start a few new plants each spring to keep my garden well stocked.
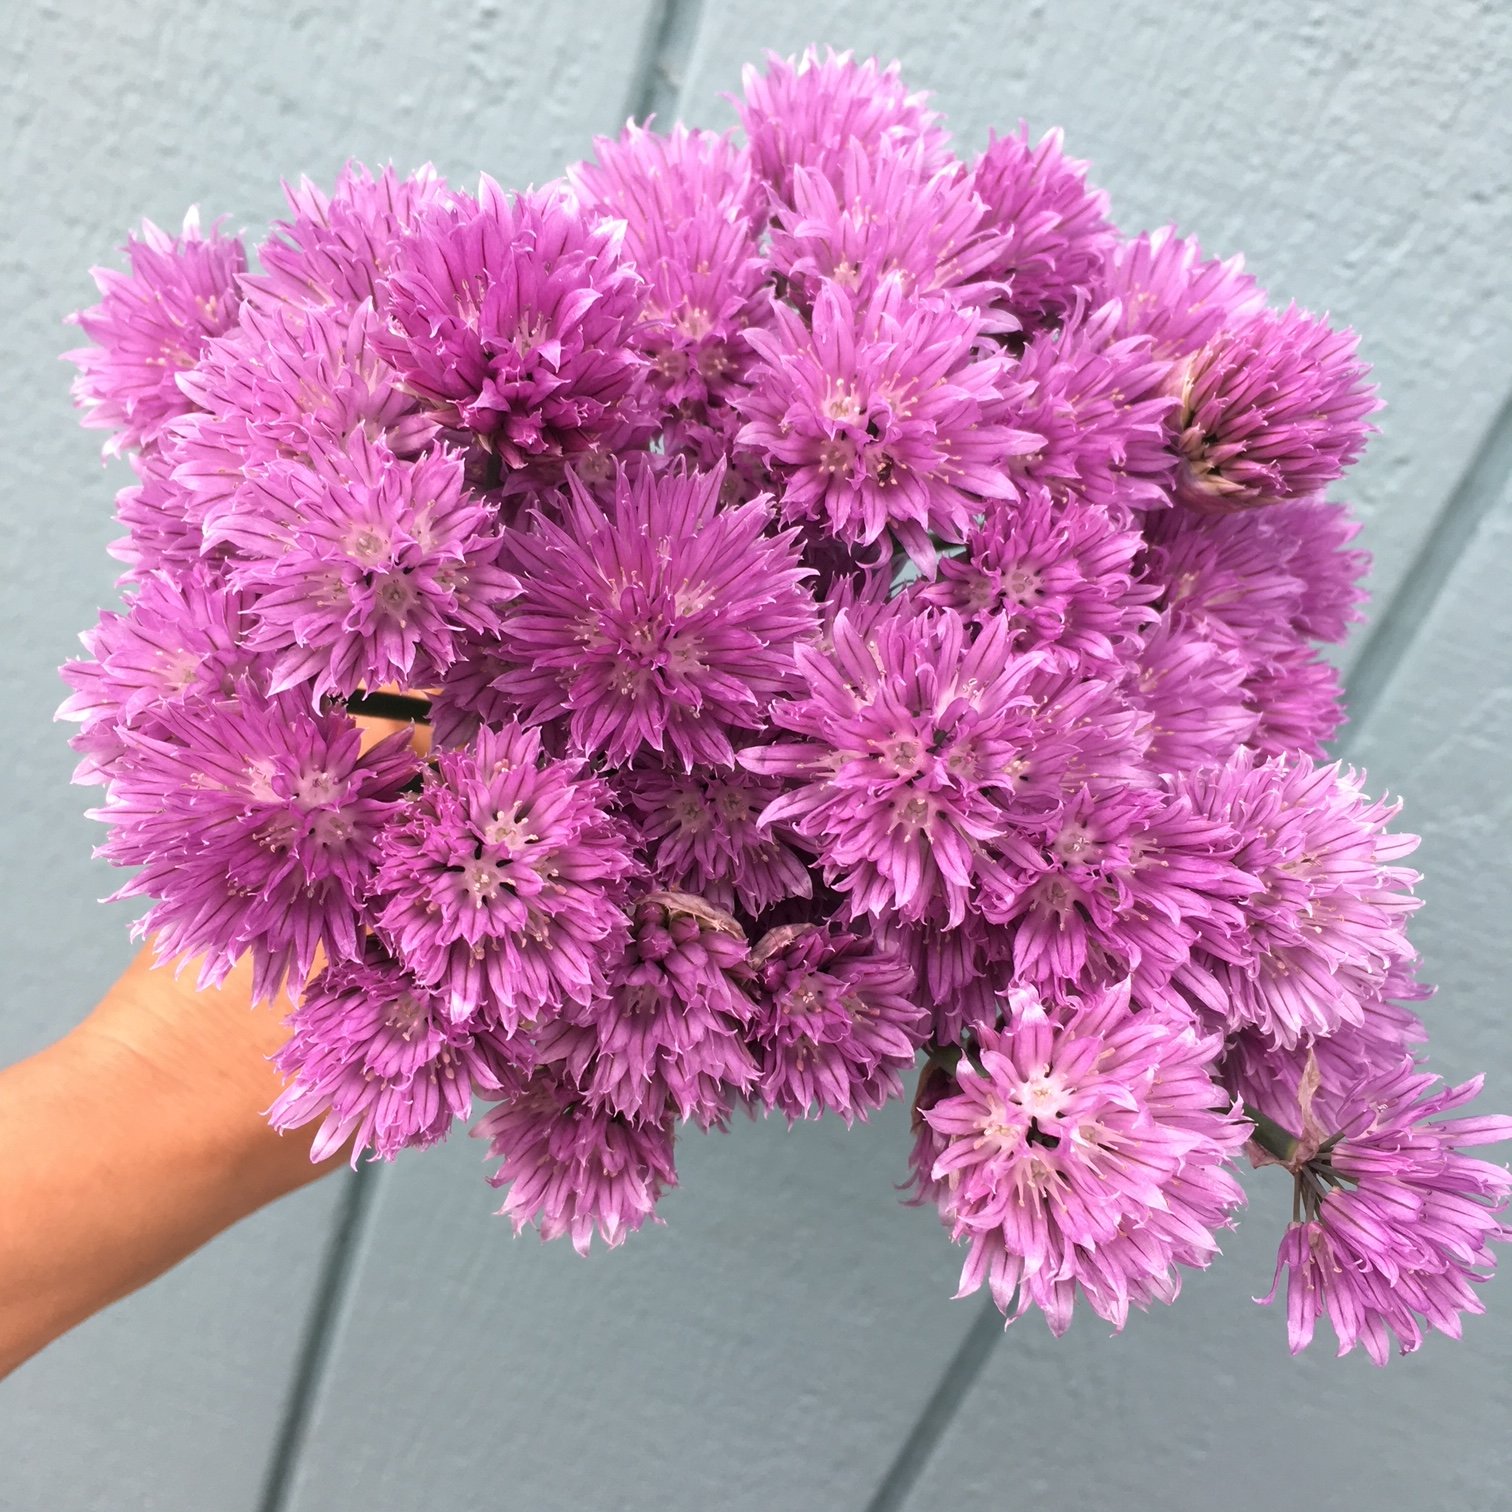
Left to right: Lavender thriving in a planter, Chive flowers - my mouth is watering just looking at these, Sage flowering big time in my home garden.
Plus a bonus herb I encourage you to try!
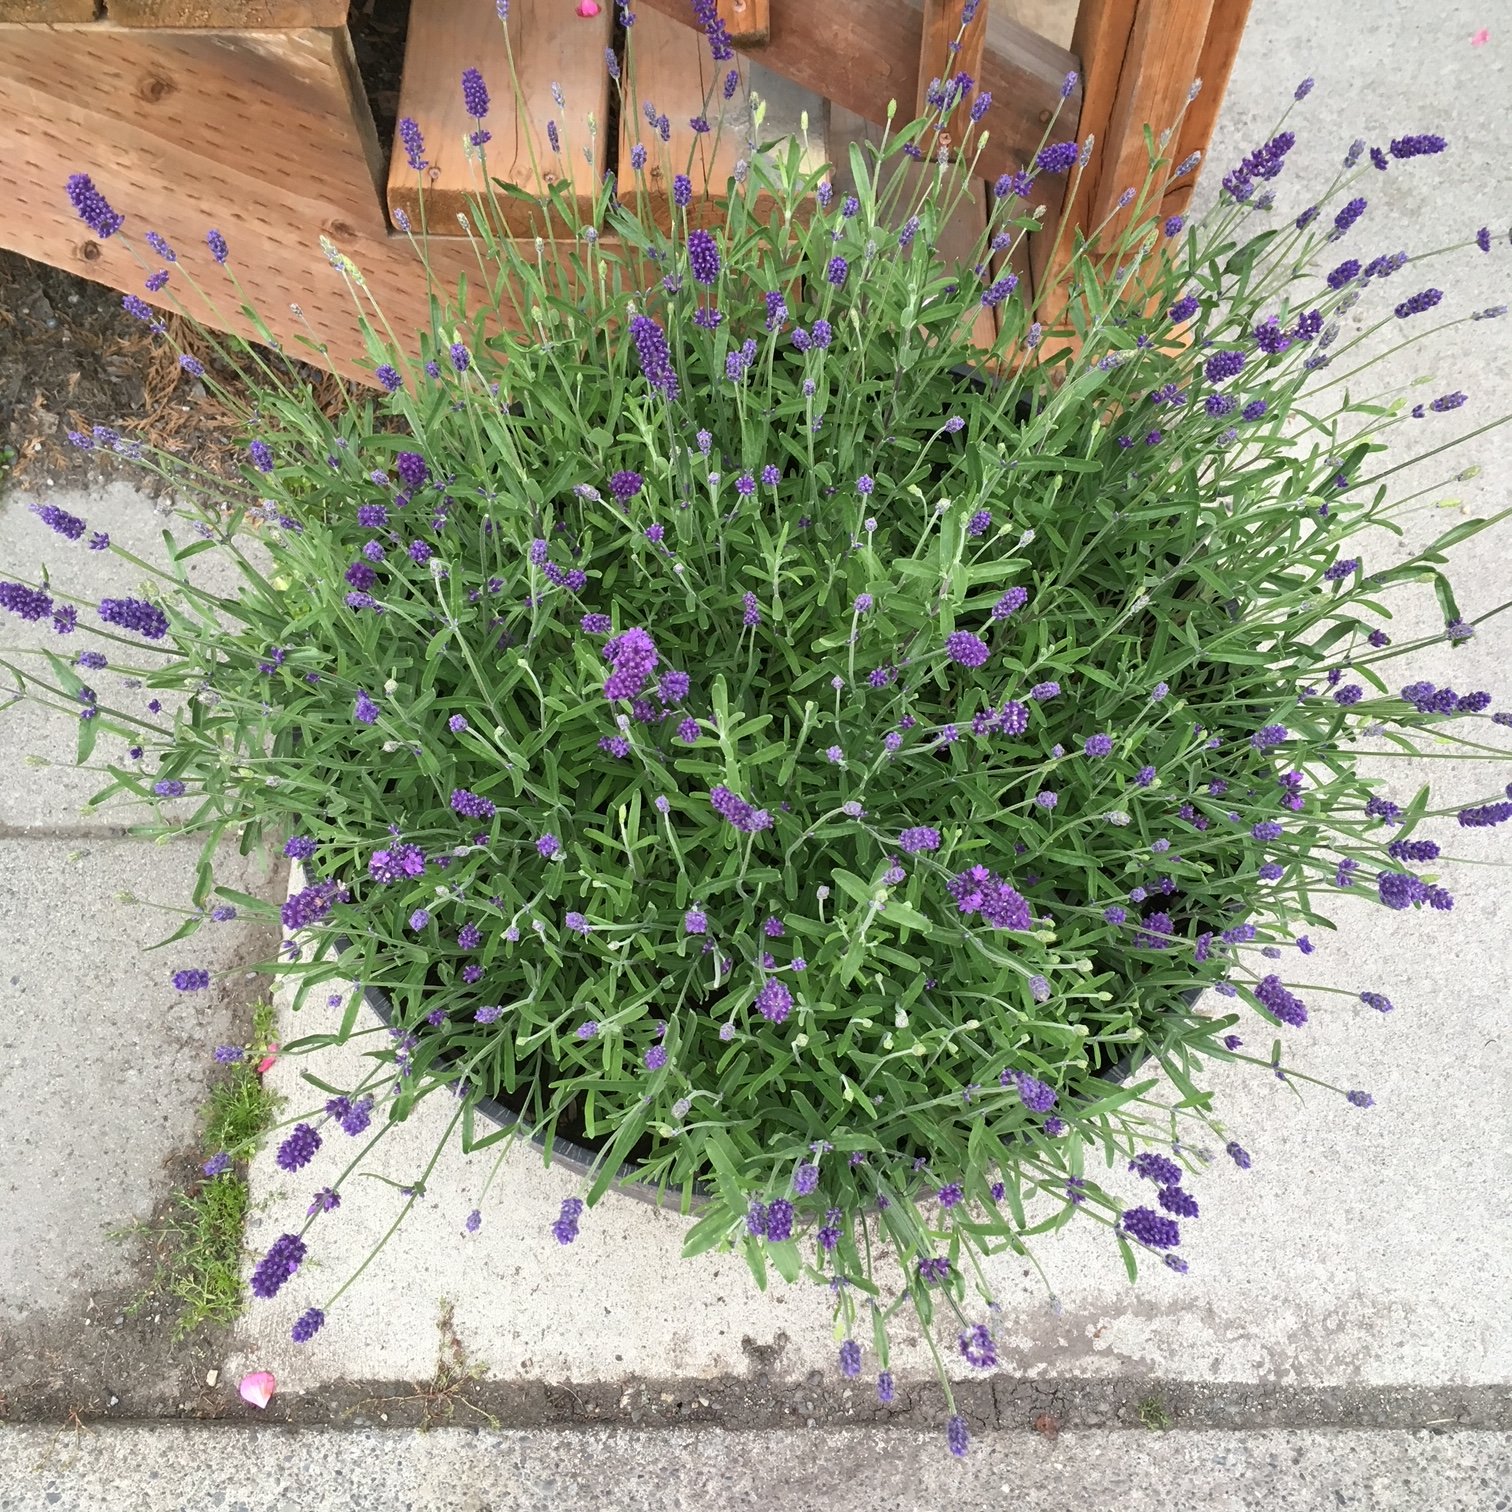
In addition to these fabulous and relatively easy-to-grow culinary herbs I also want to mention another favorite flower/herb: Lavender. I grow the Elegance variety.
Lavender is more challenging to grow in my northern climate. It is a slow grower and thrives in warmer temps.
This is one of the earliest plants I start by seed. I then make sure to plant it in a warm, sheltered environment which usually means in a pot on my super sunny front porch.
Harvest mature flowers for the vase or harvest each stem when flowers are budding if you want to hang for drying. Lavender keeps its aroma and color well after drying.
If you’re up for a challenge, try this amazing herb. The beauty, aroma, and happiness you will enjoy from this plant are priceless and well worth the difficulty!

How to Grow Ranunculus
One of the most popular flowers right now in the modern florist and wedding flowers world has to be ranunculus.
And for good reason! These beauties are amazing. They have this multi-petaled rose-like quality and they last forever in the vase, especially when grown locally (like in your backyard).
Plus, as garden flowers, they are so bright and beautiful! I want to see these growing in more gardens around town.
I do consider these a more advanced flower to grow, mainly because the process of starting these is a bit different than other cut flowers.
But do not fear! I am here to walk you through the entire process. From ordering corms to harvesting blooms for the vase.
So let’s jump right in.
Where do I get ranunculus corms?
Since ranunculus is started by corms (root matter saved from the previous year’s growth), you must first source and order these.
I sell a mixed bag of 20 corms each spring. Be sure to hop on my email list HERE in order to get first dibs on all my sales. For 2023 I am selling Picotee varieties in purple, orange, and pink. I order hundreds of corms each fall and save my own varieties from year to year, so I end up with plenty to share.
If you’re looking for other varieties check out Ferna Farms. They are another small farm offering these awesome corms to home growers.
When do I start ranunculus corms?
I start all my ranunculus about 2 weeks before planting out.
My plant-out date will be early May, so I’m starting all my corms the 3rd week of April.
Once sprouted, these guys grow fast! Plus, they do well in cooler temps, so if covered, they can weather a few touches of frost.
How do I start them?
First, you’ll need to soak your corms.
What the heck does this mean? It simply means, popping your corms in a bucket, adding cool water, and letting them sit for about 4 hours.
Some farmers recommend gently agitating the water while they are soaking (using a fish tank bubbler or leaving a stream of water running). I’m here to say, I’ve done it without any agitation and everything turns out OK.
Once properly soaked, they will look relatively plump. Now you’re ready to pre-sprout.
Pre-sprouting consists of layering a grow flat with potting mix. I use ProMix seed starting mix (ideally organic if I can find it locally).
Once a layer of the mix is in the flat, place your corms root-side down in the tray. If you think of your corms as little octopuses, the “tentacles” go down.
You can place them pretty close - I do about 2 finger-widths apart. Then, cover them with soil.
Lightly water (err on the side of too dry than too wet otherwise your precious corms may rot) and place somewhere dark at room temp.
Check these daily. Once they have started to grow green shoots out of the soil, it’s time to place them under lights at about 16 hours/day or if your garden beds are ready for them, it’s time to plant.

Planting soaked corms in seed starting mix for pre-sprouting.
Ranunculus beginning to sprout and grow under lights.
How do I plant ranunculus in the garden?
After pre-sprouting your ranunculus, they are ready to plant in the garden. Gently loosen each corm from the potting mix, dig a shallow hole, and place them in your garden bed. I plant mine about 9'“ apart.
They will benefit from a general-purpose organic fertilizer and bone meal application at planting time.
How do I tend my ranunculus plants?
Ranunculus care is similar to other cut flower care. As they can grow taller, they will be susceptible to wind and heavy rain. I suggest staking or netting them in your garden. Or at least, planting them in a sheltered location, out of any spring or summer winds.
How do I cut my ranunculus for the vase?
Ranunculus is cut as soon as the flowers reach the “soft marshmallow” stage. If harvested too soon, they will not open. You can wait until they are fully open to harvest but their vase life will be diminished slightly.
Please know that you don’t have to cut for the vase. Ranunculus looks gorgeous in the garden! And they bloom prolifically until the heat of the summer comes on strong.
SPECIAL NOTE ON GROWING A FALL RANUNCULUS CROP:
I learned this technique from a farming friend in Norther Alberta who has similar summers to where I grow.
Since the first planting of ranunculus will most likely peter out in late July, I loved the thought of a second planting. Last year I tried it for the first time.
Here’s what I did:
I saved about half my corms (you can just hold them at room temperature in a paper bag).
Go through the same steps of soaking and pre-sprouting starting in mid-June.
Plant in the garden once they have pre-sprouted and tend normally.
If you live in an area with cooler summers, you will be blessed with a late crop that will bloom until the first frost!
10 reasons to grow a garden

Whether you’re a newbie to gardening, a wanna-be gardener, or an intermediate gardener who just needs a reminder, I’m here to…
1) offer a little inspiration for why we all need to tend a garden
and
2) show you how to be successful in any garden endeavor (CLICK HERE to check out my online gardening class, which goes on sale again in March of 2023)
Now for the inspiration part…
Here’s why to garden:
You’ll get regular low-intensity exercise: Here’s what your body does when your gardening: standing, squatting, bending over, walking all over, reaching, stretching, hauling, lifting, pulling, carrying, etc. Science tells us that longer periods of low-intensity exercise may offer more benefits than shorter periods of intense exercise. I’m not advocating you stop running or going to the gym but I am advocating that you create more enjoyable activities in your life that keep you moving and standing (just pretty much anything besides sitting on your duff).
You’ll feel a sense of accomplishment: In a fast-paced world loaded with tech, creating something with your hands that YOU can harvest for your family is truly sacred.
You’ll get more outside time: Most people spend their whole days working inside. Being outside is a true balm for the soul. Having a garden to tend to, kind of like having a dog to walk commits to you spending more time outside.
You’ll meet your neighbors: If you garden in your front yard I guarantee you will get to know your neighbors well! This is such a fabulous byproduct of gardening.
You’ll teach your kids solid life skills: Here’s what your kids can learn from a backyard garden: responsibility, love of nature, care of living things, curiosity, cooperation, self-sufficiency, that veggies taste good, just to name a few. Plus, once someone knows how to garden, they’ll know it forever (just like riding a bike). Imagine giving your kids the gift of being able to grow their own food!!
You’ll eat the healthiest food on the planet: If you grow using my methods… organically and with solid soil-building techniques, your vegetables will be loaded with nutrition. The health of the soil directly affects the nutrient density of your food.
You’ll eat the most delicious food on the planet: I’m not surprised why some people don’t like vegetables, especially if their only method of consumption is through frozen or “fresh” veggies from the grocery store. You guys, if you haven’t experienced fresh garden strawberries or fresh garden peas, or fresh garden anything YOU are missing out on a culinary wonder. Veggies were meant to grow, pick and eat immediately. Yes, it is great to learn to store them for later too but let’s face it, if you are growing your own veggies, you will eat way more veggies because they are so damn good. Make eating healthy easy! Start with superb taste by growing your own.
You’ll enjoy beauty every day: Now, technically this is possible to do every day without a garden BUT gardening has the opportunity to enhance our yard so beauty is EVERYWHERE. Plus, if you follow my steps to start growing your own cut flowers, you can fill your home with beauty too. Fresh flowers smiling at you from your kitchen counter is truly a beautiful thing.
You’ll feed pollinators: Bees and butterflies and other beneficial insects love gardens. They love flowering gardens. So let your herbs go to seed, let your mustards and broccoli go to seed (after you’ve harvested some of course), plant flowers, and your yard will be a playground for all the good bugs. Good bugs help pollinate our food crops and they eat other not-so-good bugs.
You’ll have gifts to give: My neighbors grow tons of basil and garlic and every year all of us neighbors on the street get the most amazing jar of pesto. Sharing your garden’s bounty is one of life’s greatest pleasures.
So there you have it.
I hope I’ve convinced you how amazing growing a garden can be.
And now, I want to personally invite you to join my March 2023 launch of The IncrEdible Garden Course - a three-week online course designed to teach you the fundamentals to create a backyard oasis full of food and flowers your family will love.
GO HERE to learn more!
Container Gardening for EVERYONE
I know that for some folks, space is a huge issue when it comes to gardening.
I spent years gardening on my front porch in any vessel that would hold soil. Fortunately, I now own a home with a modest lot and manage an entire vacant lot to grow on - YES, I am blessed.
That being said there are a few reasons I still love growing cut flowers in containers:
1) It increases the amount of space I can cultivate. Even with all my gardening space, I still feel a little greedy in this department - I want more!
2) You can line a porch or patio with them, creating cozy outdoor “rooms”.
3) They are inexpensive to start.
4) They bring your gardens and flowers closer to your home, creating beauty you can view from inside your home (I love positioning all my gardens within view of key windows).
5) If arranged in a sheltered area around your home, you can often plant earlier and harvest later since they are growing in a warmer microclimate (the potted dahlias that I grow on my porch usually get a solid 2 weeks of additional bloom time in the fall.

Grow your dahlias and eat too! Kale planted next to dahlias is both beautiful and utilitarian.
Not sure what to grow in pots?
Here are some of my favorite varieties to pop in a planter:
Calendula
Ammi
Dahlias
mini Sunflowers ( I love growing these en masse in a large container. This is any single stem sunflower, they are simply spaced 4 inches apart in the container. The close proximity will keep them small)
Bachelor buttons
Snapdragons
Cosmos
Borage
Lavender
Nasturtium
Poppies
Sweet Peas
Salad mixes
Greens (kale, collards, etc)
Radishes
Cucumbers
Tomatoes
Pumpkins
Herbs
Space everything a little closer than you would in the garden.
I try to squeeze as many plants into a container as possible. Just remember that overcrowding can lead to less than robust plants. In general, space most plants 6-8 inches apart. If growing dahlias, they need 5 gallons each as a minimum.
So what kinds of planters do you need?
The sky really is the limit, but to get you started here are some ideas. Half whisky barrels, large containers from the garden store. In general anything around 2 gallons and larger. Single herb plants will thrive in a gallon container, but that’s the smallest I ever go.
If using old whisky or wine barrels, ask the garden store if you should line them. Sometimes this is needed if there is alcohol residue in the wood - this will leach into the soil and kill your plants.
Make sure any planters you are using have good drainage. If not, drill small drain holes in the bottom.
Once you’ve got your containers, you’re ready get dirty and fill em up!
Here’s what I fill my containers with: 1/3 garden soil, 1/3 compost, 1/3 potting mix. You can re-use your soil year after year, just treat it like your garden soil and amend it with compost and organic fertilizers every year.
When can you plant?
The great thing about growing in containers is that if you position planters in a warm and sheltered place in your yard (usually close to your house), the soil thaws out quickly each year.
You can often plant earlier than you can in your in-ground beds.
I start my early-season salad mix in April (my last frost date hovers around May 15th). Warmer season crops I still wait until there is no chance of frost.
With this planting schedule, I can easily squeeze two crops into the same container: first my cool-season salad (planted in April and harvested through May), then my warm-season dahlias (planted at the end of May and harvested through September).
Final notes.
The main downside of container growing is the time committed to watering. During a warm summer, when plants are mature, you can plan to water at least once per day, sometimes more.
In addition, any cut flower will grow tall and beautiful. Don’t let a windstorm ruin all your hard work. Stake and support your flowers early. Check them periodically to make sure they’re secure!
Itching to learn more? My online course, The IncrEdible Garden, starts in February 2022!
If you’re not already, YOU MUST GO HERE TO GET ON MY EMAIL LIST FOR FIRST DIBS.
Garden Supply Check-list
Spring will be here faster than you think and with that, it’ll be planting time! So let’s get organized.
I want to get you set up early so you’re ready to break ground, or pop those seeds in the soil, as soon as you can.
With supply chain issues going on this year I also want to make sure you buy anything additional that you need soon so you have EVERYTHING you need for a great growing season.
Here’s my challenge to you: over the next 10 days, grab this checklist and head into your garden shed for an early season inventory!
Seeds - inventory what you have - most seeds are viable for 2-3 years
Potting soil for seed starting
Grow lights
Shelving for your plants and lights
Trays and domes - you can use these again and again just be sure to wash before planting
Heat mats & thermostat
Timer for your lights
4 packs or 6 packs - you can use these again and again just be sure to wash before planting
3 inch pots or 4 inch pots - you can use these again and again just be sure to wash before planting
Gallon pots - you can use these again and again just be sure to wash before planting
Plant labels - buy or make your own
Dish gloves or latex gloves - for seed sowing indoors these help keep my hands from getting all dried out
Watering can - I like a kids specific one for watering indoors
Soil test - DIY kit or identify a lab to send out to
Organic soil amendments per your soil test
Compost - home-made or commercial
Trowel
Weeding tools
Pitch fork or broad fork
Bed prep rake or stiff tined rake
Pots and planters and/or garden beds - I know they’re all covered in snow, just make a plan, especially if you need more
Trellising and staking supplies
Garden journal or calendar
Your garden plan and garden map
Garden gloves - I love having a leather pair and a more waterproof pair
Knee pads or equivalent
Did I forget anything? Comment below to share your must-haves for the season.

Tried & True Garden Varieties

Giant Orange Marigolds.
In order to get you growing an amazing and fail-proof garden, I want to get you started with some of my tried and true varieties.
Since I’m a flower LOVER and flower grower this list will be flower heavy. BUT I also want you to have some of my favorite varieties for your veggie garden.
Over the years I’ve rubbed shoulders with vegetable farmers (quite literally - my husband managed a large vegetable CSA at the same time I started my flower farm) and tested different varieties myself.
Often just choosing the right varieties will set you up for success in the garden. And with SO many fun and beautiful varieties out there - how do you know what to choose?
By putting your ear to the ground and being committed to experimenting!
Wiser growers than I have told me to commit 20% of my farm to new varieties. I’m recommending this to you now too.
Don’t go overboard with new stuff - then you risk wasting too much valuable garden space to varieties that you’re not actually sure will produce well. Stick to tried and true varieties and dip your metaphorical toe into fun and exciting new ones each year.
So now on to my tried and true varieties that I know, you’ll love.
First, for the flower garden:
Ammobiom

Ammobium aka Winged Everlasting.
Centaurea - Classic Magic, Blue Boy OR Black Button
Calendula - Orange Button
Cosmos - any Double Click Variety
Cynoglossum - Chinese Forget-me-not OR Firmament
Dill - Bouquet
Ornamental Grass - Frosted Explosion
Marigold - Giant Orange
Nasturtium - Trailing
Nigella - Albion Black Pod
Poppy - Breadseed OR Shirley

Shirley Poppy.
Rudbeckia - Cherokee Sunset
Saponaria - Pink Beauty
Scabiosa - Black Knight
Snapdragon - Potomoc varieties OR Madame Butterfly varieties

Bunches of Potomac Snapdragons.
Strawflowers - Copper Red OR Purple Red
Sunflowers - Procut varieties OR Sunrich varieties
Now for the veggie patch:
Beets - Touchstone Gold & Chiogga
Broccoli - Belstar

Belstar Broccoli just starting to grow crowns.
Carrot - Yaya
Cilantro - Calypso OR Cruiser
Cucumber - Diva OR Socrates
Kale - Red Russian OR Lacinato (also called Dinosaur or Black)

Red Russian Kale co-housed with Dahlias.
Peas - Sugar Ann OR Sugar Snap
Pumpkin - Cinnamon Girl
Spinach - Corvair
Tomato - Sun Gold
Zucchini - Dunja OR Blck Beauty
There you have it! This is by no means a comprehensive list but it’s meant to get you on the right track to a highly productive garden this season.
So now on to ordering seeds! GO HERE to read all about my favorite places to place your order.
Time to Plant Garlic
I’m a flower farmer but the one thing that I also let into my commercial garden is garlic. I LOVE garlic. It is easy and SO FUN to grow. Plus, once you’ve tried it fresh from your garden there is no going back to store-bought.

Freshly harvested garlic from the Turnstone Farm gardens.
Hopefully, after reading through these easy steps, you too will find BIG success with growing garlic.
But before we begin let’s do a brief garlic primer! So that we’re all on the same page, here are some basic garlic definitions.
A HEAD of garlic is the entire bundle that is made up of 2+ cloves.
A CLOVE is the individual piece of garlic that you would peel before cooking.
SOFTNECK garlic is a variety typically grown in more southern climates. Each head has many cloves and it is easily braided together into those quintessential garlic braids (maybe you’ve seen these at markets or in your grandma’s kitchen!?).
HARDNECK garlic is the best variety for Alaskan growing. It tends to produce fewer but larger cloves than softneck.

Garlic emerging in the early summer.
Ok, now on to the fun stuff. Here are 4 easy steps to successful garlic growing:
1) Prep your site: I like to start by clearing any old garden remnants and weeds, then adding any amendments like compost or soil nutrients that you may need. A comprehensive soil test will give you all the necessary info here. Loosen the soil with a broadfork or pitchfork.
2) Make your rows. I plant 4 rows to a 2.5ft wide bed. Dig a shallow trench about 3-4 inches deep with a flat-ended shovel.
3) Plant garlic. Place garlic cloves in the ground, about 3 inches deep with the pointy side pointing up. There is no need to peel the garlic clove but you do need to separate it from the garlic head (each head holds 2+ cloves).
4) Mulch. Mulching will protect the garlic cloves from any freeze-thaw action that occurs in the fall or spring.
NOTE, if you ordered seed garlic and it’s not here yet, don’t despair! MULCH your beds now to keep the soil insulated until you’re ready to plant.
Easy, right?! Now go do some planting. Your future self will thank you :)
In general, you will have the most success planting at any point from mid-September through mid-October. Although I have planted in early November in a pinch.

Lush garlic plants in the Turnstone Farm garden.
May 20th Photo Garden Tour
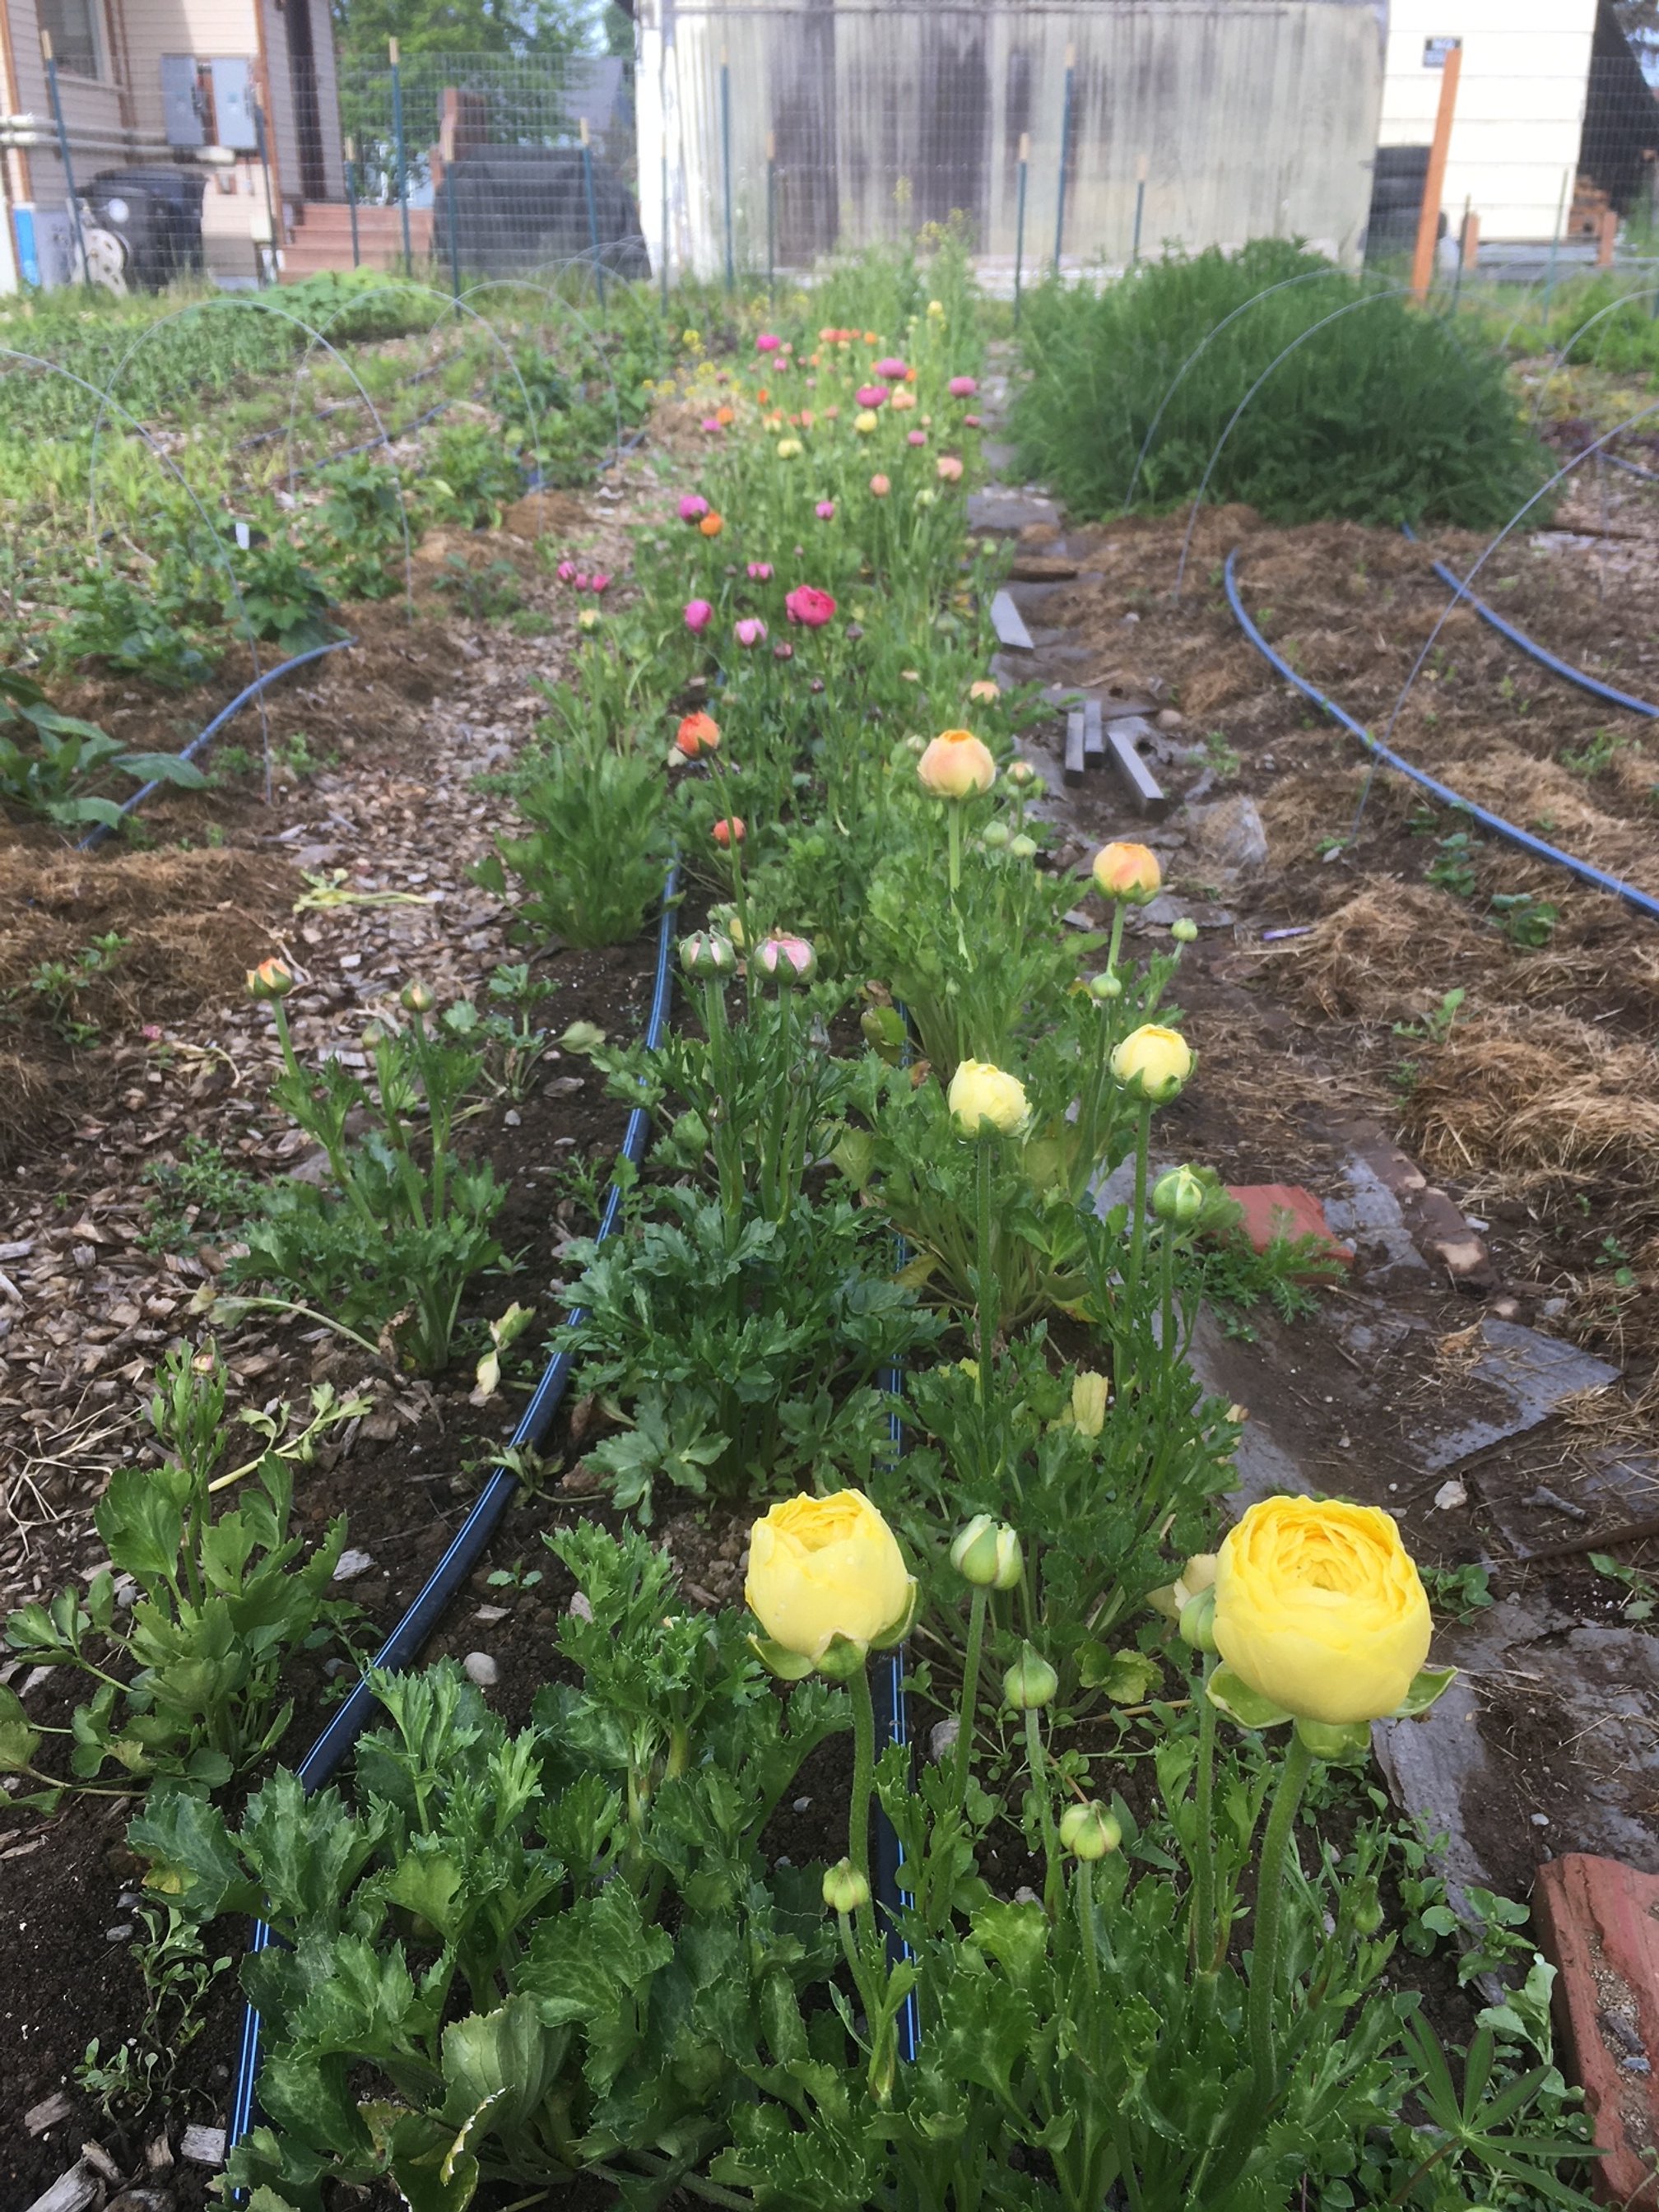
It’s May 20th! Here’s what the Turnstone Farm flower field looks like today.

The garden is almost 75% planted! I brought on an employee for the summer (super excited!) and we’re making fast work of getting the flower babies in the ground. Here’s strawflower with a good view of my drip line irrigation system.

Dahlias are in! My designated dahlia bed at my 16th Ave plot is full. But not to worry - I’m opening a NEW plot in Rogers Park and will have space for many more :)
Note - if you’re planting dahlias, don’t forget to label the plant. I just cut leftover yogurt containers into strips, write the name with a grease pen (marker may wear off by the end of the season - I learned the hard way), and attach to the base.

Garlic - one of my all time favorite plants to grow! And I dedicated a precious full bed to it this year. If you haven’t grown this, you must. It’s something you plant in the fall, so don’t forget to mark your calendars to order seed garlic in late summer.

The tulips are SO CLOSE! I’m out there everyday checking the bloom status. Once they start blooming it happens fast! Just seeing these wavy and elegant leaves makes me so happy.

I put in 25 peonies last fall! Full disclosure - I am a peony NEWBIE. You can follow me along as I learn to grow this beauty. WIN #1 - they ALL survived the winter.
A handful of these were specialty and heirloom varieties from my farming friends at https://www.lyndakerfarms.com/. SO excited!!! Brides - be ready to be majorly wowed.
Best of 2020: My Favorite Varieties from the Veggie Garden
Corvair is a slow to bolt spinach variety that needs a place in every home garden.
In addition to growing flowers, I grow a big veggie garden in our backyard.
Every year our lawn gets smaller and our veggie garden gets bigger.
Here are some of my favorite veggies from the garden this year:
Tomato: Sun Gold. A sweet, early and prolific cherry tomato. The past two years I’ve been thinking: “maybe I should just grow all Sun Golds!” But I also like to have variety.
You will not be disappointed. I grow mine in an unheated hoop house. Next year I will trial these outdoors.
Kale: Red Russian. I’ve been growing Red Russian for six years. It is just my absolute favorite kale year after year.
It’s meaty and sweet in the fall. Plus you can grow it as a baby green by planting densely OR grow into a large plant for bunching. Once cut and massaged with dressing it makes THE BEST kale salad.
And get this folks, we still have kale in the garden now (it’s November as I write this)! We planted a HUGE bed of kale early in the summer. The leaves are frozen but you can go pick and they saute into an amazingly sweet and delicious side dish.
Carrot: Yaya. A yummy 5-6 inch sweet and tender carrot. Great for eating right out of the garden. With kids around, I just can’t keep carrots in the ground till the end of summer :)
Broccoli: Blue Wind and Belstar. I loved both of these varieties. Delicious and huge! Once the main head on Belstar is harvested it goes on to produce lots of side shoots. Blue Wind, not so much. It’s more of a one-and-done variety.
Cucumber: Socrates. A great cuke for Alaska. 52 days to maturity (once transplanted out). It’s seedless, sweet and tender. The kids (and myself) ate these like candy all summer long!
I’d like to try these outdoors next year to see how they perform. But in my unheated hoop house, they did amazing in pots. I trellis these straight up to the roof of the hoop house in order to squeeze in more plants.
Zucchini: Dunja. A classic, high-yielding zucchini that I grow every year! Don’t make the mistake and grow these too big. Although it’s fun to have big zucchini in the garden, they are the most succulent when picked at the proper stage (when fruits are 6-8 inches long).
Cilantro: Calypso. If you avoid growing cilantro because it bolts too fast, try this one! It is the slowest to bolt! Then when it does, you can cut the flowers to put in a vase (they smell heavenly) or wait till it forms seeds and use them as fresh coriander. Yum!
Spinach: Corvair. A delicious, juicy spinach. This is slow to bolt, so does well into the early summer.
And of course there are more!
If you need a suggestion for a certain variety, ask below in the comment section OR send me an email at turnstonefarm@gmail.com.
There’s nothing I love more than talking about gardening.

Best of 2020 - Part 2: My Absolute Favorite Flowers of 2020
Ben Huston is one of my absolute favorite dahlia varieties. It makes my heart go “boom” every time.
Every year I grow new varieties to test and then report back on what I absolutely loved. Since I also have a small growing space I have to ruthlessly cut anything that doesn’t preform well.
I’ve looked over what I grew in 2020 and am pleased to say the below flowers made my “Best of 2020” list.
Saponaria - Pink Beauty. A nice early bloomer to fill vases early in the summer. Harvest when the first buds are open. The remaining buds on the plant will slowly open in the vase which gives you a nice long lasting cut flower. Needs staking in the garden or wind and rain might topple it.

Saponaria is the pink airy flower with the green buds that is arranged horizontally.
Strawflowers - Copper Red, Purple Red, Vintage White. These are so magical! How can I pick just one?!
These are 3 that I LOVED. A long lasting, magical and whimsical cut flower. Blooms dry great but they need to be wired as stems become weak with drying. Best of all they are super easy to grow! So if you’re new to growing flowers, start with these.

Copper Red Strawflower
Eucalyptus - Silver Drop & Silver Dollar. I first tried these last year and fell in love. Adds texture and interest to any flower garden.
I am also pleased to say that they looked amazing in pots! Plus they are relatively frost hardy, so mine looked great through October.
Be sure to start these guys early under lights as they are slow to grow!
Statice - QIS Apricot. The designers who bought from me this year absolutely LOVED these. The color is one-of-a-kind. And the tiny whorls of blooms create a nice textural element. Plus they pretty much last forever once dried!
Scabiosa - Black Knight. Every year I grow these. And every year I LOVE them more.
Unfortunately germination can be spotty, so I didn’t have a lot of blooms this year. Planting way more next year. They are true magic.
Grass - Frosted Explosion. Oh wow! Such an ethereal addition to the garden. An airy-fairy grass that looks awesome in the vase and dries amazing.

Scabiosa - Black Knight
Eryngium - Blue Glitter.
Eryngium - Blue Glitter. This gets a 10+ for cool looks! It has attractive thistle-like blooms with a metallic shine. Eryngium is a hardy perennial with long, sturdy stems.
Does well in hot, sunny locations. But also tolerates a wide variety of conditions. Expect flowers during the second year of growth and in subsequent years (although mine bloomed the first year!). Great for bees, beneficial flies and wasps. Also known as plains eryngo and flat sea holly.
Excellent long lasting cut flower and dries well!

Ben Huston Dahlia in a bouquet.

Dream Catcher Dahlia.
Dahlias - Ben Huston. A juicy orange color on showy decorative petals. Just makes my heart pound every time I see this bloom.
Dahlias - Golden Sceptor. First year growing this dainty and cheerful beauty. True yellow flowers are only 2-3 inches. Such a happy-maker! Your garden will seriously sing with these little beauties.
Dahlias - Dream Catcher. This is a stunning cut flower. Perfect petals that meld pink to yellow to green on strong and upright stems.

Rebecca Lynn Dahlia
Dahlias - Rebecca Lynn. Here’s what I said about Rebecca Lynn last year:
“Rebecca Lynn Dahlia is not just pink, it’s power pink. It’s get-things-done pink. It’s an Elizabeth-Warren-suit-jacket pink. A “nevertheless-she-persists” pink. A woman-with-a-plan pink. Grow this dahlia and you’ll want to do things! Go places! And get er done!”
Looks amazing in the garden and in pots.
There it is friends!
My Best Flowers of 2020.
Now go grow some amazing flowers.
Planting Tulips
Fall means I’m winding things down in the garden.
I’m usually somewhere on the burn-out spectrum this time of year but I know I need to push a little harder to get in all those tulip bulbs. This is the best way to have the earliest blooms in your garden.
And let me just say, hands down, tulips are one of my all time favorite flowers!!!
Tulip Overview
Tulips are a bulb planted in the fall that flower the following spring. Luckily they need a period of cold to bloom, so up there in AK they are happy perennials (which means they come back every year).
You’ll want to plant your tulip bulbs before the ground freezes but not so early that they start to sprout.
I get my tulips shipped here from a wholesaler, so I’m sort of at the mercy of their arrival which usually is late September. With our warming climate, we haven’t seen frozen ground in our Anchorage neighborhood until late October or even early November for the last 4+ years. Because of this, planting between mid-September through mid-October will work well!
Tulips prefer a full sun to partial sun environment with well drained soil.
Varieties
When shopping for varieties, the sky is the limit for colors! There are a few general types of tulips I’ll highlight here.
Darwin Tulips: an early variety that performs well as a cut flower on strong stems and comes back as a strong perennial year after year. Gudoshnik is one of my favorite.
Double Tulips: these bloom to a peony-like flower with semi to full double blooms. I love these. They have a great vase life and look extra special and unique in the garden. These will bloom later in the garden so are a good addition to get weeks and weeks of spring blooms.
Parrot Tulips: these are such a different tulip that you will surely get folks wowing over your garden! Scalloped, fringed, and feathery edges in ranges of colors create dramatic arrangements and striking flower gardens. Be on the lookout for ordering these in 2021!
There are lots more! I’ll keep updating varieties as I grow them and experiment with what does best in our Anchorage gardens.

Black hero tulips in the garden in June. This is one of my all time favorite double tulip varieties. I plant each bulb just a few inches apart for a full and dramatic look in the garden.
How to plant
Here’s a quick how-to if you’re new to planting tulips.
1) Prep your garden bed. Dig out a trench about 6-8 inches deep. Pile removed soil in a wheelbarrow or on a tarp to the side. Then sprinkle a thin layer of bone meal on the bottom plus a thin layer of compost. This is optional but I like to give the bulbs a little extra nutrition! If you have done a soil test know that tulips prefer a soil pH of 6.2 to 6.8.
2) Set the bulbs. Plant tulips in a trench as opposed to individually. Then arrange tulip bulbs pointy side up at the bottom of the trench. for the most dramatic color statement, plant bulbs close in clusters of 10-20 (or more!). Each bulb can be placed just a few inches apart. If you plant further you’ll get more of a polka dotted look in the garden. Planting closer however, will give you a nice mass of color!
3) Fill in soil around and over the bulbs. Bulbs should get a good 6 inches of soil on top.
4) Water bulbs well. If it’s a nice rainy fall, you may be able to skip this step.
5) Mulch (optional). I honestly don’t mulch my tulips most years and they do just fine. If you do mulch, be sure to remove it in the spring. Mulch insulates the soil nicely which means it will also keep the soil colder longer! If you don’t remove it promptly, your bulbs will bloom later.
Tulip Maintenance
Now just sit back and wait! When tulips start to emerge in the spring, monitor for soil moisture and water as needed. Just be sure not to over water! They need light moisture: not dry and not too wet.
Blooms last in the garden for a long time. Once blooms are spent, I snip them off so that energy is put into making the bulb bigger and stronger.
Tulips for Cutting
If you’re cutting blooms for the table and still want your bulb to flower next year, leave 2-3 sets of leaves on the plant.
Cut single tulips when color just begins to show on the petals. Doubles, on the other hand, won’t open in the vase unless you cut them after they begin to open in the field.
When arranging with tulips, know that they continue to grow after being cut. So after placing them perfectly in an arrangement, you may have to re-cut a few times to keep them at their proper height.

Copper Image a (double variety) tulip on the left. Brisbane (a double ruffled variety) tulip on the right. This photo was taken right after cutting. Notice when cutting double tulips, the bloom is almost fully open. My double tulips will last in the vase a good 1-2 weeks.
Garden Picture Escape
I just want to share some beauty with you! Here goes…

A few of my early dahlia varieties! Can I just say, I am loving these :)
Ready for bouquet making! My backyard gets transformed into a floral studio at least once per week.
Poppies! These are some of my favorite blooms this summer. They are bringing me SO MUCH JOY!!

A quick afternoon harvest. During the peak blooming months I’m harvesting 3 times per week.
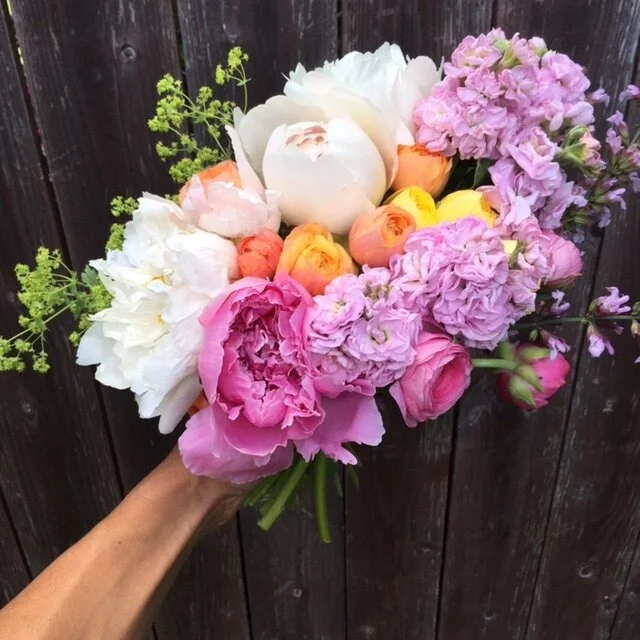
A seasonal bridal bouquet using stock, ranunculus, peonies and ladies mantle.

June 15th Two Minute Garden Tour
As the days grow longer the garden is slowly coming along. Every year there is a point a few weeks after transplanting out that everything really starts to take off!
Here you can see that in the first part of the video. Most of these plants were planted over a month ago. And they’re getting huge!!
I finished planting (or at least filled all the beds) a couple weeks ago. Now I’ll just fill in as things get cut.
I had a super successful tulip harvest this year and sold every bloom through my home delivery program (and one wedding). What fun!! Thanks to EVERYONE who supported the roll out of home deliveries :) I’m planning to continue it through the summer as long as I have blooms available after my subscription customers are taken care of :)
So without further delay - here is my digital June 15th garden tour!

My 4 Favorite Garden Tools
As we begin another gardening season I wanted to share 4 of my absolute favorite and most used garden tools.

Clockwise from left: bed prep rake, broadfork, Fiskars Big Grip Garden Knife, CobraHead weeder.
Bed Prep Rake: This makes your garden bed into a lovely flat surface, just perfect for planting. The one pictured here I purchased from Johnnys Seeds. It is extra wide which makes it easier to get a level surface with less passes.
You can also purchase small plastic sleeves to place on the tines to mark your rows. These can be removed or adjusted depending on your row spacing. If you have a smaller space, or are not ready to make the investment, you could use a classic bow rake available at any hardware store.
Broadfork: If you have a large garden, eventually you must invest in one of these. With the known hazards that come with tilling, this is a tool that will loosen and aerate your soil while keeping soil microbes and beneficial soil beings happy.
Folks with smaller gardens could get by with a regular pitch fork. The key here is not to lift and flip but to insert straight down, rock the handle back about 45 degrees, then lift out and begin again about 4 inches back from the first insertion.
Once you garden has been prepped in this manner, you can easily hand weed any perennial weeds if needed, rake and plant. This makes for happy soil!
Fiskars Big Grip Garden Knife: While I haven’t tried out too many different “garden knives” I happened upon this one and haven’t bought anything superior since. It has a serrated edge that you can use to saw stubborn weeds in a pinch and a nice sharp end to easily dig holes for planting.
I prefer the straight handle to anything that looks “ergonomic”. Straight handles give me plenty of control and actually feel better on my wrists after hours in the garden.
CobraHead Weeder: This tool we bought in while living in Wisconsin. It’s designed and distributed just miles from our original farm! And it makes EASY work of deep rooted weeds and nasty invasive grass. I’m using this now as I prep my gardens for planting!
Happy gardening folks! And if YOU have a favorite garden tool please leave a comment below :)