

Grow a multi-purpose pollinator garden
Grow plants that are edible, look great in a vase and provide habitat for pollinators.
Pollinators, including bees, butterflies, and hummingbirds, play a crucial role in our ecosystem by helping to fertilize plants and ensure their reproduction.
Unfortunately, many pollinator populations are in decline due to habitat loss, pesticide use, and other factors. One way that you can help support native pollinators is by creating a pollinator garden, which provides a habitat for these important creatures to thrive.
Adding culinary herbs to a pollinator garden not only benefits the pollinators but also provides fresh ingredients for the kitchen.
Plus, some of these fabulous culinary plants do triple whammy by looking great in the vase!
Why Grow a Pollinator Garden?
Pollinator gardens are not only beneficial for the pollinators themselves but also for the environment as a whole. By providing a habitat for pollinators, you help to maintain the biodiversity of our planet. Thank you gardening friend!
Additionally, pollinators are responsible for fertilizing a large percentage of our food crops, so by supporting their populations, we are also supporting our own food systems.
You can’t grow a garden without pollinators!
Many pollinator-friendly plants are also beautiful additions to your garden. And, as mentioned earlier, adding culinary herbs to a pollinator garden can provide both beauty and practical benefits.
Choosing the Right Plants for your Pollinator Garden
When selecting plants for a pollinator garden, it is important to choose varieties that are attractive to pollinators. This typically includes plants with brightly colored flowers that are easy for pollinators to access. Native plants are often a great option, as they have evolved alongside the local pollinator populations and are well-suited to their needs.
When choosing culinary herbs to include in a pollinator garden, there are several options to consider. Many herbs have flowers that are attractive to pollinators, while others have foliage that can provide shelter for them.
Some popular culinary herbs that pollinators love include the following:
Addition #1 for your multi-purpose pollinator garden: Basil
Basil is a popular culinary herb that also has flowers that are attractive to bees and other pollinators.
It is an annual plant that grows well in warm weather. When planting basil in a pollinator garden, be sure to space the plants at least 12 inches apart to allow room for growth.
Basil can be trickier to grow in northern climates. I grow mine exclusively in a hoop house. In warmer climates it does well outdoors. The variety I love for cooking is Genovese. If growing for the vase, shop for varieties with deep purple leaves - they are amazing.
Any variety will produce interesting flowers for you and for your pollinators.
Addition #2 for your multi-purpose pollinator garden: Thyme
Thyme is a low-growing perennial herb that has small, fragrant flowers that are attractive to bees and butterflies.
It’s a great option for a pollinator garden because it can grow in a variety of soils and is drought-tolerant.
Thyme can be started from seed early in the season. It’s a perennial in northern climates although I plant extra each year in case I lose some over the winter.
Addition #3 for your multi-purpose pollinator garden: Cilantro
Cilantro/coriander is a fabulous fresh annual herb.
Since cilantro will bolt in the summer, I grow mine for culinary uses in the early summer and then let it bolt (go to flower).
Cilantro flowers smell heavenly - pollinators love them and they are a great filler flower for the vase.
Let a few of the flower heads go to seed. This seed is coriander! You can save it for planting next year or harvest for some super cool bouquet elements.
Addition #4 for your multi-purpose pollinator garden: Sage
Sage is a culinary herb that also has attractive flowers that are popular with pollinators.
It’s a perennial plant that prefers well-draining soil and can be grown easily from seed. In my experience it survives 2-3 years and then dies back. Flowers usually develop in the second year. You can use the foliage and flowers to fill out your home arrangements.
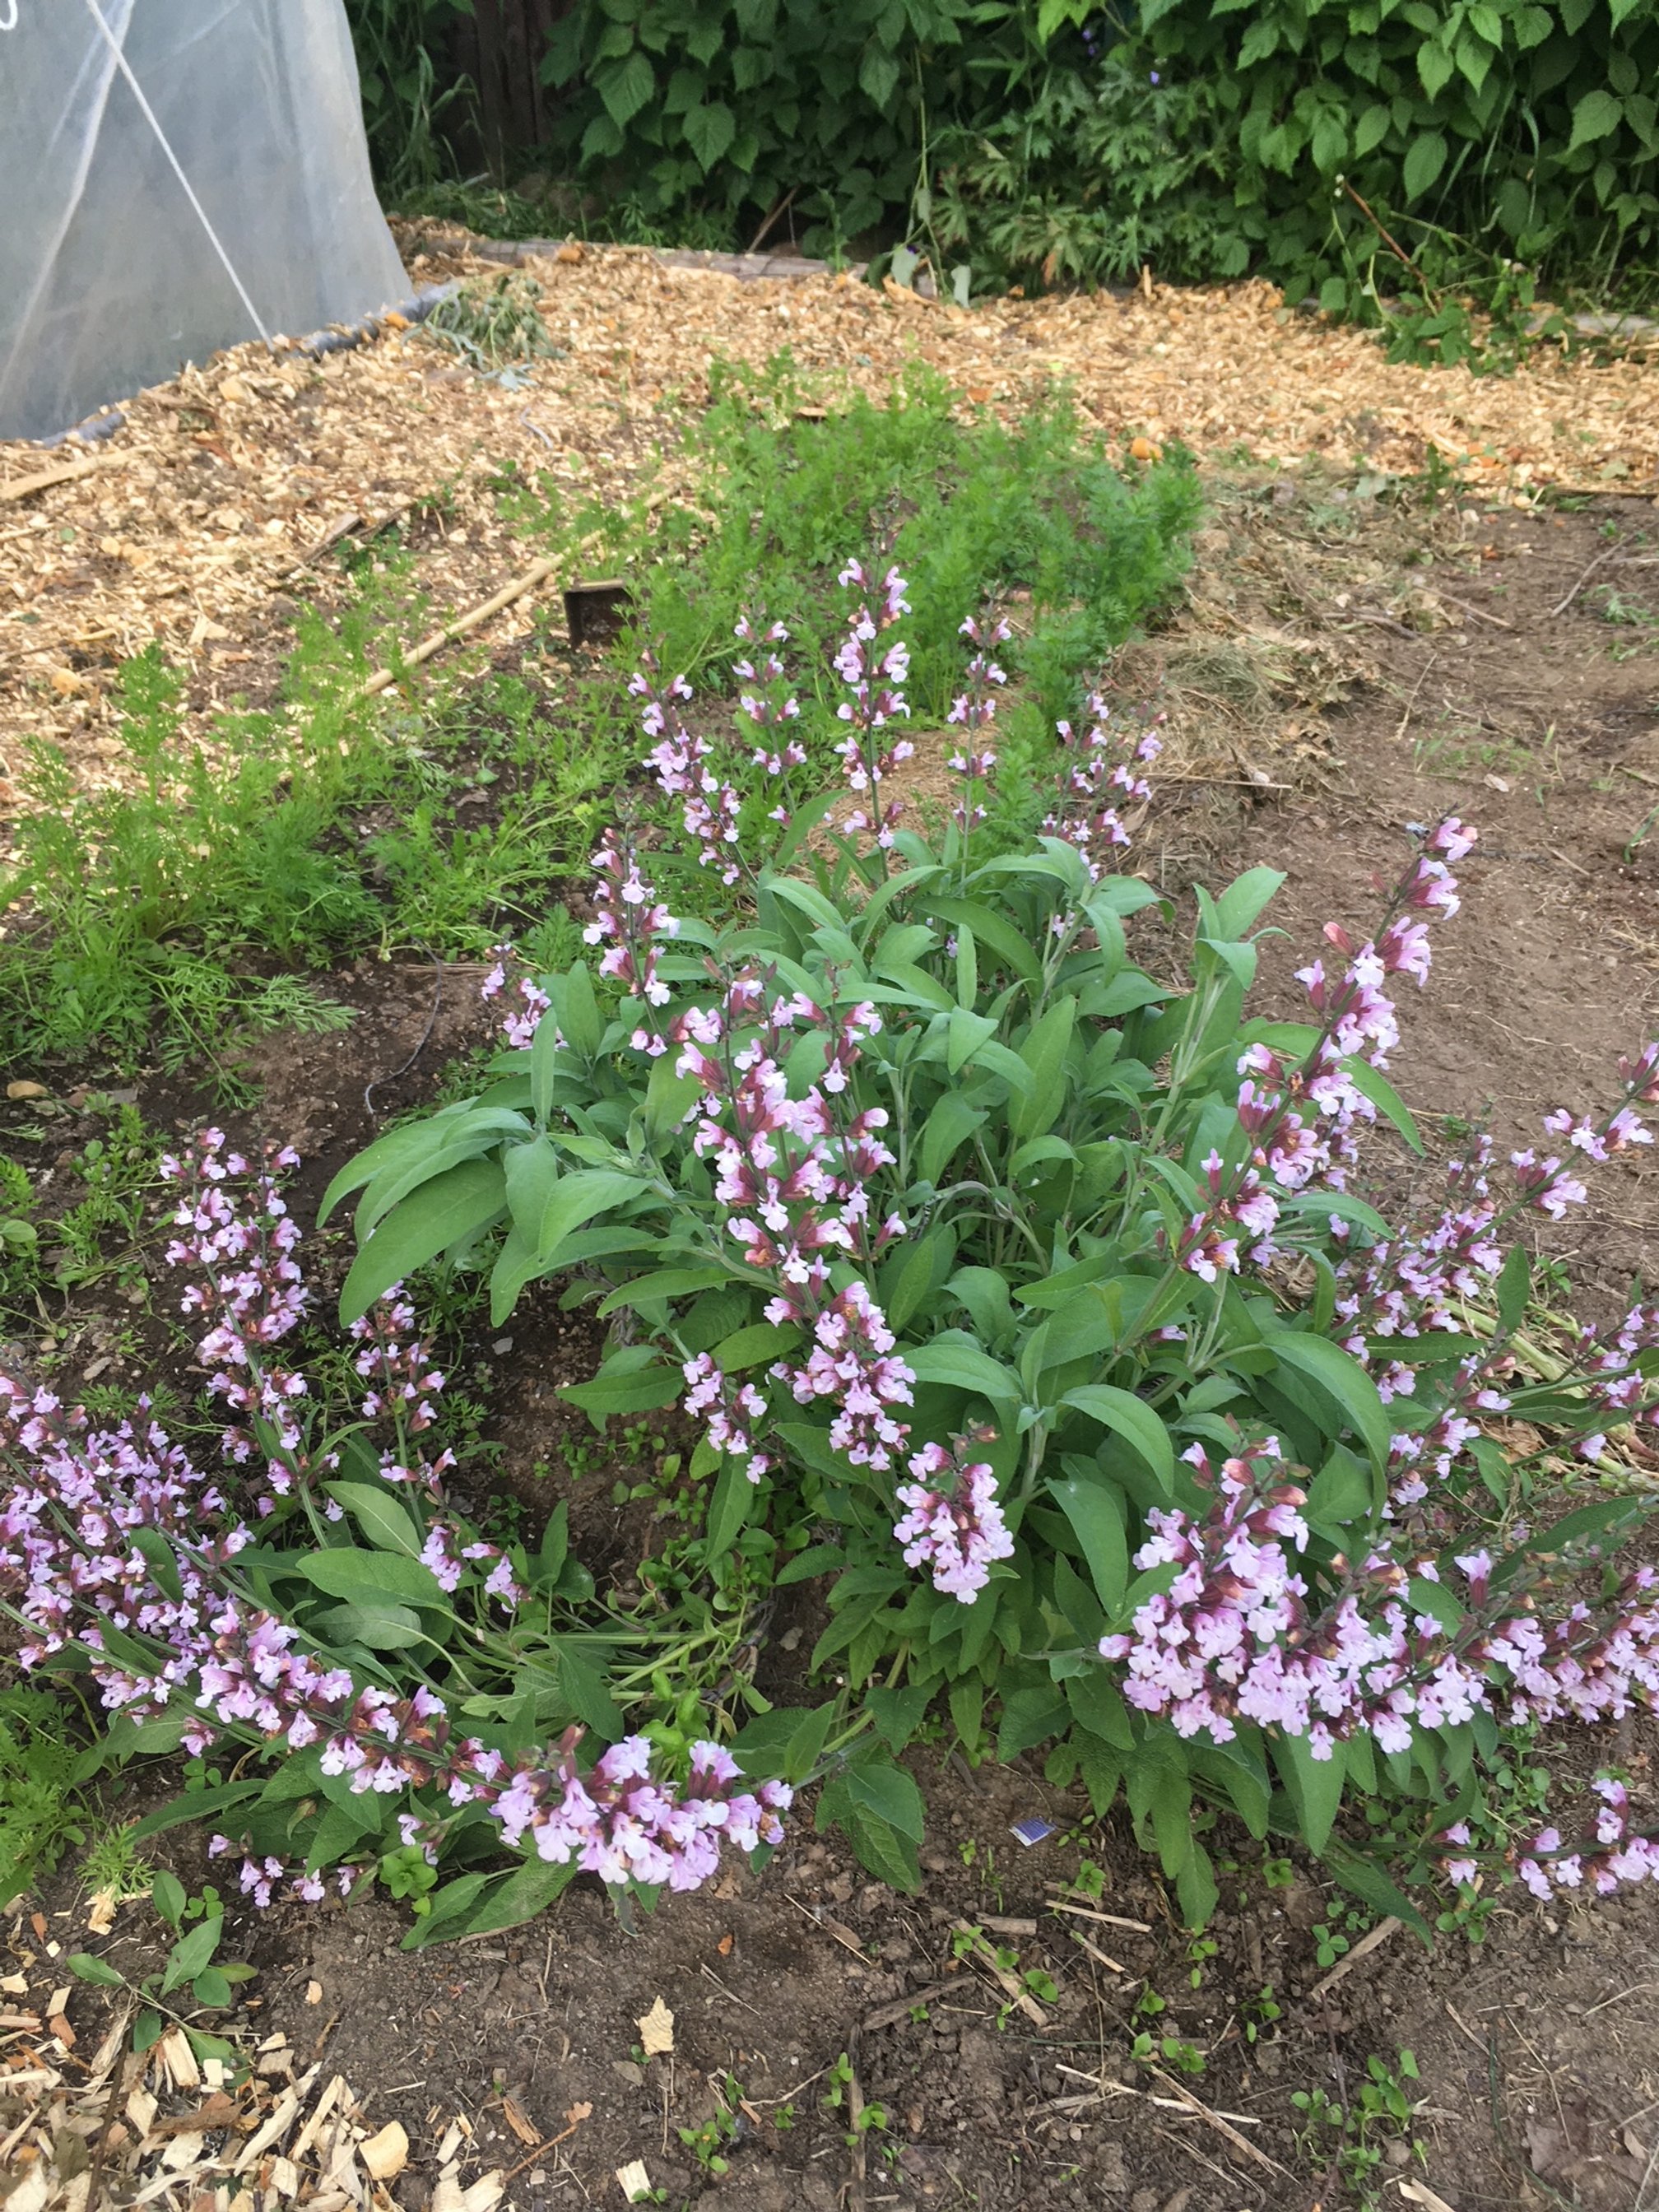
Sage, flowering in it’s second year in my backyard garden.
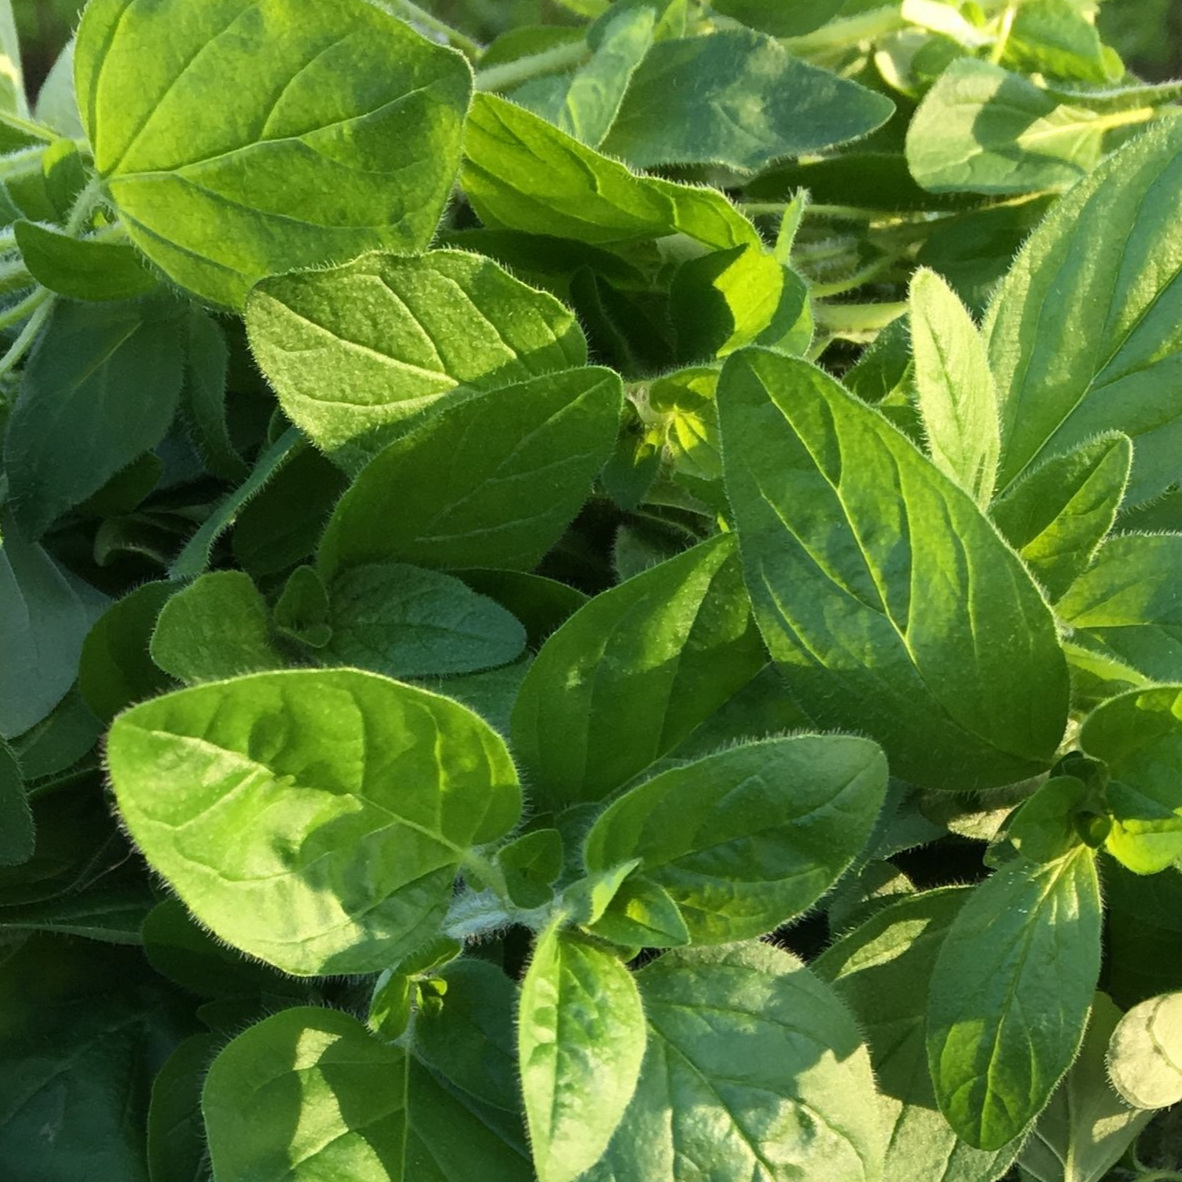
Addition #5 for your multi-purpose pollinator garden: Oregano
Oregano is a perennial herb that is commonly used in Italian and Mediterranean cuisine.
It produces small, pink or purple flowers in the summer, which are a great source of nectar for bees and other pollinators.
Oregano is also known to repel some garden pests, making it a great companion plant. I love popping oregano into a bouquet - it’s purple flowers make a nicely scented filler.
Addition #6 for your multi-purpose pollinator garden: Mint
Mint is a hardy herb that is easy to grow and has a refreshing scent.
It produces small, white or purple flowers in the summer, which are a great source of nectar for pollinators.
Mint spreads enthusiastically, so it is best to plant it in a container or a designated area of the garden. You will have extra plants to dig up and give away or compost every year.
Addition #7 for your multi-purpose pollinator garden: Chives
Chives are another easy-to-grow herb that can be used in pollinator gardens.
They produce pretty pink or purple flowers in the summer, which are a great source of nectar for bees and other pollinators.
Chives are also known to repel some garden pests, making them a great companion plant. Every year they grow into bigger clumps that can then be divided and spread out or given away to your neighbors. The flowers are edible, look great in a vase and dry well hung upside down.
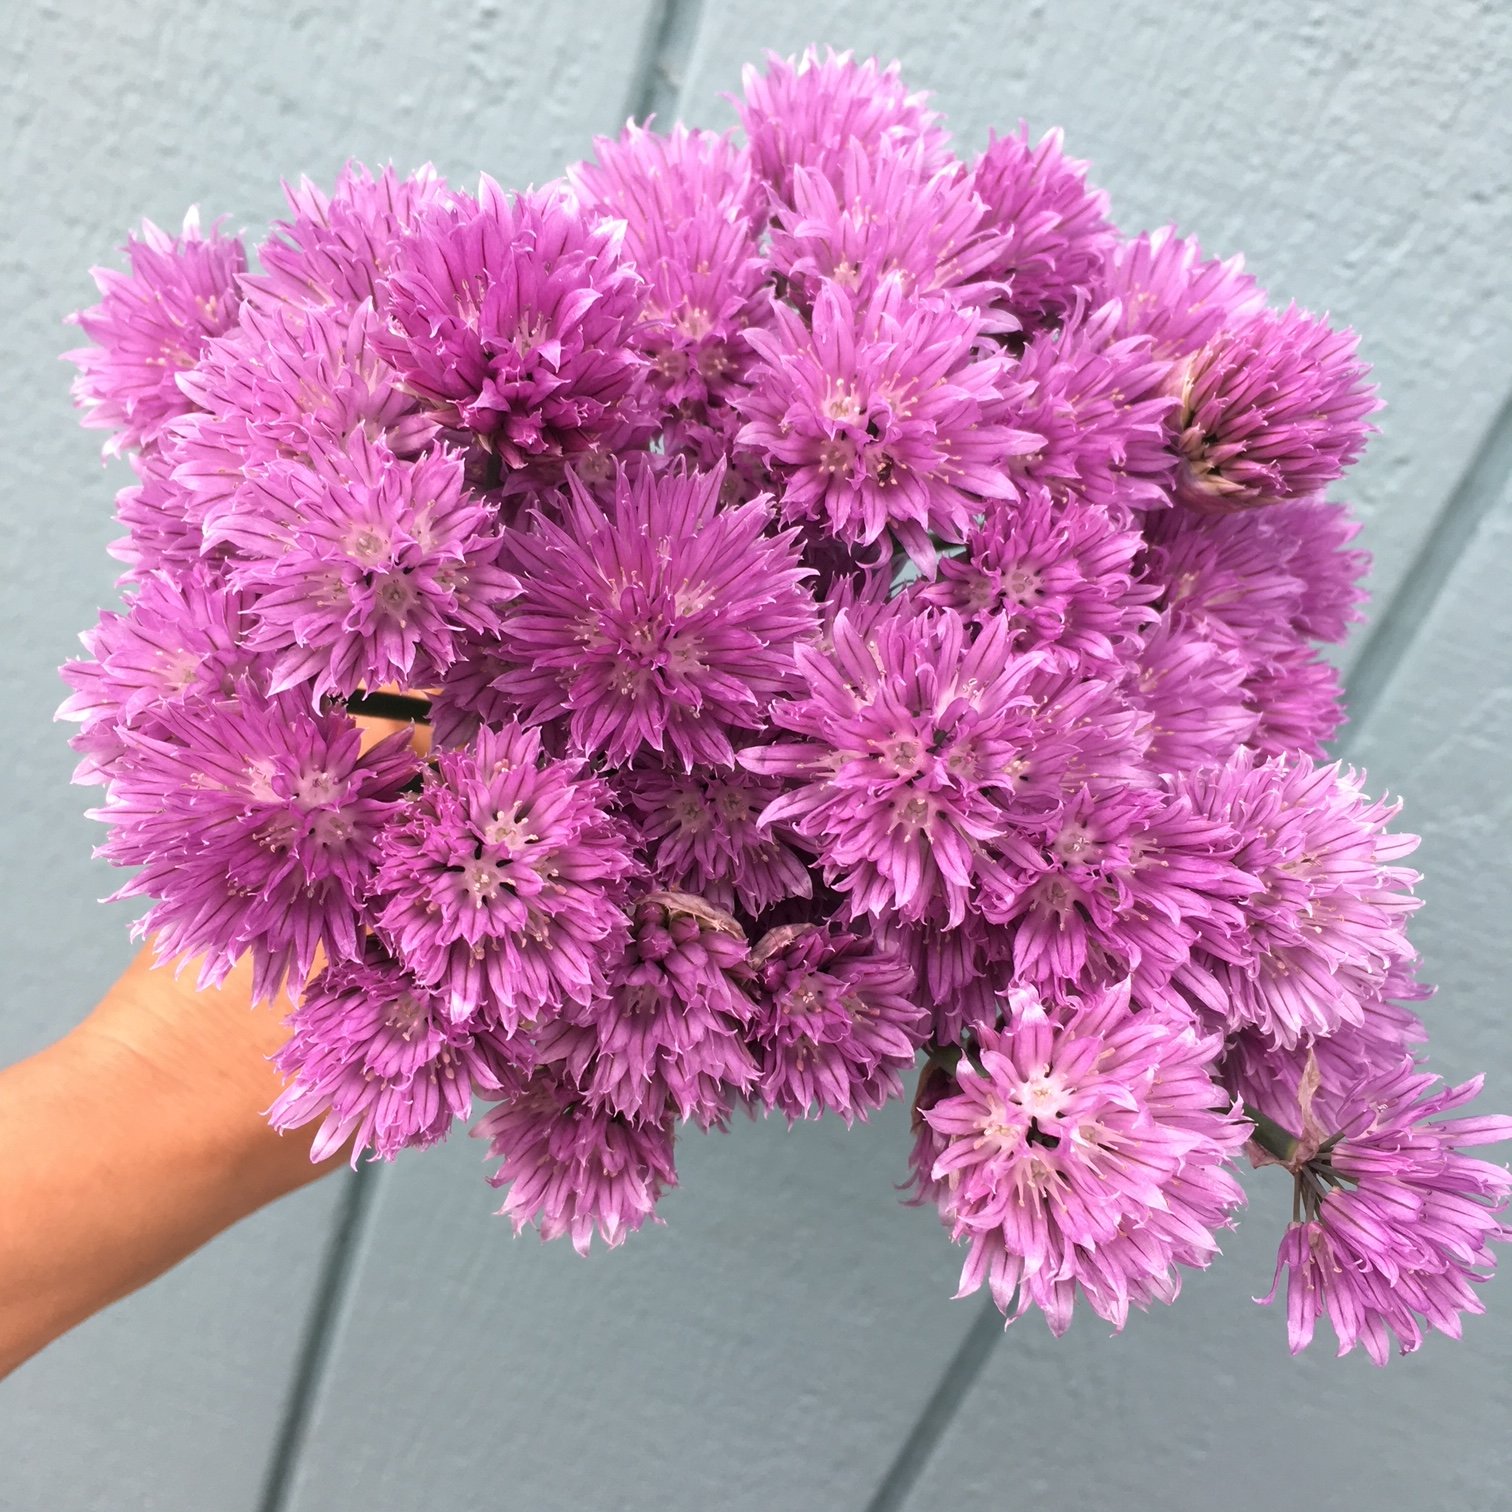
Chives are a fabulous herb, attract pollinators and look great in a vase.
Maintaining your Pollinator Garden
Once you’ve established your culinary-pollinator-cutting-garden, maintain it properly to ensure that it continues to provide a habitat for pollinators.
This includes watering the plants regularly, fertilizing as needed (with organic fertilizers and compost) and frequently cutting flowers for your bouquets so the plants keep producing more stems.
Remember to avoid the use of pesticides (natural and conventional) in a pollinator garden, as you will kill not only the bad bugs but the good bugs too. This is the reason I’ve never sprayed anything in my garden. Even some of the natural and organic sprays will kill the beneficial bugs.
Creating a pollinator garden with culinary herbs is a great way to support pollinator populations while also providing a source of food and flavor for yourself and super cool additions to your home grown bouquets.
By following the tips outlined here, you can create a beautiful and functional pollinator garden that will benefit both pollinators and humans alike.
Storage Notes:
I keep all the herbs I cut from my garden in a small jar of water on the counter.
Some dislike the fridge (basil) and will often get lost in the crisper.
No one likes to discover rotten home-grown herbs weeks later in the bottom of the crisper!
Field Notes: Week 15
April 12-16
We finally opened up the Airport Heights Elementary School greenhouse. After a couple of weeks delay due to below zero nighttime temps, we fired it up!
I am blessed to be able to use this space and am excited to say that I’m assisting in their annual plant sale this year.
Stay posted as I will be helping them sell Garden Kits this year - full of a collection of popular and simple to grow veggie, herb, and flower starts.

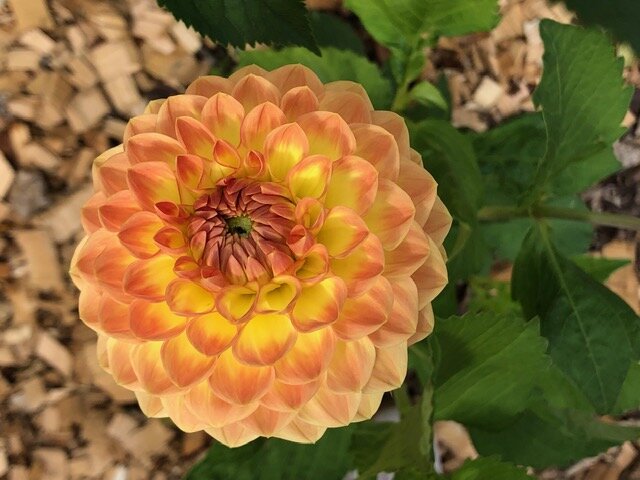
Me in the greenhouse after moving plants from my home seed starting set-up (lights and shelves). Look at those freaking dahlias!!!
It happens every year… I am officially behind on planting!
Here’s what I was SUPPOSED to plant this week:
Scabiosa: fire king & black knight
Coreopsis hybrida: Incredible! Tall Mix
Cynoglossum: Firmament OP
Dill: Bouquet
Gomphrena: QIS Orange & QIS carmine
Grass: Ruby Silk
Grass: Highlander
Kale: Elegance
Nasturtium: Trailing Mix & Phoenix & Purple Emperor
Marigold: Giant Orange
Poppy: shirley
Saponaria: pink beauty
Zinnia: queen lime orange & queen lime with blush & Zowie Yellow Flame
Statice: QIS apricot & Rosysed
Here’s what I actually did plant:
Ranunculus: ALL my saved corms. Happy to say I saved around 200 corms from 2020.
Anemone: ALL
Oh well - you know what I’ll be doing tonight! Catching up on planting.
Last but not least: the kids and I started a planter garden on the front porch. Each planter is filled with a different salad green: arugula, spinach, lettuce mix, swiss chard, and baby kale.
We sprinkle the seeds on top of the soil - pretty close as we want lots of small baby greens. Then press down gently and water in. Then we’ll keep the seeds lightly watered until they germinate.
I’m so excited every year to do this as I get to plant a good 2-3 weeks before I can really get in my garden beds. And by that time we’ll be harvesting salad every night!
Once the salad greens are done I’ll move a few dahlias and tomatoes into those planters. This, dear friends, is a great method if you’re tight on space!
Field Notes: Week 10
March 8-14
I started my first round of seeds on March 9th. Everything this early goes into 3/4” soil blocks. Here’s a list of what I seeded with corresponding quantities:
Monarda-Panorama Red (40)
Oregano (40). 3-5 seeds per block
Sage (40)
Rosemary (40). Would have seeded thyme but realized I didn’t have thyme seeds. Ugh, something like this happens every year!
Eucalyptus-Lemon Bush (60). There was a seed shortage/failure of 3 other eucalyptus vareiteis so I am only able to grow Lemon Bush this year. Hope it’s awesome as I’m in love with eucalyptus.
Verbascum-Rosetta (20). NEW VARIETY. Trialing this!
Snapdragons-Potomac Cherry, Potomac Appleblossom, Potomac Ivory, Potomac Royal (40 each)
Gomphrena-QIS Carmine (10), Audray White (60). Looking forward to growing these again after a few years off.
Dahlias-a whole buch of varieties (75)
Aside from dahlias, all plants are on a heat mat and under a light. Dahlias are in either a gallon pot or a 4” pot depending on tuber size.


Seed starting set up on the left. I have one shelf with lights so far! On the right, seeds have germinated! Ones in front are looking a bit leggy: need to lower my lights.

5 of my Favorite Edibles!
Flowers are not just food for the soul! They can also be REAL food. In fact, my two kiddos DELIGHT in plucking a flower and munching.
I want to share 5 easy flowers that you can grow AND eat!
Flower petals can be used fresh or dried for garnish during the cold, dark winter months.
Aside from nasturtiums, which are completely edible (leaves and stems), be sure to eat only the petals of these flowers.
Calendula
Tangy and slightly bitter, you can add these petals to sweet or savory dishes.
An easy to grow and prolific bloomer. They also readily self-seed in the garden for years after your first planting.
Direct seed in the garden after last frost OR start indoors 4-5 weeks before last frost (which in my neighborhood is around May 15th).
Plant in the garden or in planters giving about 6-9” of space between each plant.
Bachelor Buttons
These flowers are delicate and whimsical and are always one of the first to bloom! They are mild and sweet.
Direct seed as soon as soil can be worked or start indoors 3-4 weeks before last frost.
Plant out about 6-9” apart in the garden or in planters. Be sure to stake as these grow tall and can easily topple in a wind storm.

Calendula comes in colors ranging from pale yellow to rich orange.

Bachelor Buttons are one of the first annual flowers to bloom in the garden.
Snapdragons
Snapdragons are a workhorse in my flower garden. They come in many colors, last a long time in the vase, are cold hardy AND you can eat them. They taste a bit bitter and floral :) Add a few as garnish to salads, deserts or drinks.
I would say these are for the intermediate grower. They can be tricky to germinate so plant a few seeds per cell or pot. Press the seed gently into soil but don’t cover as this seed needs light to germinate.
Start these early! I’m planting my first succession (a succession is simply anytime you seed a specific variety) the 3rd week in March. I’ll do two successions about 3-4 weeks apart.
Space about 6-12” apart in the garden. Be sure to pinch when plants are 4” high - this will give you a branching plant with lots of blooms!
Nasturtiums
These guys are the classic edible. They taste a bit spicy and both the flowers and the leaves look amazing on a salad.
Plant directly in a pot or in the ground 2 weeks before last frost OR start indoors 3-4 weeks before the last frost.
Cover seeds, as they require dark to germinate.
These look amazing anywhere in the garden, in planters or hanging pots. Plant about 3 plants per 10” pot or space 8-12” apart in the garden.

Nasturtiums: a bright and cheery addition to your salad.

Snapdragons come in tons of colors!
Sunflowers
Not only can you eat the seeds, you can eat the petals! They are bittersweet and will brighten up any salad or dessert.
One of the easiest flowers to grow. They do great in pots (but will be shorter and smaller), or in the garden. Folks tend to think these need to grow super tall! I personally love these to be more manageable for the vase so grow them closer together (6” apart).
Direct sow in the garden after last frost. You can also start indoors 2-3 weeks before planting outdoors. They grow fast, so don’t start too soon!
Two of my favorite varieties for the vase are ProCut Orange and ProCut Gold and Sonja. If you’re looking to grow seeds, go with Standfast from Fruition Seeds.

Sunflowers (edible) & zinnias (not edible) harvested off our old farm in WI.

Sunflowers on our old farm in WI.

Three ways to turn your lawn into garden!
Slowly my yard is being taken over by garden… veggies, flowers, fruit trees, berries. Every year I adjust, move and hone my current gardens and slowly get rid of lawn.
This year is no different! In fact I’m planning to turn WAY more lawn into garden especially due to the recent turn of events. Food security has always been important to me, but now more than ever I’m taking it seriously.
If you’re also looking to add more food or flower production to your yard read on to find a few ways I’ve dealt with getting rid of that pesky grass.
The Smother Method: Sheet Mulching/Lasagna Gardening
This is a nice way to passively smother the grass. In its basic form sheet mulching can just be a 1/2 inch layer of cardboard or newspaper on top of your lawn to smother the underlying grass.
From here you can go a couple directions: 1) amend with the proper layers for a lasagna garden or 2) top with soil and plant directly into that.
If I’m making raised beds, I’ll build my boxes right over the sheet mulch. This will ensure that no grass grows up into the boxes.
First of all stock up on cardboard (bike shops are a great place to grab lots of cardboard as all new bikes come in a huge box) or newspaper and lie that over the area you’d like to garden. It’s a good idea to do two layers of cardboard and closer to 6-8 layer of newspaper just to be safe (invasive grass can be extremely tough!).
Once the cardboard id is down, water it throroughly. Then layer from bottom to top in this order:
1) organic fertilizers per your soil test - if you absolutely don’t want to mess with a soil test you can add an all purpose one - just follow the directions on the box.
2) manure or compost
3) straw or dried leaves
4) grass clippings
5) compost or manure
6) more leaves or straw.
Water again thoroughly. I’d let this set for 2-3 months. Or if you can, let it set and decompose all summer. And you’ll have a killer garden next spring!
If you want to plant directly, add a few inches of garden soil on top of the last straw/leaf layer and plant away.
Solarization
This is a low-labor and passive method for getting rid of lawn. You can also use this in an established garden bed if you’re having excessive weed problems. The sun shines through the plastic, heating up the underlying plant material enough to kill it.
First thing after the snow melts, cut your grass short where you are planning to build your garden and water thoroughly. If the grass is already cut short from the previous fall, don’t worry about this step.
Buy or scavenge a piece of clear plastic (I tend to hoard plastic scraps for this very purpose). The bigger the better. If pieces are too small, it’s harder to weigh therm all down and you might lose some in a wind storm.
Cover the entire garden-to-be area in plastic and weigh down with rocks, lumber, fire wood, or anything else. This is probably the most important step, as you don’t want wind to pick these up and move them around. This will lead to frustration and lots of tedious work on your end!
The plastic does need to be clear - the sun shining through the plastic will heat up the underlying grass - killing it!
Now wait for 4 weeks and check! Be patient. Once the underlying grass is dead (it will turn green to yellow to brown) you are ready to garden.
Give the area a shallow till (not too deep as you may mix up deep weed seeds) or just plant right into the dead matter. I don’t advocate for regular tilling BUT it is useful to establish your new garden beds and to mix in soil amendments for the first year.
Sod Removal
This is a labor intensive method but will give you a usable garden space quickly as you don’t have to wait for the grass to die off as you do in some of the above methods.
You can either rent a sod cutter from the hardware store or manually cut and dig the sod. Once sod is removed, you can amend the soil as needed (with compost and fertilizers) and plant directly! For the first season of planting, you can double dig, rototill or broadfork (this you can do every year without any soil damage).
Then plant away!
Note that all these above methods can be used to create in-ground beds OR you can build up to make raised beds. In-ground beds are simple and inexpensive. Raised beds will heat up a little quicker in the spring and provide better drainage but you’ll have to pay for the lumber or material to build up the sides plus bring in additional soil.
How to Grow Dahlias
Growing dahlias is such a joy!
It takes time, patience and some work. And I know it pays off when blooms start to fill your garden with gorgeous color.
I’m here to walk you through how I grow my dahlias - from starting the tuber to growing-on in the garden.
starting your tubers
Start your tubers inside in mid to late March.
Fill a gallon pot half full of potting mix (I use the organic Pro-Mix from Southside Garden Supply) and lie your tuber in there. Be sure to orient the eye of the tuber toward the top, as that’s where the shoot will come up and turn into your dahlia plant! Unsure what an “eye” looks like? Click Here for a good view of one. You won’t need lights until the shoot pops through. You can keep your pots somewhere out of the way but warmish: 50-70 degrees.
It’ll take about a week or two (sometimes longer) for the shoot to pop through the soil.
Until then, keep your soil dry. Maybe just drizzle water on it if it’s looking super dry or dusty. Too much water will rot your tuber before it sprouts up.
Once the shoot pops through the soil, get your plants under lights!
A simple full spectrum florescent or LED shop light will do. Now you can start watering as needed. Keep soil moist and well drained.
planting out
Wait until after the danger of the last frost has passed before planting your dahlia out in the garden. Historically this means Memorial Day but since our northern climate is changing so fast, I think you can safely plant out around Mother’s Day.
The Merril Field weather station hasn’t recorded a last frost after May 5th for 10 years!
When selecting your planting site, choose a sunny or mostly sunny location. You can opt for a large pot (5 gallons or more) or a place in your garden (raised bed or in-ground).
soil requirements
Be sure to do some soil prep before planting your dahlias to ensure that you get your plants off to a good start. Dig a large hole and mix in some compost and some general fertilizer. I like to use the all purpose fertilizer mix from Down to Earth.
After you’ve planted be sure to schedule a monthly side-dress of a more bloom-specific fertilizer like the bone meal from Down to Earth. To do this, dig a shallow trench next to the plant, add your fertilizer, cover fertilizer with soil and water well.
growing on
Once your dahlias are planted be sure to immediately stake them. You can either use a large tomato cage or a stake (2x2 or long bamboo stick). If using the stake, loosely tie the plant to the stake every now and then to keep the plant supported.
As your dahlia begins to bloom, either cut the blooms for your enjoyment in a vase or dead-head them once they start to fade. This will keep ample energy available for creating new blossoms!
Dahlias will keep blooming until the first frost. Once the dahlia is killed by the frost it is time to save your tubers!
If you have any questions now or as you get growing be sure to comment here or send me an email at turnstonefarm@gmail.com.
Happy growing!!

Starting your seeds indoors
After a long winter there’s nothing more hopeful than pushing seeds into fresh potting mix.
For many years I have been starting my seeds indoors under lights before transitioning them to an outdoor unheated hoophouse.
I want to share with you how easy seed starting can be!
I’ll start by outlining what you’ll need to get started:
Pots and domes
Seeds
Potting mix or growing medium
Lights
Heat mats
Shelves
Now I’ll walk you through each of the above items in more detail…
Pots and Domes
I use 11x21 inch trays and fill them with soil blocks. Interested in soil blocking? Read more HERE!
You can also use 4 pack or 6 pack plastic containers. Or plant straight into 3-4” pots. You can find all these options at your local garden store.
So should you choose a larger pot or smaller pot? If you plant into larger containers you won’t have to worry about transplanting later when your plants are getting big. But if you’re growing a lot of plants you’ll get more plants in less space if you use the 4 or 6 packs.
Also invest in a few plastic domes! These will help keep the humidity perfect for seed germination.
Seeds
Ready to order seeds? Go to my blog on where to order seeds HERE. It’ll help you get off to a great start.
Potting Mix
There are a few products that I really like. If you’re in Anchorage, you can find them at Southside Garden Supply or Alaska Mill and Feed.
1) Pro-mix MP Mycorrhizae Organik. This is a great all-round potting mix and it’s organic! I’m using this for all my seed starting needs this year. It is also working great for soil blocking! Find this in cubes at Grow Generation.
2) Fishy Peat or Alaska Earth - made in Alaska! I’ve had success with both products. They are not organic but are made with wholesome natural ingredients. Both can be found at Alaska Mill and Feed.
3) Fox Farm Light Warrior or Ocean Forest- this company has a variety of potting mixes and seed starting mixes. They use natural products and they work great! Grow Generation and Alaska Mill and Feed carry these.
Note, that if you’re growing a lot of starts, buying a cube will be more cost effective than buying individual bags. Ask your local garden store if they offer these products in cubes!
Lights
To be honest, I tend to be opportunistic when it comes to lighting. I look for free stuff and cheap stuff. And what’s great is that they’ve all worked just fine. So here’s what I’ve used: LED shop lights from Costco, florescent shop lights as found in any hardware store, grow-specific LED lights. All these will do the job! I say buy whatever fits your budget best.
The most important steps when it comes to lighting is 1) to keep the lights just a few inches from the plant to prevent “leggyness” and 2) to give your plants 16 hours of light (an inexpensive outlet timer works great for making this happen).
Heat Mats and Thermostats
For the BEST germination, invest in a a seed starting heat mat AND thermostat made specifically for this. This will cost you around $70.00-$80.00 If you can’t afford this your first season, don’t sweat! But even soil heat at around 75-80 degrees will give you the best seedling germination (for most plants).
Soil temperatures are roughly 10 degrees cooler than ambient room temperature, so often your soil may be cooler than you think without a heat heat mat.
Shelves
I use simple metal wire shelving so I can stack my seedlings. But get creative here! You’ll just need a place to hang the lights and a place underneath to set your trays.
NOW you’re READY TO PLANT!
1) Fill your pots with damp soil.
2) Put 1-2 seeds on top. Your seed packet will give you a germination rate for each seed. If its less than 80% put 2 seeds in each pot.
3) Lightly cover with soil. Just barely cover as light aids the germination of most flower seeds. I like to cover just so there is a bit of soil contact on top of seed.
4) Cover with a plastic dome and place under lights and on heat mats.
5) Keep seeds damp but not overwatered. Once seeds germinate I vent the domes by making sure there’s a bit of airflow between the tray and the dome. You can also take the dome off if it’s getting too moist in there.
Happy planting out there!
My 5 Favorite Seed Companies
If you’re a gardener (seasoned or aspiring) I hope you will find my garden resources helpful! Every year I discover new ideas, techniques and sources. I hone and streamline my gardening processes and am here to share what I know.
What I love best of all though is that with gardening you never stop learning. There are endless varieties and variables that can lead to success or failure. And remember, failure is where you really learn! I’m failing all over the place :)

To start, here’s a breakdown of where I order my seeds.
I prefer to order all my seeds online. The variety is endless and it’s easy to source organic and heirloom or open pollinated varieties if that’s what you’re looking for.
1) Johnny’s Selected Seeds. Johnny’s is a comprehensive seed company out of Maine. They carry almost everything you would want to grow AND have tons of growing guides and resources. They carry organic, heirloom, open pollinated and conventional seeds.
I usually order the bulk of my seeds from Johnny’s as the quality and webpage functionality is outstanding.
They offer free shipping for orders over $200.00.
2) High Mowing. This is a company that sells exclusively organic seed out of Vermont. I love this company because I know everything is organic and extremely high quality. Most of my salad greens seeds come from High Mowing.
They offer free shipping on orders over $10.00! This is a screaming deal.
3) Bakers Creek Heirloom Seeds. A company out of the Ozarks that sells heirloom and old fashioned varieties. Their prices are VERY reasonable. Their print catalog is also SUPER fun to look through.
I usually only order some rare and unusual veggies or flowers that I can’t find anywhere else. Even though I don’t order much from them each year, what I have ordered has had great germination and good quality. And their packets of seeds usually have way more seeds than other seed companies.
4) Foundroot. These guys are an Alaskan company out of Haines. They have hand picked varieties that do great in Alaska and cater to home gardeners - which means their packet quantities won’t overwhelm you.
5) Fruition Seeds. Another great seed company based in New York. These guys are a small company with lots of passion and great seed starting resources. All their seeds are organic and open-pollinated.
So there it is! Page through some of these online catalogs or request a print catalog. Curl up in your cozy chair and dream about your spring garden.
Oh, and when do I do this?? I start putting together my seed orders in December. If I have any last minute purchases, I’ll do another order in February or March.
Don’t wait too long as specific seed varieties do sell out.
And, before you know it, it’ll be time to start your seeds!

10 Must-grows! My absolute favorite varieties from the 2018 flower cutting garden
The end of the growing season is a good time to reflect on what went well and what needs improvement for next year. There is simply nothing that compares to learning things from experience, sometimes the lessons are hard and other times they are joyous.
I’m going to focus on the latter and share with you my ABSOLUTE FAVORITES from my 2018 cutting garden. These flowers stunned me every time I entered the garden with their productivity, abundance and beauty!
Tickseed (Coreopsis hybrida): this lovely small and abundant flower is GREAT for cutting. It is full of small one inch blooms that will transform from tiny bud to flower in the vase for a super long lasting cut. In the garden this flower looks full and bushy and has colors ranging from white to yellow, to orange and red.
Breadseed Poppy (Papaver somniferum): a super easy to grow flower transforms from a large and delicate lavender flower with a grape colored center to HUGE poppy pods that look super cool cut in a bouquet or dried for a fun project later.

Madame Butterfly Snapdragons (Antirrhinum majus): snapdragons love growing in Alaska - they like relatively cool weather. Mine bloomed continuously from early July through the end of October!! This variety is an open faced frilly bloomed version of the standard snapdragon. I just LOVED these flowers. And they would look great as a dessert topping as snapdragon blooms are edible.
Amaranth - red spike (Amaranthus cruentus): A fun deep red/burgundy grain that looks stunning in arrangements and in the garden. Very easy to grow!
Cerinthe - kiwi blue (Cerinthe major purpurescens): This was my first season growing cerinthe! It is a great early season bloomer. Blue/green foliage with tiny blue/purple bells. So fun!
Dahlias: Linda’s Baby: a pinkish-orange specialty dahlia that is SO prolific in blooms, you will be amazed. Nice and long stemmed for cutting.
Cosmos - double click cranberry (Cosmos bipinnatus): Deep burgundy/pink double blooms that bloom mid summer till first frost. Huge plants and plentiful blooms.

Nigella - love in a mist (Nigella damascena): A fun flower that ranges from blue to white (it is so hard to find a true blue flower and here is one!). You can cut in flower stage or wait for the seed pod to emerge for a funky floral addition to your dining room bouquet.
Rudbeckia - cherokee sunset (Rudbeckia hirta): Simply big and gorgeous! Although the wait for blooms always seems long, they are well worth it. Big, showy burgundy to yellow double or single blooms that have a long vase life and long bloom time on the plant. Very hardy - these can be planted before the last frost.

Dusty miller - new look (Senecio cineraria): These will be looking great till the end of October this year! they’re an easy all season frosted leaf that looks great cut in a vase or in the garden. You can even dry them for making wreaths or dried bouquets.
If 10 varieties seems a bit daunting to you, pick 5 and add them to your garden next year!
I will advise that the garden stores might not carry these varieties, and that’s why I highly recommend starting your own seeds. Then you can grow EXACTLY what you want to grow.
Leave a comment here telling me 2 of YOUR favorite flowers to grow!

Spring Fever: 5 Veggies you can Plant NOW (Before the Last Frost)
I’ve been talking to folks lately who are antsy to get into their gardens but are waiting till the last frost (usually sometime in mid may).
Don’t wait! There are hardy vegetables you can sow now for early season bounty. Get fresh produce from your own yard weeks before your neighbors by planting these crops now:

1) Peas: plant as soon as the soil can be worked, 1-1 1/2” between seeds in rows 12” apart. Plan and install your trellis early, as growth can come on quick once they’re up. Keep in mind that as they grow they will cast shade onto whatever crop is north of them. Because of this I like to save the northern edge of my bed for peas.
2) Radish: another crop that prefers cool soil to warmer soil. Plant seeds 1/2-1” apart in rows that are 2-4” apart. These grow fast! So I like to make extra use of space and plant in between my carrot rows. You will have eaten them all by the time the carrots are starting to fill in!
3) Carrots: plant now for a summer harvest! Plant about 1/2-1” apart in rows about 12” apart. Thin to 1” apart once seedlings germinate. Be patient - germination often takes 1-3 weeks and may be closer to 3 in cooler temps.
4) Spinach: a SUPER cold hardy crop and grows best in the spring or fall when temperatures are low. Leaves can freeze and then thaw when the sun warms them. Sow as soon as the soil can be worked. For baby salad leaves plant 60 seeds per foot in rows 2-4 inches apart. Harvest outer leaves when they reach the size you most prefer for salad.
5) Kale: baby kale can be planted for continuous cutting as soon as the soil can be worked. Plant 60 seeds per foot, 2-4 inches between each row. Once you have salad sized leaf, you can cut baby leaves for salad. Cut outer leaves, so the inside ones can continue to grow for continuous production.
Yay! Now you’ll be harvesting a full salad in no time!
Be forewarned: germination time may take longer in cooler temperatures. Be patient and keep beds moist but not drenched.
Comment below and tell me what your favorite early season veggie is!
Happy Gardening!