


8 Best Perennials for the Alaskan Cutting Garden
Here are 8 fabulous perennials for the Alaskan cut flower garden.
There are so many benefits to adding perennials to your cut flower garden.
Once established, they are super hardy.
They spread each year, leading to a greater number of stems every summer.
They often bloom earlier than annuals, thus filling the gap between spring blooming bulbs and annual flowers.
Pollinators love the early-season blooms.
Many of them are truly extra unique.
Perennials can be expensive to purchase from the nursery. But with patience and curiosity you can start most of these perennials from seed for almost nothing.
Some perennials need to be seeded a full year before they flower, but don’t be discouraged.
The best time to start a perennial by seed was last year. The next best time is this spring.
Commit to picking 3 varieties to try from the list below and grow 10 plants of each variety. You’ll have extra in case some die off OR you’ll have extra to give to your neighbor.
Columbine - Barlow Mix, Pink Petticoat and McKana Giant Mix.
Plant in the spring for flowering the following year.
After only a couple years Columbine forms a lush and full bushy plant with many stems. It is one of the earliest to bloom in the garden, which is a huge bonus for the cut flower patch.
Cut for the vase when half the florets on the stem are open. After cutting one round from a plant, watch and wait as I’ll often get a second flush of blooms a couple weeks later.

Pink Petticoat Columbine (bottom left) in an early summer Turnstone Farm bouquet.
Echinacea - There are a few varieties in different colors, just pick your favorite!
These need to be started the year before they flower. I start mine first thing in the spring, usually in week 11 or 12.
Once established, they are hardy and tall.
Harvest fresh for the vase when the petals have opened. Harvest for drying once the cone has started to turn golden.

Echinacea Cone in a Turnstone Farm Boutonniere
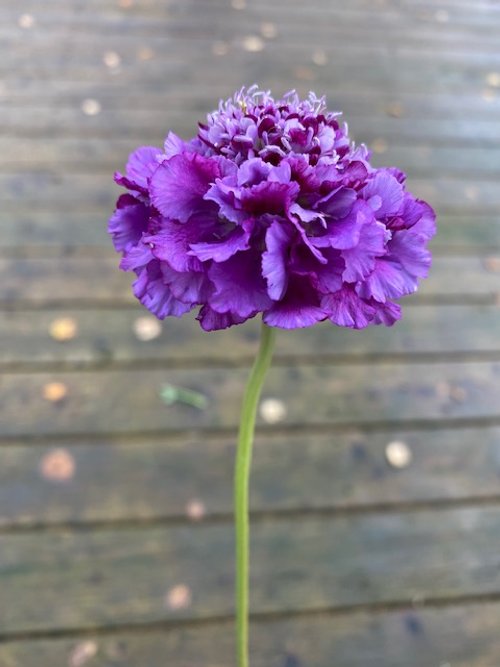
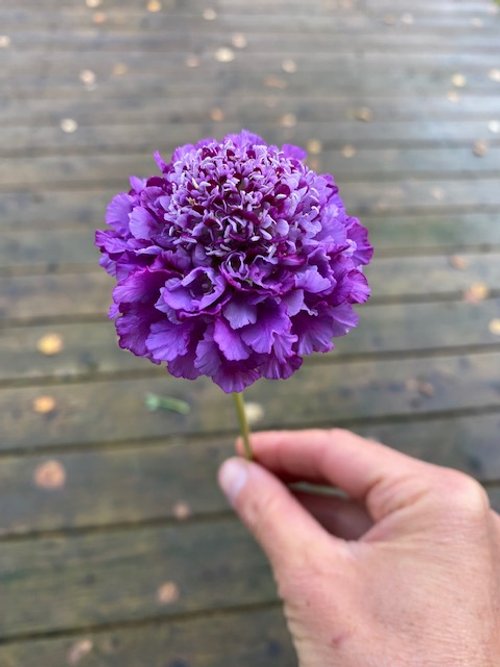
Eryngium - Blue Glitter and White Glitter.
Plant in week 11 or 12 for flowering the following year.
This plant gets a top score for cool looks! It has attractive thistle-like blooms with a metallic shine.
Eryngium is a hardy perennial with long, sturdy stems.
It does well in hot, sunny locations. But also tolerates a wide variety of conditions. Expect flowers during the second year of growth and in subsequent years (although mine bloomed the first year!). Great for bees, beneficial flies and wasps. Also known as plains eryngo and flat sea holly.
This is an excellent long lasting cut flower and dries well.
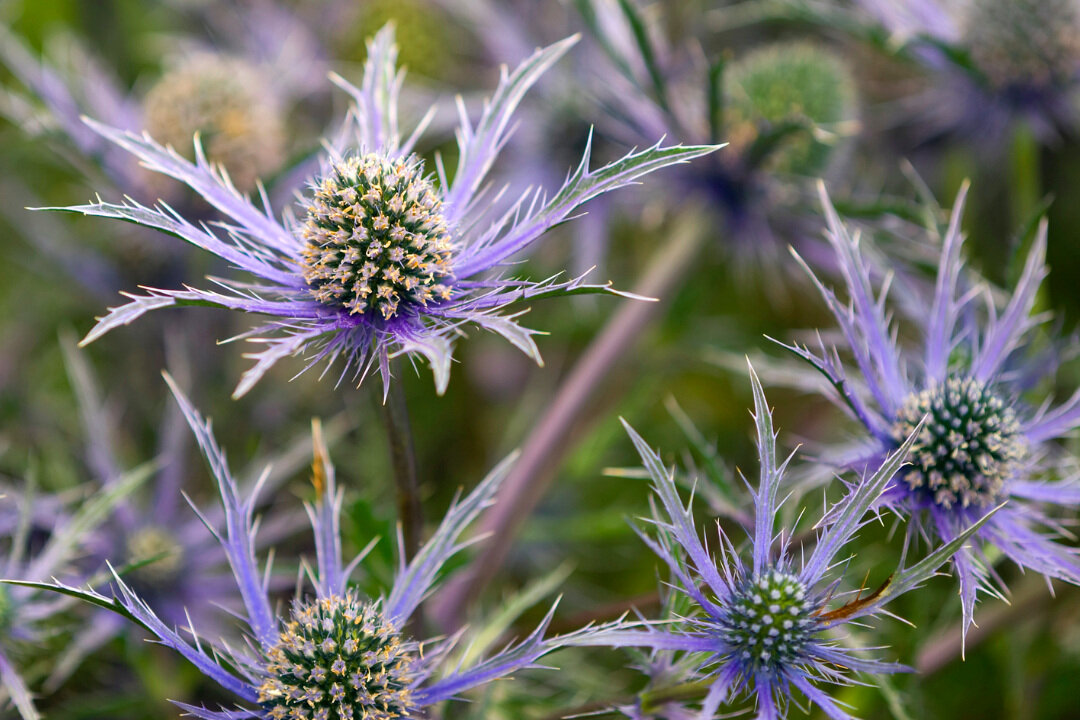
Blue Glitter Eryngium
Heliopsis - Burning Hearts
Sow in the early spring for flowering the following year. I start any new plantings in week 12 or 13.
These are slower to establish but offer delicate and stunning flowers.
Harvest for the vase when flowers are fully open.

Burning Hearts Heliopsis in the Turnstone Farm Garden
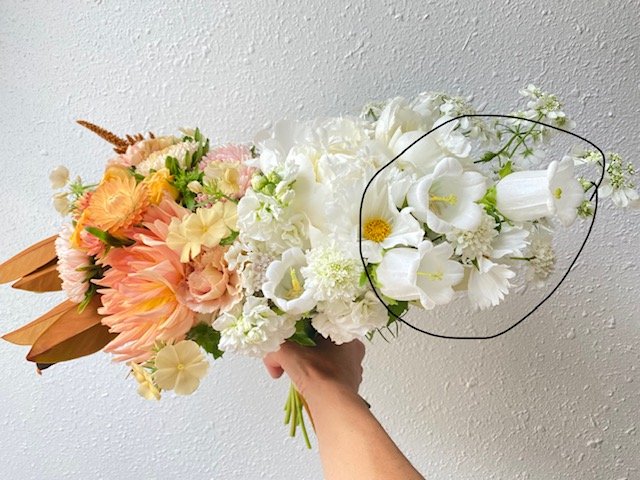
Monarda - Red Shades, Panorama Mix or Wild Bergamot.
Seed these in the early spring (week 12 or 13) for flowering the following year.
Monarda is a favorite for pollinators. My patch is always swarming with native pollinators and honey bees.
Plants grow tall and lush in the garden, which make a nice border for a garden room or as a living privacy screen.
Harvest when all the petals are almost fully open. Pop in a vase or hang to dry.

Red Shades Monarda (circled) in a Turnstone Farm Bouquet Subscription
Yarrow - Cloth of Gold and Summer Pastels.
Plant early in the spring for flowering the same season. I usually start a new variety in week 12 or 13.
Each year yarrow expands, so you have to be wary if you don’t want it to spread.
Yarrow is considered a “cool flower” and can withstand a light frost.
Harvest for the vase when pollen is visible on the flowers. If you cut too early, the florets will wilt. Sometimes it’s hard to get this right, so be patient! You can also harvest at this same stage and hang to dry. Yarrow dries excellent and holds its color well.

Yarrow is a fabulous perennial for the Alaskan garden
Peony - so many fabulous varieties!
While Peonies can be started from seeds, like apples, they will not be true to their parent plant.
I am going to try this in 2023 and will give you an update in a following blog.
If you’d like to try your hand at starting a NEW peony variety from seed here are the steps:
Collect seed pods from a couple of plants.
Dry the seed pods.
Once the seeds start to ripen the pods will crack open.
Prepare a space in your garden and plant the seeds in the fall. Mark them well so you know where they are in the spring.
In the spring monitor and care for the plants that have come up.
You should get your first bloom in year 3 and many more in year 4 and 5.
Since most of us don’t want to wait 5 years for a bunch of blooms, peonies are most commonly started from root stock or purchased from a nursery.

A beautiful peony in the Turnstone Farm Garden.
I hope you are now inspired to start a few new perennials by seed this year!
Cannot wait to hear about your 2023 flower gardens.

Grow Your Own Cutting Garden: 10 Cut Flowers for the Intermediate Gardener
Add a little challenge to your home cutting garden with these 10 varieties.
If you’ve already mastered some of the beginner cut flowers I reference here in my last blog, you’re ready to add a few more challenging flowers to your garden.
I classify these as more intermediate because each of these varieties may have one or more needs:
the need to be started earlier and usually indoors
more time babying them inside
particular needs when harvesting
the need for succession planting
For greater ease in growing any of these, skip the succession planting for now and just do one planting of each during the last seeding week I mention for each variety.
If you want to test your skills further, pick a few to succession seed for a longer blooming garden.
Campanula
These are fun and delicate blooms that look fabulous in the garden.
I also use them consistently in my wedding work.
In the vase they lasted a good 1-2 weeks in good condition.
This is an all round excellent flower.
Cut these for the vase when the first flower opens up as the other buds will continue to open in the vase.
Cosmos
Cosmos is a staple of mine every year. Varieties I love are: Rubenza, Double Click Varieties and Cupcakes.
I plant mine in two successions, one starting week 15 and another starting week 18. The varieties I plant in week 18 are usually more fall themed colors like Rubenza and Double Click Cranberries.
Pinch these when 4-6 inches tall to get the most blooms per plant.
These flowers are delicate and ephemeral. They look stunning and full in the garden and marvelous in the vase.
Part of their joy is that they can’t be shipped since they are so delicate.
You can only have these in your vase if you grow them yourself or buy from a local farm.
Harvest when just beginning to open for longest vase life.

Double Click Cosmos in the Turnstone Farm Gardens
Dianthus
I fell in love with the “Sweet” varieties last year and am growing three different colors from this line.
My seeding will occur during week 13 and 15.
Harvest for the vase when the florets are 10-20% open. They will continue to open in the vase giving a solid 2 weeks of vase life.
Godetia
While this one didn’t make my initial “best of” list I’m still listing it here for the home gardener. “Grace Mix” gives you a nice variety of colors for your garden.
I’m giving this one more go this coming year to see if I can get a bit more length to the stems.
I’m seeding these in week 15 and 18.
Godetia will last forever in the garden and in the vase - florets just keep opening up. It is short and sturdy for garden beds.
The petals are easily damaged by rain. Although we had an exceptionally rainy summer in 2022 which was my first year growing these.
Phlox
Cherry Caramel, Dulce de Leche and Sugar Stars are what I grow each year.
I start these in week 14, 17 and 19.
These are delicate blooms that have a solid vase life. Harvest when the flower just begins to show color. If you cut before they are fully open they will open in the vase.
This is a solid cut and come again flower and the more you cut, the more blooming stems will grow.
Scabiosa
This is a tall plant with long strong stems.
I love “Black Knight”, “Oxford Blue” and “Fire King” but there are many more fabulous varieties.
Start in week 13 and week 16.
Scabiosa looks whimsical and lively in the garden or you can cut it just when the first florets begin to open. When cut at this time it will last a solid 1-2 weeks in the vase.
Scabiosa loves cooler temperatures so does better in our cooler Alaskan summers.

Black Knight Scabiosa
Snapdragons
My go to variety is any color in the “Potomac” variety family. They are strong and sturdy with fabulous blooms.
If you want something more unique try “Madame Butterfly” varieties or “Chantilly”. These two types have the most unique florets but are much more delicate and break fairly easy. If you’re just bringing them from garden to your house, they should do fabulous.
This is one of the earliest flowers I plant and I start these in week 11 and week 14. They grow slow and you can put them in the garden extra early since they can weather a few light frosts.
Harvest for the vase when 1/3 of the florets have started to open.

Me netting a bed of snapdragons in the original Turnstone Farm Flower fields in Southern Wisconsin.
Statice
These are great for a long lasting cut flower or for drying.
They come in a variety of colors but my favorite is QIS Apricot.
I start these by seed in week 12 and week 14.
Cut when most of the flowers are fully open and showing color.
Sunflowers
Although these are relatively easy to grow, I put them here for a couple reasons. The first being that they are good practice for succession planting. I plant these in weeks 18, 20 and 22.
Varieties I’m growing this year include the Sunrich series and the Procut series. I grow these each year and then will add in one fun and new variety each year.
You can succession plant sunflowers a couple ways: plant the same variety every 2-3 weeks for 3 successions. OR plant different varieties (that each have a different DTM) at the same time. Then repeat this once or twice.
You can also play with growing them close together to get the perfect sized sunflower for the vase. I space mine 4-6” apart for best results.
Harvest for the vase when petals are just beginning to unfurl but are fully colored.

Space your sunflowers 4-6” apart to create the best size flowers for your vase.
Rudbeckia
I love the Cherokee Sunset, Indian Summer and Prairie Sun varieties.
I start these by seed in week 13. I don’t find it necessary to succession seed as these are cut and come again flowers. You cut them and they keep growing new stems!
Harvest when the stems pass the wiggle test. Simple grab onto a stem and wiggle back and forth. If the bloom wobbles on a floppy stem, wait to cut until the stem has matured further. Once the flowers are fully open I check daily for a nicely rigid stem

Look at this freaking beauty!!!! Rudbeckia is stunning in the cut flower garden.
I hope this gave you new ideas for your home cutting garden this year. Start with 1-5 new varieties and see how they do!

Don't Start Your Seeds too Early!
It’s January and I know very soon, I’m going to be itching to plant my seeds indoors. This is such a joyful time of hope and anticipation.
I know, you’re itching to start your garden too. But hold on to your horses…
One of the most common mistakes you can make is starting crops too early inside.
Why is this a problem?
Nothing stresses a plant more than being confined for too long.
They deplete resources from the potting mix and they start to grow their roots in circles, becoming root-bound in their tiny pots.
Unless you have A LOT of space and plenty of lights, it’s best to practice restraint and start your seeds a bit later.

Here’s how to figure out planting dates for your garden plants.
Figure out your last frost date.
Read the back of your seed packet or look up your specific variety in a seed catalog. It should give recommendations on when to plant indoors. They will say something like: plant 6-8 weeks before the last frost. For this specific example, I’d go with the 6-week start date.
If they recommend to direct seed, start indoors only 2 weeks before planting out OR just direct seed. These plants usually don’t appreciate root disturbance.
Write down on your calendar what you’re starting and when.
Take notes as you go, throughout the growing season. If something gets really root-bound and is sluggish to grow after you pop it in the garden, make a note. You might try to start a week later the following year. Your garden journal is your biggest friend. If you don’t have one, start one NOW.
So, you might be wondering what I’m starting first?
By the way, I’m starting seeding a full week later than last year.
In 2022, all my cool season crops were spot on in regard to planting time. But all my warm loving crops could have benefited from getting started a week (or two) later.
Just for you, here’s a sneak peek at my first week of seed starting, which is coming up fast folks!
Turnstone Farm seed starting the week of March 12th:
Oregano
Sage
Rosemary
Thyme
Snapdragon - Potomac Varieties. These guys grow relatively slow and love the cool spring temps. I try to start these as early as I can because they can be planted before the last frost.
If I was starting perennials that I may want to bloom the first year, I’d start them now too.
Thats it for my first week of planting.
Happy garden planning!
Best of 2022: My Favorite Flowers from the Cutting Garden
Fall is time to dig out all the garden notes you’ve been taking and put that data to good use.
I’ve been reviewing my notes and I’m here to tell you what I absolutely LOVED in my cutting garden this year.
These are all annuals, grown specifically for my cutting garden.
I will follow this post with a blog on perennials. As they become a bigger part of my cutting garden, they deserve their very own article.
So without further ado, here are my top 9 Cutting Annuals for 2022:
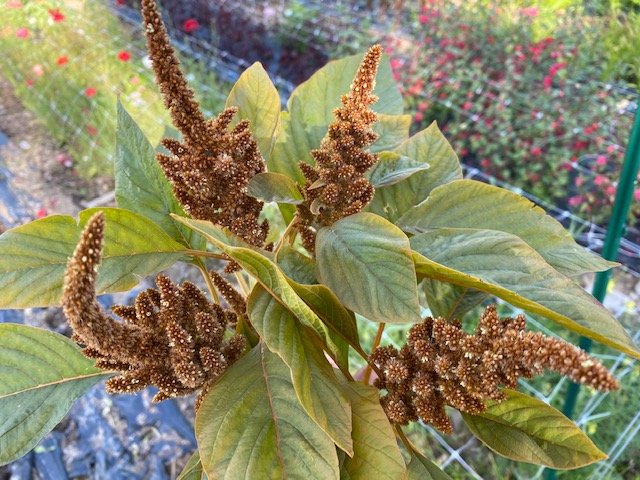
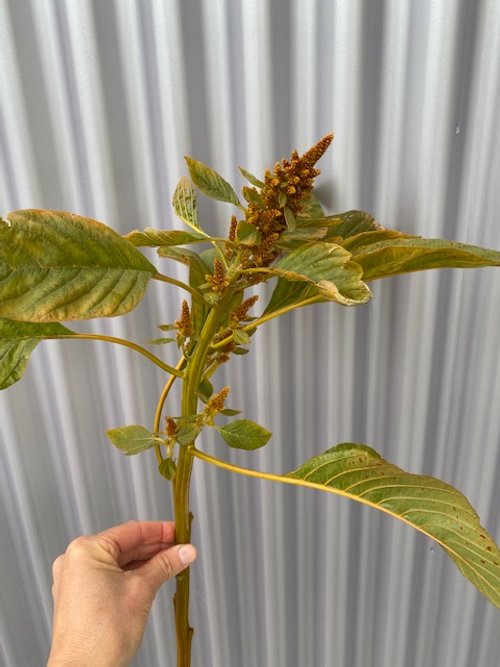
Hot Biscuits Amaranth
Amaranth is a beautiful grain that has gorgeous foliage and stunning inflorescence.
Hot biscuits consistently out-produced all the other Amaranth varieties I grew in height and size. It was such an amazing fall-colored addition to bouquets.
I looks full and interesting in the garden and does amazing in the vase. I consistently had it in the vase for 2 + weeks.
In addition, you can hang it to dry for an everlasting bouquet.
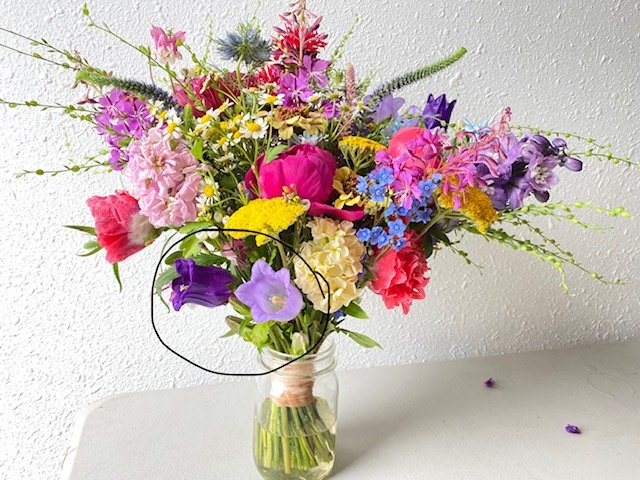
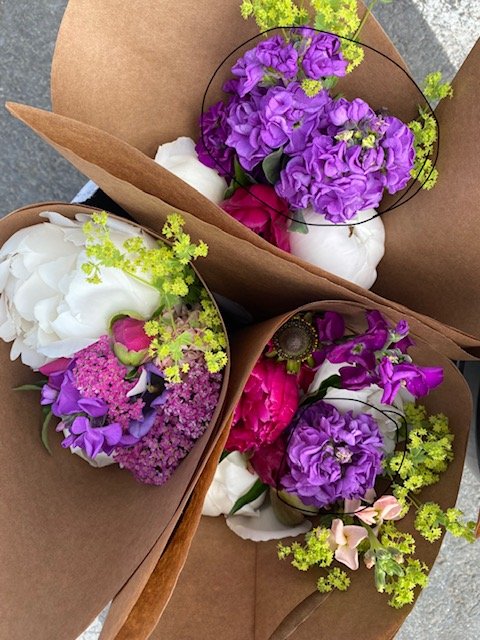
Campanula
These are fun and delicate blooms that look fabulous in the garden.
I also used them consistently in wedding work this year. See above bridal bouquets!
In the vase they also lasted a good 1-2 weeks in good condition.
This is an all round excellent flower.
Cut these for the vase when the first flower opens up as the other buds will continue to open in the vase.

Vintage Brown and Iron Varieties Stock
Stock is an early season bloomer and helps fill the gap between tulips and all the other garden varieties.
Its smell cannot be beat.
The flowers are edible.
It lasts for a solid week + in the vase.
It comes in a variety of colors: white, apricot, purple, light and bright pink and yellow.
While a more challenging flower to grow as it must be started earlier, dislikes dry conditions (spring 2022 anyone!), and dislikes heat, it is well worth the challenge.

Salmon Frosted Breadseed Poppy
This one was a show stopper this year.
These were like little explosions in the vase. I cut them just as they start opening up and then they poof out into big fluffy balls of color.
While all poppies have a short vase life, this one did a little better than most. I got a solid 3+ days of blooming time in the vase.
That’s good news y’all!
Some flowers are more ephemeral than others.

Giant Orange Marigold
This flower makes my favorites list every year.
Here’s why:
It has a stunning and cheery color.
It smells heavenly.
It dries well.
It can last up to 3 weeks in the vase.
One plant pumps out blooms almost all summer long.
It’s easy to grow.
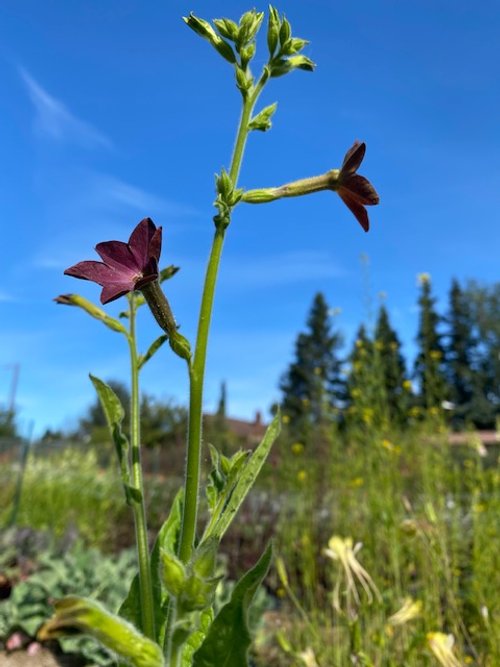
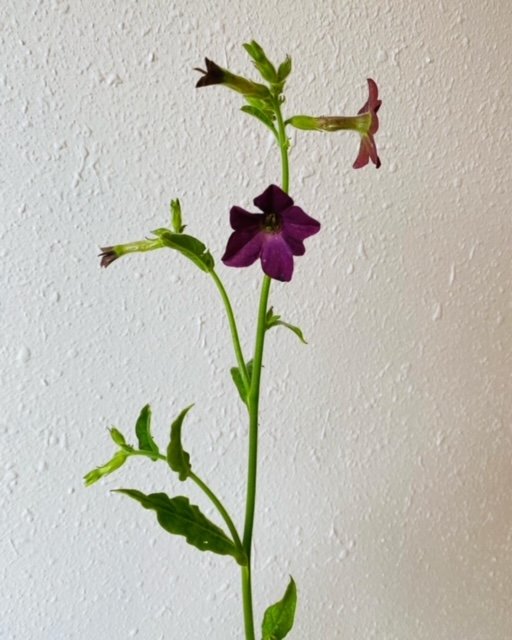
Bronze Queen Nicotiana
I LOVED this flower. It is delicate and whimsical and was the perfect addition to most of my bouquets.
As a garden flower it adds interest and texture but is a little sparse. It is not big, showy or bright.
In the vase is really where it shines.
It has a long vase life and it is so fun to look at those delicate little trumpet flowers!

Godetia
While this one didn’t make my initial “best of” list I’m listing it here for the home gardener.
I have not decided if I’m growing it again next year for my cutting garden but I would highly recommend it as an addition to any flower gardeners repertoire.
The pros: it lasts forever in the garden and in the vase - florets just keep opening up. It is short and sturdy for garden beds. It does well in shorter vases.
The cons: it is too short to use in most bouquets. The petals are easily damaged by rain.
Try it and see if you like it!

Rubenza Cosmos
Cosmos is a staple of mine every year.
These flowers are delicate and ephemeral. They look stunning and full in the garden and marvelous in the vase.
Part of their joy is that they can’t be shipped since they are so delicate.
You can only have these in your vase if you grow them yourself or buy from a local farm.
Rubenza is a magical deep maroon color with a vibrant yellow center. I find myself marveling at it’s beauty EVERY time I see it.
Oxford Blue Scabiosa
This is a tall plant with long strong stems.
It looks gorgeous and lively in the garden or you can cut it just when the first florets begin to open. When cut at this time it will last a solid 1-2 weeks in the vase.
Scabiosa loves cooler temperatures so does better in our cooler Alaskan summers.
How to harden off your plants
One of the most important parts of growing a successful garden is getting your plats hardened off.
What plants do you need to harden off?
Not all plants need hardening.
If you’re growing in a greenhouse, any plants going in there don’t need to go through this process.
Direct seeded plants don’t need hardening (maybe this is obvious). If you’re seeding directly into your garden beds, your seedlings will pop up all ready to deal head-on with the elements. This is a big benefit of direct seeding.
ALL other plants will need some hardening off.

Stock, snapdragons and other cool-hardy flowers getting hardened off under shade cloth.
Plants need some sort of gradual adjustment to outdoor conditions. After being cozy and warm indoors for their entire lives, it can be stressful to get popped directly outdoors.
The first plants I harden off in the spring are all the “cool-hardy’s”. These are plants that can survive a light frost and include the following:
Most salad greens
Spinach
Kale
Broccoli
Peas
Onions
Snapdragons
Bupleurum
Poppies
Rudbeckia
Calendula
Ammi
Strawflower
Campanula
Nigella
Most perennial flowers that are suited to your zone.
In general, to get fully hardened off, plants need about 3-5 days in the shade.
When nighttime temps are steadily in the 30s, the above varieties can be set out in a shady spot. In previous years I was moving my plants all over the place, from shady spot to shady spot.
This year I finally streamlined my process and started using hoops (made of thick wire and then stuck in the ground) and draping 30% shade cloth over the top.
My cool loving plants go in here and in 3-5 days we’re good for planting!
For warm-season plants, I’m a little more cautious. Ideally, before hardening these crops, our night temperatures would be in the 45 + zone. In Alaska, this can be a tall order!
So for these, I watch the weather and put them in their shade hoop when temps are in the 40s or higher. Using past last frost dates can work but since each spring is so different sometimes it’s hard to predict.
To help any early-planting anxiety you may have about cold temps, you can always add extra protection by putting a layer of Agribon over the hoop as well.
In fact, this would have helped me this season as I pushed it a little with a few varieties and killed off a few trays during a spotty frost that struck our neighborhood last week.
(sigh)
I guess it’s just a good reminder that a good fail is always the best way to be successful in the end!

30% shade cloth hooped over my cool-hardy flowers.
May 20th Photo Garden Tour
It’s May 20th! Here’s what the Turnstone Farm flower field looks like today.

The garden is almost 75% planted! I brought on an employee for the summer (super excited!) and we’re making fast work of getting the flower babies in the ground. Here’s strawflower with a good view of my drip line irrigation system.

Dahlias are in! My designated dahlia bed at my 16th Ave plot is full. But not to worry - I’m opening a NEW plot in Rogers Park and will have space for many more :)
Note - if you’re planting dahlias, don’t forget to label the plant. I just cut leftover yogurt containers into strips, write the name with a grease pen (marker may wear off by the end of the season - I learned the hard way), and attach to the base.

Garlic - one of my all time favorite plants to grow! And I dedicated a precious full bed to it this year. If you haven’t grown this, you must. It’s something you plant in the fall, so don’t forget to mark your calendars to order seed garlic in late summer.

The tulips are SO CLOSE! I’m out there everyday checking the bloom status. Once they start blooming it happens fast! Just seeing these wavy and elegant leaves makes me so happy.

I put in 25 peonies last fall! Full disclosure - I am a peony NEWBIE. You can follow me along as I learn to grow this beauty. WIN #1 - they ALL survived the winter.
A handful of these were specialty and heirloom varieties from my farming friends at https://www.lyndakerfarms.com/. SO excited!!! Brides - be ready to be majorly wowed.
Field Notes: Week 11
March 15-21
Here’s what I seeded this week:
Achillea-Cloth of Gold (40). Love this name. Also ordered Cassis, but there was a crop failure.
Asclepias-Wild Orange Type (20), Snowy Milkweed (20)
Gomphrena-QIS Orange (40)
Echinacea-Bravado (20), Green Twister (20)
Eryngium-White Glitter (40)
Solidago-Golden Baby (20).
Rudbeckia-Green Wizard (20), Cappuccino (20), Denver Daisy (20), Triloba (20)
A few dahlias are starting to sprout: Thomas Edison, Ben Huston, Cafe au Lait. So glad I’m not heating a greenhouse yet! It’s been cold (negative last night) and we got over a foot of snow in the last week.

Thomas Edison dahlia is the first to sprout! Once they sprout, put them under lights and start to water them regularly.
How to Grow Dahlias
Growing dahlias is such a joy!
It takes time, patience and some work. And I know it pays off when blooms start to fill your garden with gorgeous color.
I’m here to walk you through how I grow my dahlias - from starting the tuber to growing-on in the garden.
starting your tubers
Start your tubers inside in mid to late March.
Fill a gallon pot half full of potting mix (I use the organic Pro-Mix from Southside Garden Supply) and lie your tuber in there. Be sure to orient the eye of the tuber toward the top, as that’s where the shoot will come up and turn into your dahlia plant! Unsure what an “eye” looks like? Click Here for a good view of one. You won’t need lights until the shoot pops through. You can keep your pots somewhere out of the way but warmish: 50-70 degrees.
It’ll take about a week or two (sometimes longer) for the shoot to pop through the soil.
Until then, keep your soil dry. Maybe just drizzle water on it if it’s looking super dry or dusty. Too much water will rot your tuber before it sprouts up.
Once the shoot pops through the soil, get your plants under lights!
A simple full spectrum florescent or LED shop light will do. Now you can start watering as needed. Keep soil moist and well drained.
planting out
Wait until after the danger of the last frost has passed before planting your dahlia out in the garden. Historically this means Memorial Day but since our northern climate is changing so fast, I think you can safely plant out around Mother’s Day.
The Merril Field weather station hasn’t recorded a last frost after May 5th for 10 years!
When selecting your planting site, choose a sunny or mostly sunny location. You can opt for a large pot (5 gallons or more) or a place in your garden (raised bed or in-ground).
soil requirements
Be sure to do some soil prep before planting your dahlias to ensure that you get your plants off to a good start. Dig a large hole and mix in some compost and some general fertilizer. I like to use the all purpose fertilizer mix from Down to Earth.
After you’ve planted be sure to schedule a monthly side-dress of a more bloom-specific fertilizer like the bone meal from Down to Earth. To do this, dig a shallow trench next to the plant, add your fertilizer, cover fertilizer with soil and water well.
growing on
Once your dahlias are planted be sure to immediately stake them. You can either use a large tomato cage or a stake (2x2 or long bamboo stick). If using the stake, loosely tie the plant to the stake every now and then to keep the plant supported.
As your dahlia begins to bloom, either cut the blooms for your enjoyment in a vase or dead-head them once they start to fade. This will keep ample energy available for creating new blossoms!
Dahlias will keep blooming until the first frost. Once the dahlia is killed by the frost it is time to save your tubers!
If you have any questions now or as you get growing be sure to comment here or send me an email at turnstonefarm@gmail.com.
Happy growing!!