

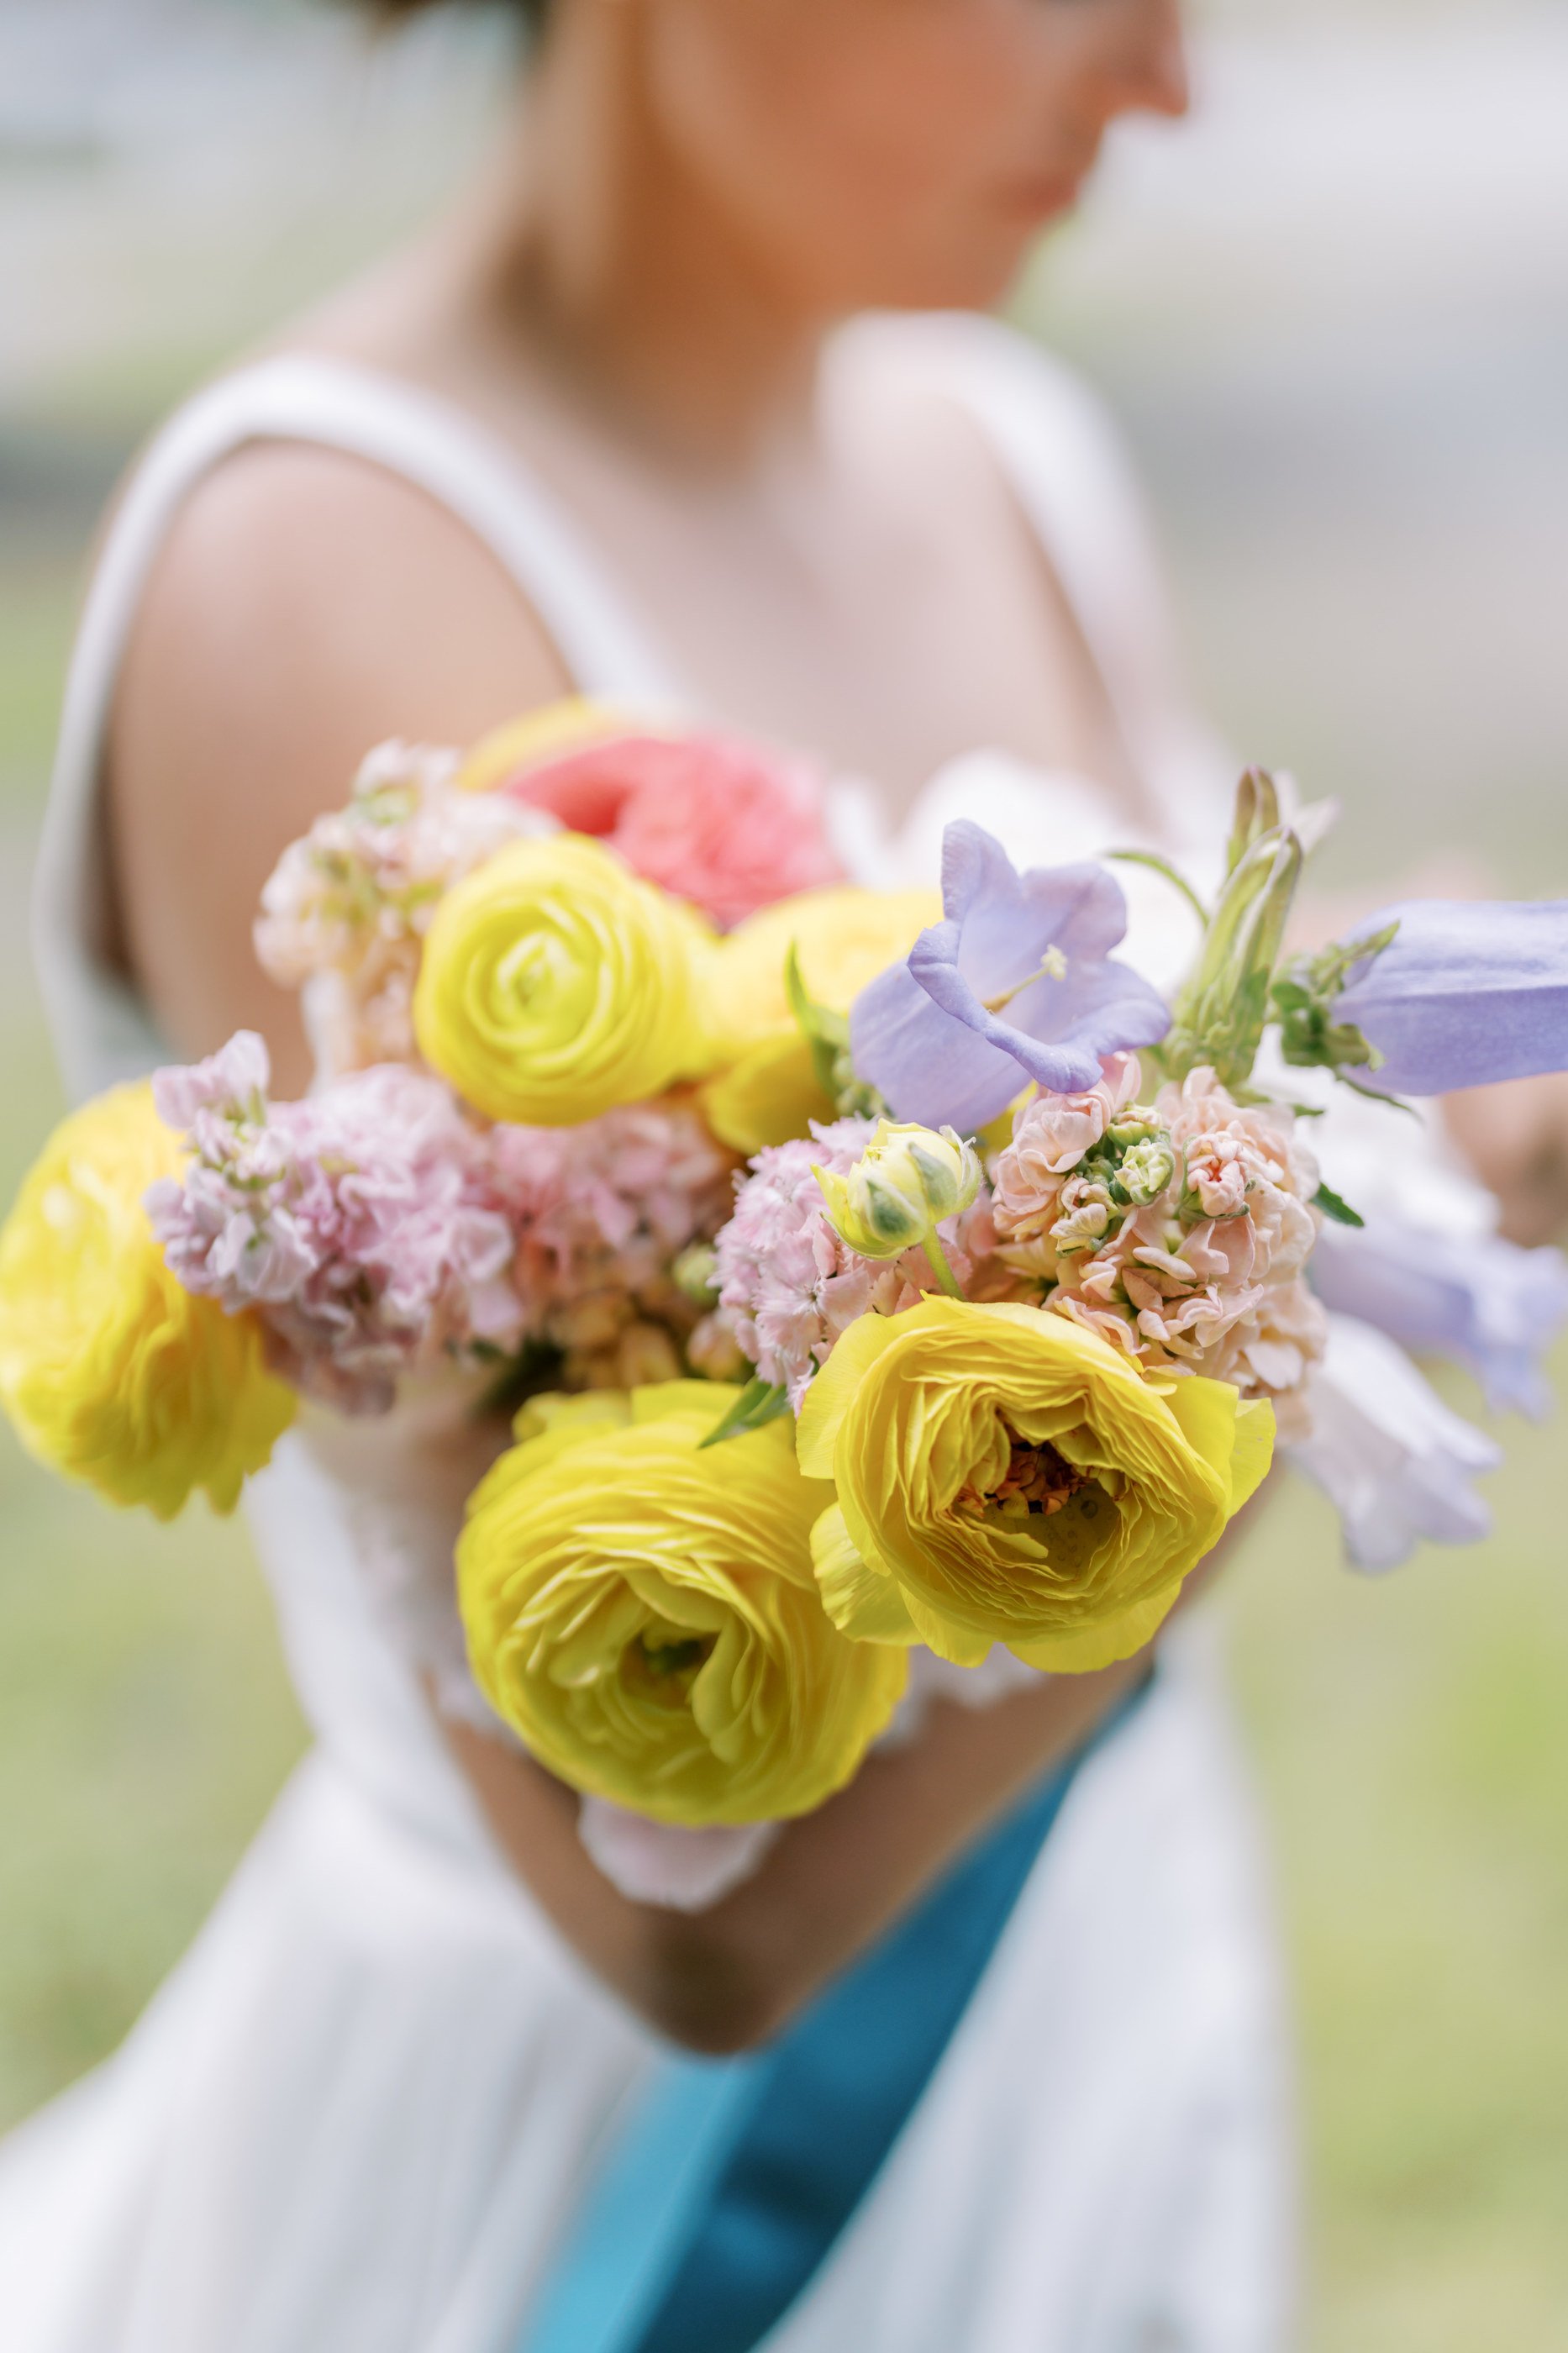
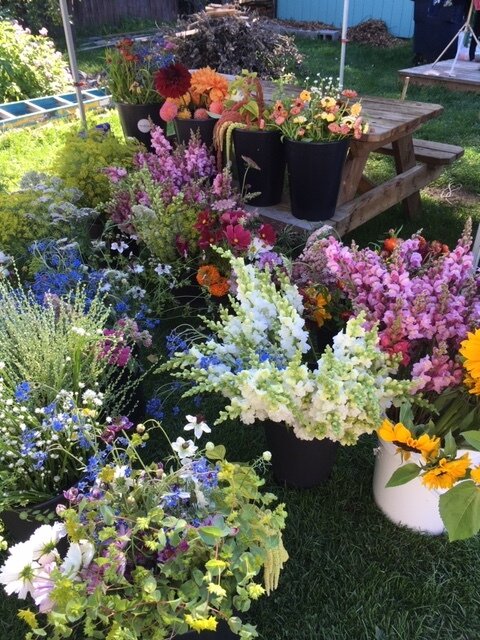
Grow a multi-purpose pollinator garden
Grow plants that are edible, look great in a vase and provide habitat for pollinators.
Pollinators, including bees, butterflies, and hummingbirds, play a crucial role in our ecosystem by helping to fertilize plants and ensure their reproduction.
Unfortunately, many pollinator populations are in decline due to habitat loss, pesticide use, and other factors. One way that you can help support native pollinators is by creating a pollinator garden, which provides a habitat for these important creatures to thrive.
Adding culinary herbs to a pollinator garden not only benefits the pollinators but also provides fresh ingredients for the kitchen.
Plus, some of these fabulous culinary plants do triple whammy by looking great in the vase!
Why Grow a Pollinator Garden?
Pollinator gardens are not only beneficial for the pollinators themselves but also for the environment as a whole. By providing a habitat for pollinators, you help to maintain the biodiversity of our planet. Thank you gardening friend!
Additionally, pollinators are responsible for fertilizing a large percentage of our food crops, so by supporting their populations, we are also supporting our own food systems.
You can’t grow a garden without pollinators!
Many pollinator-friendly plants are also beautiful additions to your garden. And, as mentioned earlier, adding culinary herbs to a pollinator garden can provide both beauty and practical benefits.
Choosing the Right Plants for your Pollinator Garden
When selecting plants for a pollinator garden, it is important to choose varieties that are attractive to pollinators. This typically includes plants with brightly colored flowers that are easy for pollinators to access. Native plants are often a great option, as they have evolved alongside the local pollinator populations and are well-suited to their needs.
When choosing culinary herbs to include in a pollinator garden, there are several options to consider. Many herbs have flowers that are attractive to pollinators, while others have foliage that can provide shelter for them.
Some popular culinary herbs that pollinators love include the following:
Addition #1 for your multi-purpose pollinator garden: Basil
Basil is a popular culinary herb that also has flowers that are attractive to bees and other pollinators.
It is an annual plant that grows well in warm weather. When planting basil in a pollinator garden, be sure to space the plants at least 12 inches apart to allow room for growth.
Basil can be trickier to grow in northern climates. I grow mine exclusively in a hoop house. In warmer climates it does well outdoors. The variety I love for cooking is Genovese. If growing for the vase, shop for varieties with deep purple leaves - they are amazing.
Any variety will produce interesting flowers for you and for your pollinators.
Addition #2 for your multi-purpose pollinator garden: Thyme
Thyme is a low-growing perennial herb that has small, fragrant flowers that are attractive to bees and butterflies.
It’s a great option for a pollinator garden because it can grow in a variety of soils and is drought-tolerant.
Thyme can be started from seed early in the season. It’s a perennial in northern climates although I plant extra each year in case I lose some over the winter.
Addition #3 for your multi-purpose pollinator garden: Cilantro
Cilantro/coriander is a fabulous fresh annual herb.
Since cilantro will bolt in the summer, I grow mine for culinary uses in the early summer and then let it bolt (go to flower).
Cilantro flowers smell heavenly - pollinators love them and they are a great filler flower for the vase.
Let a few of the flower heads go to seed. This seed is coriander! You can save it for planting next year or harvest for some super cool bouquet elements.
Addition #4 for your multi-purpose pollinator garden: Sage
Sage is a culinary herb that also has attractive flowers that are popular with pollinators.
It’s a perennial plant that prefers well-draining soil and can be grown easily from seed. In my experience it survives 2-3 years and then dies back. Flowers usually develop in the second year. You can use the foliage and flowers to fill out your home arrangements.
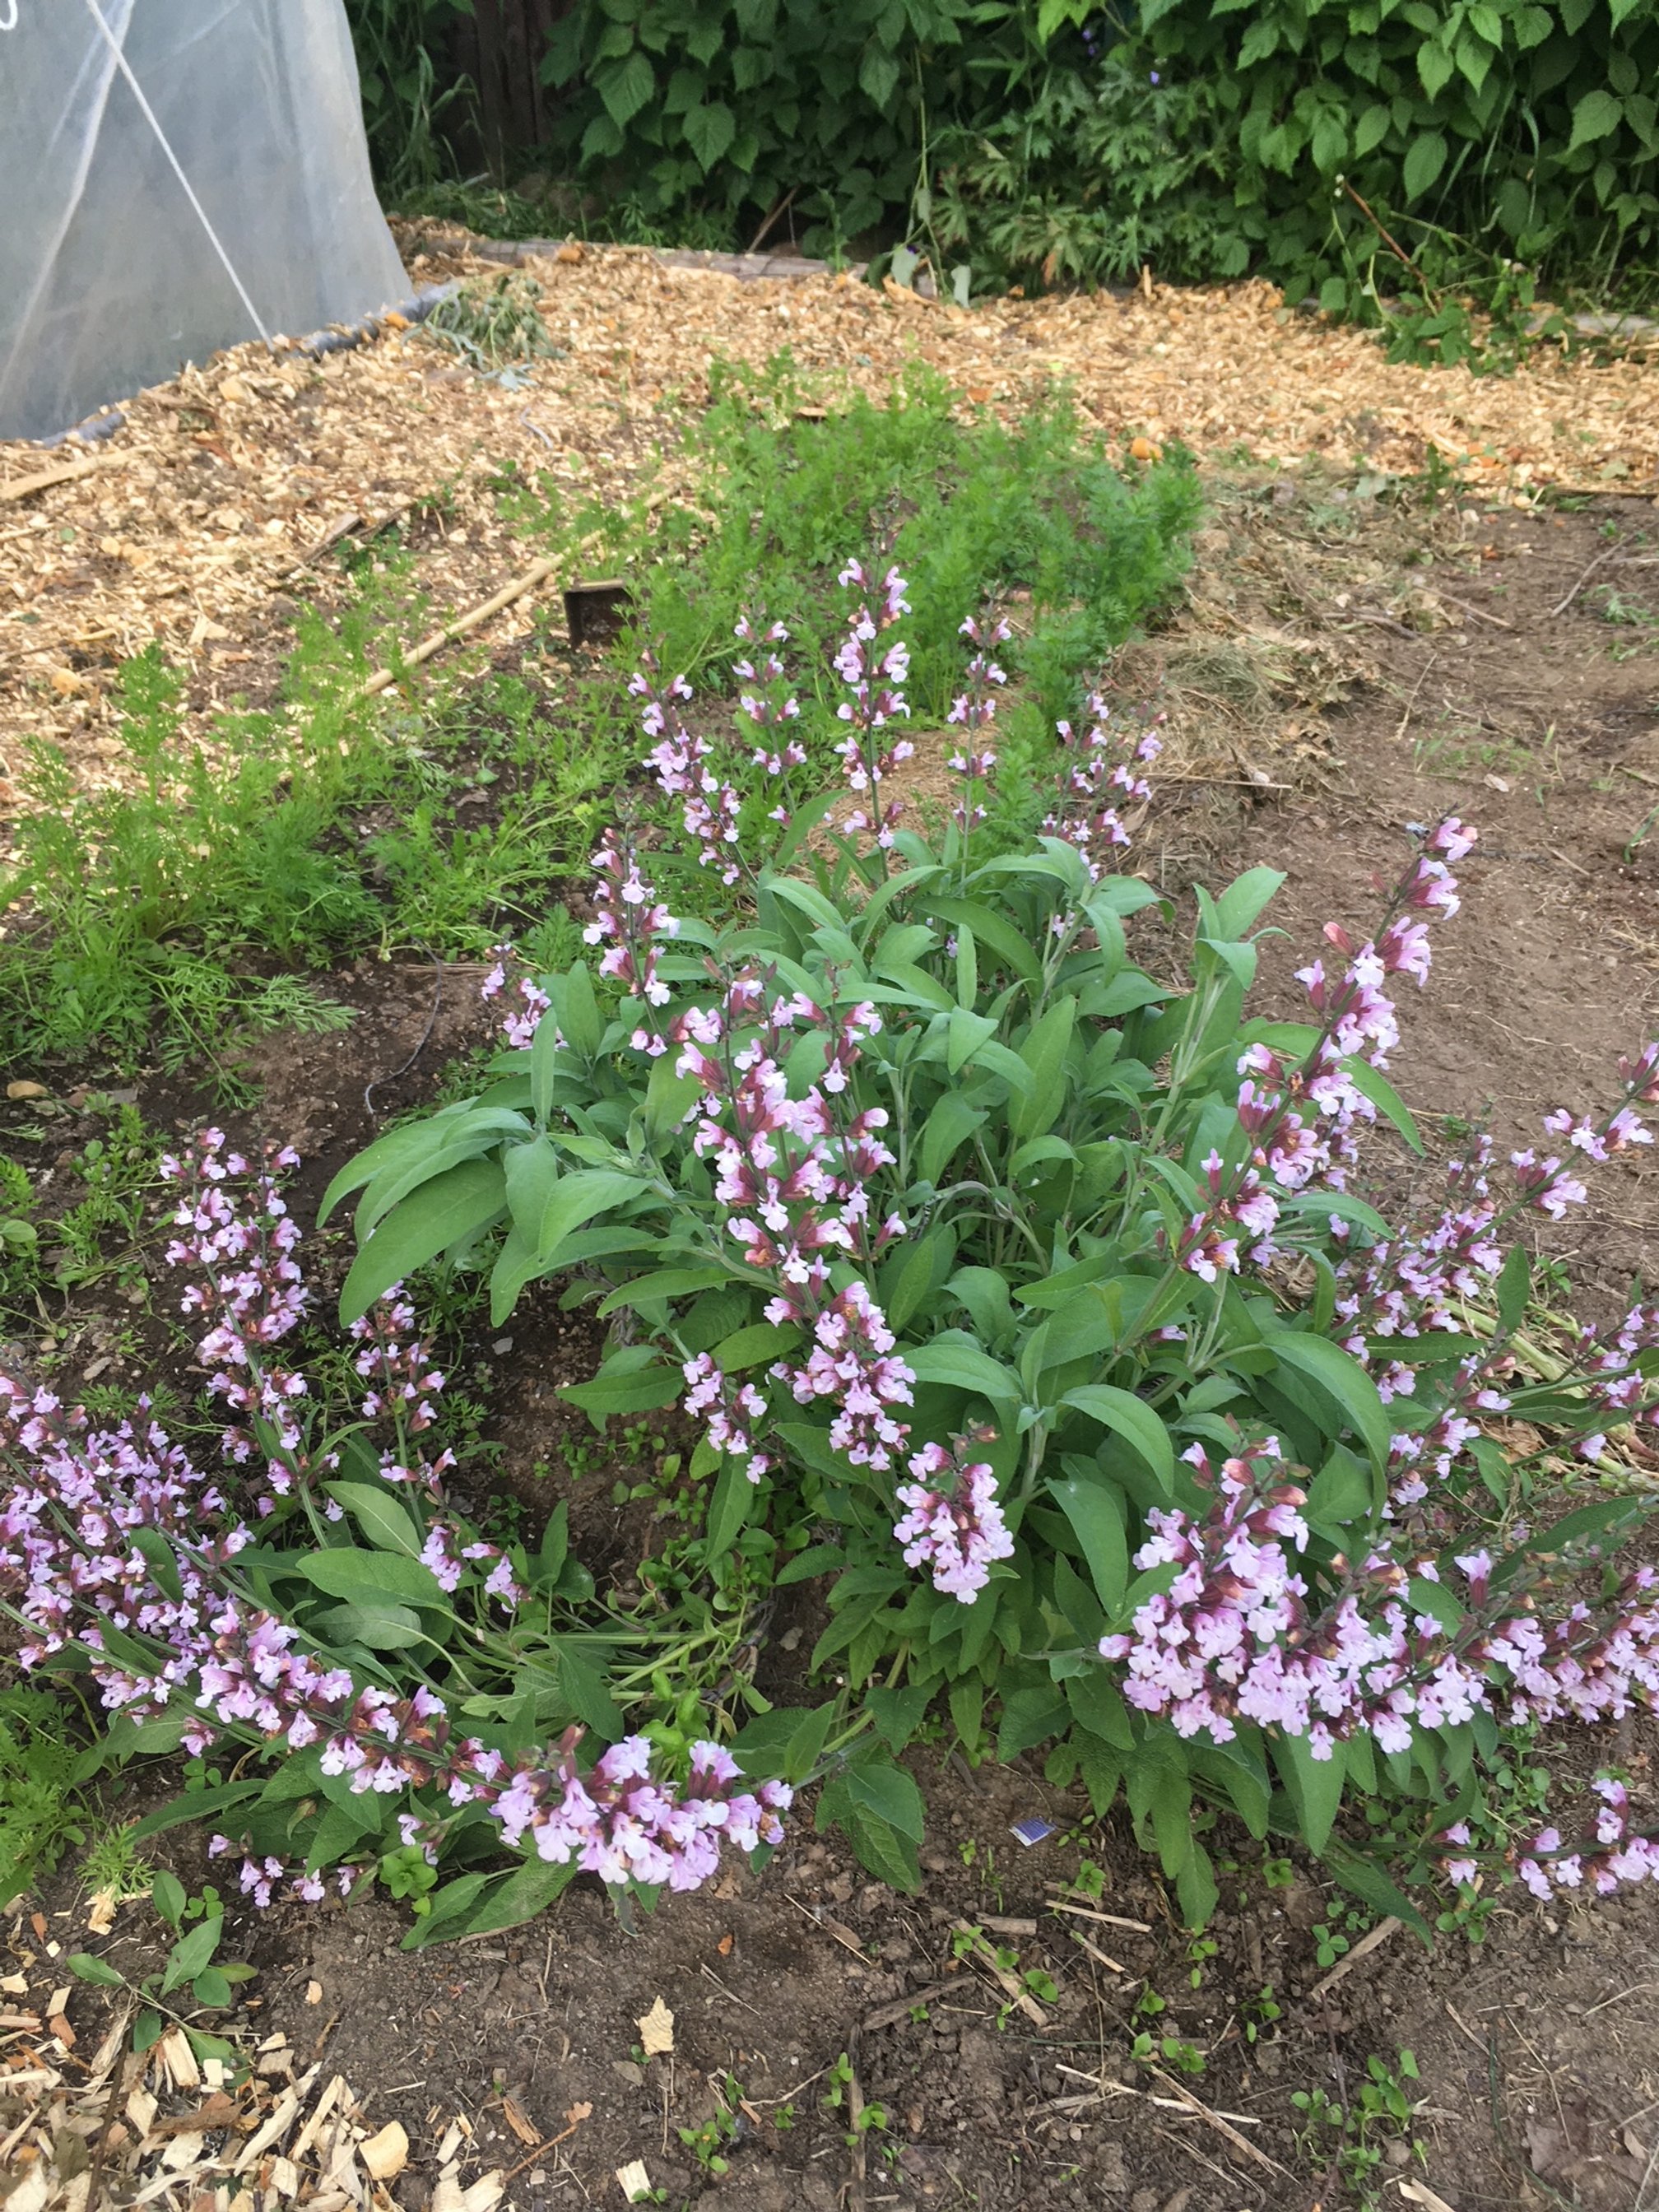
Sage, flowering in it’s second year in my backyard garden.
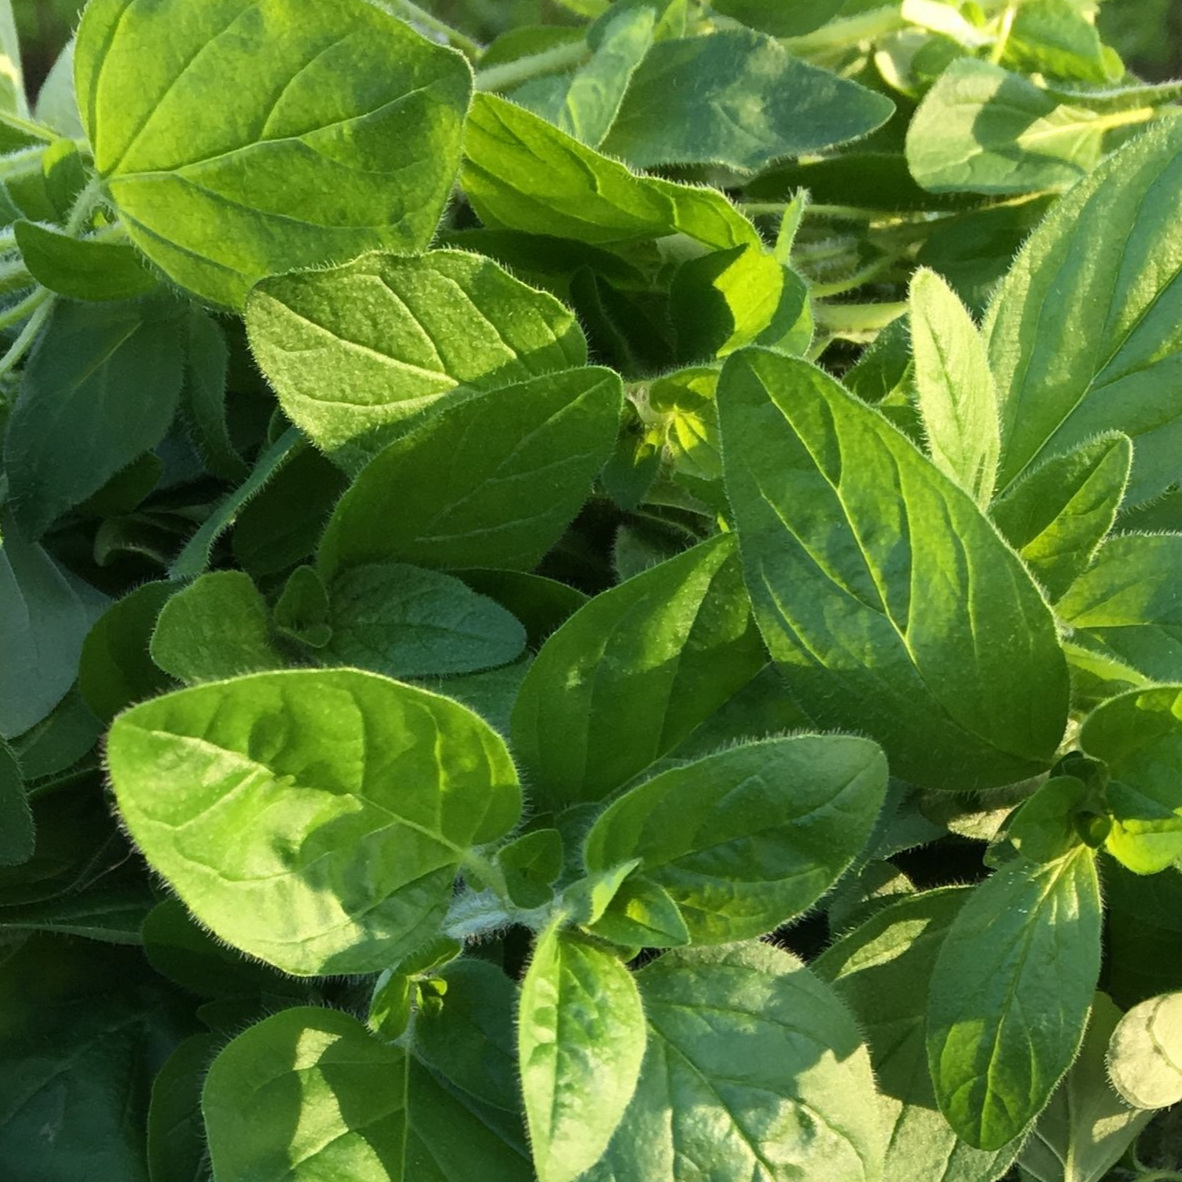
Addition #5 for your multi-purpose pollinator garden: Oregano
Oregano is a perennial herb that is commonly used in Italian and Mediterranean cuisine.
It produces small, pink or purple flowers in the summer, which are a great source of nectar for bees and other pollinators.
Oregano is also known to repel some garden pests, making it a great companion plant. I love popping oregano into a bouquet - it’s purple flowers make a nicely scented filler.
Addition #6 for your multi-purpose pollinator garden: Mint
Mint is a hardy herb that is easy to grow and has a refreshing scent.
It produces small, white or purple flowers in the summer, which are a great source of nectar for pollinators.
Mint spreads enthusiastically, so it is best to plant it in a container or a designated area of the garden. You will have extra plants to dig up and give away or compost every year.
Addition #7 for your multi-purpose pollinator garden: Chives
Chives are another easy-to-grow herb that can be used in pollinator gardens.
They produce pretty pink or purple flowers in the summer, which are a great source of nectar for bees and other pollinators.
Chives are also known to repel some garden pests, making them a great companion plant. Every year they grow into bigger clumps that can then be divided and spread out or given away to your neighbors. The flowers are edible, look great in a vase and dry well hung upside down.
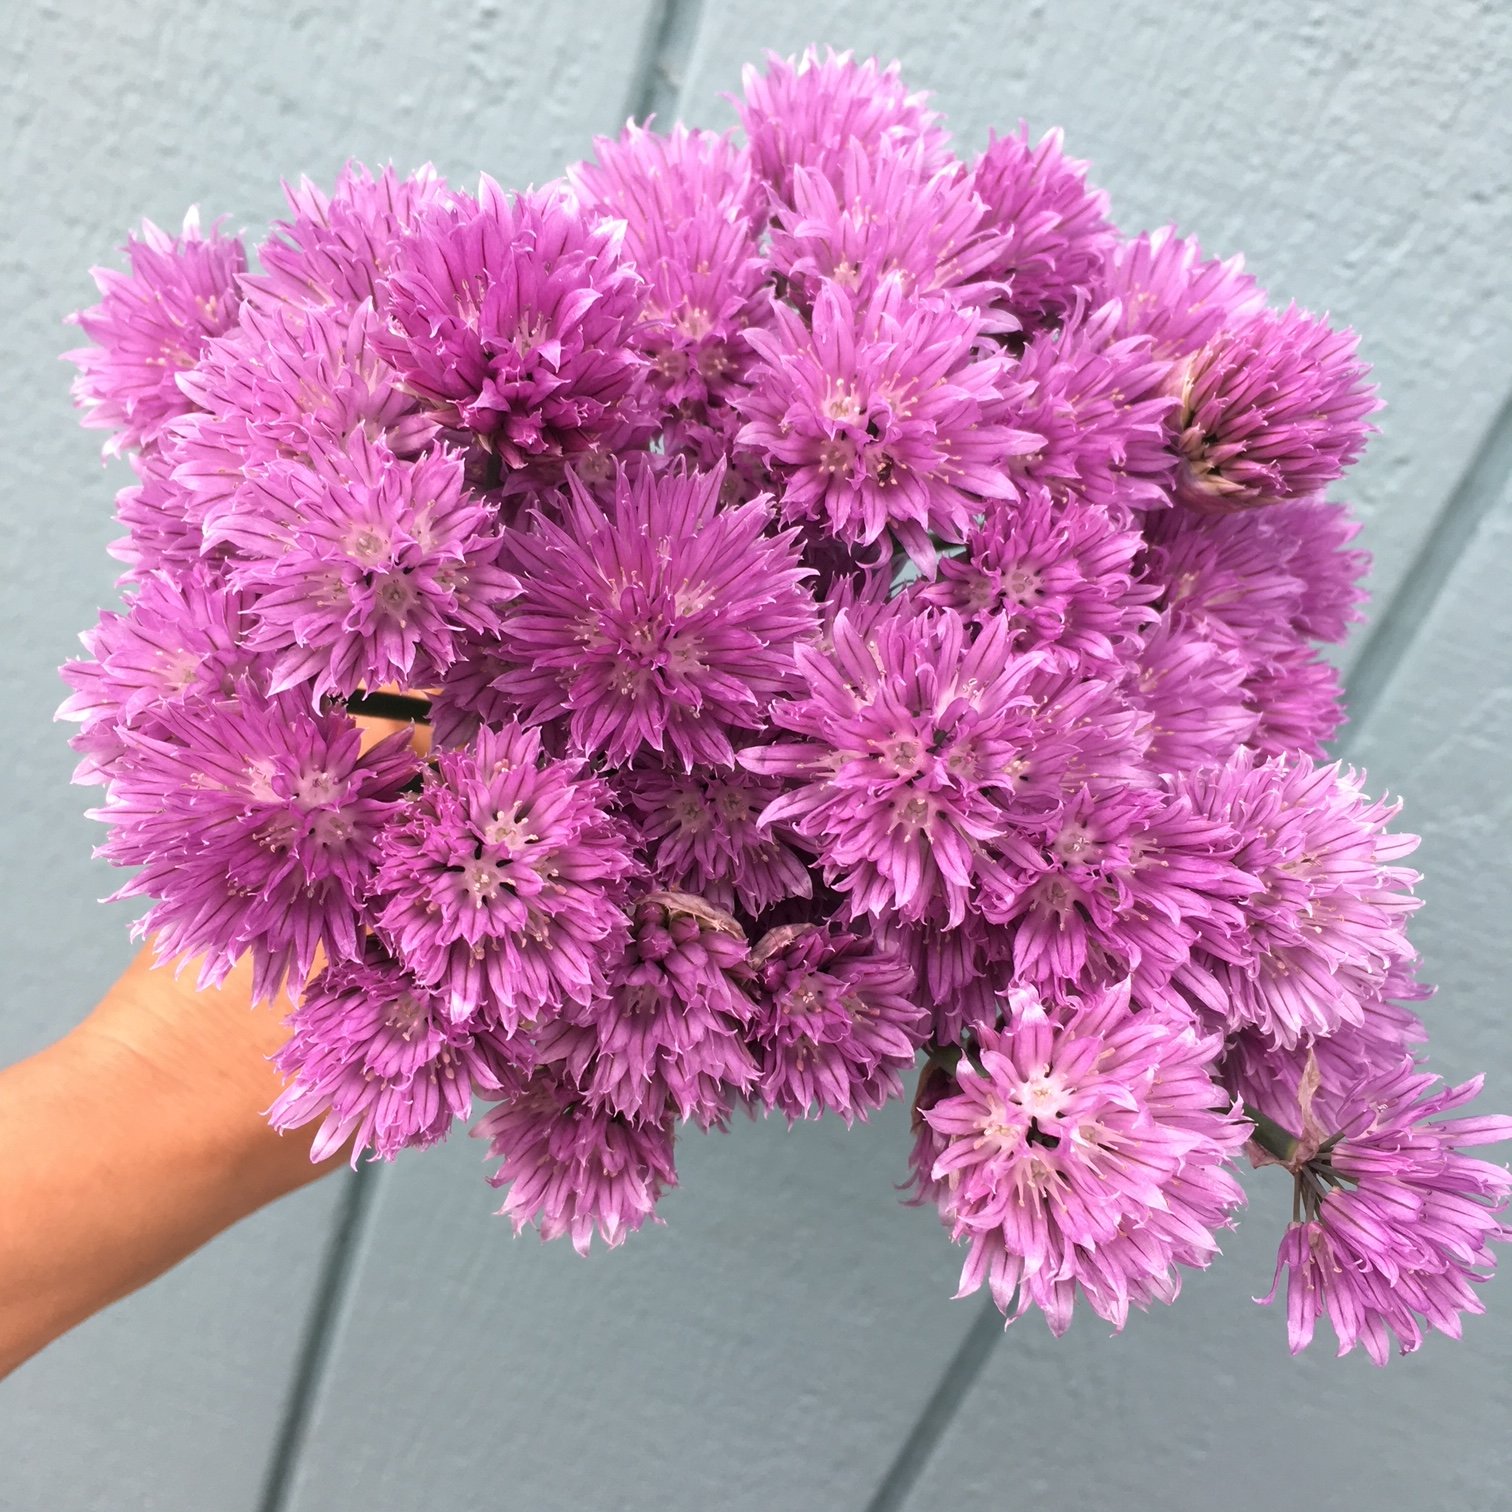
Chives are a fabulous herb, attract pollinators and look great in a vase.
Maintaining your Pollinator Garden
Once you’ve established your culinary-pollinator-cutting-garden, maintain it properly to ensure that it continues to provide a habitat for pollinators.
This includes watering the plants regularly, fertilizing as needed (with organic fertilizers and compost) and frequently cutting flowers for your bouquets so the plants keep producing more stems.
Remember to avoid the use of pesticides (natural and conventional) in a pollinator garden, as you will kill not only the bad bugs but the good bugs too. This is the reason I’ve never sprayed anything in my garden. Even some of the natural and organic sprays will kill the beneficial bugs.
Creating a pollinator garden with culinary herbs is a great way to support pollinator populations while also providing a source of food and flavor for yourself and super cool additions to your home grown bouquets.
By following the tips outlined here, you can create a beautiful and functional pollinator garden that will benefit both pollinators and humans alike.
Storage Notes:
I keep all the herbs I cut from my garden in a small jar of water on the counter.
Some dislike the fridge (basil) and will often get lost in the crisper.
No one likes to discover rotten home-grown herbs weeks later in the bottom of the crisper!
Grasses and Greenery to Elevate your Home Cutting Garden
Once you have a nice collection of flowers planned for your home cutting garden, you are ready to take it to the next level.
It’s time to start growing grasses and greenery.
Here are some of my favorite varieties from this genre of plants.
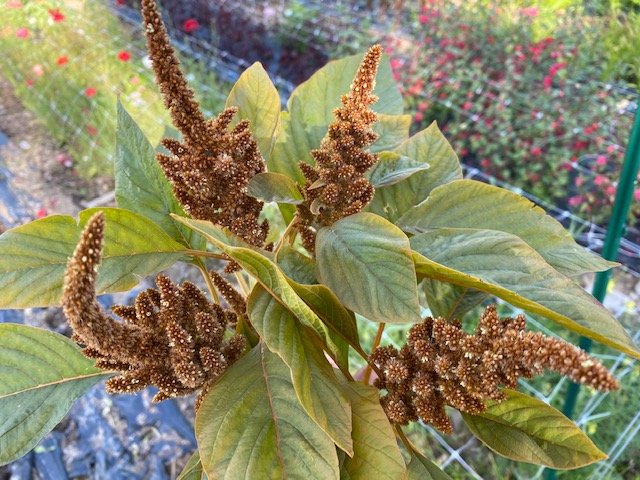
Amaranth - level of difficulty: moderate.
Amaranth is a grass that has beautiful upright or cascading seed heads.
Hopi Red Dye and Hot Biscuits are my favorites right now although I’ve grown so many different varieties over my 7 years of flower farming.
Plant in week 17 and 19.
Although these grow easily and vigorously I call them moderately challenging because they tend to prefer heat.
Amaranth would grow out of control in my original flower garden in the steamy mid-west heat.
Up in Alaska, they grow slower and are sensitive to cold temps. I’ve lost a few plantings by optimistically planting these out too early.
Pinch when plants are 4 - 6 inches high.
Hot Biscuits Amaranth in the Turnstone Farm Garden.
Atriplex - level of difficulty: easy.
Plant in week 13 and 15.
Pinch when plants are 4-6 inches high OR plant 3-5 seeds to a cell. This will stunt them a bit to make the stems more manageable.
These easily self-seed so be careful - you will have to “weed” these out of places you don’t want them.
Harvest when seed heads have matured completely. Pop in a vase or hang to dry.
Bells of Ireland - level of difficulty: challenging.
Plant indoors in week 15 and 17.
I call these challenging because germination can be spotty and slow, so I often like to pre-sprout in damp paper towels before planting.
Pinch once plants are 4-6 inches tall to promote more stems per plant.
Harvest when the “bells” are firm to the touch.
Bupleurum - level of difficulty: challenging.
Maybe it’s just me, but I find this one challenging to grow. It does prefer to be direct seeded but I like to get a head start indoors.
Plant starting in week 13. You could plan for 2 to 3 successions spaced 2-3 weeks apart if desired.
Be patient as it can take a little longer to germinate.
Harvest when the flower heads are fully open - the flower heads stay green. You can also hang to dry at this stage as well.
Cress - level of difficulty: easy.
Penny, Persian or Wrinkled are what I grow. Seeds save well after being dried.
Plant in week 15 and 18.
Harvest when seed heads are fully mature.
Dill - level of difficulty: easy.
“Bouquet” is the variety best for cutting.
Plant in week 15. You could try a few successions 2 - 3 weeks apart.
I only do one planting since aphid pressure becomes high in my garden later in the summer. I’ve gotten rid of this problem by not replanting dill and certain varieties of kale.
Harvest when seed heads are fully mature.
Add to an arrangement or hang to dry.

Bouquet Dill in a Turnstone Farm wedding arrangement. Photo courtesy of Erica Rose
Fennel - level of difficulty: easy
“Bronze” is lovely but you can try other varieties too. They all offer great ferny and delicate elements to your arrangements.
Start in week 14 and 17.
Harvest at various stages for fun elements. Or wait for seed heads to mature fully to add to bouquets or hang to dry. Smells heavenly.
Figwort - level of difficulty: easy
Plant in 13. This is actually a perennial to zone 4 but will flower the first year. I have yet to discover if it will come back in my garden but there’s no reason to think it won’t.
Harvest when flower heads are fully mature.
Grass - level of difficulty: easy
Highlander, Lowlander, Green Drops and Ruby Silk are 4 of my favorites. But try others! There are many.
Grasses are so fun to grow!
Plant in week 15 and 17.
Remember that one seed equals one grass, so you can cluster 5-7 seeds in one cell or pot when planting.

Ruby Silk Grass from the Turnstone Farm Garden
Scented Geranium - - level of difficulty: moderate
I took a few cuttings from a plant in my son’s school. I now have 7 big and bushy plants sitting in my window waiting to go outside for the summer.
Heres what I did:
1) Take a cutting (feel free to pop by my garden and ask for a cutting in the fall).
2) Place cutting in damp soil or a bit of water. You could add some propagating hormone, but mine sprouted roots without.
3) Once you see roots sprouting, pot them up.
4) Pinch back once plant is 6 inches tall to encourage branching.
5) Harden off and plant out in the garden.
6) Before the first fall frost, dig up, pop in a pot and bring inside. You now have a gorgeous house plant to place in a sunny window all winter.
7) In the spring, harden off and plant out again. You can take cuttings from this plant at any time to make more plants for your garden
Feeling unsure about starting seeds indoors go here to read my blog all it: https://www.turnstonefarmalaska.com/garden-blog/2018/10/27/seed-starting-part-3-starting-your-seeds-indoors
Grow with care and you are well on your way to a killer home cutting garden!

5 Cut Flowers for the Advanced Gardener
Try these 5 cut flowers for the advanced grower.
If you’re ready for more challenge in your garden, you are going to love these 5 cut flower!
They are a staple in my commercial cutting garden year after year. And while they take a bit more care that easier varieties, with practice you will have great success.
Dahlias
While dahlias are not hard to grow, they offer more challenges than just planting a seed.
To read more in depth on growing dahlias go here to read my blog: https://www.turnstonefarmalaska.com/garden-blog/how-to-grow-dahlias
There are hundreds of dahlias varieties that are great for the garden and the vase. Go here to read up on dahlia varieties: https://www.turnstonefarmalaska.com/garden-blog/choosing-dahlia-varieties
Harvest when the flower has fully opened but before the petals on the back side have started to wither. Dahlias do not last long in the vase but you should get a solid 3-5 days of beauty on your dining room table.

Cornel and Dreamcatcher dahlias tucked into a Turnstone Farm wedding flower arch. Photo courtesy of Lauren Roberts
Nigella
I’m planting nigella in week 16 and 19.
Varieties I love include: Black Albion Pod, Love-in-a-mist and Delft Blue.
While these aren’t officially a hard flower to grow, mine seem to take special care. In fact I wrote in my notes section next to my planting date: “take special care!”.
Nigella prefers to be direct seeded and since I don’t direct seed anything besides salad greens in my garden I think they suffer a little when transplanted.
This is a fun and super unique flower that can be harvested for the flower and for the pod. The pod dries great for everlasting bouquets.

Nigella pod in a Turnstone Farm boutonniere. Photo courtesy of Lauren Roberts
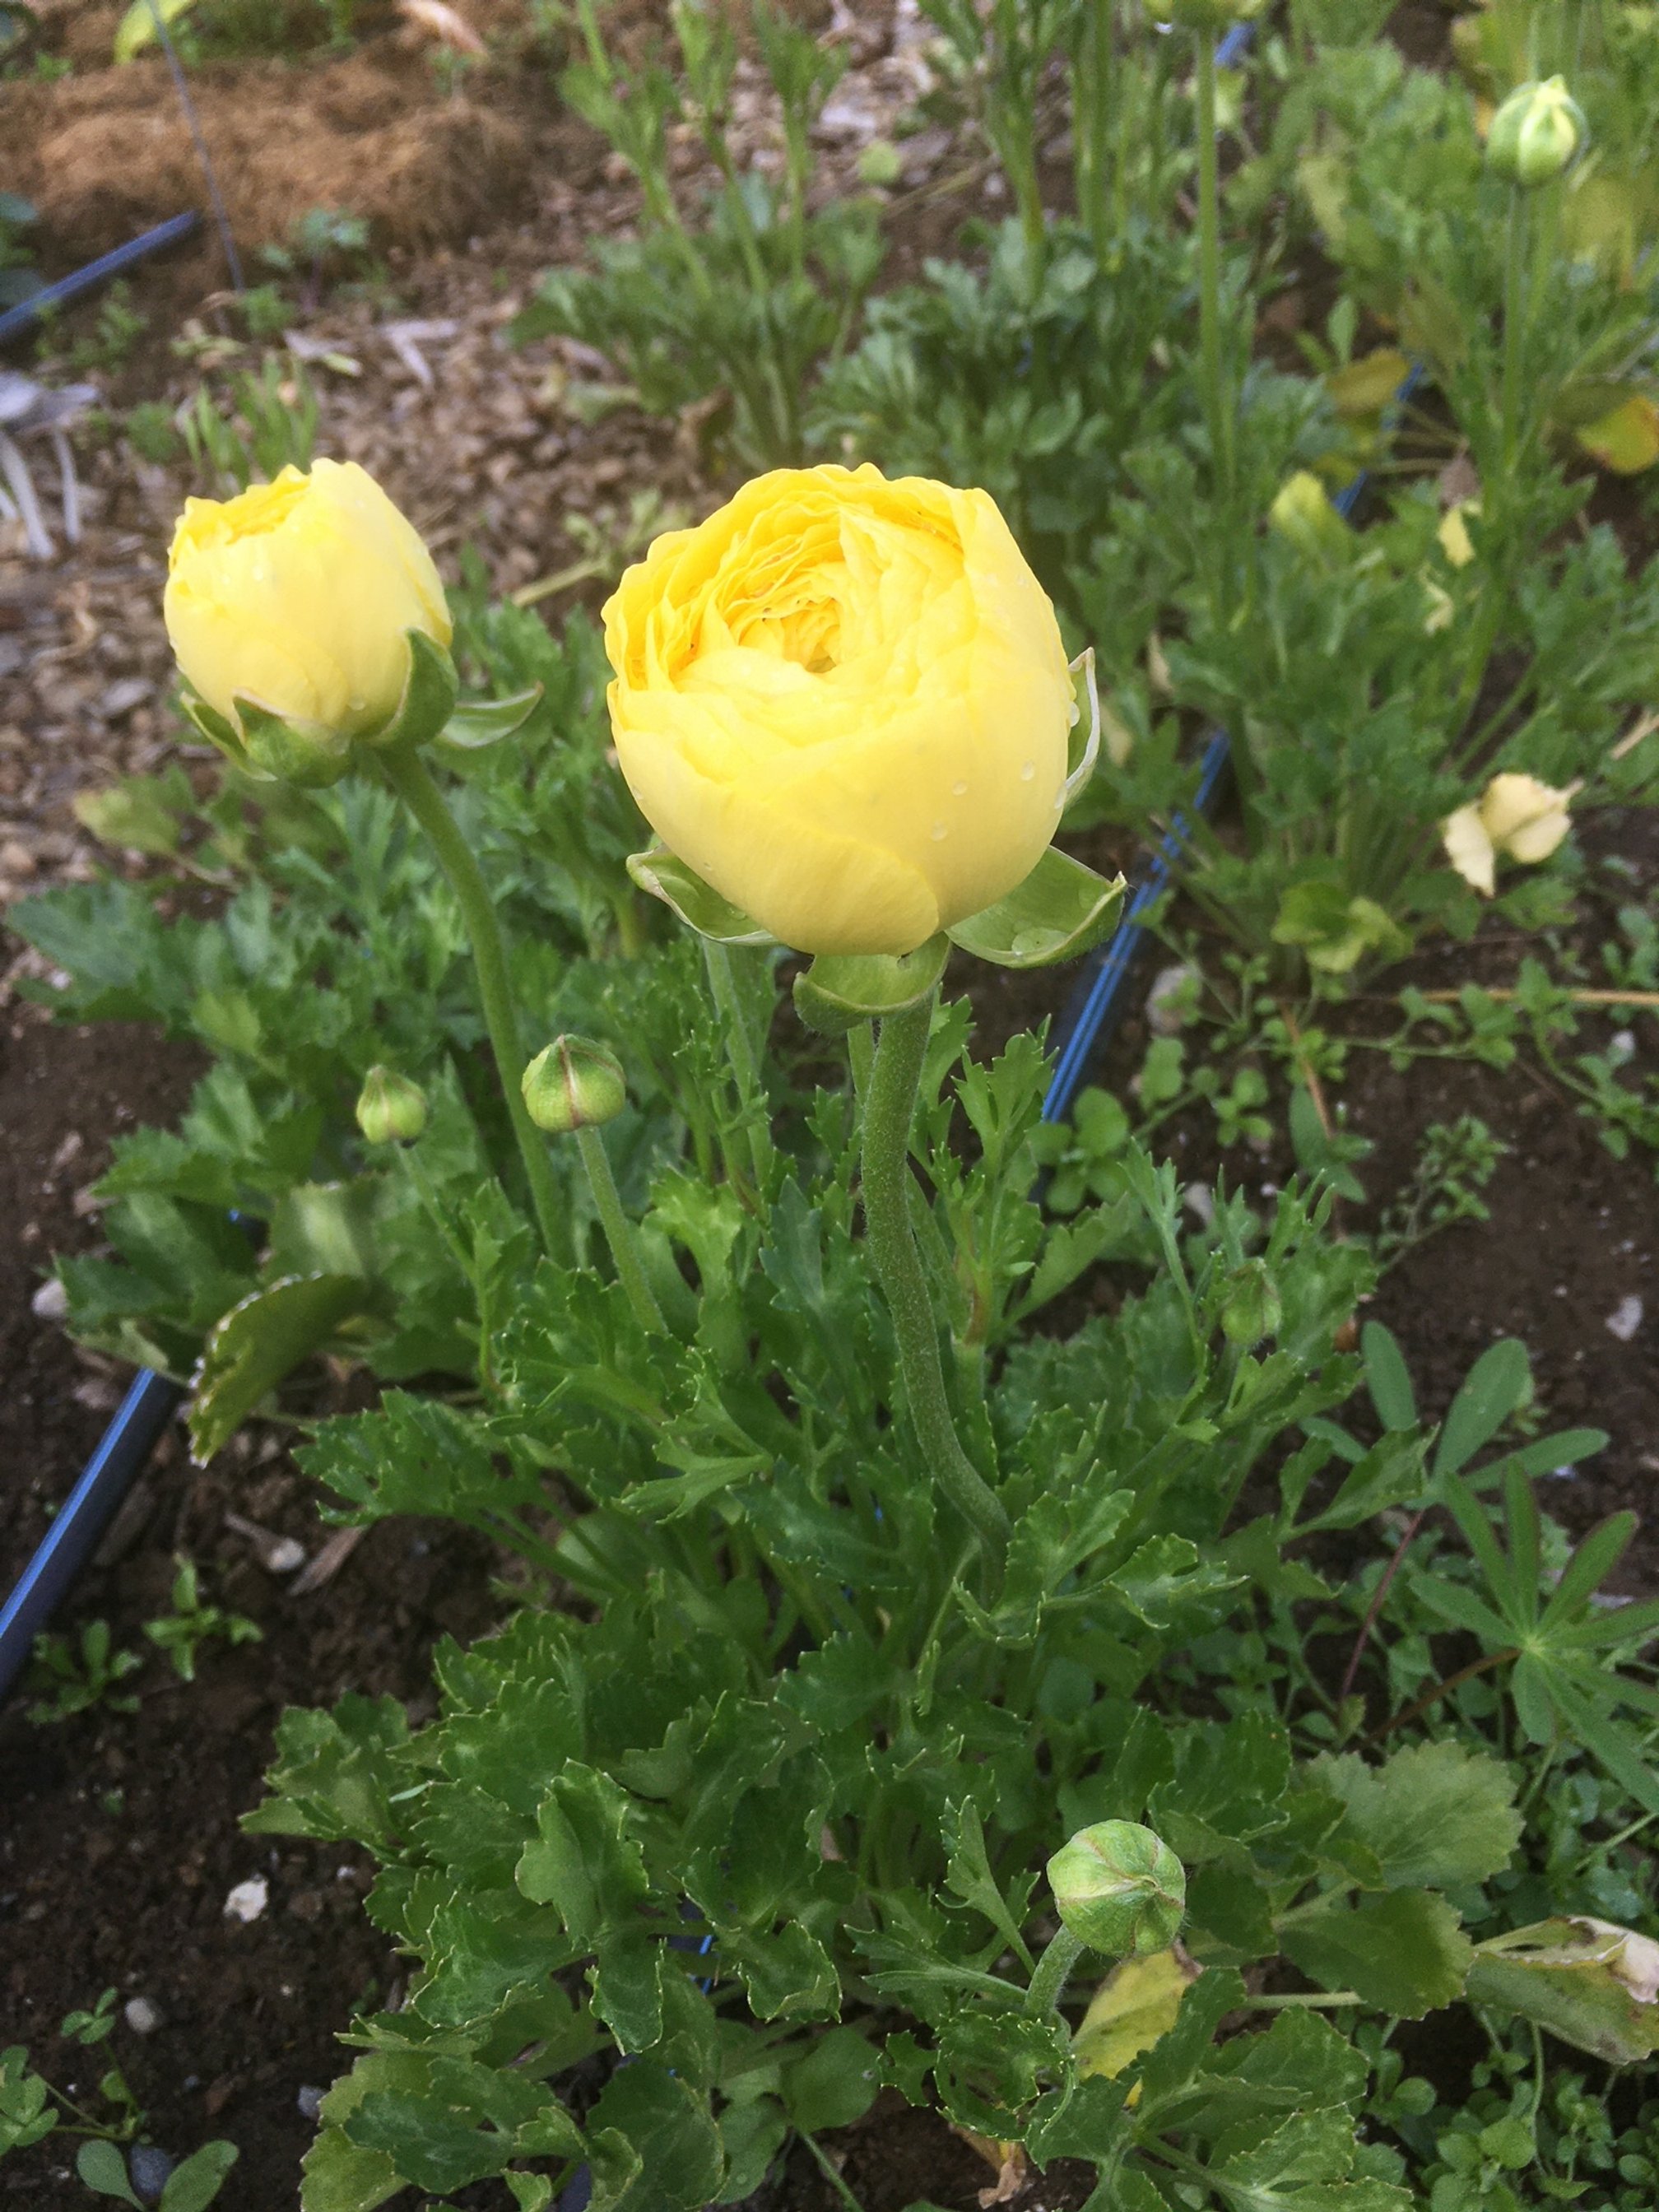
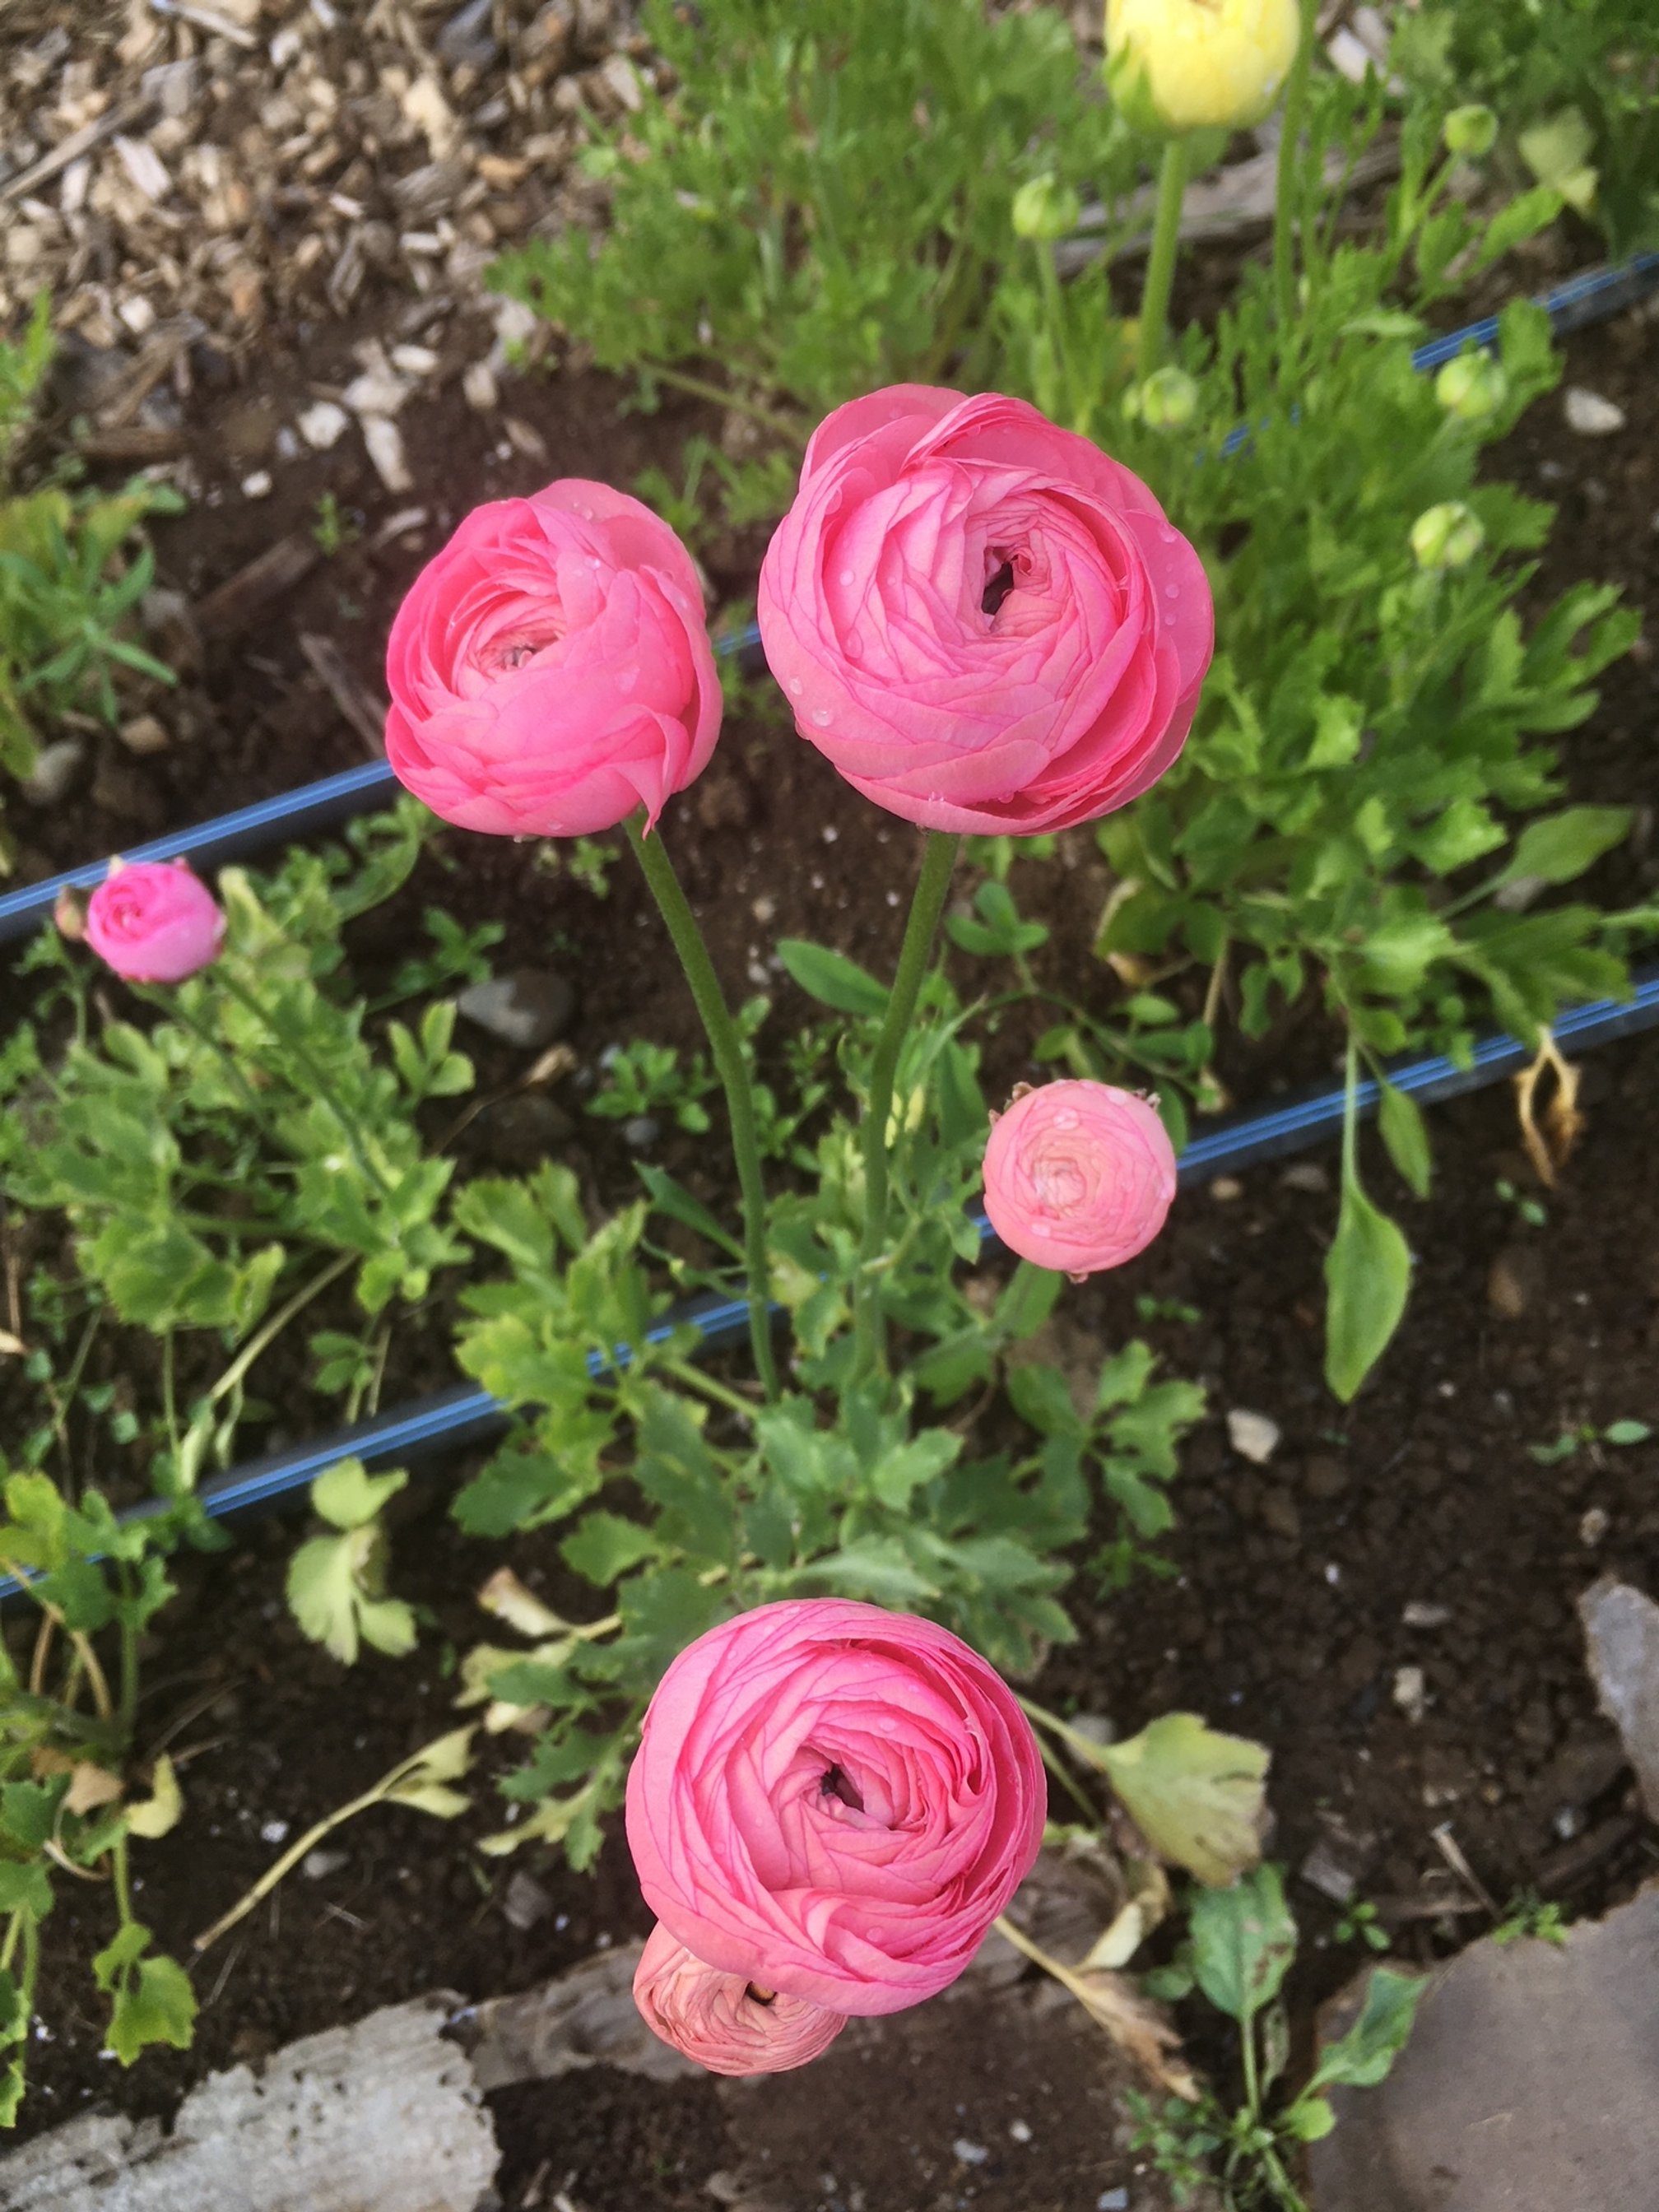
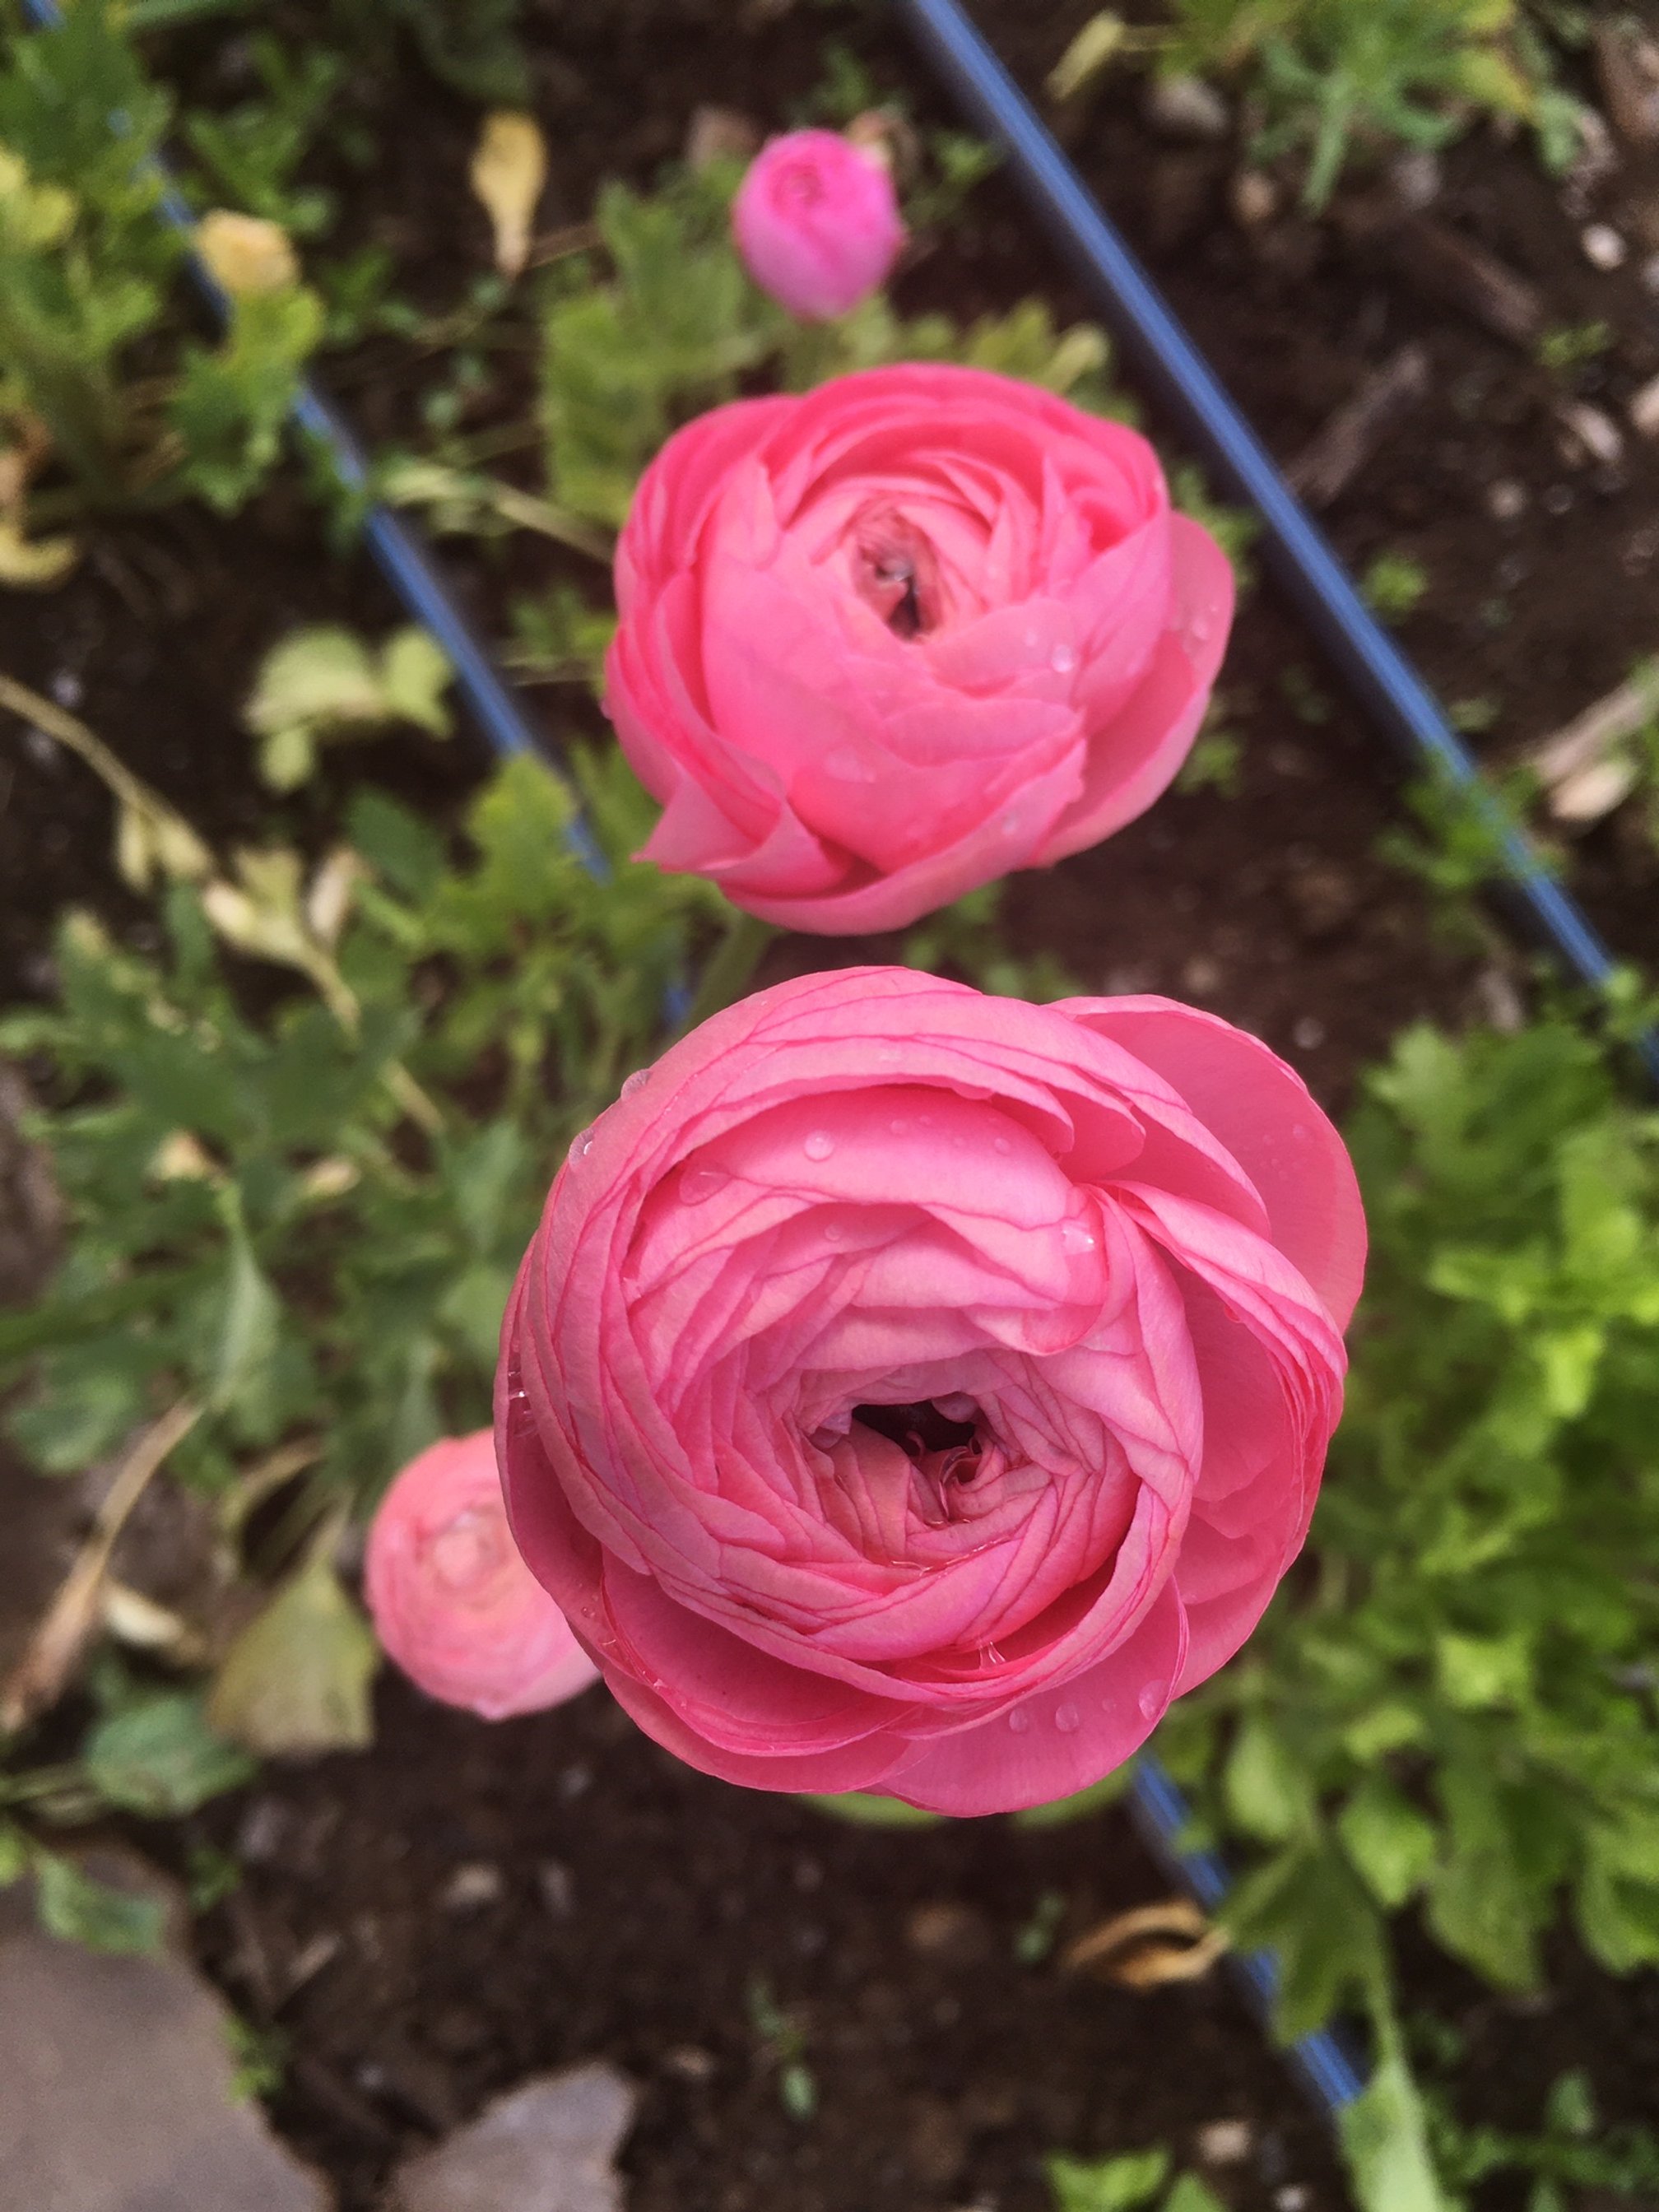
Ranunculus
I start ranunculus by corms in week 16. There is a special process for planting these so be sure to read up by clicking the link below.
Ranunculus loves cool weather. That’s why they are a great flower for northern growers. Most growers plant one round of ranunculus for spring and early summer blooms.
I recently learned how to also get in a fall crop by planting a second round in week 20. This can be a bit of a gamble because if we have a warm summer they will not thrive. But it’s worth the effort! The past two years I’ve gotten a fall harvest although the blooms seem to be smaller than my spring crop.
These can be cut for harvest as soon as the buds feel like soft marshmallows. The more stems you cut, the more blooms you get per plant.
For a more in depth look at growing ranunculus GO HERE to read my blog: “How To Grow Ranunculus”
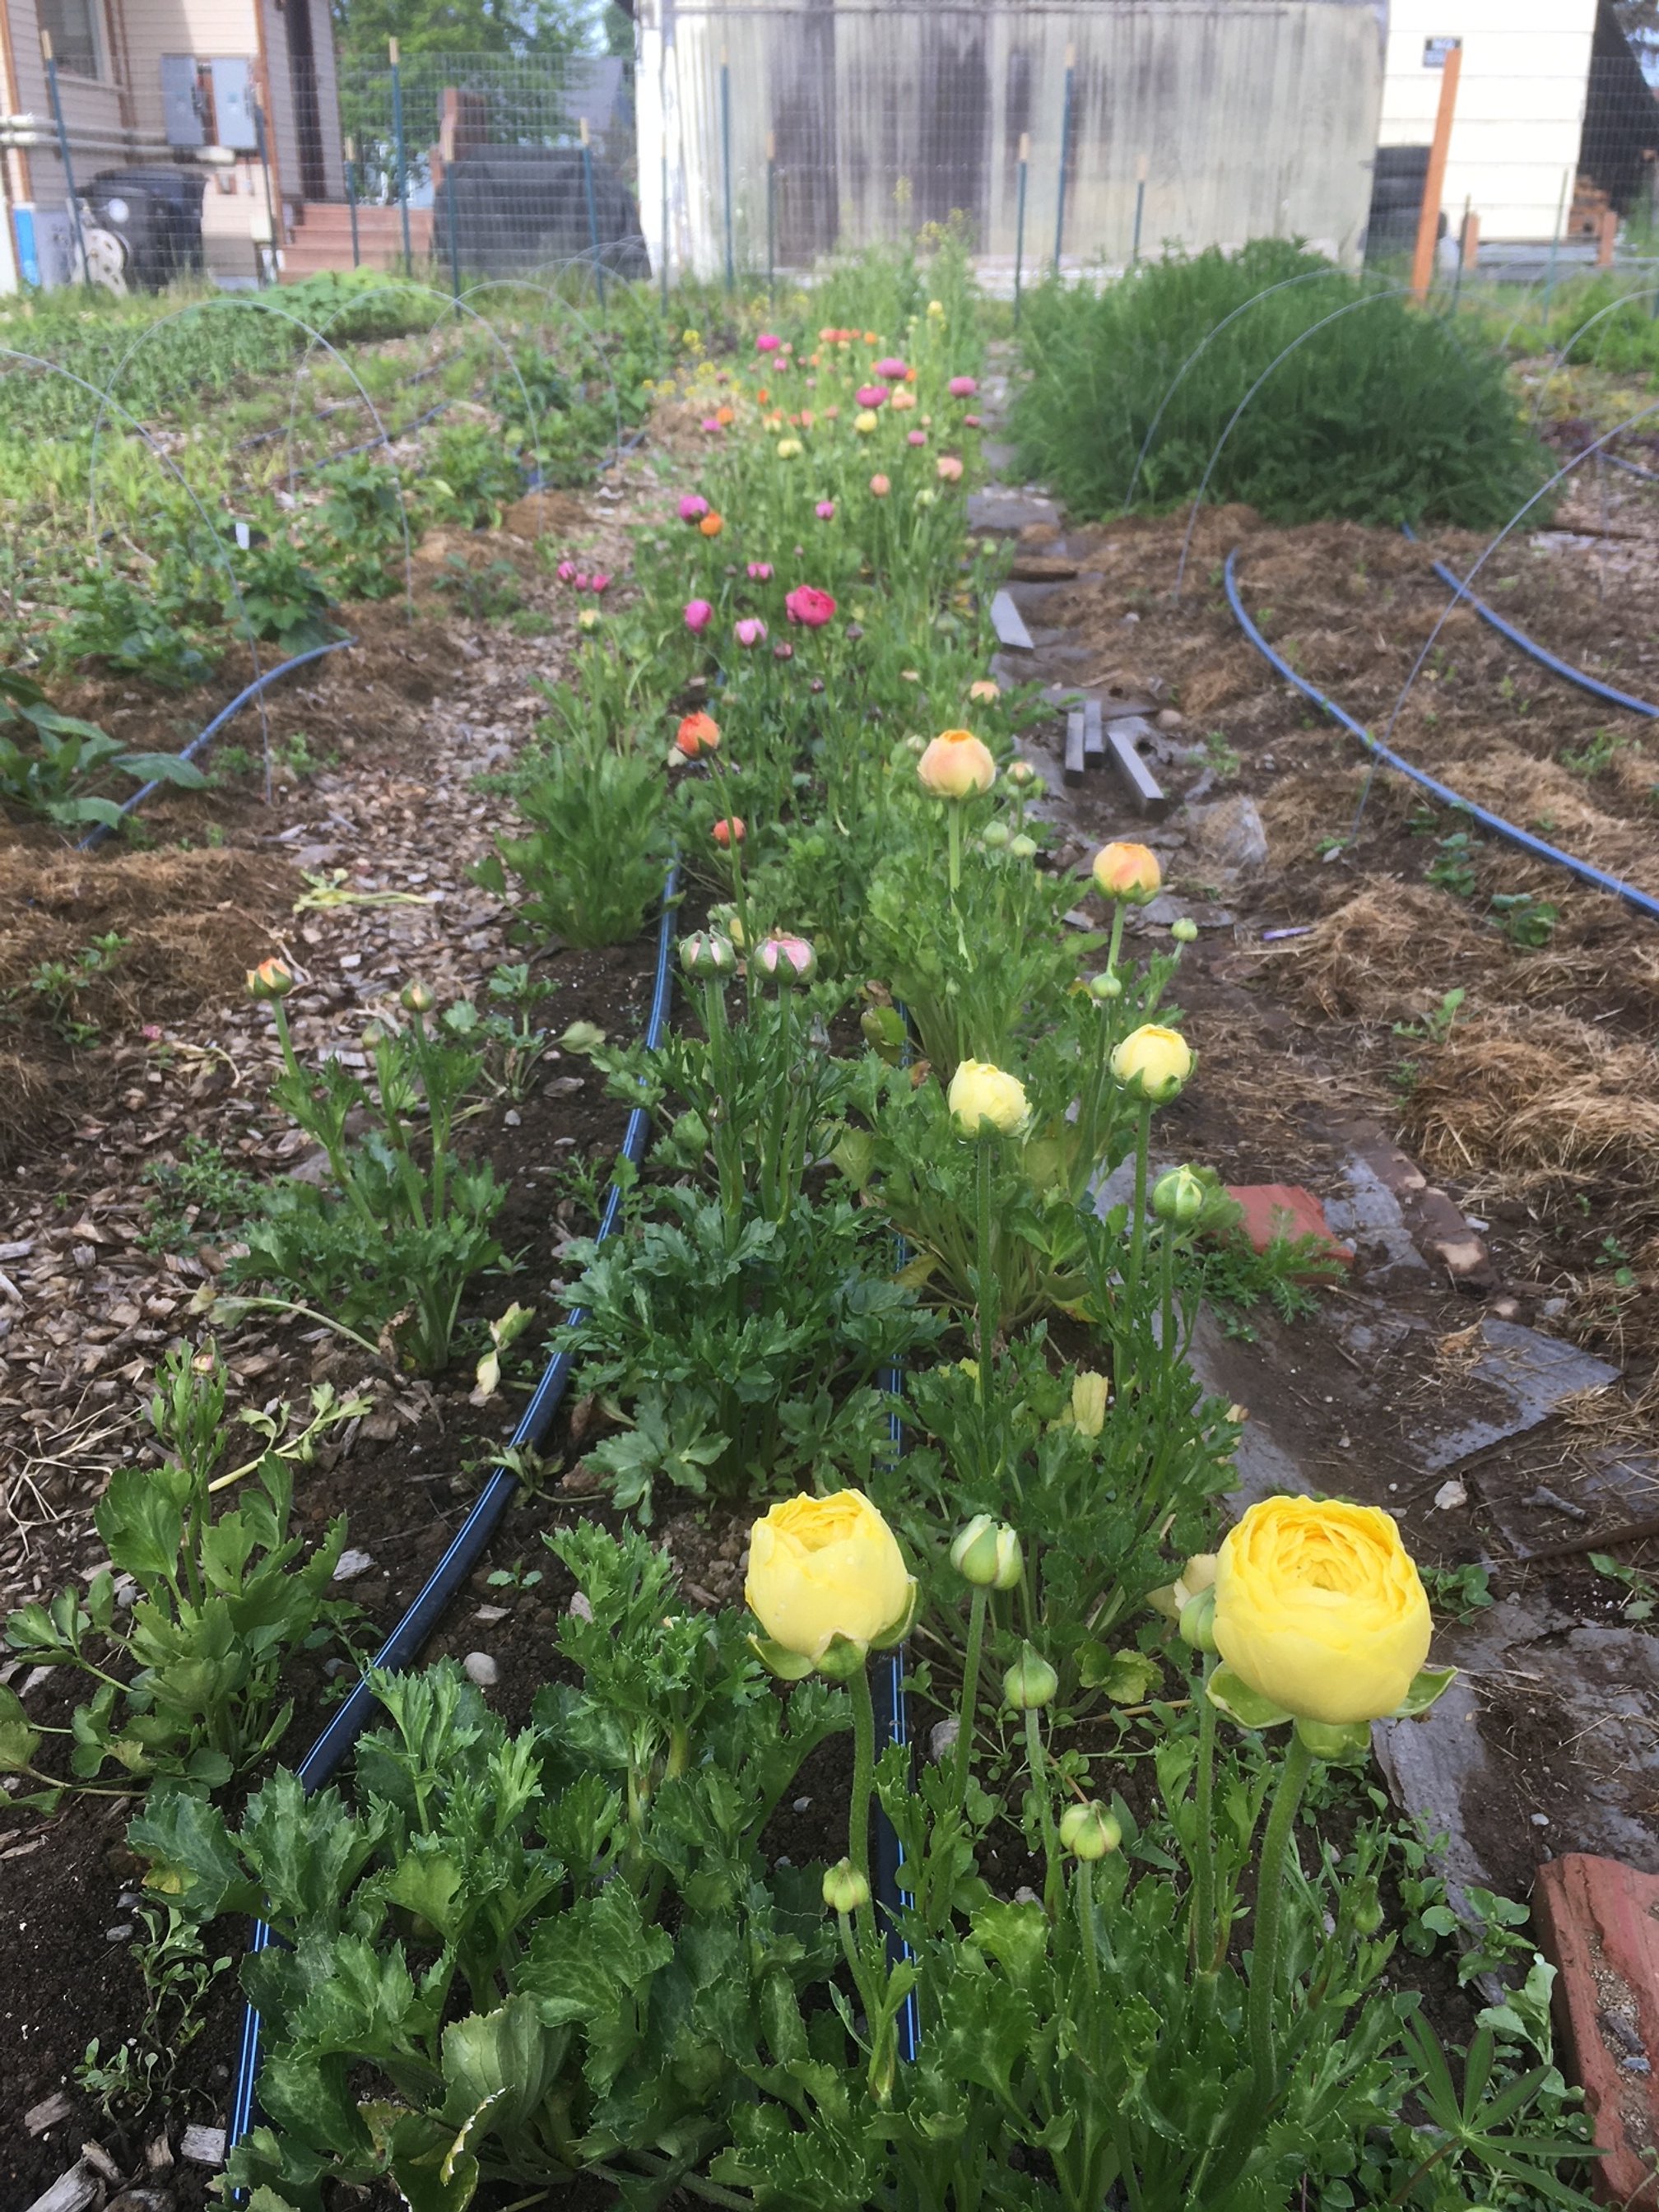
Yellow ranunculus is a luxurious and wildly popular wedding flower. Photo credit Corrine Graves
Anemones
Anemones are one of my absolute favorite flowers. I grow different varieties each year, so just search around for colors that look amazing to you. I’m starting mine in week 13 only.
These are started very much like ranunculus. Follow the instructions for planting ranunculus here: https://www.turnstonefarmalaska.com/garden-blog/how-to-grow-ranunculus
Ideally you’ll harvest these for the vase after the flower has fully opened once and closed once (they close at night). This is just about impossible to keep track of, so I just harvest when the flower is almost fully open.
Anemones have a fabulous vase life. They don’t ship well so you will almost never see good looking ones anywhere but in your garden, at a farmers market or in your Turnstone Farm bouquet.

Anemones from the Turnstone Farm garden.
Stock
I’m starting all my stock in week 13. This is considered a one and done flower, meaning you grow one plant for one bloom and then the plant is done.
Because of this, I would usually plant 2-3 successions. But because stock dislikes heat I stick to only one early season planting. It would be worth testing a planting that’s mature in time for fall. Perhaps I’ll try a few this year to see how they fare!
Stock is an early season bloomer that helps fill the gap between tulips and all the other garden varieties.
Its smell cannot be beat and the flowers are edible.
It lasts for a solid week to two in the vase and the dried petals can make a heavenly smelling potpourri once dried.
It comes in a variety of colors: white, apricot, purple, light and bright pink and yellow.
While a more challenging flower to grow as it must be started earlier, dislikes dry conditions (spring 2022 anyone!), and dislikes heat, it is well worth the challenge.
Purple stock helps fill out these early season Turnstone Farm bouquets.

Grow Your Own Cutting Garden: 10 Cut Flowers for the Intermediate Gardener
Add a little challenge to your home cutting garden with these 10 varieties.
If you’ve already mastered some of the beginner cut flowers I reference here in my last blog, you’re ready to add a few more challenging flowers to your garden.
I classify these as more intermediate because each of these varieties may have one or more needs:
the need to be started earlier and usually indoors
more time babying them inside
particular needs when harvesting
the need for succession planting
For greater ease in growing any of these, skip the succession planting for now and just do one planting of each during the last seeding week I mention for each variety.
If you want to test your skills further, pick a few to succession seed for a longer blooming garden.
Campanula
These are fun and delicate blooms that look fabulous in the garden.
I also use them consistently in my wedding work.
In the vase they lasted a good 1-2 weeks in good condition.
This is an all round excellent flower.
Cut these for the vase when the first flower opens up as the other buds will continue to open in the vase.
Cosmos
Cosmos is a staple of mine every year. Varieties I love are: Rubenza, Double Click Varieties and Cupcakes.
I plant mine in two successions, one starting week 15 and another starting week 18. The varieties I plant in week 18 are usually more fall themed colors like Rubenza and Double Click Cranberries.
Pinch these when 4-6 inches tall to get the most blooms per plant.
These flowers are delicate and ephemeral. They look stunning and full in the garden and marvelous in the vase.
Part of their joy is that they can’t be shipped since they are so delicate.
You can only have these in your vase if you grow them yourself or buy from a local farm.
Harvest when just beginning to open for longest vase life.

Double Click Cosmos in the Turnstone Farm Gardens
Dianthus
I fell in love with the “Sweet” varieties last year and am growing three different colors from this line.
My seeding will occur during week 13 and 15.
Harvest for the vase when the florets are 10-20% open. They will continue to open in the vase giving a solid 2 weeks of vase life.
Godetia
While this one didn’t make my initial “best of” list I’m still listing it here for the home gardener. “Grace Mix” gives you a nice variety of colors for your garden.
I’m giving this one more go this coming year to see if I can get a bit more length to the stems.
I’m seeding these in week 15 and 18.
Godetia will last forever in the garden and in the vase - florets just keep opening up. It is short and sturdy for garden beds.
The petals are easily damaged by rain. Although we had an exceptionally rainy summer in 2022 which was my first year growing these.
Phlox
Cherry Caramel, Dulce de Leche and Sugar Stars are what I grow each year.
I start these in week 14, 17 and 19.
These are delicate blooms that have a solid vase life. Harvest when the flower just begins to show color. If you cut before they are fully open they will open in the vase.
This is a solid cut and come again flower and the more you cut, the more blooming stems will grow.
Scabiosa
This is a tall plant with long strong stems.
I love “Black Knight”, “Oxford Blue” and “Fire King” but there are many more fabulous varieties.
Start in week 13 and week 16.
Scabiosa looks whimsical and lively in the garden or you can cut it just when the first florets begin to open. When cut at this time it will last a solid 1-2 weeks in the vase.
Scabiosa loves cooler temperatures so does better in our cooler Alaskan summers.

Black Knight Scabiosa
Snapdragons
My go to variety is any color in the “Potomac” variety family. They are strong and sturdy with fabulous blooms.
If you want something more unique try “Madame Butterfly” varieties or “Chantilly”. These two types have the most unique florets but are much more delicate and break fairly easy. If you’re just bringing them from garden to your house, they should do fabulous.
This is one of the earliest flowers I plant and I start these in week 11 and week 14. They grow slow and you can put them in the garden extra early since they can weather a few light frosts.
Harvest for the vase when 1/3 of the florets have started to open.

Me netting a bed of snapdragons in the original Turnstone Farm Flower fields in Southern Wisconsin.
Statice
These are great for a long lasting cut flower or for drying.
They come in a variety of colors but my favorite is QIS Apricot.
I start these by seed in week 12 and week 14.
Cut when most of the flowers are fully open and showing color.
Sunflowers
Although these are relatively easy to grow, I put them here for a couple reasons. The first being that they are good practice for succession planting. I plant these in weeks 18, 20 and 22.
Varieties I’m growing this year include the Sunrich series and the Procut series. I grow these each year and then will add in one fun and new variety each year.
You can succession plant sunflowers a couple ways: plant the same variety every 2-3 weeks for 3 successions. OR plant different varieties (that each have a different DTM) at the same time. Then repeat this once or twice.
You can also play with growing them close together to get the perfect sized sunflower for the vase. I space mine 4-6” apart for best results.
Harvest for the vase when petals are just beginning to unfurl but are fully colored.

Space your sunflowers 4-6” apart to create the best size flowers for your vase.
Rudbeckia
I love the Cherokee Sunset, Indian Summer and Prairie Sun varieties.
I start these by seed in week 13. I don’t find it necessary to succession seed as these are cut and come again flowers. You cut them and they keep growing new stems!
Harvest when the stems pass the wiggle test. Simple grab onto a stem and wiggle back and forth. If the bloom wobbles on a floppy stem, wait to cut until the stem has matured further. Once the flowers are fully open I check daily for a nicely rigid stem

Look at this freaking beauty!!!! Rudbeckia is stunning in the cut flower garden.
I hope this gave you new ideas for your home cutting garden this year. Start with 1-5 new varieties and see how they do!
Grow Your Own Cutting Garden: 5 Cut Flowers for the Beginning Gardener
Learn these 5 easy-to-grow for the beginning cut flower grower.
If you’re new to growing flowers for cutting I want to offer you 5 flowers that are fantastic for the beginning grower.
Master these and then you can move on to more difficult ones next year.
#1 Calendula is an easy and prolific flower.
Varieties I love are Orange Button and Ivory Princess. Orange Button is the classic bright orange calendula flower. Ivory Princess is a unique soft yellow.
Strip the petals off for a salad garnish or to dry and then add to salves or use as a natural dye.
You can start these directly in the garden or inside. I’m seeding mine in week 14 and week 17 in order to have 6 weeks of continuous blooms. I also leave the calendula patch clear in the garden because they readily self seed. You could plant these once and then simply let a few plants go to seed each fall. You will then not have to re-seed ever again!
Fun fact: some people feed calendula to their chickens to create a more orange yolk. I’m not sure it changes the nutritional value of the eggs but it does make the yolk beautiful.

Ivory Princess Calendula in the Turnstone Farm garden
#2 Bachelor Buttons are one of the earliest blooming flowers in the annual garden.
Blue Boy, Classic Magic and Black Button are fantastic varieties. I plant these once in week 14. You could definitely plan for at least two plantings for continuous blooms all season. I opt not to since cutting these small flowers is very time consuming on a large scale. They are valuable to me in the early season though, since they are one of the first to bloom in my garden.
Fun fact: Bachelor Button flowers are edible. They make for a great garnish.

Bachelor Buttons in the Turnstone Farm Garden
#3 Marigolds are one of my absolute favorite flowers.
Every year I grow Giant Orange. It is the best for cutting and produces loads of big, fragrant blooms.
I’m planting two successions: one in week 14 and one in week 16.
Make sure to pinch marigolds back when they are 4-6 inches tall. If you don’t pinch, you will only get 1 flower per plant. If you pinch, you will get many, many blooms.
Most cut flowers, including marigolds benefit from being supported by netting (shown below). This helps support them in a heavy rain or wind storm. It’s easy to lose an entire crop in one storm if you fail to do so.
Fun fact: Marigolds dry great hung upside down. They hold their vibrant color well and make for fantastic fall dried arrangements.

Giant Orange Marigolds

Be sure to net your flowers so you don’t lose them in a storm.
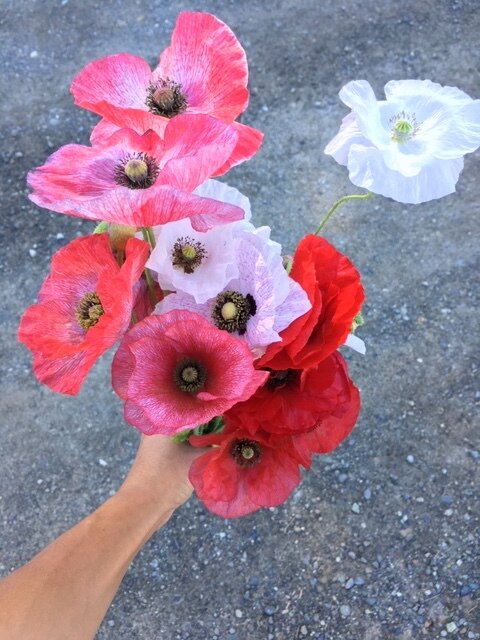
#4 Poppies are one of the most cheerful additions to the garden.
My favorite varieties include any Breadseed variety (they are the best for pod production) and any Shirley variety. They both come in many colors! Pick a few to start with and have fun.
Don’t forget to save your own seed as it is very easy to do so. I usually just let poppies self seed in the garden from the pods of the previous year. If I’m starting a new variety, I’ll start these indoors in week 20 and week 22.
The only way you’ll ever get poppies in an arrangement is if you grow your own or buy from a local farmer. Since they have a short vase life, they do not transport well. Even with the short vase life they are so worth the effort.
Harvest for the vase right when the bud is about to pop open and you can just start to see the color of the bloom.
Fun fact: poppy pods are fabulous dried and made into fall arrangements or popped into a bud vase.

Shirley poppy in the Turnstone Farm garden.
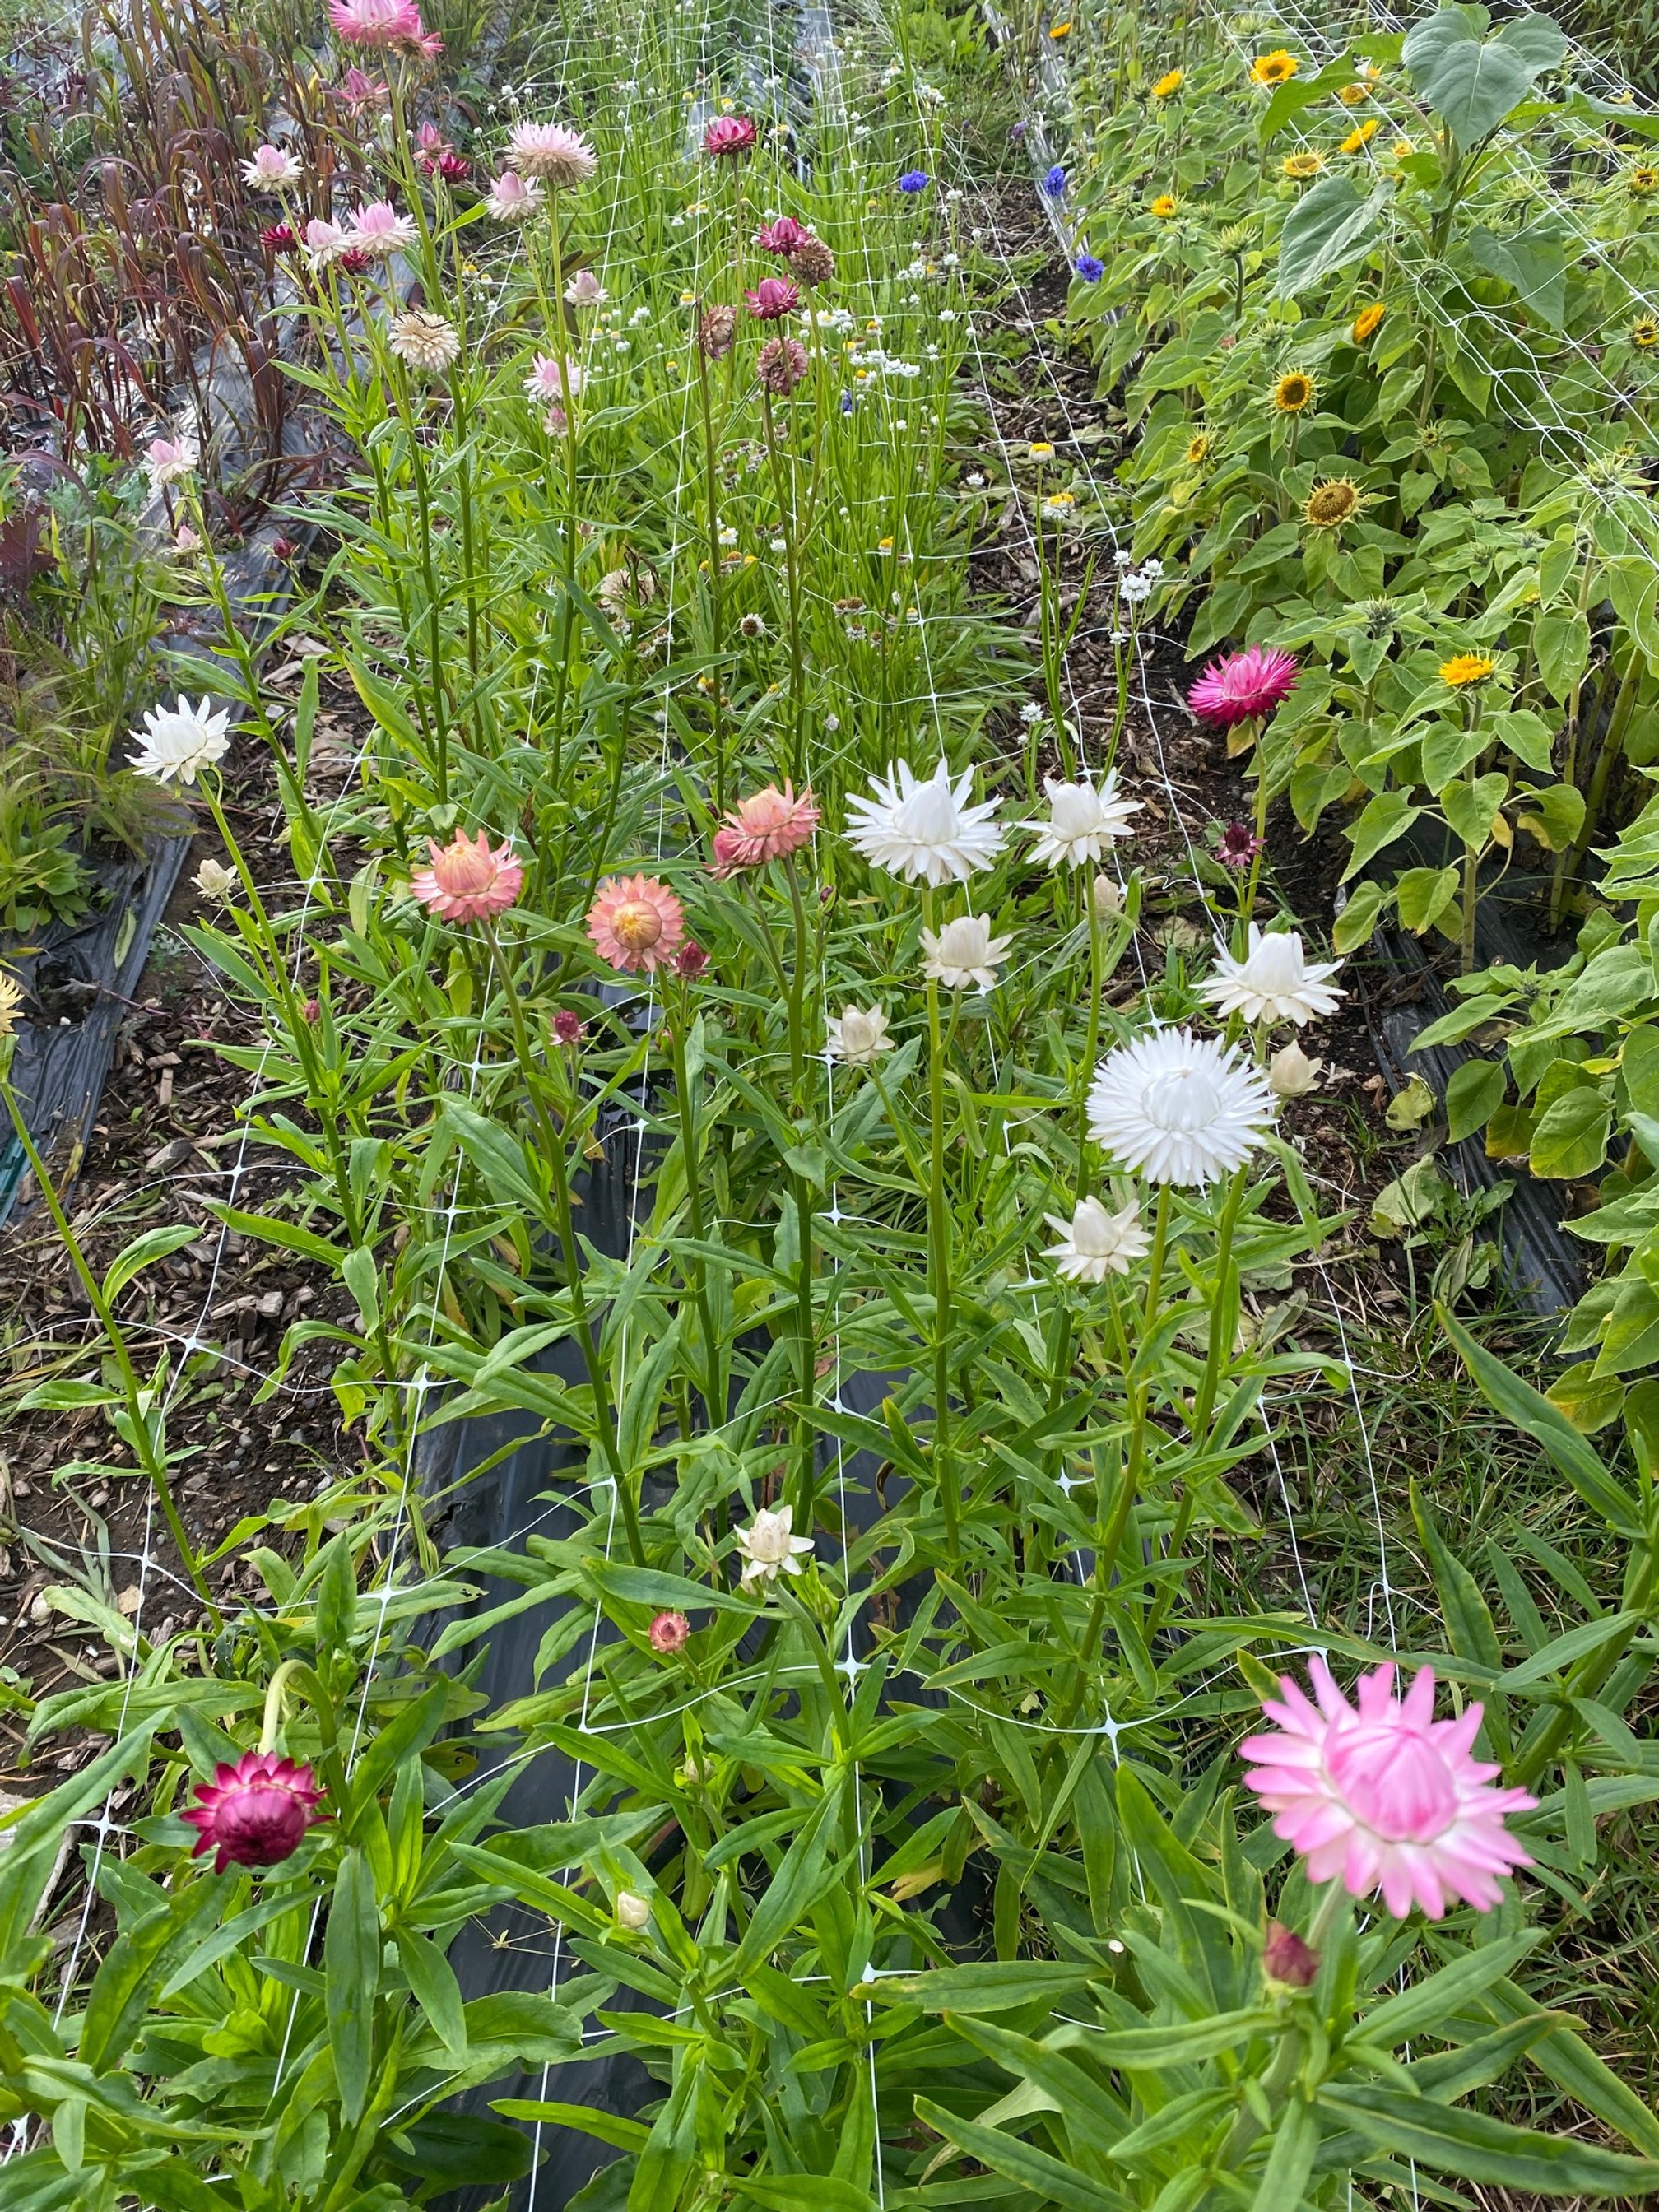
#5 Strawflowers are an easy and whimsical addition to your garden.
Copper Red, Purple Red and Apricot are my favorites. Although there are so many kinds, so you can’t go wrong.
Strawflowers benefit from pinching. If you don’t, you will get one flower on one very thick stem.
I’m seeding my strawflowers in week 14 and week 17.
Fun fact: harvest at different stages of bloom to get different looking elements in your arrangements: bud stage, just about to open, and fully open.

A dried Turnstone Farm arrangement with strawflowers.

10 Steps to Planning your Dream Garden
Get ready for the best garden ever by following these simple steps.
If you haven’t planned your 2023 garden yet, put it on your schedule!
Get your planning done now so that when planting time comes, it’s smooth sailing through the busy and exciting spring season.
Spring will be here soon.
Here are the 10 steps to planning your dream garden:
Put it in your schedule.
Give yourself ample time to plan. Take care of yourself by giving yourself quiet time to sit, think, and plan. I like to give myself 60-90 minutes of “focus time” for projects like this. After 60-90 minutes I need a break!
Write out all the plants you’d like to grow.
How do you decide? If growing veggies and herbs, grow ones your family already loves to eat. If growing flowers, choose ones that complement where you are expereince-wise. Grow beginner flowers (link to blog) if you’re newer to gardening. Grow harder ones if you want more challenge.
Get real about what you will be growing this season.
Now it’s time to whittle down the above list into a manageable “Core Crop” list. For starters go for 5 veggies, 5 flowers and 2-3 herbs.
Pick your varieties.
Now is the fun time! Once you have your “Core Crop” list, you can dig out those gorgeous seed catalogues and get specific about what you’re growing. Pick varieties that do well in your climate and growing location. Read the descriptions carefully so you get all the information.
Plan your seeding dates.
This is the most challenging part of your planning. I like to create a spreadsheet for this. That way each year I can make adjustments or just do what I did last year.
Need more guidance on this, GET ON MY EMAIL LIST to get notified when The IncrEdible Garden Course opens again - this is my signature online course that teaches you everything you need to know to grow a highly successful backyard oasis filled with food and flowers your family will love.
Plan for succession planting.
In other words, don’t plant all your broccoli seeds at once! Plan to seed accordingly so that you have crops continuously all season.
Draw your gardens.
Use grid paper to draw all your gardens.
Draw in your crops.
I like to make note of all my planned seeding dates (if direct seeding) or all my transplant dates (if seeding indoors) right there on my garden drawing (or map).
Put your first seeding date in your planner or calendar.
Plan for success by having all your tools and supplies ready to go so on your first seeding day, you can get right to work.
Start your garden journal.
This can be a note on your phone (I use Evernote) or a paper journal where you write down everything you notice, see, or experience in your garden. It’s where you write down your failures and your successes. There’s nothing worse than failing at the same thing twice because you forgot to take note of it. This is how you become a better garden!

How to Grow Ranunculus
One of the most popular flowers right now in the modern florist and wedding flowers world has to be ranunculus.
And for good reason! These beauties are amazing. They have this multi-petaled rose-like quality and they last forever in the vase, especially when grown locally (like in your backyard).
Plus, as garden flowers, they are so bright and beautiful! I want to see these growing in more gardens around town.
I do consider these a more advanced flower to grow, mainly because the process of starting these is a bit different than other cut flowers.
But do not fear! I am here to walk you through the entire process. From ordering corms to harvesting blooms for the vase.
So let’s jump right in.
Where do I get ranunculus corms?
Since ranunculus is started by corms (root matter saved from the previous year’s growth), you must first source and order these.
I sell a mixed bag of 20 corms each spring. Be sure to hop on my email list HERE in order to get first dibs on all my sales. For 2023 I am selling Picotee varieties in purple, orange, and pink. I order hundreds of corms each fall and save my own varieties from year to year, so I end up with plenty to share.
If you’re looking for other varieties check out Ferna Farms. They are another small farm offering these awesome corms to home growers.
When do I start ranunculus corms?
I start all my ranunculus about 2 weeks before planting out.
My plant-out date will be early May, so I’m starting all my corms the 3rd week of April.
Once sprouted, these guys grow fast! Plus, they do well in cooler temps, so if covered, they can weather a few touches of frost.
How do I start them?
First, you’ll need to soak your corms.
What the heck does this mean? It simply means, popping your corms in a bucket, adding cool water, and letting them sit for about 4 hours.
Some farmers recommend gently agitating the water while they are soaking (using a fish tank bubbler or leaving a stream of water running). I’m here to say, I’ve done it without any agitation and everything turns out OK.
Once properly soaked, they will look relatively plump. Now you’re ready to pre-sprout.
Pre-sprouting consists of layering a grow flat with potting mix. I use ProMix seed starting mix (ideally organic if I can find it locally).
Once a layer of the mix is in the flat, place your corms root-side down in the tray. If you think of your corms as little octopuses, the “tentacles” go down.
You can place them pretty close - I do about 2 finger-widths apart. Then, cover them with soil.
Lightly water (err on the side of too dry than too wet otherwise your precious corms may rot) and place somewhere dark at room temp.
Check these daily. Once they have started to grow green shoots out of the soil, it’s time to place them under lights at about 16 hours/day or if your garden beds are ready for them, it’s time to plant.

Planting soaked corms in seed starting mix for pre-sprouting.
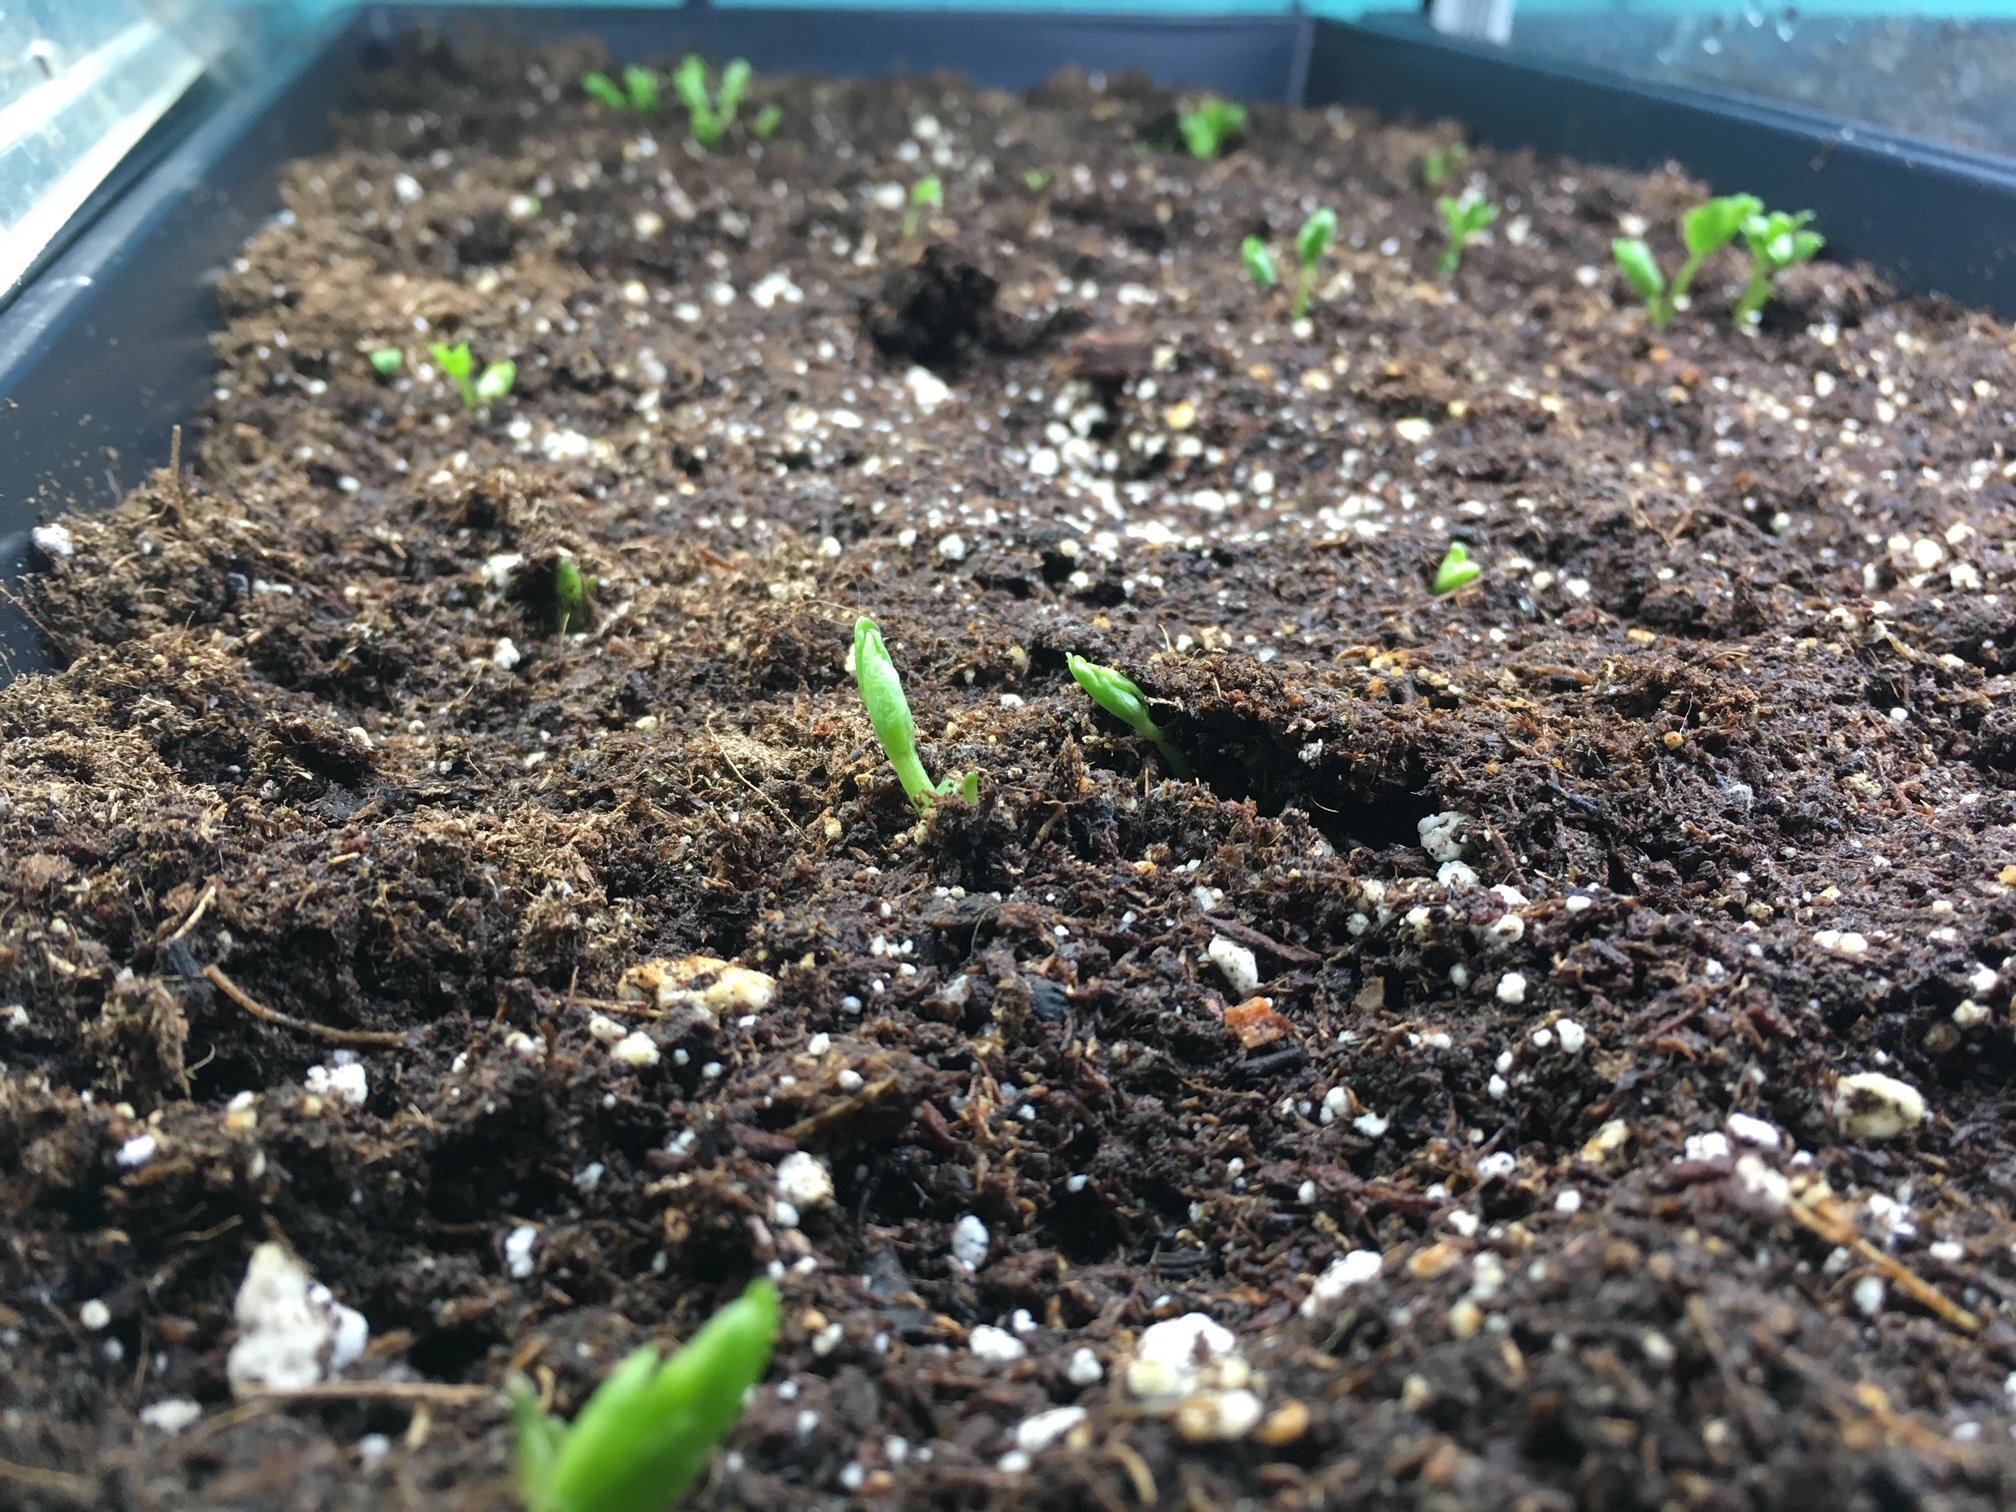
Ranunculus beginning to sprout and grow under lights.
How do I plant ranunculus in the garden?
After pre-sprouting your ranunculus, they are ready to plant in the garden. Gently loosen each corm from the potting mix, dig a shallow hole, and place them in your garden bed. I plant mine about 9'“ apart.
They will benefit from a general-purpose organic fertilizer and bone meal application at planting time.
How do I tend my ranunculus plants?
Ranunculus care is similar to other cut flower care. As they can grow taller, they will be susceptible to wind and heavy rain. I suggest staking or netting them in your garden. Or at least, planting them in a sheltered location, out of any spring or summer winds.
How do I cut my ranunculus for the vase?
Ranunculus is cut as soon as the flowers reach the “soft marshmallow” stage. If harvested too soon, they will not open. You can wait until they are fully open to harvest but their vase life will be diminished slightly.
Please know that you don’t have to cut for the vase. Ranunculus looks gorgeous in the garden! And they bloom prolifically until the heat of the summer comes on strong.
SPECIAL NOTE ON GROWING A FALL RANUNCULUS CROP:
I learned this technique from a farming friend in Norther Alberta who has similar summers to where I grow.
Since the first planting of ranunculus will most likely peter out in late July, I loved the thought of a second planting. Last year I tried it for the first time.
Here’s what I did:
I saved about half my corms (you can just hold them at room temperature in a paper bag).
Go through the same steps of soaking and pre-sprouting starting in mid-June.
Plant in the garden once they have pre-sprouted and tend normally.
If you live in an area with cooler summers, you will be blessed with a late crop that will bloom until the first frost!
Field Notes: Week 10
March 8-14
I started my first round of seeds on March 9th. Everything this early goes into 3/4” soil blocks. Here’s a list of what I seeded with corresponding quantities:
Monarda-Panorama Red (40)
Oregano (40). 3-5 seeds per block
Sage (40)
Rosemary (40). Would have seeded thyme but realized I didn’t have thyme seeds. Ugh, something like this happens every year!
Eucalyptus-Lemon Bush (60). There was a seed shortage/failure of 3 other eucalyptus vareiteis so I am only able to grow Lemon Bush this year. Hope it’s awesome as I’m in love with eucalyptus.
Verbascum-Rosetta (20). NEW VARIETY. Trialing this!
Snapdragons-Potomac Cherry, Potomac Appleblossom, Potomac Ivory, Potomac Royal (40 each)
Gomphrena-QIS Carmine (10), Audray White (60). Looking forward to growing these again after a few years off.
Dahlias-a whole buch of varieties (75)
Aside from dahlias, all plants are on a heat mat and under a light. Dahlias are in either a gallon pot or a 4” pot depending on tuber size.


Seed starting set up on the left. I have one shelf with lights so far! On the right, seeds have germinated! Ones in front are looking a bit leggy: need to lower my lights.

5 of my Favorite Edibles!
Flowers are not just food for the soul! They can also be REAL food. In fact, my two kiddos DELIGHT in plucking a flower and munching.
I want to share 5 easy flowers that you can grow AND eat!
Flower petals can be used fresh or dried for garnish during the cold, dark winter months.
Aside from nasturtiums, which are completely edible (leaves and stems), be sure to eat only the petals of these flowers.
Calendula
Tangy and slightly bitter, you can add these petals to sweet or savory dishes.
An easy to grow and prolific bloomer. They also readily self-seed in the garden for years after your first planting.
Direct seed in the garden after last frost OR start indoors 4-5 weeks before last frost (which in my neighborhood is around May 15th).
Plant in the garden or in planters giving about 6-9” of space between each plant.
Bachelor Buttons
These flowers are delicate and whimsical and are always one of the first to bloom! They are mild and sweet.
Direct seed as soon as soil can be worked or start indoors 3-4 weeks before last frost.
Plant out about 6-9” apart in the garden or in planters. Be sure to stake as these grow tall and can easily topple in a wind storm.
Calendula comes in colors ranging from pale yellow to rich orange.
Bachelor Buttons are one of the first annual flowers to bloom in the garden.
Snapdragons
Snapdragons are a workhorse in my flower garden. They come in many colors, last a long time in the vase, are cold hardy AND you can eat them. They taste a bit bitter and floral :) Add a few as garnish to salads, deserts or drinks.
I would say these are for the intermediate grower. They can be tricky to germinate so plant a few seeds per cell or pot. Press the seed gently into soil but don’t cover as this seed needs light to germinate.
Start these early! I’m planting my first succession (a succession is simply anytime you seed a specific variety) the 3rd week in March. I’ll do two successions about 3-4 weeks apart.
Space about 6-12” apart in the garden. Be sure to pinch when plants are 4” high - this will give you a branching plant with lots of blooms!
Nasturtiums
These guys are the classic edible. They taste a bit spicy and both the flowers and the leaves look amazing on a salad.
Plant directly in a pot or in the ground 2 weeks before last frost OR start indoors 3-4 weeks before the last frost.
Cover seeds, as they require dark to germinate.
These look amazing anywhere in the garden, in planters or hanging pots. Plant about 3 plants per 10” pot or space 8-12” apart in the garden.

Nasturtiums: a bright and cheery addition to your salad.

Snapdragons come in tons of colors!
Sunflowers
Not only can you eat the seeds, you can eat the petals! They are bittersweet and will brighten up any salad or dessert.
One of the easiest flowers to grow. They do great in pots (but will be shorter and smaller), or in the garden. Folks tend to think these need to grow super tall! I personally love these to be more manageable for the vase so grow them closer together (6” apart).
Direct sow in the garden after last frost. You can also start indoors 2-3 weeks before planting outdoors. They grow fast, so don’t start too soon!
Two of my favorite varieties for the vase are ProCut Orange and ProCut Gold and Sonja. If you’re looking to grow seeds, go with Standfast from Fruition Seeds.

Sunflowers (edible) & zinnias (not edible) harvested off our old farm in WI.

Sunflowers on our old farm in WI.
Garden Picture Escape
I just want to share some beauty with you! Here goes…

A few of my early dahlia varieties! Can I just say, I am loving these :)
Ready for bouquet making! My backyard gets transformed into a floral studio at least once per week.
Poppies! These are some of my favorite blooms this summer. They are bringing me SO MUCH JOY!!

A quick afternoon harvest. During the peak blooming months I’m harvesting 3 times per week.
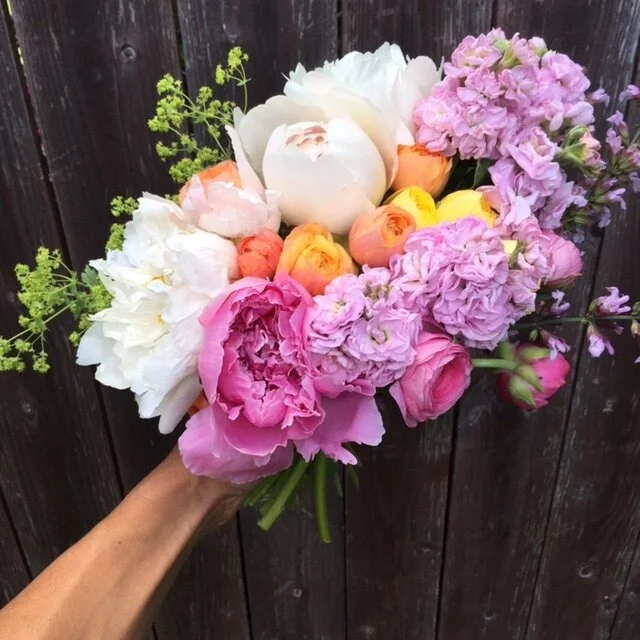
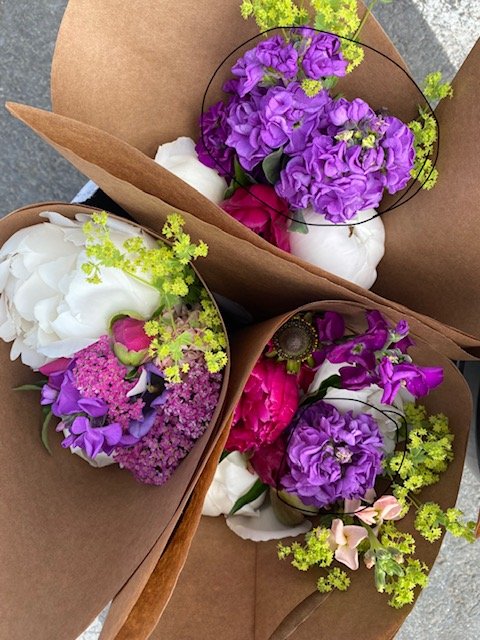
A seasonal bridal bouquet using stock, ranunculus, peonies and ladies mantle.
How I started flower farming
Want to know how all this started?! Thought it would be fun to indulge in enjoyable recollection of past events by taking you through my farming start-up years.
Read on to find out how this all began. I’ll take you back to 2013. Back to our time just outside Madison, WI. Back to a wild, homestead turned commercial farm.
But my farming actually goes back even further, to when I was a child. I’ve always had the plant-lover in me, even from a very young age. I remember insisting on having my own garden, apart from the family plot. And one of my favorite crops: strawflowers! I still grow them to this day. They remind me of being a kid and the magic of growing - from seed to flower.
My very first job was in a greenhouse. I have very fond memories of biking 10+ miles (I couldn’t yet drive) from Eagle River to Muldoon to work at the now-gone Alaska Greenhouse.
I was all set to take this passion further into college but changed course at the last minute from Sustainable Ag to Ecology and Art. In retrospect what a perfect major for a gardener. Being a gardener is part artist, part scientist, part naturalist.

Here I am with one of our laying hens. In addition to flowers we raised 200 + laying hens, turkeys, meat chickens, sheep and pigs!
But honestly I lost touch with gardening for some time and pursued other interests. It wasn’t until I found myself living in the midwest that reconnected with gardening and farming in a big way.
My husband and I moved onto a 40 acre farm in south-central Wisconsin in the summer of 2013.
This was after he worked on a variety of farms in the Madison area. And boy, does he have some wild stories to tell - from milking cows on a raw-milk dairy to holing up in a donut shop to avoid a tornado on the way to his job as manager of a vegetable CSA farm.
His love of animals and the desire to work outside was the motivator in making this farm happen. We started with a flock of 200 laying hens, pictured above on a a property we found to rent on craigslist for dirt cheap.
As a life-long gardener, I was thrilled with the opportunity to go from having my neighborhood community garden plot to having ACRES to grow.
Soon we added meat chickens, turkeys and pigs. Sheep came soon after as a means to mow the pasture on our property.

8 foot tall ragweed in the perennial flower bed :(
There was a small perennial flower garden on the property that was covered in 8 foot tall rag weed. I conned my mom to help and we practically broke our backs weeding that thing. In fact, most of the growing area on this property was covered in ragweed. We weeded and weeded and weeded.
This was my first taste at flower farming and I loved it!

A pic of our market stand. Flower bouquets and stems by the each on the right.
The following year, I planted a patch of annual flowers and grew for a flower subscription and a tiny new farmers market in Madison.

Spring planting! There’s always so much hope and potential that comes with planting. Plus sore backs and endless work.
Here’s me and my farm dog Max, netting my first bed of snapdragons.
Our son was born on the farm during that third growing season. What a joy it was to have him come into the world.
Living on a 40 acre farm, working off farm and trying to grow a family was a lot!
When our son was 8 months we made the painstaking decision to leave the farm and move back to Alaska.
This was one of the toughest decisions I’ve ever made. I’ll probably never forget Jason and I walking the rural road with our dogs running and baby in the backpack, ruminating on this decision over and over.

This picture just sings BOUNTY! You can see our turkeys in movable houses to the left. And there’s me taking stock of my zinnia bed at the height of summer.

Here’s me harvesting for market. And there’s the farmhouse in the back. Our son entered the world in that house with the help of three fabulous midwives.
After leaving the farm I knew I had to continue growing. I just had no idea how this would happen. After a hiatus from farming and growing a small home garden in our yard I discovered that people were farming in the city! Who knew?

Llewyn reaping the benefits of a small backyard garden.
I poured over google earth and online property tax info to find the dream properties in my neighborhood.
I wrote a few letters to the land owners got interest! An amazing couple was open to having me garden on their vacant lot!
And so began Turnstone Farm 2.0 - an urban flower farm. The first two years I also grew herbs and salad mix but have since decided to focus my growing strictly on flowers.

My current flower farm is a small plot on a vacant lot.
So what’s next for the farm?
I’m always looking for more land. I have my eye on a few properties in the neighborhood. And wouldn’t turn down something rural again if an opportunity came.
But more than thinking about expanding the footprint of my tiny farm, I want to 1) make a profitable business, 2) pay myself a living wage 3) grow demand for Alaskan flowers 4) make really happy customers!

The urban flower farm in full bloom.
Choosing Dahlia Varieties
I fell in love with dahlias a little reluctantly.
My first exposure to these wild and beautiful flowers was when I was landscaping for the city. I worked with the Tree and Shrub People but occasionally helped out the Flower People.
The Flower People used to fill a gigantic bed next to the performing arts center with huge (and I thought garish and gaudy) dahlias. I’m sure they were amazing but I always thought them a bit silly. I mean, I was a Tree and Shrub Person after all: practical and no nonsense (I am however often unpractical and full of nonsense).
Once I became a flower farmer I still tried to steer clear of these flowers, mainly because of my previous association with them in the city garden.
But then I saw a different side to these flowers by seeing what other folks were growing for cutting - a more delicate side.
So I cautiously bought a few tubers AND FELL IN LOVE.
I am always amazed that from a sad little tuber grows a huge lush plant that can reach 5-6 feet tall with flowers that come in all colors of the rainbow (almost). The varieties I fell in love with first were the psychadelic looking pompons or ball dahlias. After that first year I quickly started adding new varieties each year.
Now I can honestly say that I’m obsessed with dahlias. I currently have 30 varieties (and over 500 actual tubers) safely tucked in my crawlspace waiting for spring planting.

Ball dahlias: my gate-way drug to the dahlia addiction.
So how do you choose which dahlias to grow?
I, of course, love to grow for cutting.
I always want the option to go into my garden and cut a bloom for the table.
Because of this I’m not going to bother with the short varieties or any other bedding variety flowers for that matter.
If you’re just getting started with dahlias, here’s what I would recommend: buy 3-5 high quality single tubers of different varieties and colors. Or more if you have the space!
Read on to learn about a handful of dahlia types. Within each type there are many different varieties of different colors and slightly different shapes.
1) Anemone varieties like “Pooh” are super fun in the garden but a little short lived in the vase. I love these because they are so different from the traditional looking dahlia. They add true variety to the garden.

Pooh - an anemone variety. This is a super prolific bloomer. And SO CHEERY!!
2) Dinner plate dahlias have huge, luxurious blooms. You can easily fill a vase to overflowing with just a handful of these flowers. I love using these in wedding bouquets and just one in a small vase on the dinner table is ah-mazing.

Cafe au Lait Dahlia - the classic dahlia for luxurious wedding bouquets.
3) Pompon or Ball dahlias can be just a few inches in diameter. I find these the most approachable variety. They are round little balls that look stunningly perfect and rather psychedelic.

Delicate and perfect - the ball dahlia.
4) Cactus dahlias are what I think of as a little garish but they can add texture and interest to the garden. I don’t currently grow these but maybe some day I’ll warm up to their crazy look.

Cactus dahlia
And believe it or not, there are more! I thought as a starter’s-guide the above mentioned varieties would be enough to get you going.
When planning your dahlia garden, pick a color palate (if that’s your thing) or a variety of colors and add diversity and texture by getting a few anemones, a few pompons, a few dinnerplates, etc.
Go here to learn how to grow dahlias in your garden: https://www.turnstonefarmalaska.com/garden-blog/how-to-grow-dahlias
2019 Must Grows! 10 of my favorites from the garden that YOU must try
Each year I try to take copious notes on all my varieties.
At the end of the year I pour over these and decide on what varieties were rock stars and which varieties to cut in the year to come.
There are obvious choices and often tough choices to make as I plan my garden for next year.
Lucky for you, I’ve done all the hard work! Read on to find out what varieties I absolutely LOVED.
Maybe you can try these in your garden next year!

Ferncliff Copper Dahlia after harvest
Ferncliff Copper Dahlia. This was a cheery little ball dahlia on a tall and gorgeous plant. Sort of a red-orange-copper color in a psychedelic ball shape.
The flowers just kept coming all summer! And they are great tuber producers. So before you know it, you’ll have tubers to give away.

Shirley Poppies in full bloom
Shirley Poppies. Folks, this was my first year growing poppies for cut flowers!! I’ve grown the breadseed poppies for seed heads but always felt a bit intimidated about using the flowers as they’re notorious for being short lived in the vase. No more!
These Shirley poppies were out of this world! Easy to grow from seed - I just tossed them in the garden. And prolific - they bloomed through the heat of summer until frost. I even figured out how to keep them happy in the vase for almost a week! (hint - cut just as you start to see color peeking from the bud)
Ruby Silk Grass after harvest
Ruby Silk Grass. Now an annual must-grow.
Last year was a trial year for this and I almost didn’t grow again… I planted it in a shady area with poor soil and it was not happy.
But this year, wow! It was part of my main garden and it did great! If you fancy clumps of golden red grass in your garden (which I highly recommend) you will love this.
I planted about 20 seeds per cell (started these inside) and had gorgeous bunches of colorful grass ALL summer. Plus, it dries great for everlasting bouquets or winter crafts.

Potomac Snapdragons in a variety of colors.
Potomac Snapdragons. It is always hard to decide on which snapdragons to grow each year - there are so many different varieties, colors, sizes, etc. But hands down, my two favorites this year were Potomac Red and Lavender. You can also buy Potomac mix if you prefer a mix of colors.
These guys bloomed ALL summer. They last a long time in the vase without a fuss. And once you cut them from the garden, they just keep sending up new flowers! They even bloomed through the first couple frosts in the fall.

Purple Red Strawflower in a boutonniere
Copper Red & Purple Red Strawflower. These fun flowers always remind me of my first childhood garden!
They’re easy to grow and so fun. Copper Red and Purple Red are vibrant and striking colors that would look great in any garden. And of course the great thing about strawflowers is the everlasting flower you can save and display all year!
Now on to my favorite edibles!
Sungold Tomatoes. Hands down the most prolific cherry tomato I grow.
Golden orange in color and SUPER sweet. If you can only grow one variety of tomato, grow these!
Chocolate Pear Tomatoes. I couldn’t list just one tomato, especially after this hot tomato-happy summer!! This is a fun open pollinated variety of tomato, which means they have not been hybridized so you can save the seeds!!
Sweet, pear shaped and reddish-brown in color. If you can grow two varieties of tomatoes, grow these too!!
Dunja Zucchini. If you like zucchini, you will love these! This is an easy to grow variety that will give you lots of zucchini to get you through the summer.
Red Russian Kale. Hands down this is my favorite kale. It has a smoother leaf structure and the leaf is a bit thicker which makes it a bit “meatier”.
You can grow this into a large plant to harvest big leaves or plant many seeds close together for a salad mix.
Magic Molly Potatoes. I usually let the valley farmers grow my potatoes.
But this year I decided to grow my own for 3 reasons:
1) We have a couple marginal garden beds that are a bit sandy - just perfect for potatoes;
2) Just for my 4-year-old son since nothing is more fun than digging potatoes as a kid;
3) I’m trying each year to grow a little more of my household’s food on our tiny urban lot!
So if you want to grow potatoes too, try these!! These are delicious and a unique deep purple color!
So there you have it! My faves of the 2019 growing season!

10 Must-grows! My absolute favorite varieties from the 2018 flower cutting garden
The end of the growing season is a good time to reflect on what went well and what needs improvement for next year. There is simply nothing that compares to learning things from experience, sometimes the lessons are hard and other times they are joyous.
I’m going to focus on the latter and share with you my ABSOLUTE FAVORITES from my 2018 cutting garden. These flowers stunned me every time I entered the garden with their productivity, abundance and beauty!
Tickseed (Coreopsis hybrida): this lovely small and abundant flower is GREAT for cutting. It is full of small one inch blooms that will transform from tiny bud to flower in the vase for a super long lasting cut. In the garden this flower looks full and bushy and has colors ranging from white to yellow, to orange and red.
Breadseed Poppy (Papaver somniferum): a super easy to grow flower transforms from a large and delicate lavender flower with a grape colored center to HUGE poppy pods that look super cool cut in a bouquet or dried for a fun project later.

Madame Butterfly Snapdragons (Antirrhinum majus): snapdragons love growing in Alaska - they like relatively cool weather. Mine bloomed continuously from early July through the end of October!! This variety is an open faced frilly bloomed version of the standard snapdragon. I just LOVED these flowers. And they would look great as a dessert topping as snapdragon blooms are edible.
Amaranth - red spike (Amaranthus cruentus): A fun deep red/burgundy grain that looks stunning in arrangements and in the garden. Very easy to grow!
Cerinthe - kiwi blue (Cerinthe major purpurescens): This was my first season growing cerinthe! It is a great early season bloomer. Blue/green foliage with tiny blue/purple bells. So fun!
Dahlias: Linda’s Baby: a pinkish-orange specialty dahlia that is SO prolific in blooms, you will be amazed. Nice and long stemmed for cutting.
Cosmos - double click cranberry (Cosmos bipinnatus): Deep burgundy/pink double blooms that bloom mid summer till first frost. Huge plants and plentiful blooms.

Nigella - love in a mist (Nigella damascena): A fun flower that ranges from blue to white (it is so hard to find a true blue flower and here is one!). You can cut in flower stage or wait for the seed pod to emerge for a funky floral addition to your dining room bouquet.
Rudbeckia - cherokee sunset (Rudbeckia hirta): Simply big and gorgeous! Although the wait for blooms always seems long, they are well worth it. Big, showy burgundy to yellow double or single blooms that have a long vase life and long bloom time on the plant. Very hardy - these can be planted before the last frost.

Dusty miller - new look (Senecio cineraria): These will be looking great till the end of October this year! they’re an easy all season frosted leaf that looks great cut in a vase or in the garden. You can even dry them for making wreaths or dried bouquets.
If 10 varieties seems a bit daunting to you, pick 5 and add them to your garden next year!
I will advise that the garden stores might not carry these varieties, and that’s why I highly recommend starting your own seeds. Then you can grow EXACTLY what you want to grow.
Leave a comment here telling me 2 of YOUR favorite flowers to grow!