Grow a multi-purpose pollinator garden
Grow plants that are edible, look great in a vase and provide habitat for pollinators.
Pollinators, including bees, butterflies, and hummingbirds, play a crucial role in our ecosystem by helping to fertilize plants and ensure their reproduction.
Unfortunately, many pollinator populations are in decline due to habitat loss, pesticide use, and other factors. One way that you can help support native pollinators is by creating a pollinator garden, which provides a habitat for these important creatures to thrive.
Adding culinary herbs to a pollinator garden not only benefits the pollinators but also provides fresh ingredients for the kitchen.
Plus, some of these fabulous culinary plants do triple whammy by looking great in the vase!
Why Grow a Pollinator Garden?
Pollinator gardens are not only beneficial for the pollinators themselves but also for the environment as a whole. By providing a habitat for pollinators, you help to maintain the biodiversity of our planet. Thank you gardening friend!
Additionally, pollinators are responsible for fertilizing a large percentage of our food crops, so by supporting their populations, we are also supporting our own food systems.
You can’t grow a garden without pollinators!
Many pollinator-friendly plants are also beautiful additions to your garden. And, as mentioned earlier, adding culinary herbs to a pollinator garden can provide both beauty and practical benefits.
Choosing the Right Plants for your Pollinator Garden
When selecting plants for a pollinator garden, it is important to choose varieties that are attractive to pollinators. This typically includes plants with brightly colored flowers that are easy for pollinators to access. Native plants are often a great option, as they have evolved alongside the local pollinator populations and are well-suited to their needs.
When choosing culinary herbs to include in a pollinator garden, there are several options to consider. Many herbs have flowers that are attractive to pollinators, while others have foliage that can provide shelter for them.
Some popular culinary herbs that pollinators love include the following:
Addition #1 for your multi-purpose pollinator garden: Basil
Basil is a popular culinary herb that also has flowers that are attractive to bees and other pollinators.
It is an annual plant that grows well in warm weather. When planting basil in a pollinator garden, be sure to space the plants at least 12 inches apart to allow room for growth.
Basil can be trickier to grow in northern climates. I grow mine exclusively in a hoop house. In warmer climates it does well outdoors. The variety I love for cooking is Genovese. If growing for the vase, shop for varieties with deep purple leaves - they are amazing.
Any variety will produce interesting flowers for you and for your pollinators.
Addition #2 for your multi-purpose pollinator garden: Thyme
Thyme is a low-growing perennial herb that has small, fragrant flowers that are attractive to bees and butterflies.
It’s a great option for a pollinator garden because it can grow in a variety of soils and is drought-tolerant.
Thyme can be started from seed early in the season. It’s a perennial in northern climates although I plant extra each year in case I lose some over the winter.
Addition #3 for your multi-purpose pollinator garden: Cilantro
Cilantro/coriander is a fabulous fresh annual herb.
Since cilantro will bolt in the summer, I grow mine for culinary uses in the early summer and then let it bolt (go to flower).
Cilantro flowers smell heavenly - pollinators love them and they are a great filler flower for the vase.
Let a few of the flower heads go to seed. This seed is coriander! You can save it for planting next year or harvest for some super cool bouquet elements.
Addition #4 for your multi-purpose pollinator garden: Sage
Sage is a culinary herb that also has attractive flowers that are popular with pollinators.
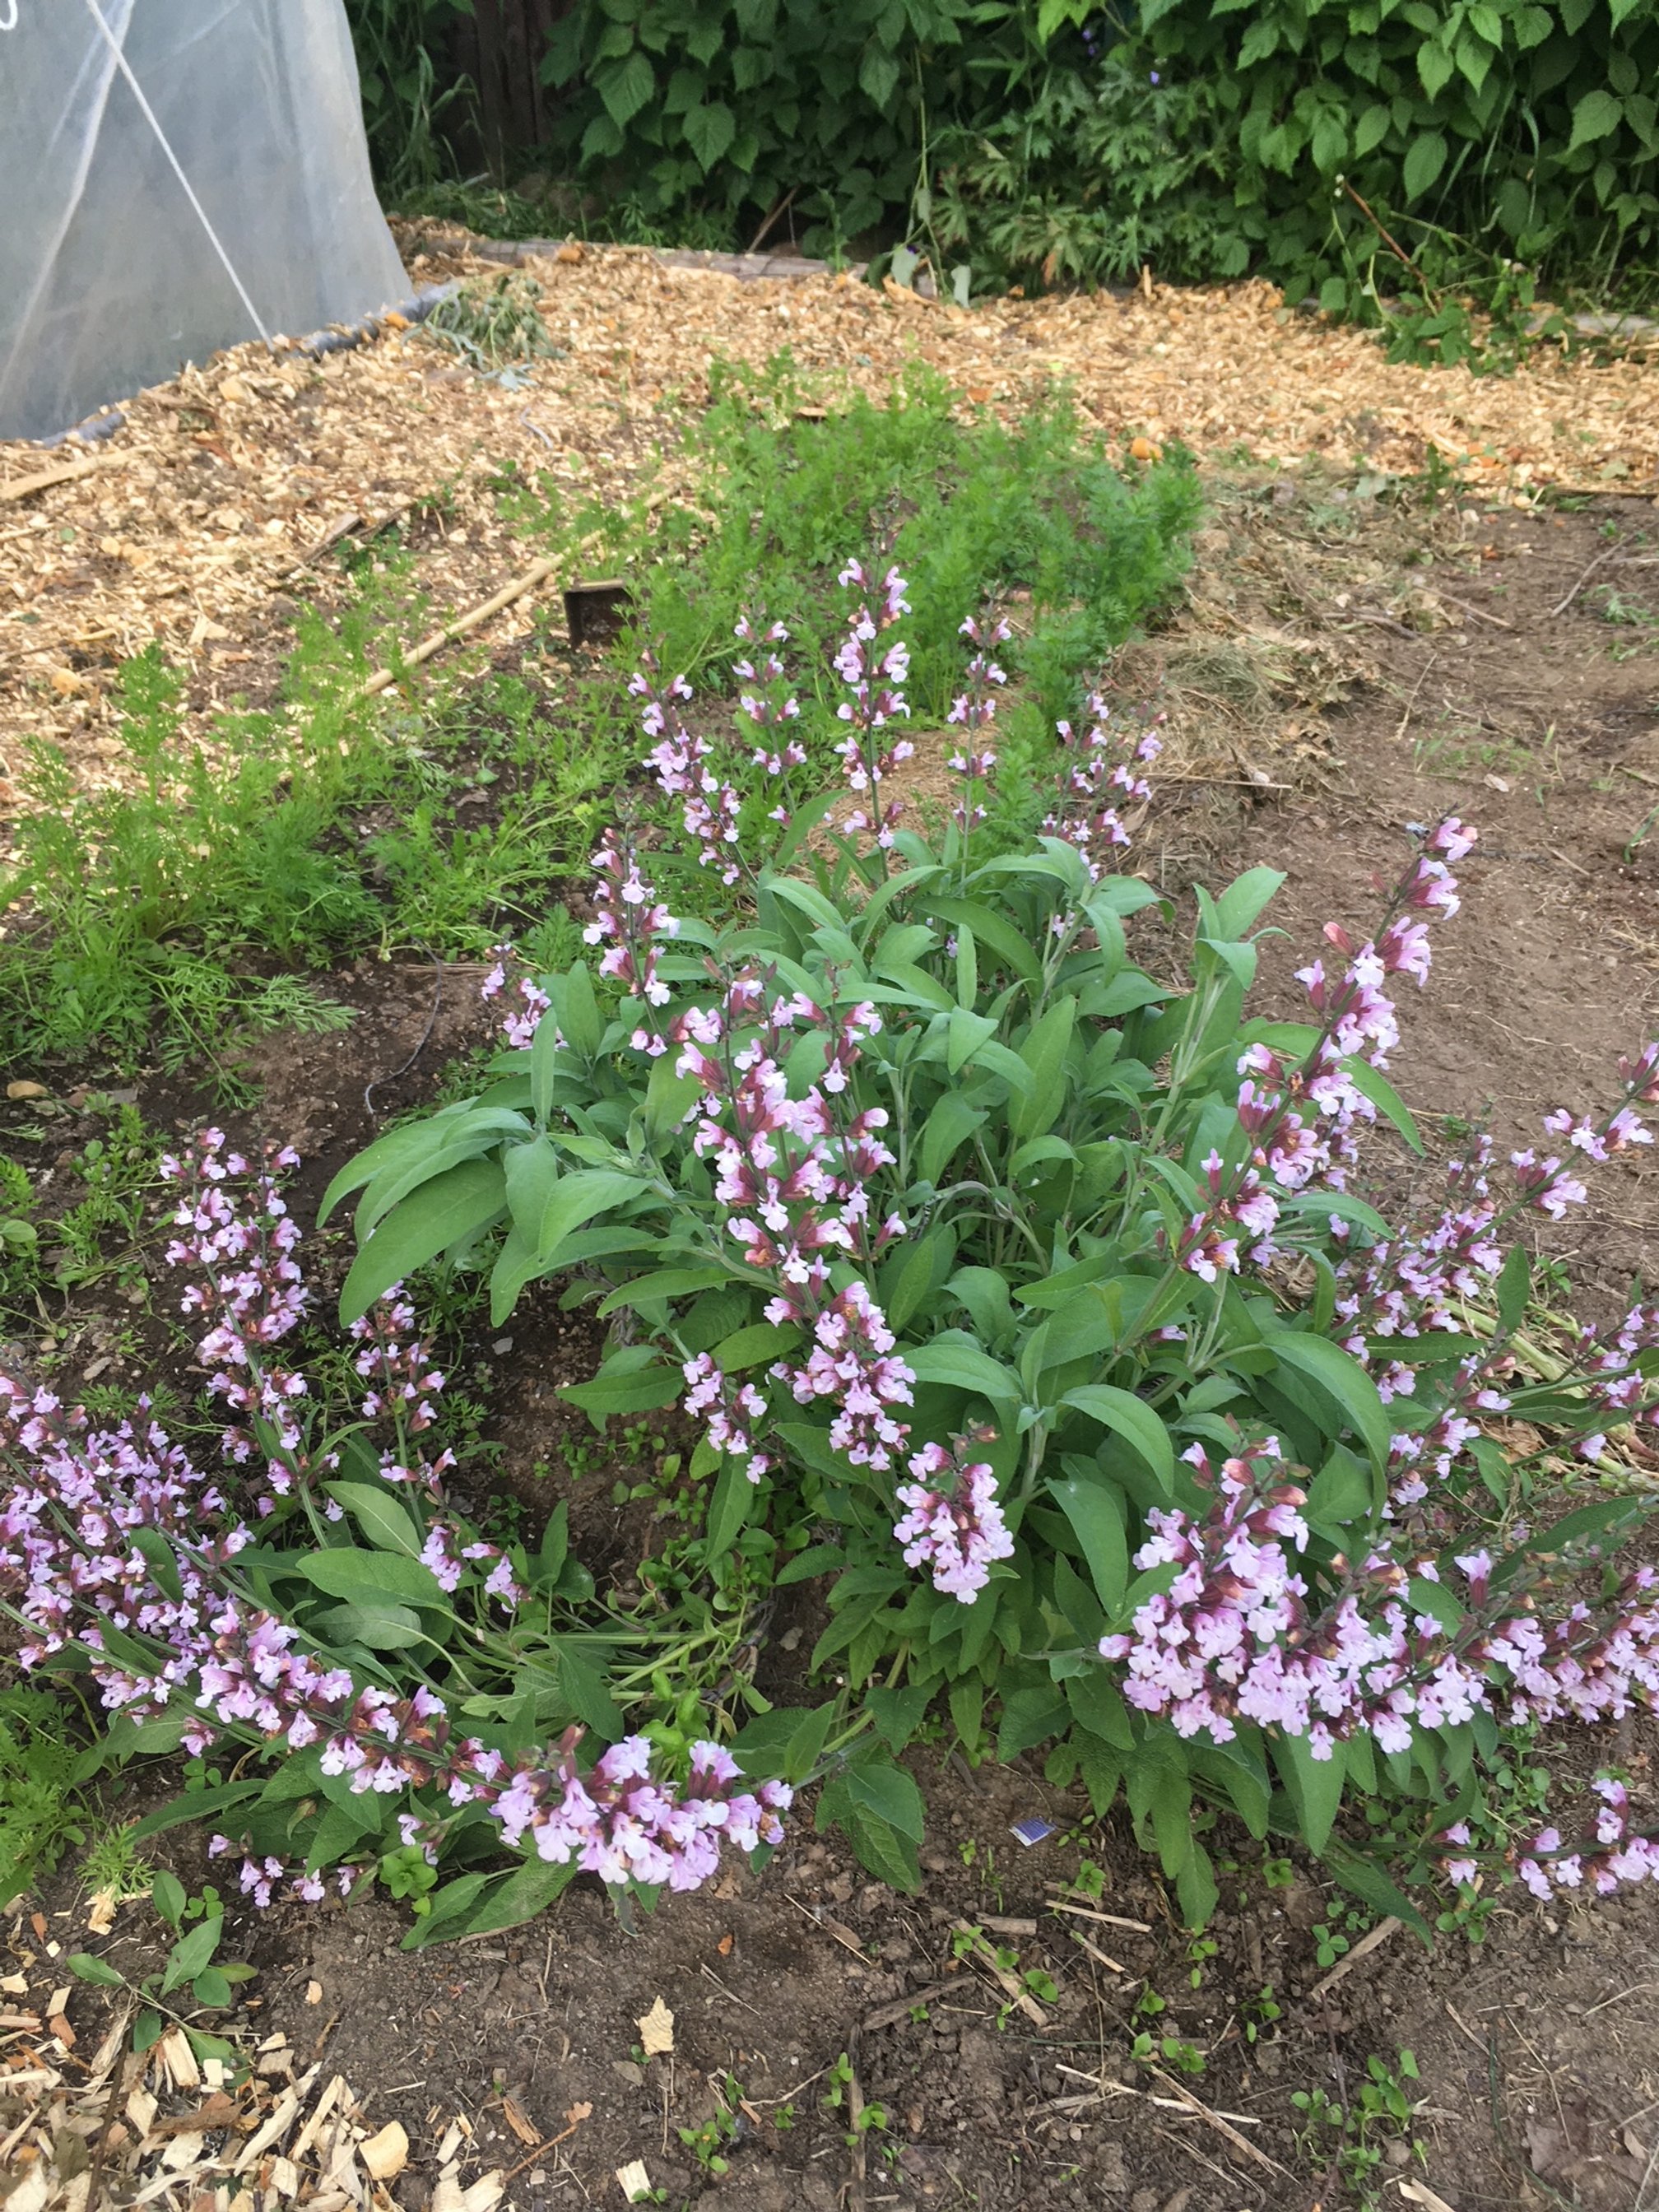
It’s a perennial plant that prefers well-draining soil and can be grown easily from seed. In my experience it survives 2-3 years and then dies back. Flowers usually develop in the second year. You can use the foliage and flowers to fill out your home arrangements.
Sage, flowering in it’s second year in my backyard garden.
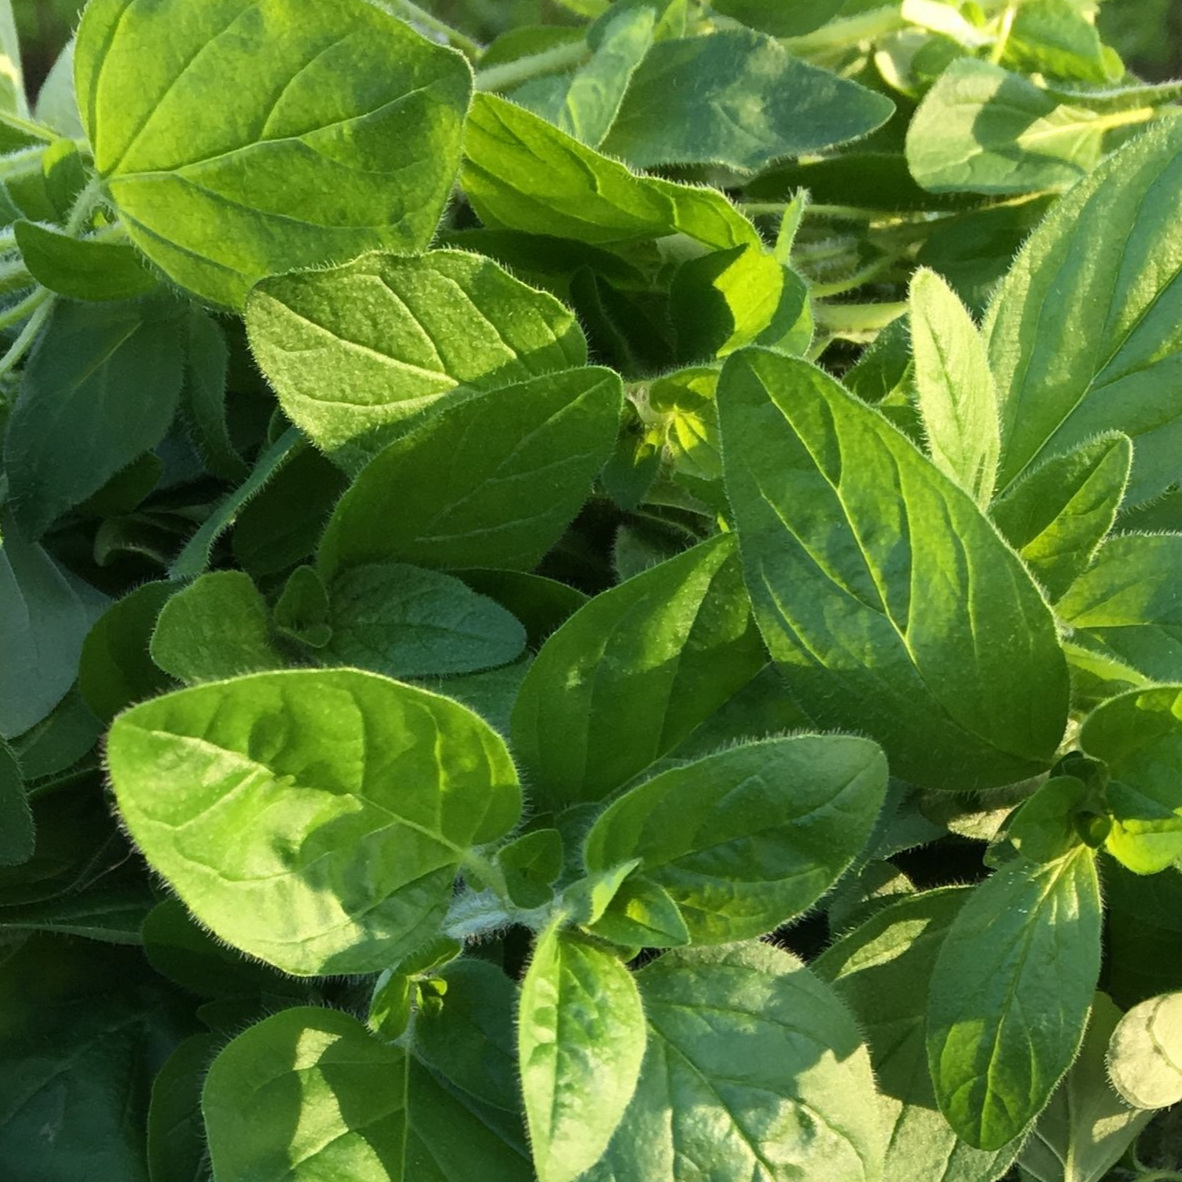
Addition #5 for your multi-purpose pollinator garden: Oregano
Oregano is a perennial herb that is commonly used in Italian and Mediterranean cuisine.
It produces small, pink or purple flowers in the summer, which are a great source of nectar for bees and other pollinators.
Oregano is also known to repel some garden pests, making it a great companion plant. I love popping oregano into a bouquet - it’s purple flowers make a nicely scented filler.
Addition #6 for your multi-purpose pollinator garden: Mint
Mint is a hardy herb that is easy to grow and has a refreshing scent.
It produces small, white or purple flowers in the summer, which are a great source of nectar for pollinators.
Mint spreads enthusiastically, so it is best to plant it in a container or a designated area of the garden. You will have extra plants to dig up and give away or compost every year.
Addition #7 for your multi-purpose pollinator garden: Chives
Chives are another easy-to-grow herb that can be used in pollinator gardens.
They produce pretty pink or purple flowers in the summer, which are a great source of nectar for bees and other pollinators.
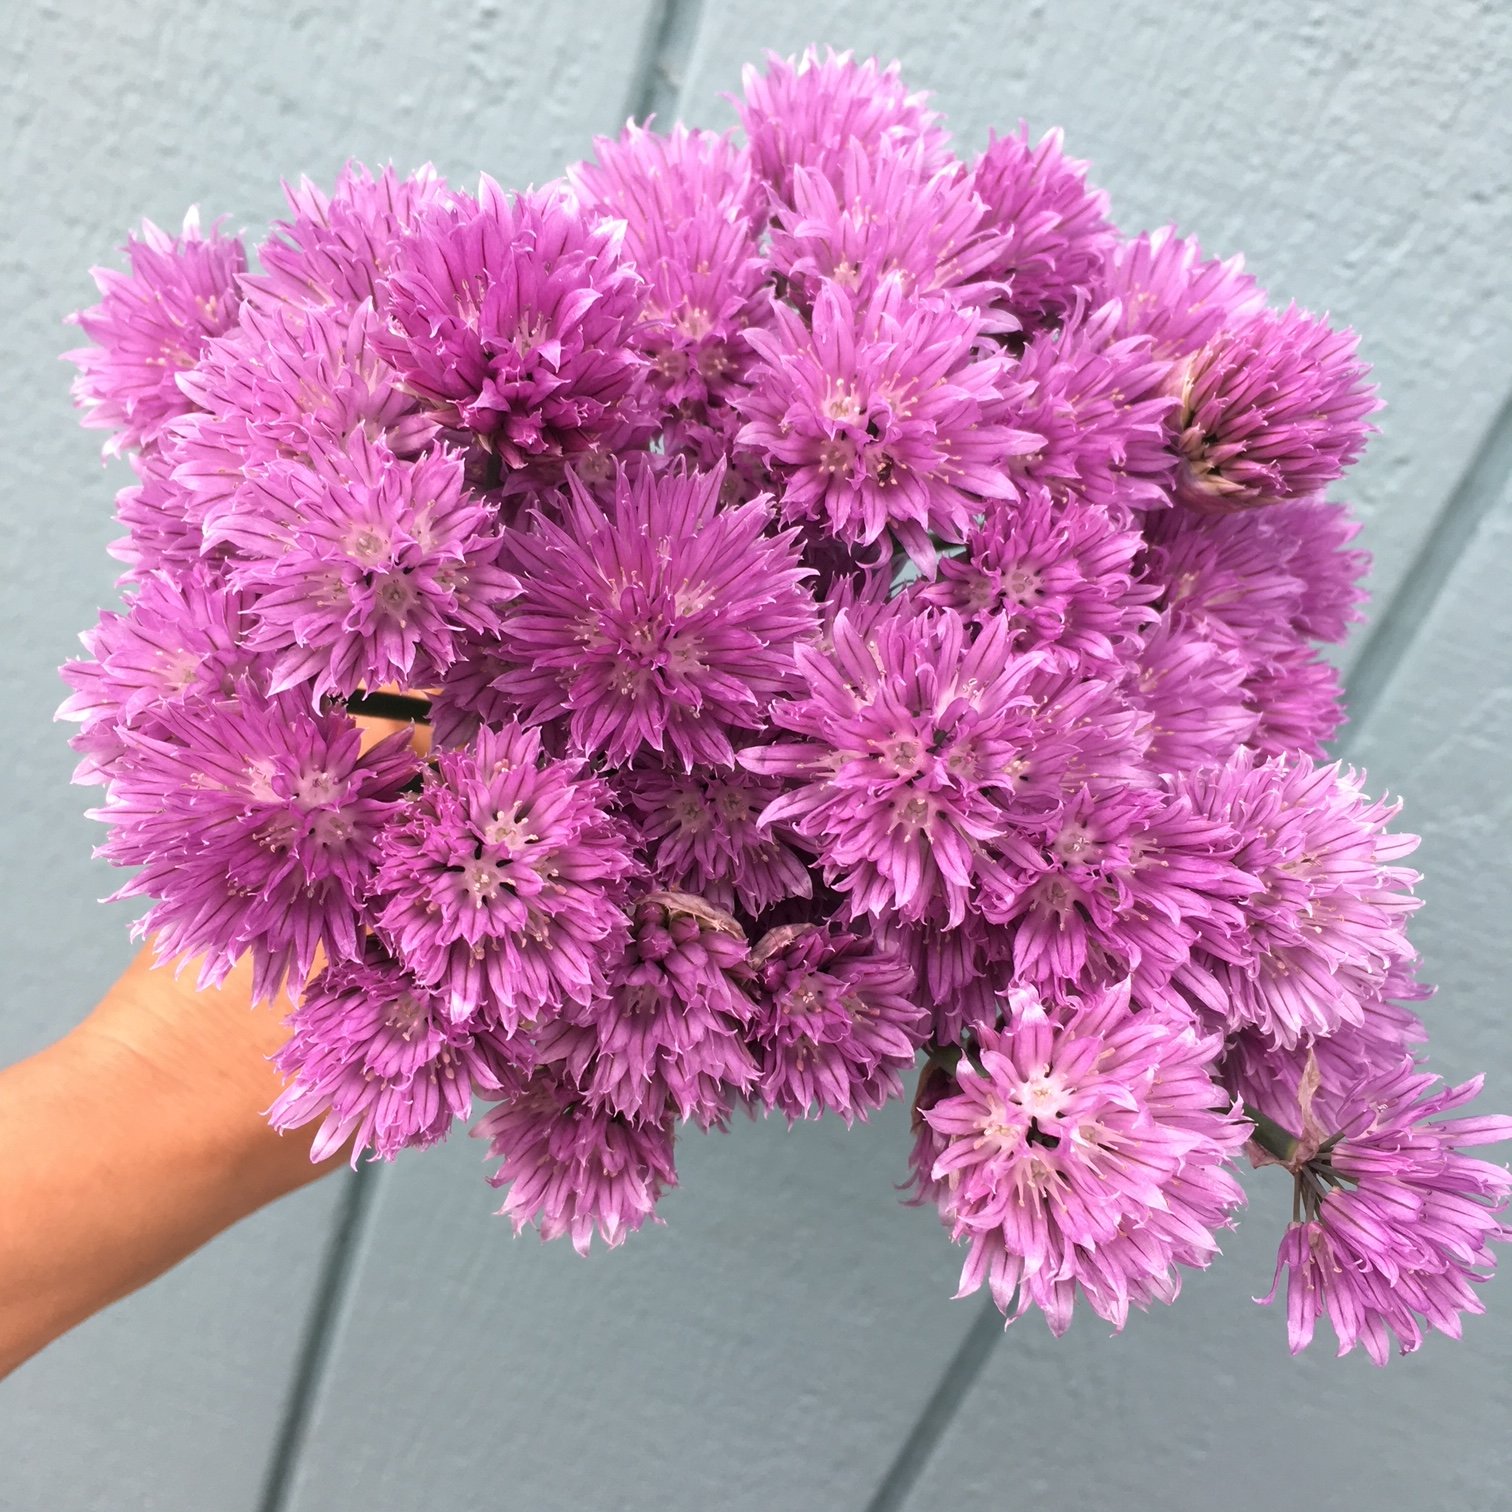
Chives are also known to repel some garden pests, making them a great companion plant. Every year they grow into bigger clumps that can then be divided and spread out or given away to your neighbors. The flowers are edible, look great in a vase and dry well hung upside down.
Chives are a fabulous herb, attract pollinators and look great in a vase.
Maintaining your Pollinator Garden
Once you’ve established your culinary-pollinator-cutting-garden, maintain it properly to ensure that it continues to provide a habitat for pollinators.
This includes watering the plants regularly, fertilizing as needed (with organic fertilizers and compost) and frequently cutting flowers for your bouquets so the plants keep producing more stems.
Remember to avoid the use of pesticides (natural and conventional) in a pollinator garden, as you will kill not only the bad bugs but the good bugs too. This is the reason I’ve never sprayed anything in my garden. Even some of the natural and organic sprays will kill the beneficial bugs.
Creating a pollinator garden with culinary herbs is a great way to support pollinator populations while also providing a source of food and flavor for yourself and super cool additions to your home grown bouquets.
By following the tips outlined here, you can create a beautiful and functional pollinator garden that will benefit both pollinators and humans alike.
Storage Notes:
I keep all the herbs I cut from my garden in a small jar of water on the counter.
Some dislike the fridge (basil) and will often get lost in the crisper.
No one likes to discover rotten home-grown herbs weeks later in the bottom of the crisper!
Grasses and Greenery to Elevate your Home Cutting Garden
Once you have a nice collection of flowers planned for your home cutting garden, you are ready to take it to the next level.
It’s time to start growing grasses and greenery.
Here are some of my favorite varieties from this genre of plants.
Amaranth - level of difficulty: moderate.
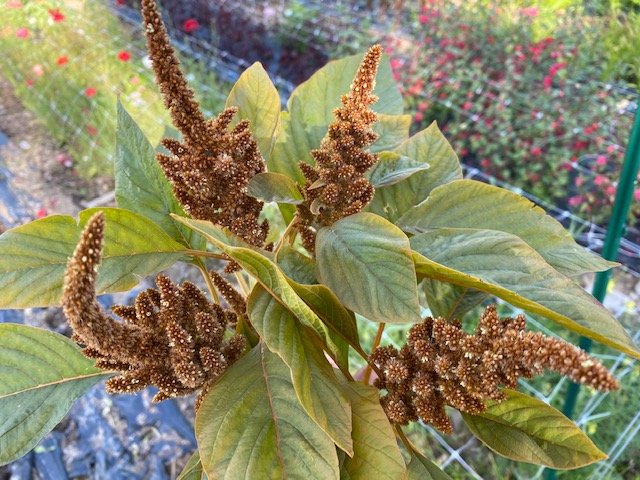
Amaranth is a grass that has beautiful upright or cascading seed heads.
Hopi Red Dye and Hot Biscuits are my favorites right now although I’ve grown so many different varieties over my 7 years of flower farming.
Plant in week 17 and 19.
Although these grow easily and vigorously I call them moderately challenging because they tend to prefer heat.
Amaranth would grow out of control in my original flower garden in the steamy mid-west heat.
Up in Alaska, they grow slower and are sensitive to cold temps. I’ve lost a few plantings by optimistically planting these out too early.
Pinch when plants are 4 - 6 inches high.
Hot Biscuits Amaranth in the Turnstone Farm Garden.
Atriplex - level of difficulty: easy.
Plant in week 13 and 15.
Pinch when plants are 4-6 inches high OR plant 3-5 seeds to a cell. This will stunt them a bit to make the stems more manageable.
These easily self-seed so be careful - you will have to “weed” these out of places you don’t want them.
Harvest when seed heads have matured completely. Pop in a vase or hang to dry.
Bells of Ireland - level of difficulty: challenging.
Plant indoors in week 15 and 17.
I call these challenging because germination can be spotty and slow, so I often like to pre-sprout in damp paper towels before planting.
Pinch once plants are 4-6 inches tall to promote more stems per plant.
Harvest when the “bells” are firm to the touch.
Bupleurum - level of difficulty: challenging.
Maybe it’s just me, but I find this one challenging to grow. It does prefer to be direct seeded but I like to get a head start indoors.
Plant starting in week 13. You could plan for 2 to 3 successions spaced 2-3 weeks apart if desired.
Be patient as it can take a little longer to germinate.
Harvest when the flower heads are fully open - the flower heads stay green. You can also hang to dry at this stage as well.
Cress - level of difficulty: easy.
Penny, Persian or Wrinkled are what I grow. Seeds save well after being dried.
Plant in week 15 and 18.
Harvest when seed heads are fully mature.
Dill - level of difficulty: easy.
“Bouquet” is the variety best for cutting.
Plant in week 15. You could try a few successions 2 - 3 weeks apart.
I only do one planting since aphid pressure becomes high in my garden later in the summer. I’ve gotten rid of this problem by not replanting dill and certain varieties of kale.
Harvest when seed heads are fully mature.
Add to an arrangement or hang to dry.
Bouquet Dill in a Turnstone Farm wedding arrangement. Photo courtesy of Erica Rose
Fennel - level of difficulty: easy
“Bronze” is lovely but you can try other varieties too. They all offer great ferny and delicate elements to your arrangements.
Start in week 14 and 17.
Harvest at various stages for fun elements. Or wait for seed heads to mature fully to add to bouquets or hang to dry. Smells heavenly.
Figwort - level of difficulty: easy
Plant in 13. This is actually a perennial to zone 4 but will flower the first year. I have yet to discover if it will come back in my garden but there’s no reason to think it won’t.
Harvest when flower heads are fully mature.
Grass - level of difficulty: easy
Highlander, Lowlander, Green Drops and Ruby Silk are 4 of my favorites. But try others! There are many.
Grasses are so fun to grow!
Plant in week 15 and 17.
Remember that one seed equals one grass, so you can cluster 5-7 seeds in one cell or pot when planting.
Ruby Silk Grass from the Turnstone Farm Garden
Scented Geranium - - level of difficulty: moderate
I took a few cuttings from a plant in my son’s school. I now have 7 big and bushy plants sitting in my window waiting to go outside for the summer.
Heres what I did:
1) Take a cutting (feel free to pop by my garden and ask for a cutting in the fall).
2) Place cutting in damp soil or a bit of water. You could add some propagating hormone, but mine sprouted roots without.
3) Once you see roots sprouting, pot them up.
4) Pinch back once plant is 6 inches tall to encourage branching.
5) Harden off and plant out in the garden.
6) Before the first fall frost, dig up, pop in a pot and bring inside. You now have a gorgeous house plant to place in a sunny window all winter.
7) In the spring, harden off and plant out again. You can take cuttings from this plant at any time to make more plants for your garden
Feeling unsure about starting seeds indoors go here to read my blog all it: https://www.turnstonefarmalaska.com/garden-blog/2018/10/27/seed-starting-part-3-starting-your-seeds-indoors
Grow with care and you are well on your way to a killer home cutting garden!
8 Best Perennials for the Alaskan Cutting Garden
Here are 8 fabulous perennials for the Alaskan cut flower garden.
There are so many benefits to adding perennials to your cut flower garden.
Once established, they are super hardy.
They spread each year, leading to a greater number of stems every summer.
They often bloom earlier than annuals, thus filling the gap between spring blooming bulbs and annual flowers.
Pollinators love the early-season blooms.
Many of them are truly extra unique.
Perennials can be expensive to purchase from the nursery. But with patience and curiosity you can start most of these perennials from seed for almost nothing.
Some perennials need to be seeded a full year before they flower, but don’t be discouraged.
The best time to start a perennial by seed was last year. The next best time is this spring.
Commit to picking 3 varieties to try from the list below and grow 10 plants of each variety. You’ll have extra in case some die off OR you’ll have extra to give to your neighbor.
Columbine - Barlow Mix, Pink Petticoat and McKana Giant Mix.
Plant in the spring for flowering the following year.
After only a couple years Columbine forms a lush and full bushy plant with many stems. It is one of the earliest to bloom in the garden, which is a huge bonus for the cut flower patch.
Cut for the vase when half the florets on the stem are open. After cutting one round from a plant, watch and wait as I’ll often get a second flush of blooms a couple weeks later.
Pink Petticoat Columbine (bottom left) in an early summer Turnstone Farm bouquet.
Echinacea - There are a few varieties in different colors, just pick your favorite!
These need to be started the year before they flower. I start mine first thing in the spring, usually in week 11 or 12.
Once established, they are hardy and tall.
Harvest fresh for the vase when the petals have opened. Harvest for drying once the cone has started to turn golden.
Echinacea Cone in a Turnstone Farm Boutonniere
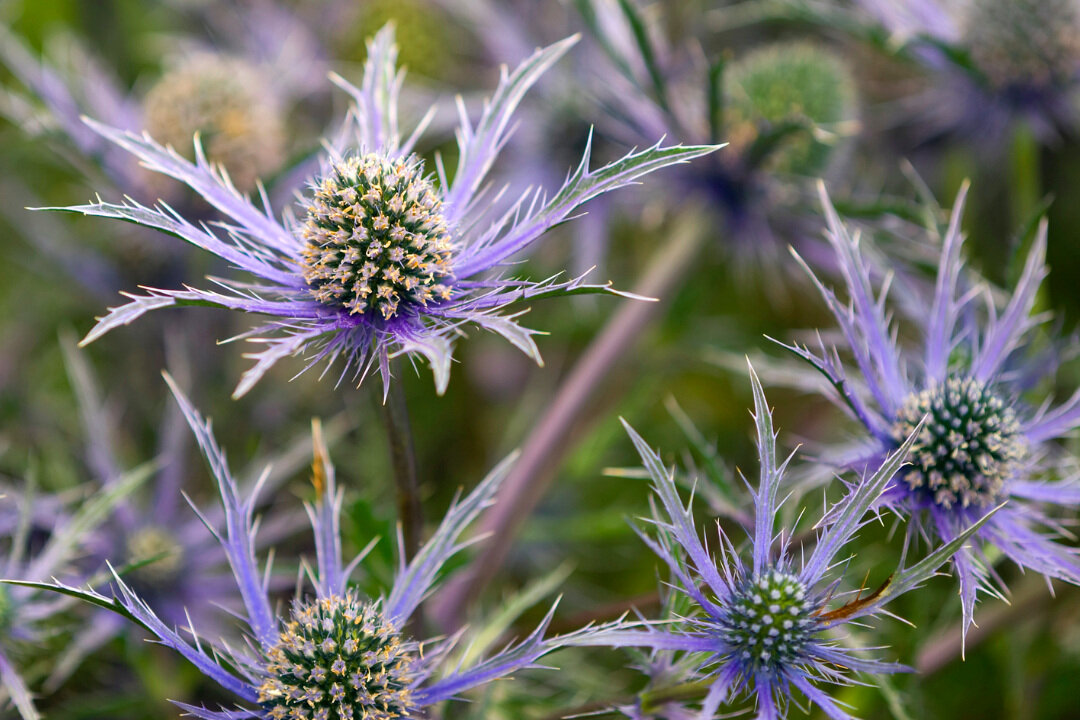
Eryngium - Blue Glitter and White Glitter.
Plant in week 11 or 12 for flowering the following year.
This plant gets a top score for cool looks! It has attractive thistle-like blooms with a metallic shine.
Eryngium is a hardy perennial with long, sturdy stems.
It does well in hot, sunny locations. But also tolerates a wide variety of conditions. Expect flowers during the second year of growth and in subsequent years (although mine bloomed the first year!). Great for bees, beneficial flies and wasps. Also known as plains eryngo and flat sea holly.
This is an excellent long lasting cut flower and dries well.
Blue Glitter Eryngium
Heliopsis - Burning Hearts
Sow in the early spring for flowering the following year. I start any new plantings in week 12 or 13.
These are slower to establish but offer delicate and stunning flowers.
Harvest for the vase when flowers are fully open.
Burning Hearts Heliopsis in the Turnstone Farm Garden
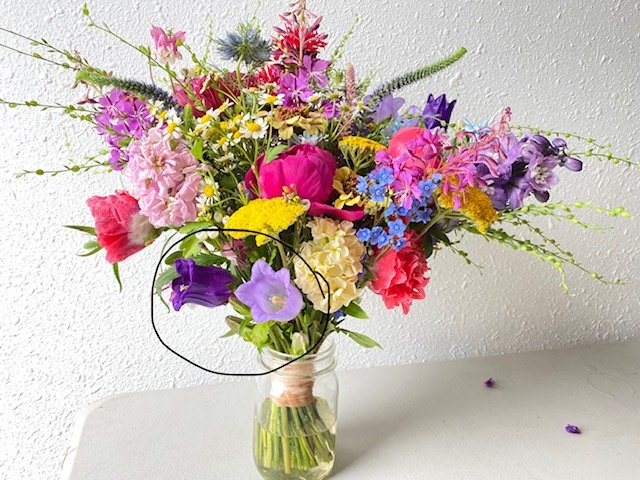
Monarda - Red Shades, Panorama Mix or Wild Bergamot.
Seed these in the early spring (week 12 or 13) for flowering the following year.
Monarda is a favorite for pollinators. My patch is always swarming with native pollinators and honey bees.
Plants grow tall and lush in the garden, which make a nice border for a garden room or as a living privacy screen.
Harvest when all the petals are almost fully open. Pop in a vase or hang to dry.
Red Shades Monarda (circled) in a Turnstone Farm Bouquet Subscription
Yarrow - Cloth of Gold and Summer Pastels.
Plant early in the spring for flowering the same season. I usually start a new variety in week 12 or 13.
Each year yarrow expands, so you have to be wary if you don’t want it to spread.
Yarrow is considered a “cool flower” and can withstand a light frost.
Harvest for the vase when pollen is visible on the flowers. If you cut too early, the florets will wilt. Sometimes it’s hard to get this right, so be patient! You can also harvest at this same stage and hang to dry. Yarrow dries excellent and holds its color well.
Yarrow is a fabulous perennial for the Alaskan garden
Peony - so many fabulous varieties!
While Peonies can be started from seeds, like apples, they will not be true to their parent plant.
I am going to try this in 2023 and will give you an update in a following blog.
If you’d like to try your hand at starting a NEW peony variety from seed here are the steps:
Collect seed pods from a couple of plants.
Dry the seed pods.
Once the seeds start to ripen the pods will crack open.
Prepare a space in your garden and plant the seeds in the fall. Mark them well so you know where they are in the spring.
In the spring monitor and care for the plants that have come up.
You should get your first bloom in year 3 and many more in year 4 and 5.
Since most of us don’t want to wait 5 years for a bunch of blooms, peonies are most commonly started from root stock or purchased from a nursery.
A beautiful peony in the Turnstone Farm Garden.
I hope you are now inspired to start a few new perennials by seed this year!
Cannot wait to hear about your 2023 flower gardens.
What do wedding flowers cost?
This is the season for inquiries about wedding flowers!
I have so much fun sitting down with couples to come up with proposals for their big day.
It’s my goal here to give you a picture of what you can expect to pay for wedding flowers.
Unlike other customer experiences, the cost can be a bit more complicated when it comes to flowers. So much depends on what each bride is looking for. I like to liken the pricing of wedding flowers to the price of a contractor for a home remodel. Everything is custom. Everything is dependent on the couple’s unique vision and desires
Does the bride want a huge cascading bouquet with lots of variety? Or does she want something more small and dainty? Does she need large table arrangements for 25 tables? Or maybe garlands for 10 tables with candles. Are pieces going to be moved from ceremony to reception? Is there a floral installation or arch involved?
You can see why it’s not simple to put a price tag on any one of these items!
Alaskan wedding photography by:Echo Photography & Lauren Roberts
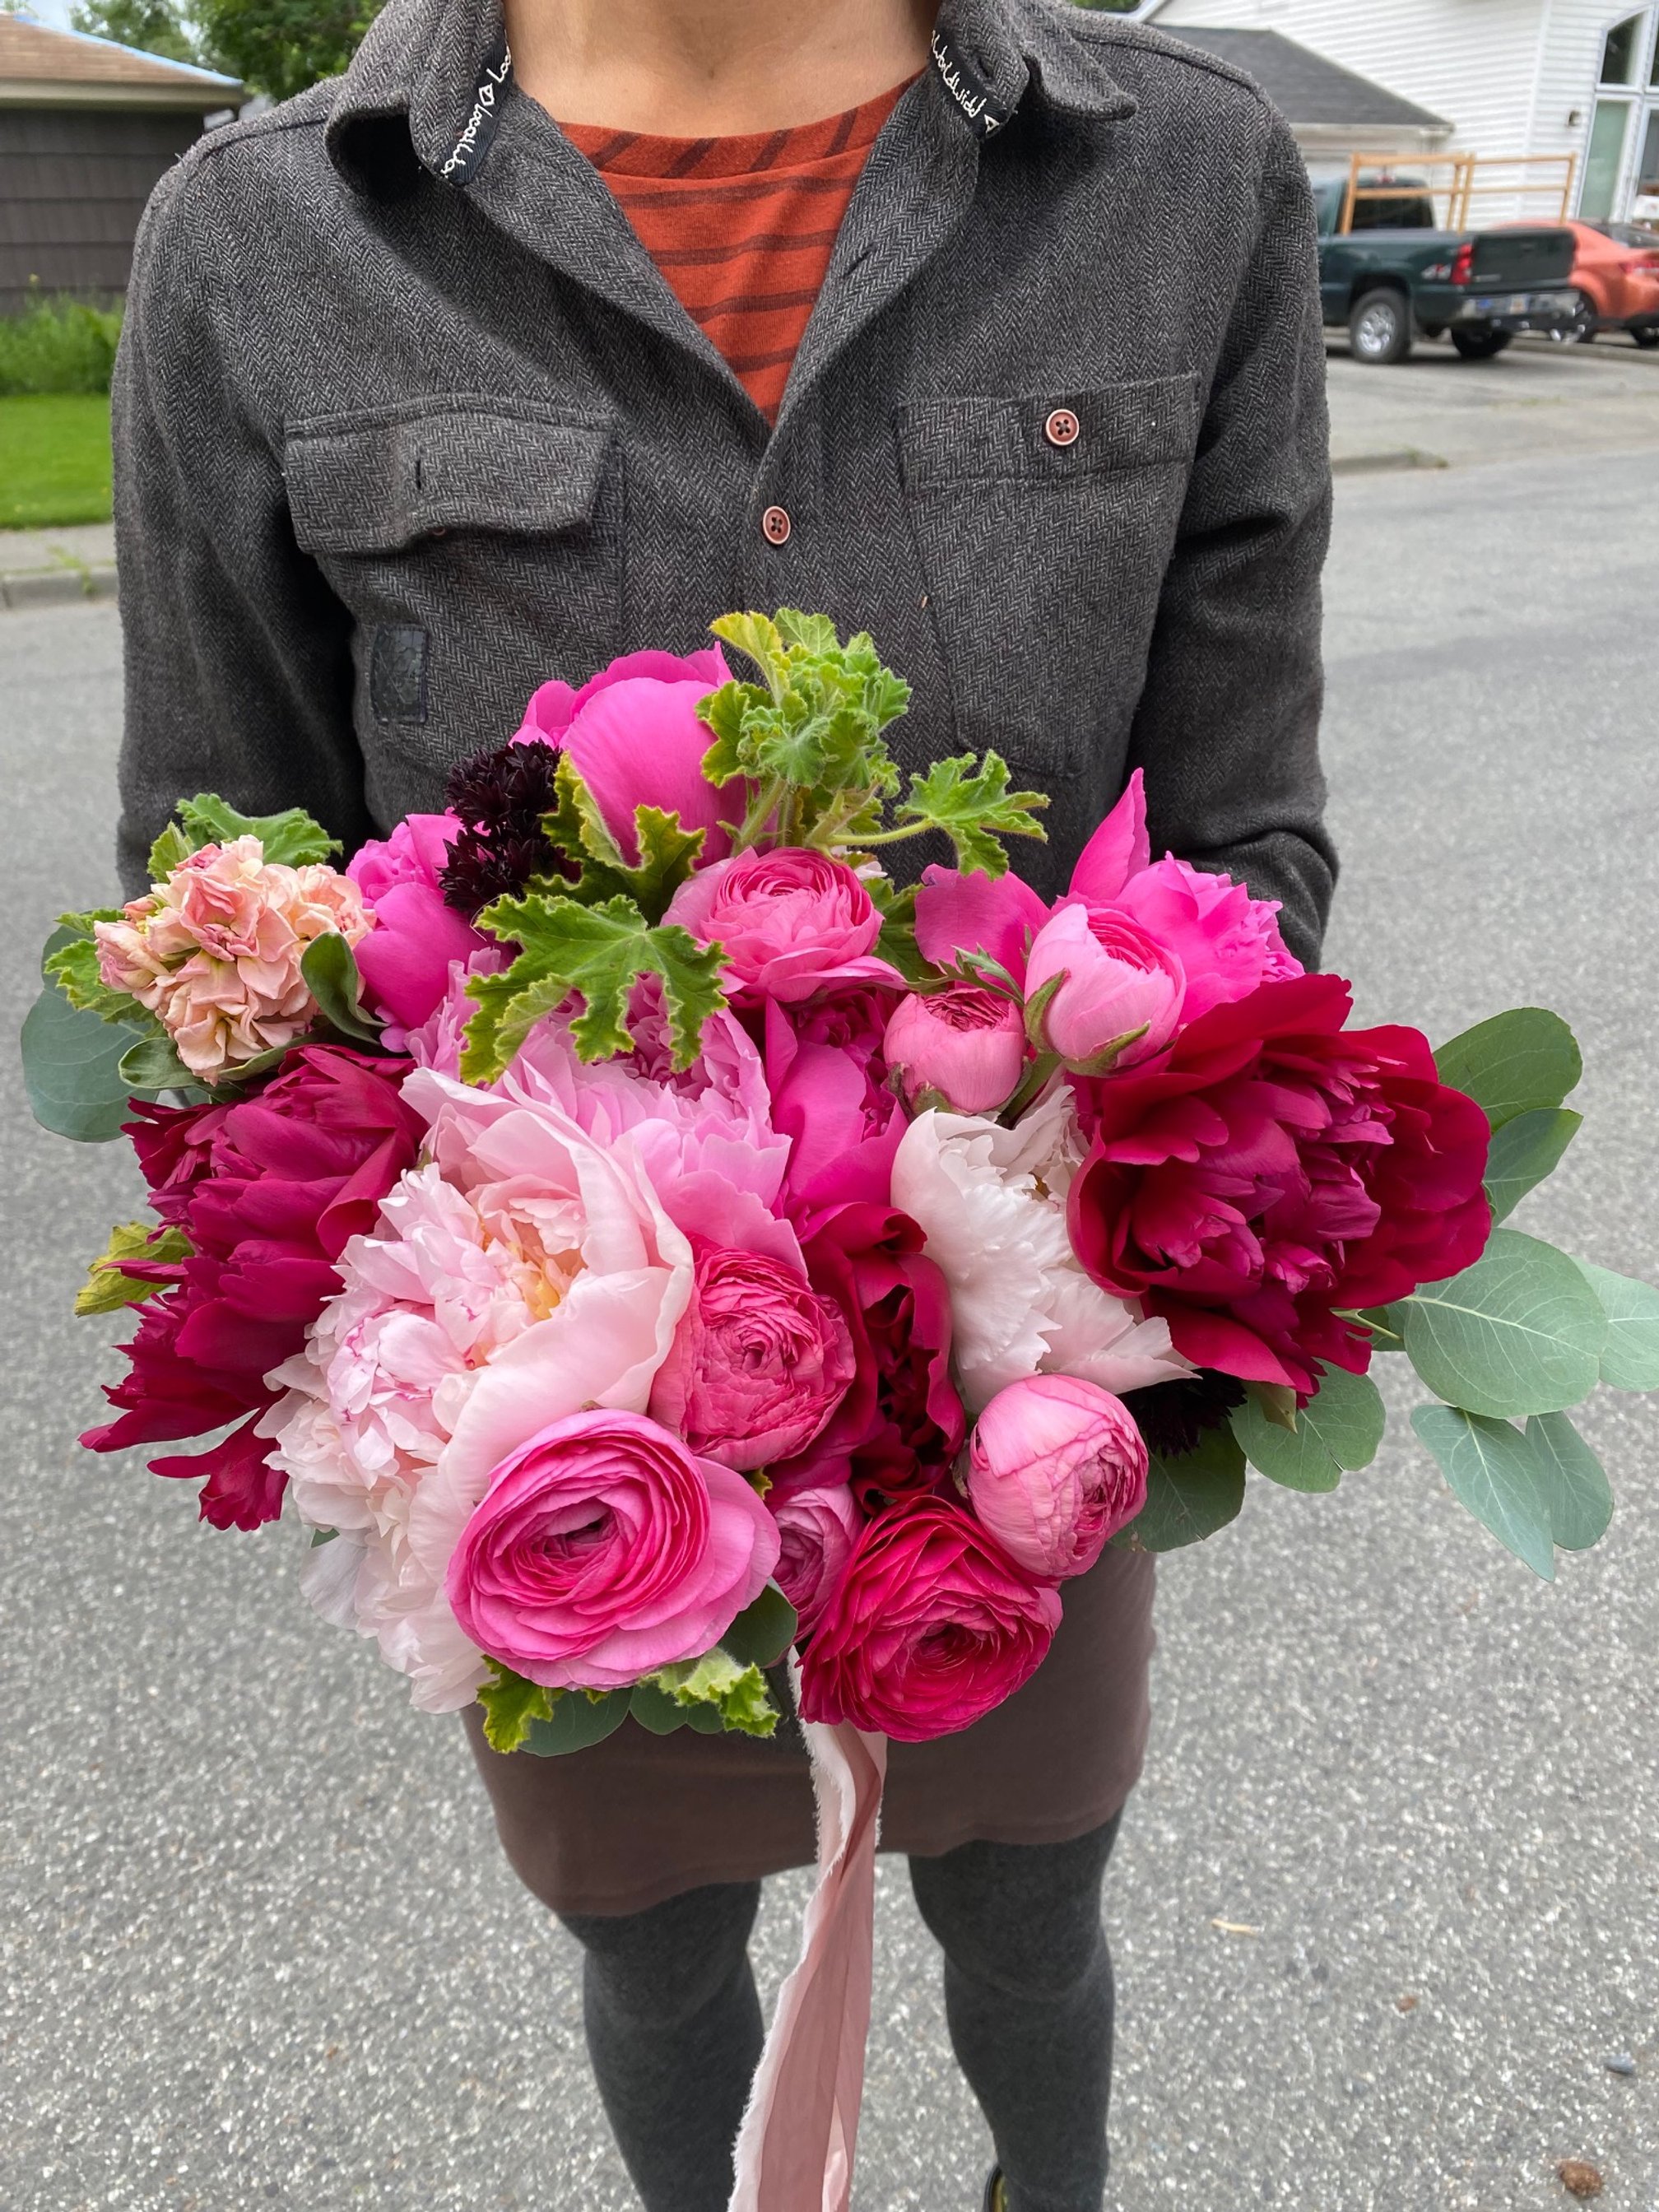
The Bridal Bouquet
So let’s get into the nitty-gritty by starting with the bridal bouquet - arguably the most important floral piece.
Your flowers will be part of your wedding photos which will be with you for a lifetime and beyond. This is your special floral piece! Give yourself permission to get exactly what you want.
Turnstone Farm bridal bouquets start around 350.00. Each piece is a work of art and completely custom. My flower designs will make you feel chic, elegant, and magical.
The Bridesmaids Bouquet
The style of your bridesmaid’s bouquets largely depends on your bridal bouquet, but not always! Usually, brides choose to have smaller versions of their bouquet for the bridesmaids. However, if you are choosing a cascading bouquet, don’t think you need to get your ladies a cascade as well. Their bouquets should be smaller and more modest. Turnstone Farm bridal bouquets start at 185.00.
Sometimes customers choose to give their bridal party a single bloom to hold. This can be a simple and elegant visual statement. Single blooms start at 15.00 each.
Floral Combs & Crowns
A stylish addition to your wedding attire are flowers for the hair! Floral combs are 75.00. Floral crowns start at 175.00.
Boutonnieres and Corsages
Expect to spend 35.00 - 65.00 on each one. The lower price reflects a standard boutonniere worn on a shirt or coat. The upper price covers a slightly more elaborate wrist corsage. Remember corsages can be worn on the wrist or pinned a jacket/blouse/dress.
Alaskan Wedding Photography by Lauren Roberts
Custom Arrangements
These may include any of the following: chapel flowers, table garlands, table arrangements (small or large), flowers for the bar or welcome table, etc.
So much about the actual price depends on the style of your arrangements, the flowers you choose, the vessel you desire, and the density of the arrangement.
Expect a small and simple table arrangement to start at 85.00. A larger, more elaborate one could reach 750.00+.
I know this is a huge price range! That’s why I spend so much care putting together your proposal. I want to make sure you get exactly what you want. I want your event to feel exactly as you envision it. I want your guests to feel honored, welcomed, and loved.
Floral Arches/installations
Arches and installations are dreamy. They are gorgeous, add a layer of luxury to your event, and create an amazing backdrop for your ceremony. Remember, the photos taken in front of an installation will be with you forever! It is because of this that installations are well worth the money.
A simple arch may start around 700.00. Expect to spend well over 1500.00 on anything more elaborate!
Other floral installations that you may want to consider in and around the reception area are: floral walls and hanging florals.
If you want to communicate abundance, magic, and beauty, this is for you!
Alaskan Wedding Photography by Kristian Irey
Interested in booking flowers for your wedding? I’d love to get to know you better and put together a proposal!
5 Cut Flowers for the Advanced Gardener
Try these 5 cut flowers for the advanced grower.
If you’re ready for more challenge in your garden, you are going to love these 5 cut flower!
They are a staple in my commercial cutting garden year after year. And while they take a bit more care that easier varieties, with practice you will have great success.
Dahlias
While dahlias are not hard to grow, they offer more challenges than just planting a seed.
To read more in depth on growing dahlias go here to read my blog: https://www.turnstonefarmalaska.com/garden-blog/how-to-grow-dahlias
There are hundreds of dahlias varieties that are great for the garden and the vase. Go here to read up on dahlia varieties: https://www.turnstonefarmalaska.com/garden-blog/choosing-dahlia-varieties
Harvest when the flower has fully opened but before the petals on the back side have started to wither. Dahlias do not last long in the vase but you should get a solid 3-5 days of beauty on your dining room table.
Cornel and Dreamcatcher dahlias tucked into a Turnstone Farm wedding flower arch. Photo courtesy of Lauren Roberts
Nigella
I’m planting nigella in week 16 and 19.
Varieties I love include: Black Albion Pod, Love-in-a-mist and Delft Blue.
While these aren’t officially a hard flower to grow, mine seem to take special care. In fact I wrote in my notes section next to my planting date: “take special care!”.
Nigella prefers to be direct seeded and since I don’t direct seed anything besides salad greens in my garden I think they suffer a little when transplanted.
This is a fun and super unique flower that can be harvested for the flower and for the pod. The pod dries great for everlasting bouquets.
Nigella pod in a Turnstone Farm boutonniere. Photo courtesy of Lauren Roberts
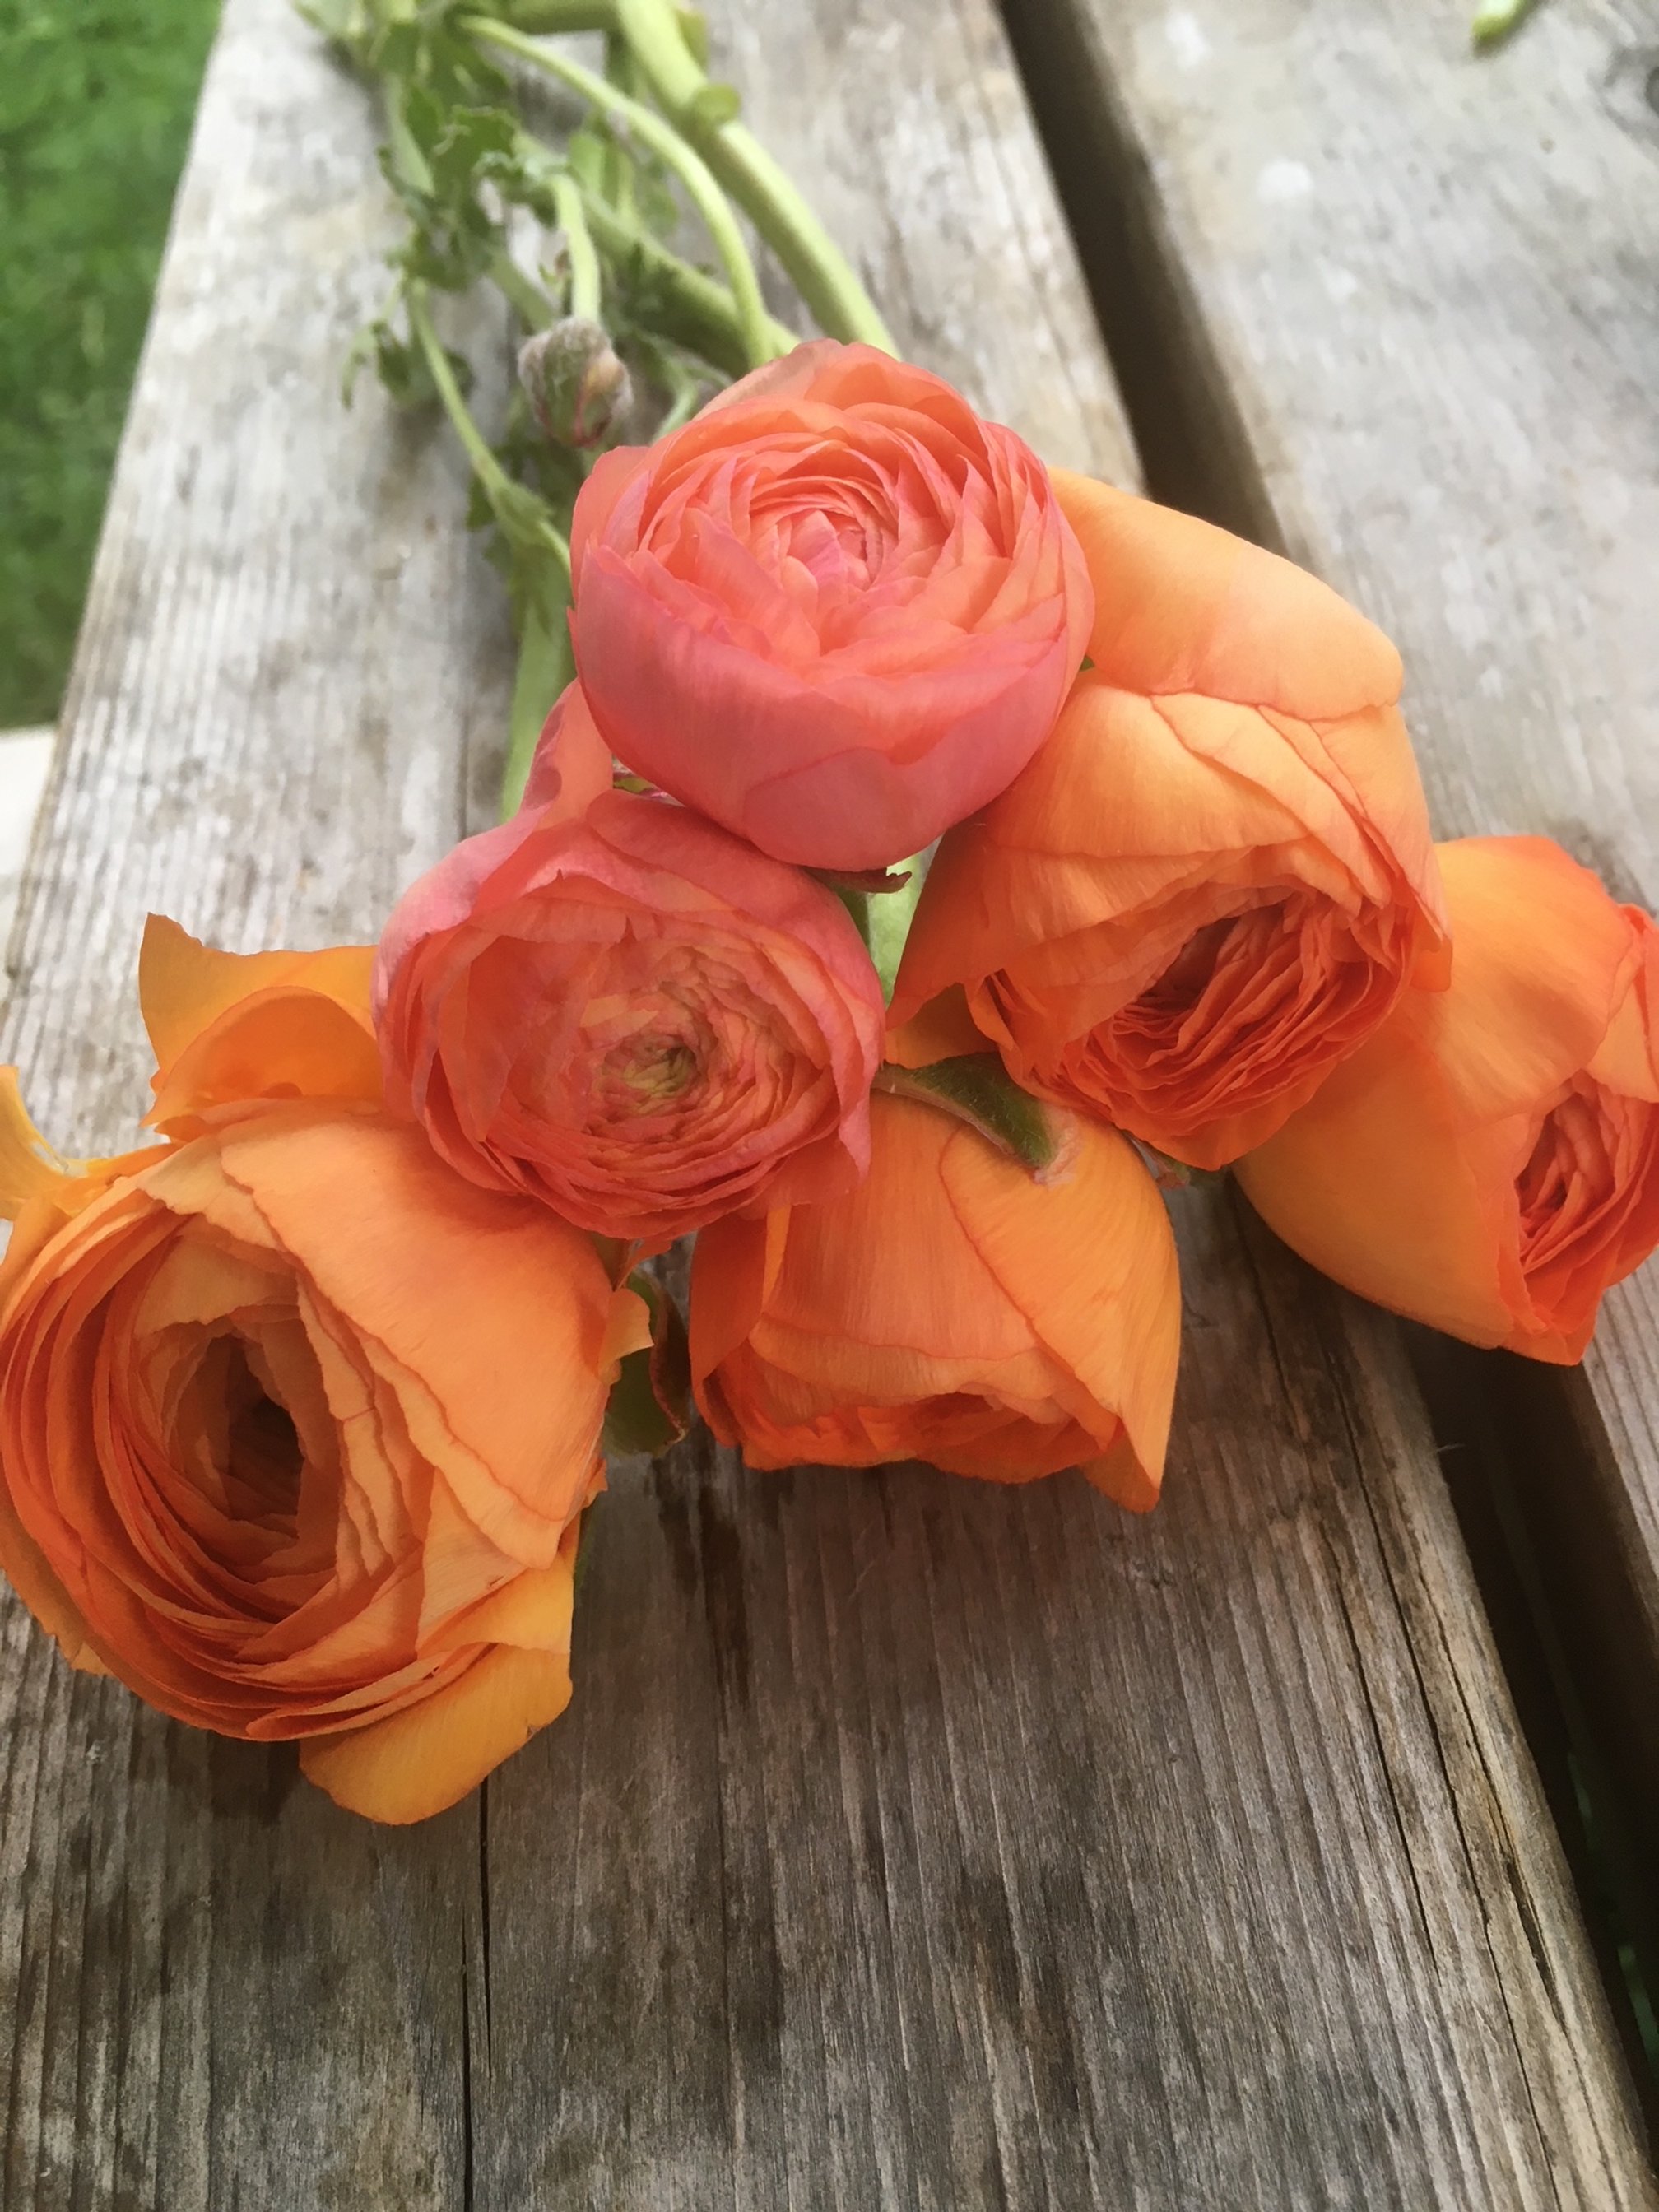
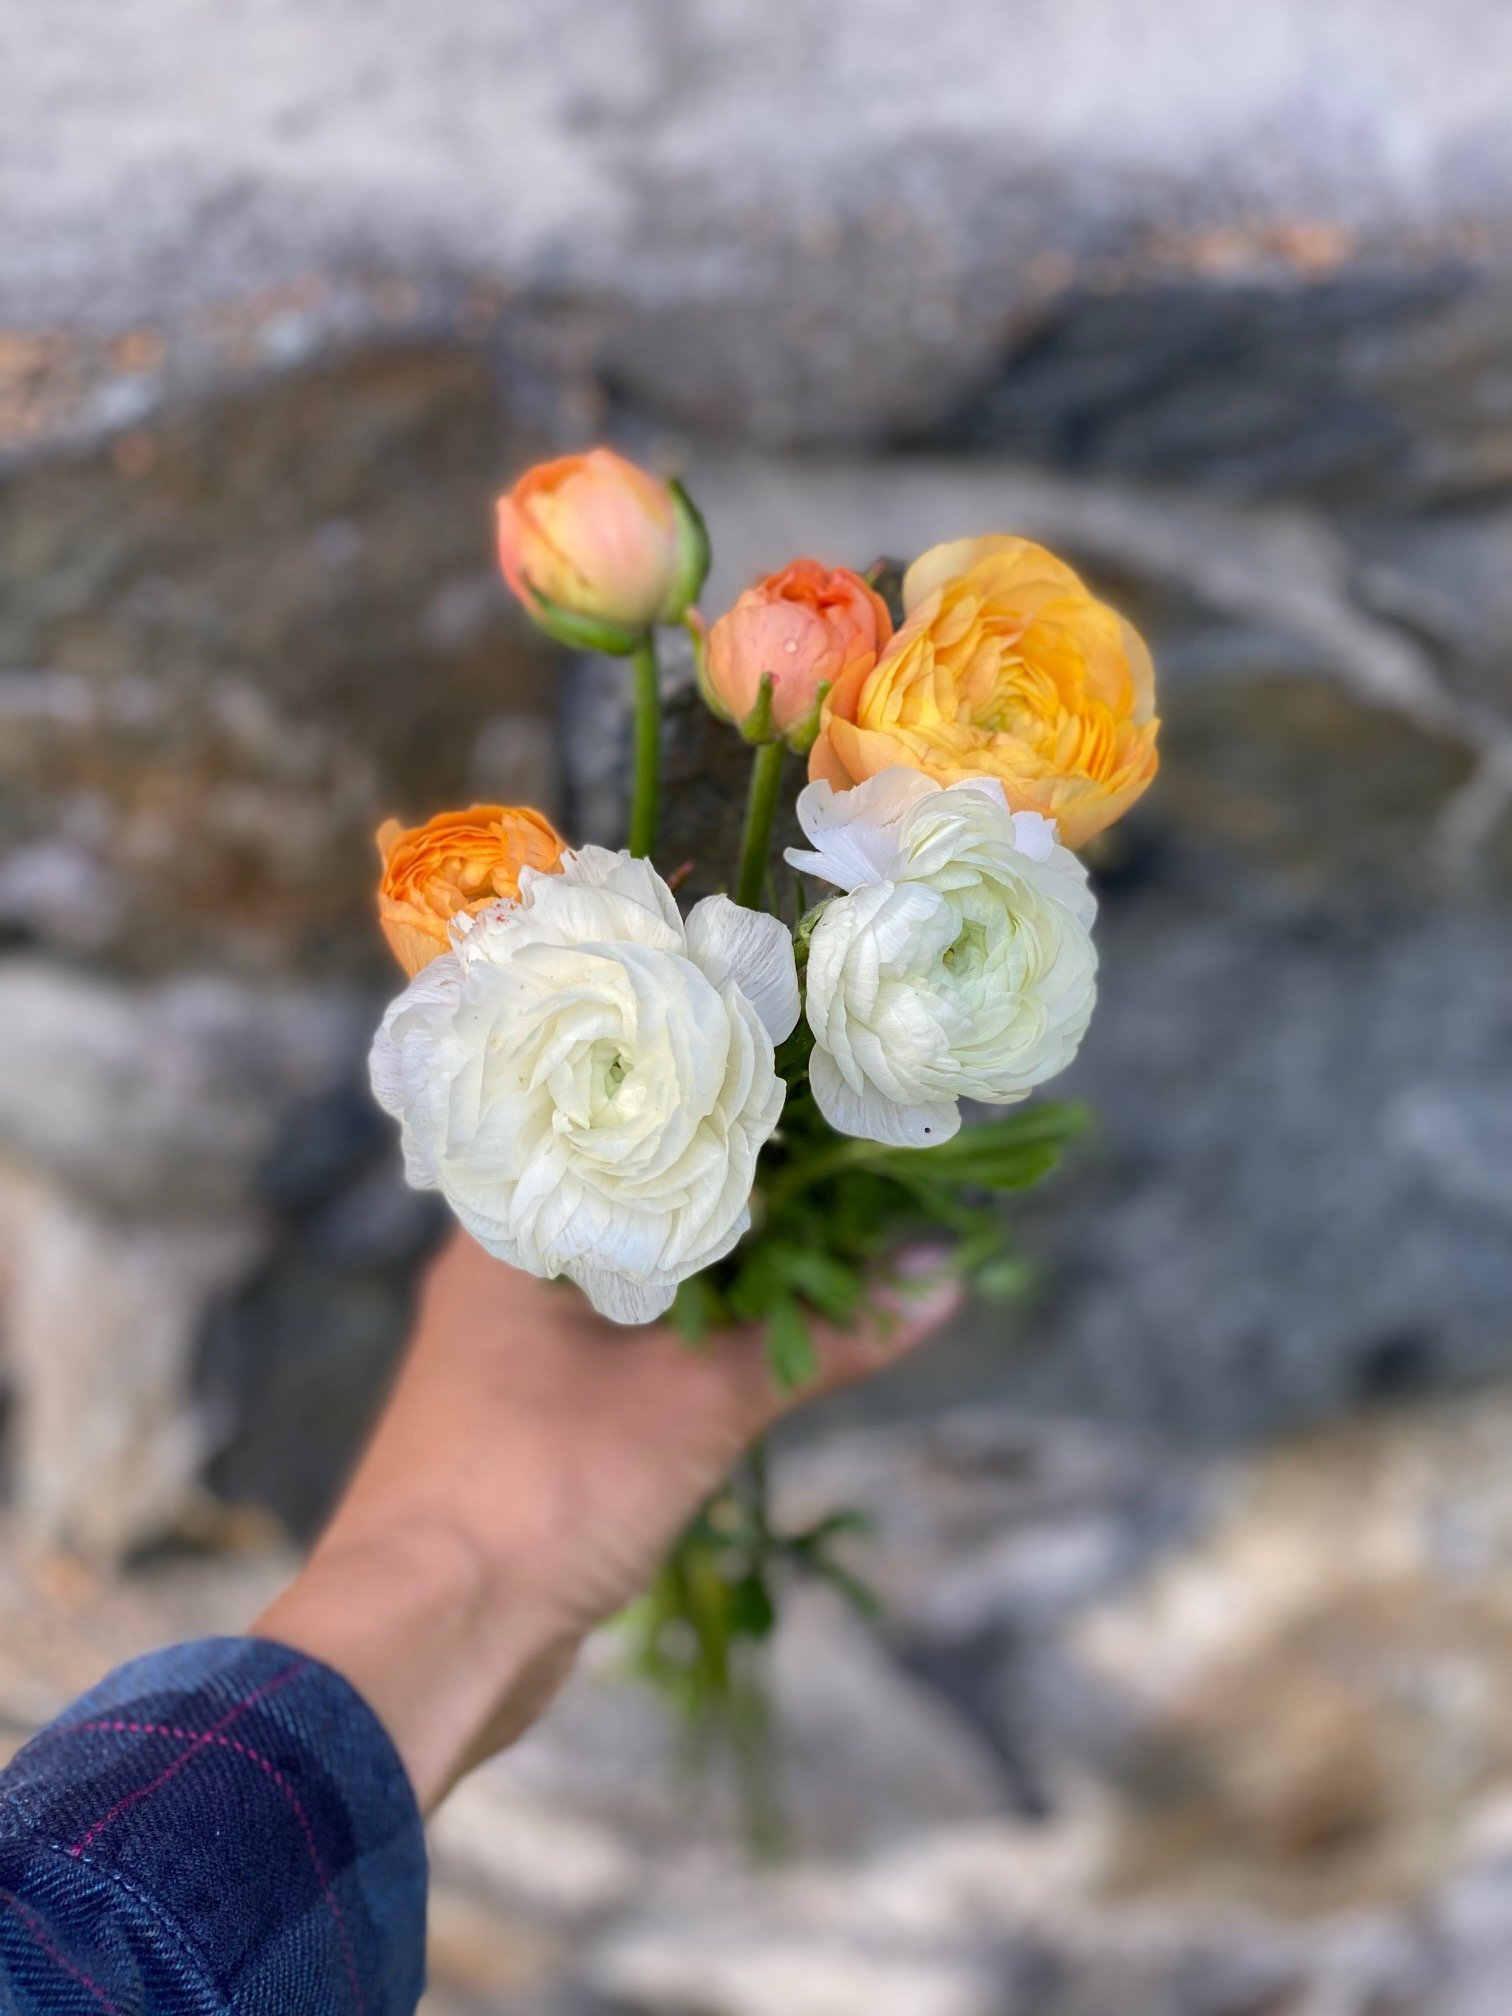
Ranunculus
I start ranunculus by corms in week 16. There is a special process for planting these so be sure to read up by clicking the link below.
Ranunculus loves cool weather. That’s why they are a great flower for northern growers. Most growers plant one round of ranunculus for spring and early summer blooms.
I recently learned how to also get in a fall crop by planting a second round in week 20. This can be a bit of a gamble because if we have a warm summer they will not thrive. But it’s worth the effort! The past two years I’ve gotten a fall harvest although the blooms seem to be smaller than my spring crop.
These can be cut for harvest as soon as the buds feel like soft marshmallows. The more stems you cut, the more blooms you get per plant.
For a more in depth look at growing ranunculus GO HERE to read my blog: “How To Grow Ranunculus”
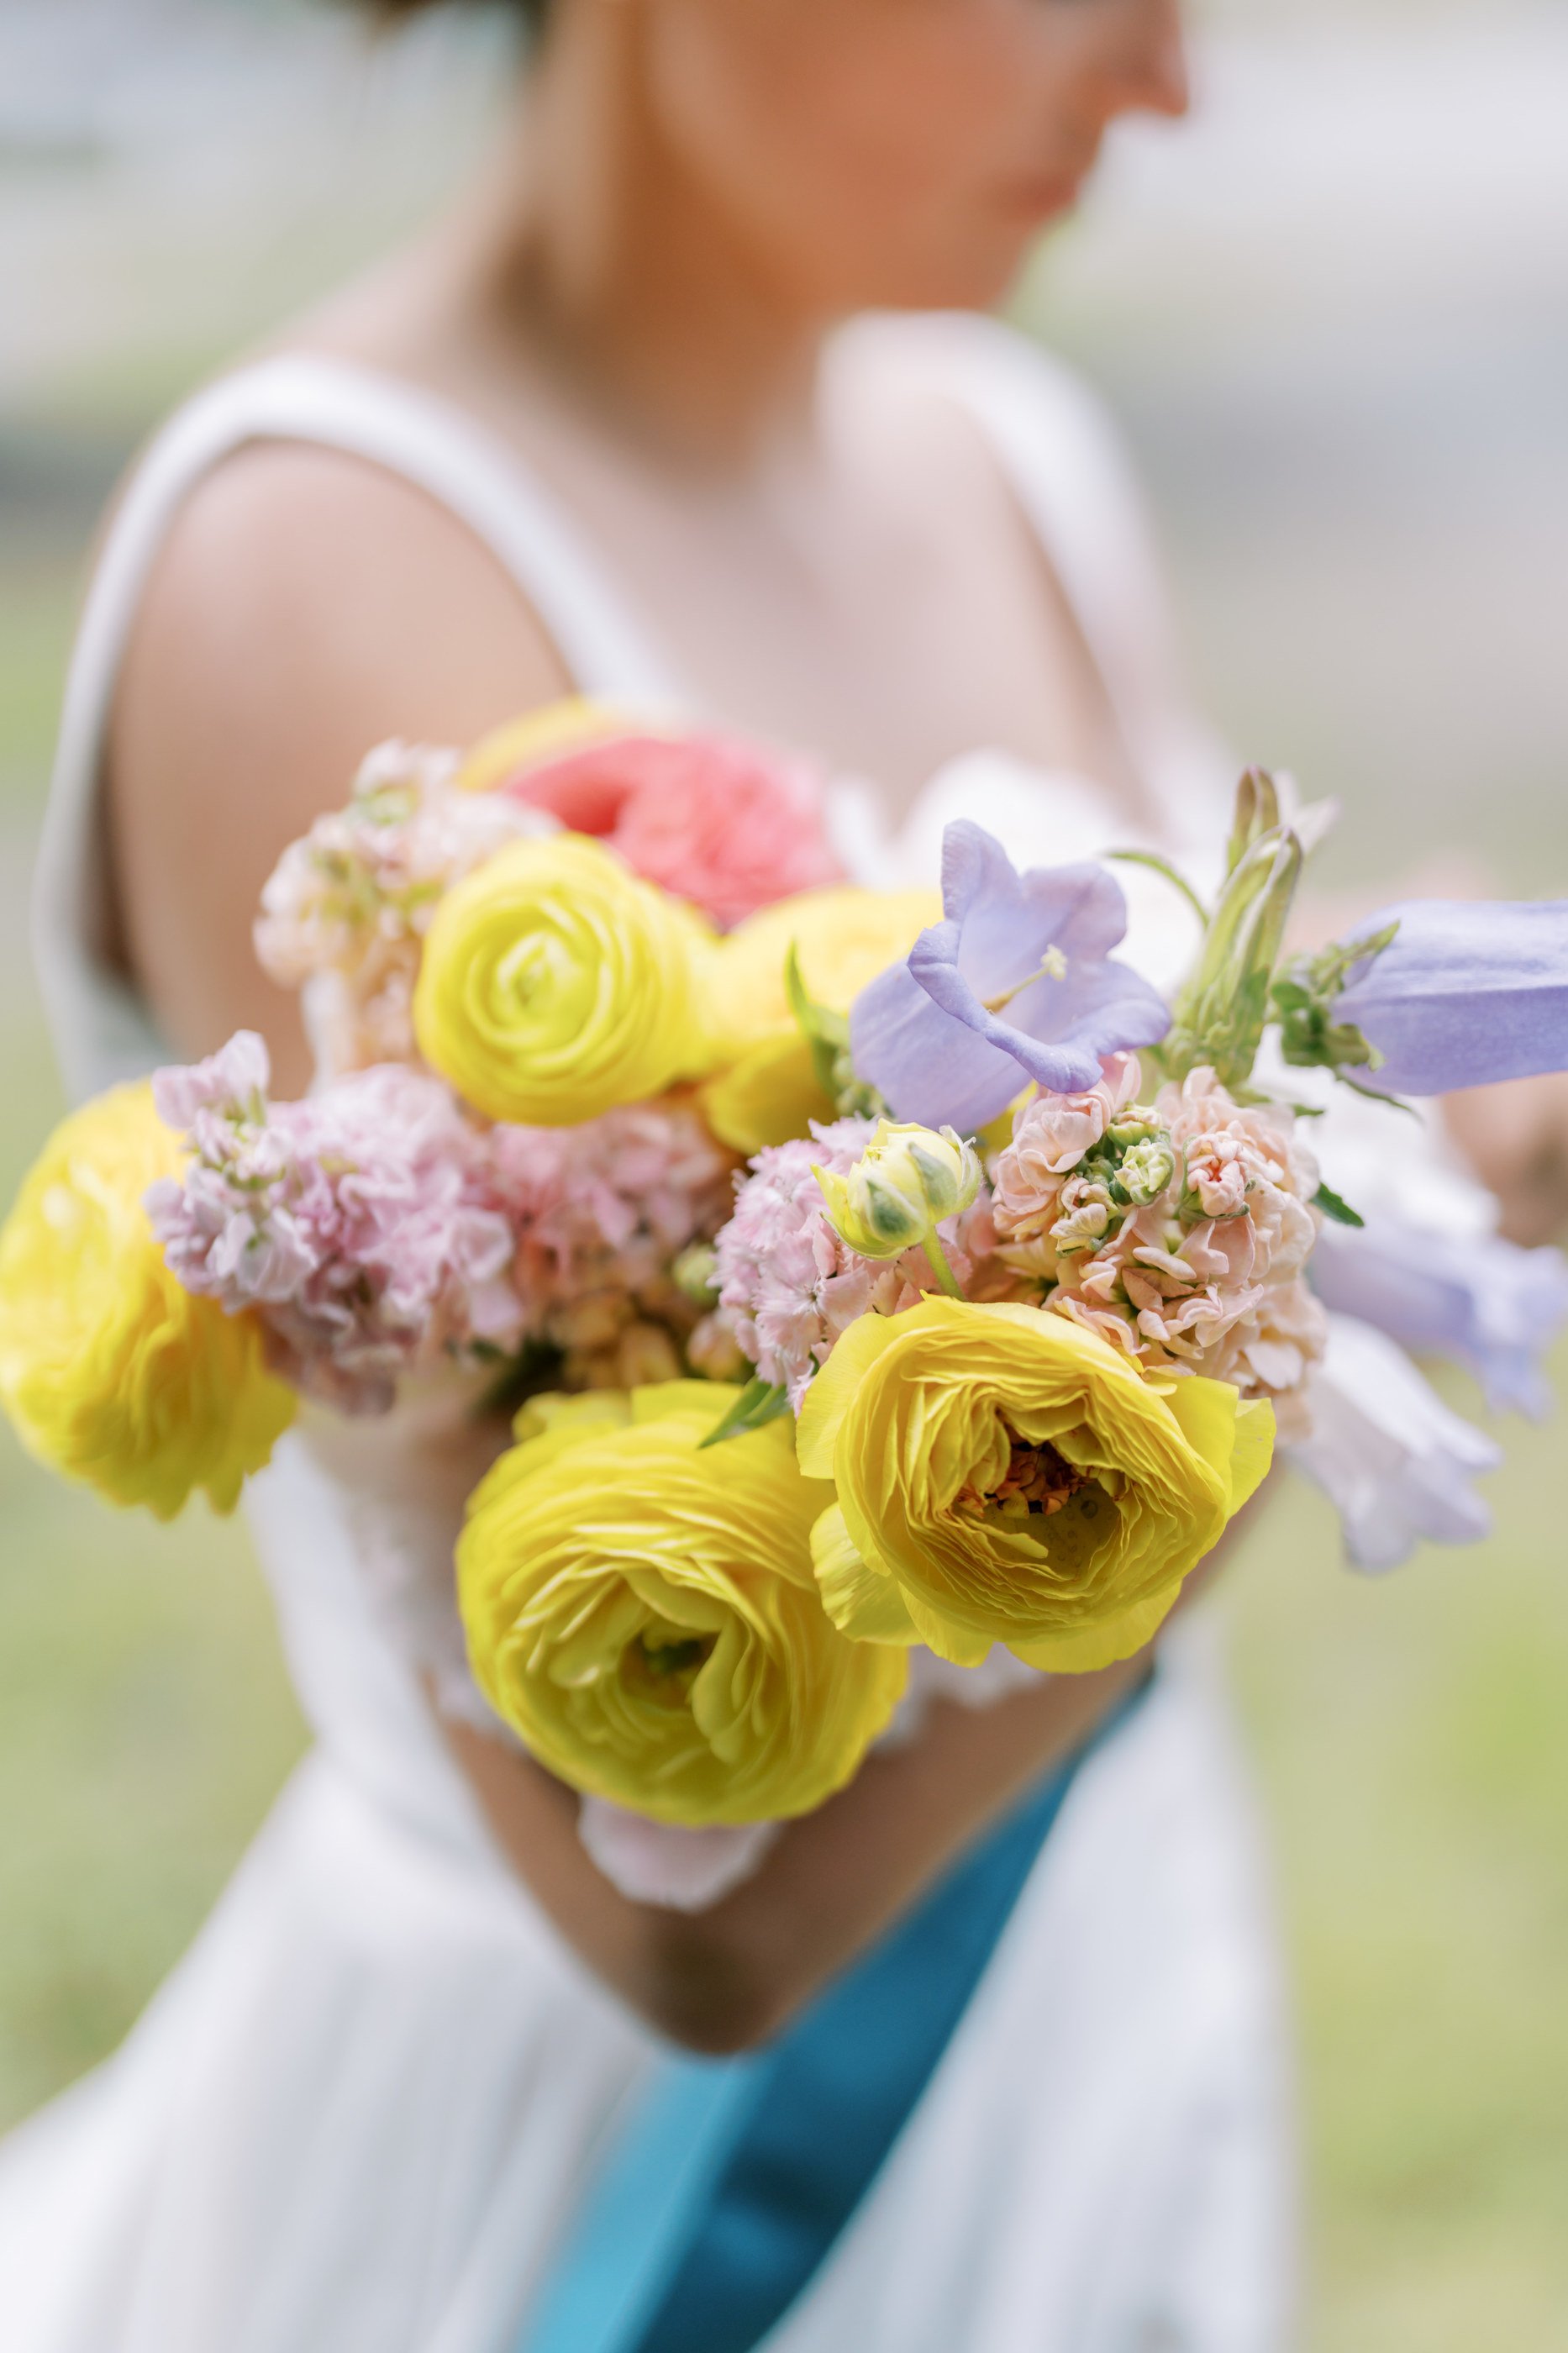
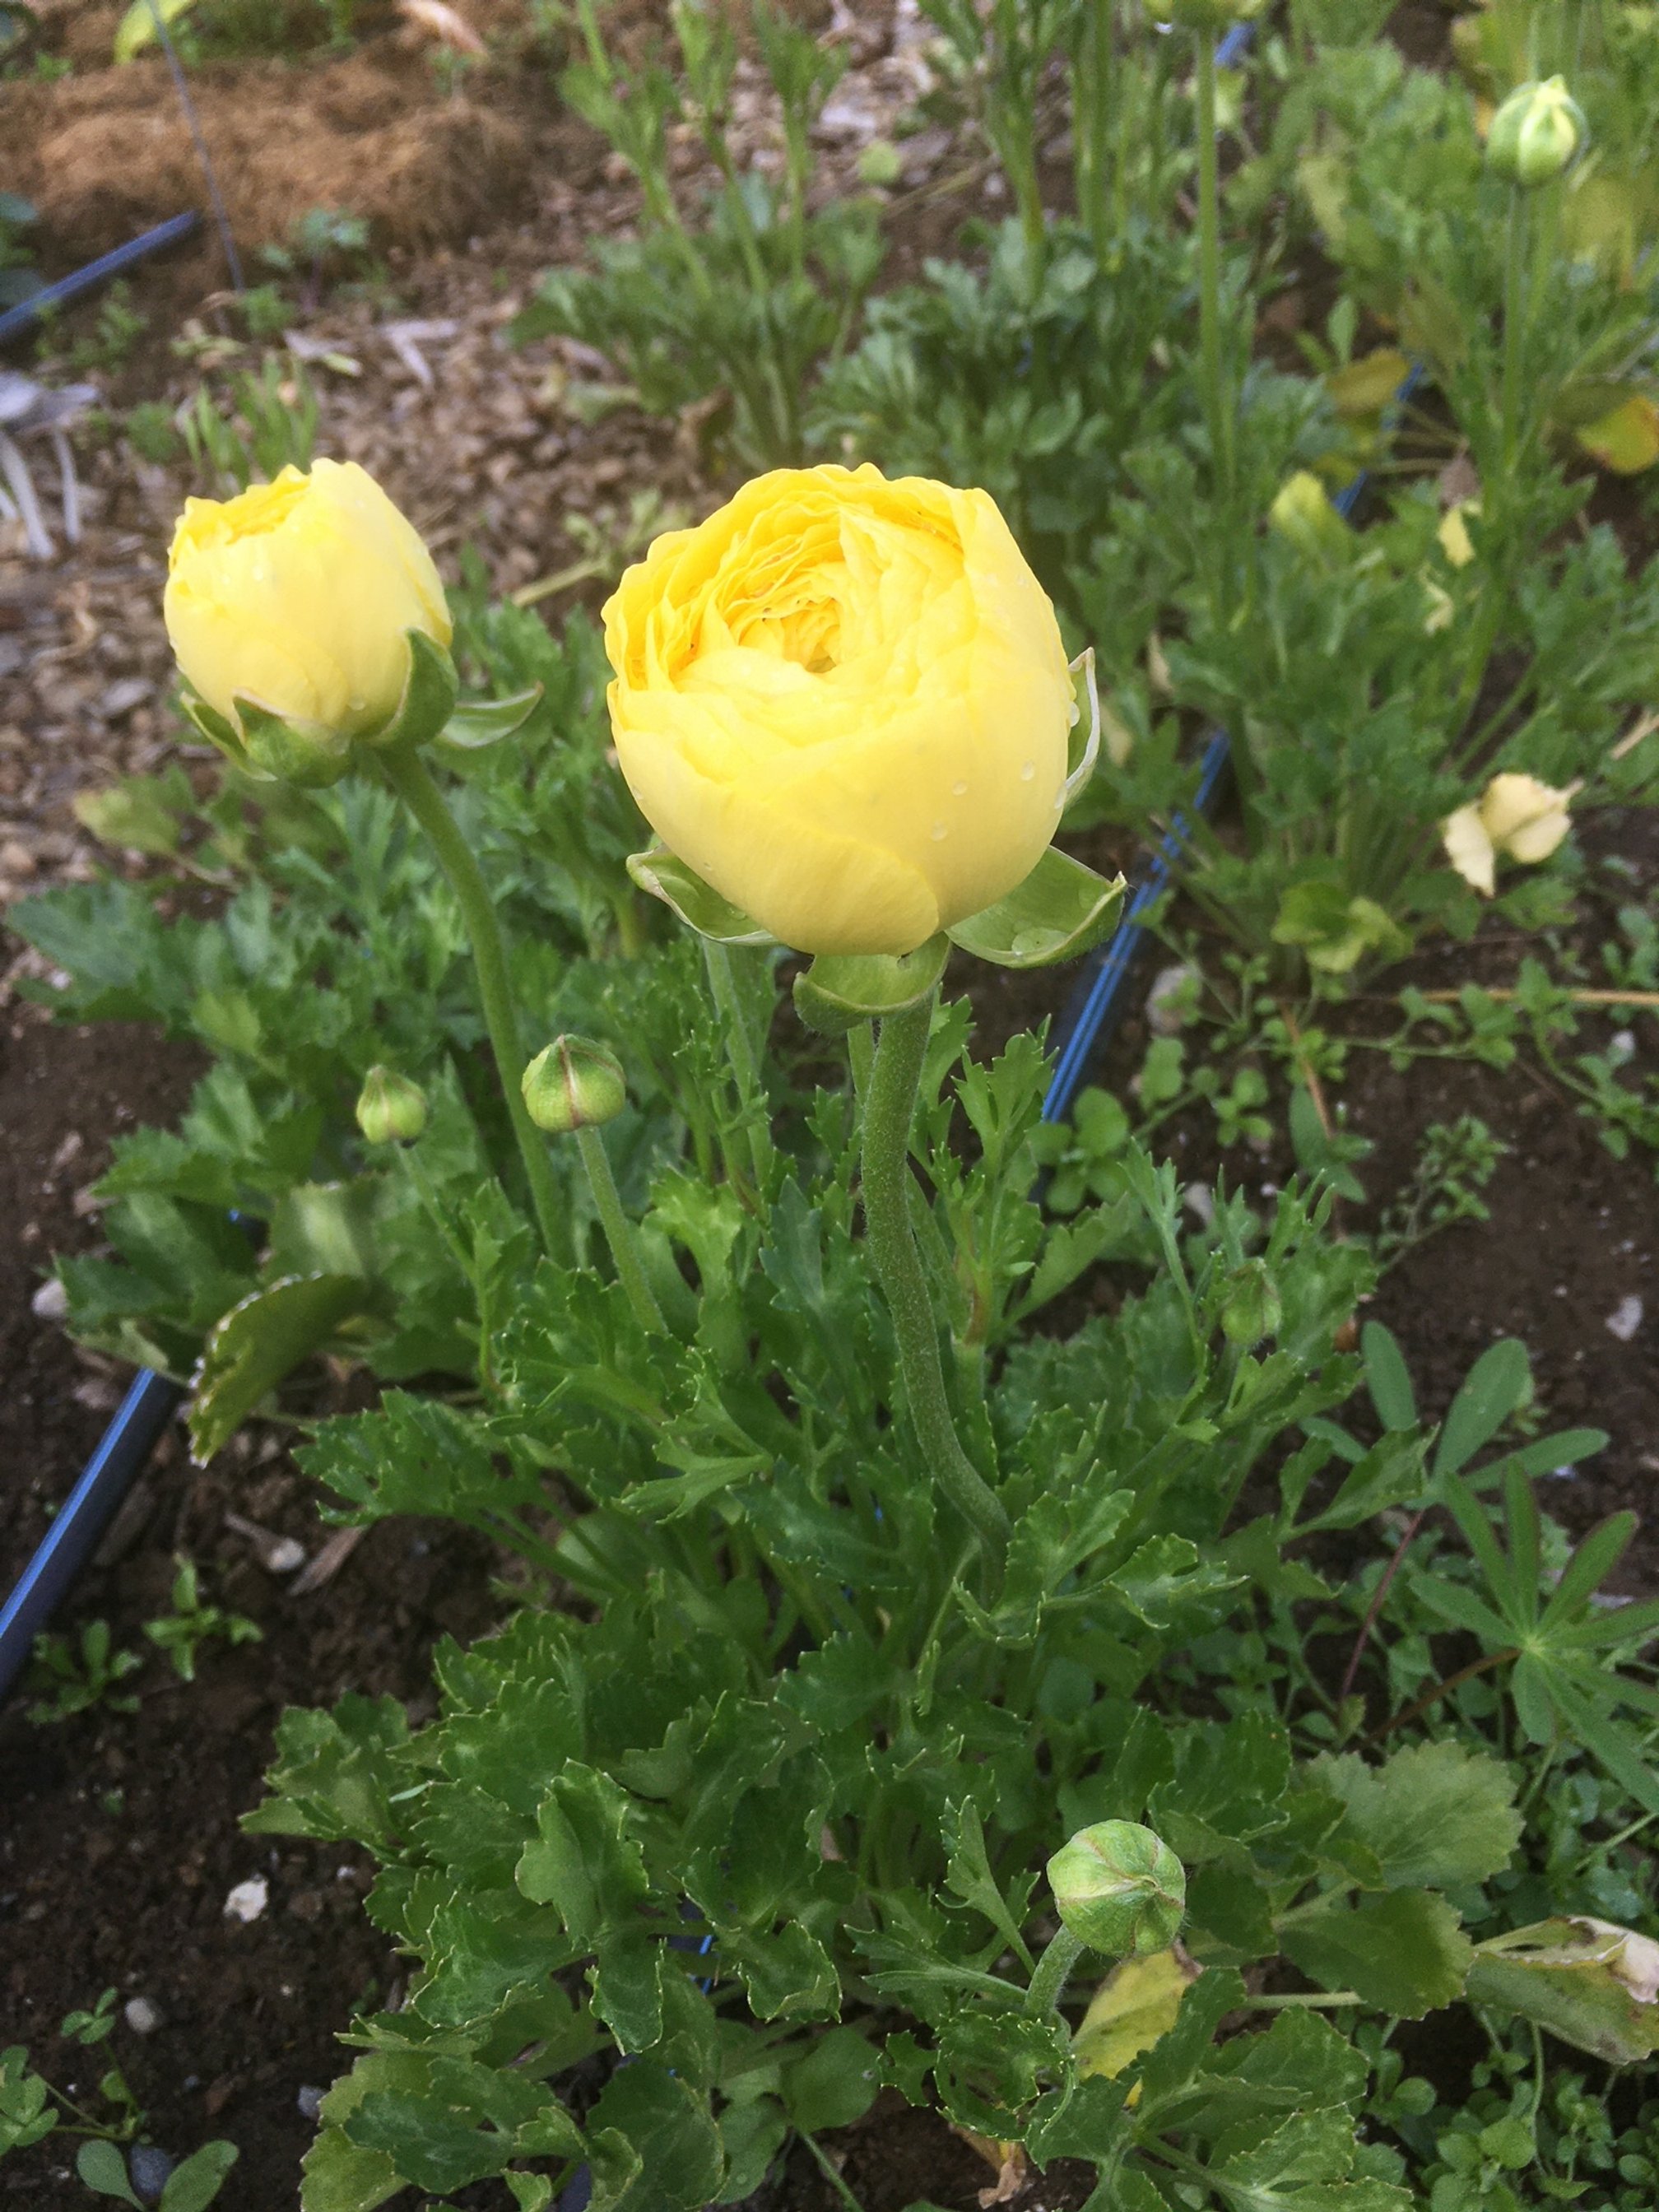
Yellow ranunculus is a luxurious and wildly popular wedding flower. Photo credit Corrine Graves
Anemones
Anemones are one of my absolute favorite flowers. I grow different varieties each year, so just search around for colors that look amazing to you. I’m starting mine in week 13 only.
These are started very much like ranunculus. Follow the instructions for planting ranunculus here: https://www.turnstonefarmalaska.com/garden-blog/how-to-grow-ranunculus
Ideally you’ll harvest these for the vase after the flower has fully opened once and closed once (they close at night). This is just about impossible to keep track of, so I just harvest when the flower is almost fully open.
Anemones have a fabulous vase life. They don’t ship well so you will almost never see good looking ones anywhere but in your garden, at a farmers market or in your Turnstone Farm bouquet.
Anemones from the Turnstone Farm garden.
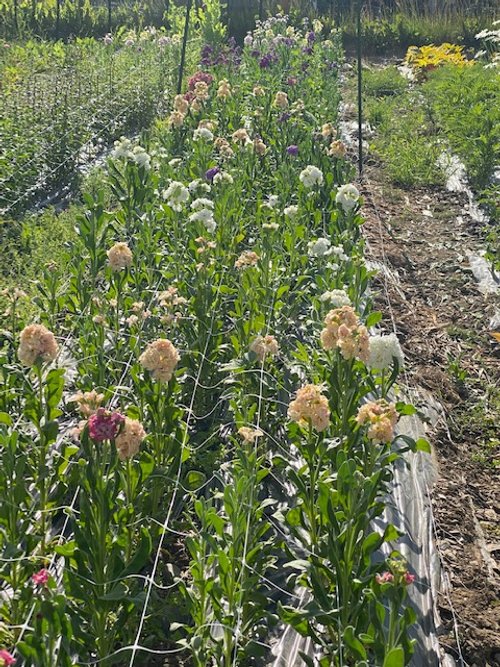
Stock
I’m starting all my stock in week 13. This is considered a one and done flower, meaning you grow one plant for one bloom and then the plant is done.
Because of this, I would usually plant 2-3 successions. But because stock dislikes heat I stick to only one early season planting. It would be worth testing a planting that’s mature in time for fall. Perhaps I’ll try a few this year to see how they fare!
Stock is an early season bloomer that helps fill the gap between tulips and all the other garden varieties.
Its smell cannot be beat and the flowers are edible.
It lasts for a solid week to two in the vase and the dried petals can make a heavenly smelling potpourri once dried.
It comes in a variety of colors: white, apricot, purple, light and bright pink and yellow.
While a more challenging flower to grow as it must be started earlier, dislikes dry conditions (spring 2022 anyone!), and dislikes heat, it is well worth the challenge.
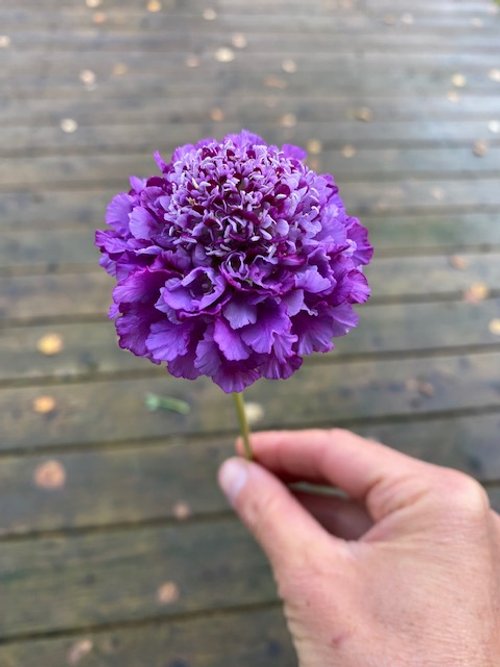
Purple stock helps fill out these early season Turnstone Farm bouquets.
Grow Your Own Cutting Garden: 10 Cut Flowers for the Intermediate Gardener
Add a little challenge to your home cutting garden with these 10 varieties.
If you’ve already mastered some of the beginner cut flowers I reference here in my last blog, you’re ready to add a few more challenging flowers to your garden.
I classify these as more intermediate because each of these varieties may have one or more needs:
the need to be started earlier and usually indoors
more time babying them inside
particular needs when harvesting
the need for succession planting
For greater ease in growing any of these, skip the succession planting for now and just do one planting of each during the last seeding week I mention for each variety.
If you want to test your skills further, pick a few to succession seed for a longer blooming garden.
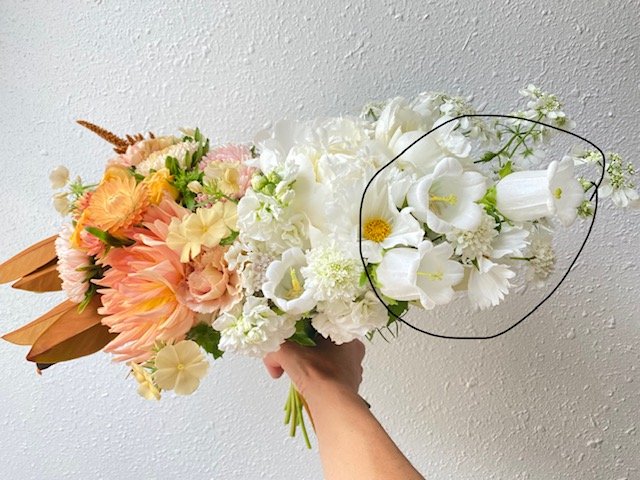
Campanula
These are fun and delicate blooms that look fabulous in the garden.
I also use them consistently in my wedding work.
In the vase they lasted a good 1-2 weeks in good condition.
This is an all round excellent flower.
Cut these for the vase when the first flower opens up as the other buds will continue to open in the vase.
Cosmos
Cosmos is a staple of mine every year. Varieties I love are: Rubenza, Double Click Varieties and Cupcakes.
I plant mine in two successions, one starting week 15 and another starting week 18. The varieties I plant in week 18 are usually more fall themed colors like Rubenza and Double Click Cranberries.
Pinch these when 4-6 inches tall to get the most blooms per plant.
These flowers are delicate and ephemeral. They look stunning and full in the garden and marvelous in the vase.
Part of their joy is that they can’t be shipped since they are so delicate.
You can only have these in your vase if you grow them yourself or buy from a local farm.
Harvest when just beginning to open for longest vase life.
Double Click Cosmos in the Turnstone Farm Gardens
Dianthus
I fell in love with the “Sweet” varieties last year and am growing three different colors from this line.
My seeding will occur during week 13 and 15.
Harvest for the vase when the florets are 10-20% open. They will continue to open in the vase giving a solid 2 weeks of vase life.
Godetia
While this one didn’t make my initial “best of” list I’m still listing it here for the home gardener. “Grace Mix” gives you a nice variety of colors for your garden.
I’m giving this one more go this coming year to see if I can get a bit more length to the stems.
I’m seeding these in week 15 and 18.
Godetia will last forever in the garden and in the vase - florets just keep opening up. It is short and sturdy for garden beds.
The petals are easily damaged by rain. Although we had an exceptionally rainy summer in 2022 which was my first year growing these.
Phlox
Cherry Caramel, Dulce de Leche and Sugar Stars are what I grow each year.
I start these in week 14, 17 and 19.
These are delicate blooms that have a solid vase life. Harvest when the flower just begins to show color. If you cut before they are fully open they will open in the vase.
This is a solid cut and come again flower and the more you cut, the more blooming stems will grow.
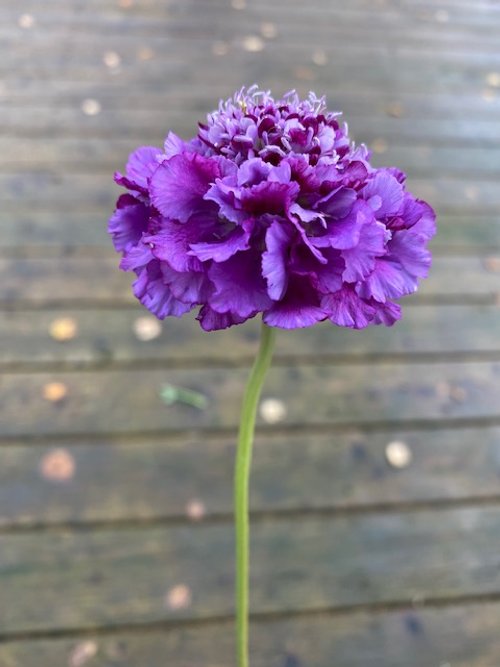
Scabiosa
This is a tall plant with long strong stems.
I love “Black Knight”, “Oxford Blue” and “Fire King” but there are many more fabulous varieties.
Start in week 13 and week 16.
Scabiosa looks whimsical and lively in the garden or you can cut it just when the first florets begin to open. When cut at this time it will last a solid 1-2 weeks in the vase.
Scabiosa loves cooler temperatures so does better in our cooler Alaskan summers.
Black Knight Scabiosa
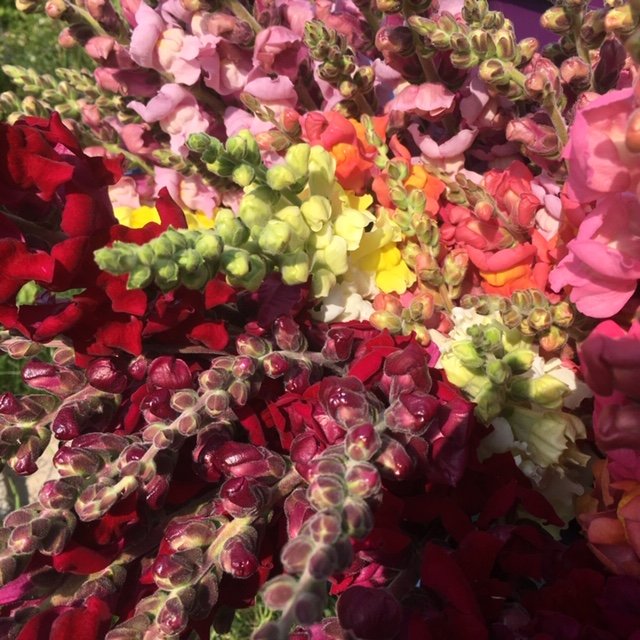
Snapdragons
My go to variety is any color in the “Potomac” variety family. They are strong and sturdy with fabulous blooms.
If you want something more unique try “Madame Butterfly” varieties or “Chantilly”. These two types have the most unique florets but are much more delicate and break fairly easy. If you’re just bringing them from garden to your house, they should do fabulous.
This is one of the earliest flowers I plant and I start these in week 11 and week 14. They grow slow and you can put them in the garden extra early since they can weather a few light frosts.
Harvest for the vase when 1/3 of the florets have started to open.
Me netting a bed of snapdragons in the original Turnstone Farm Flower fields in Southern Wisconsin.
Statice
These are great for a long lasting cut flower or for drying.
They come in a variety of colors but my favorite is QIS Apricot.
I start these by seed in week 12 and week 14.
Cut when most of the flowers are fully open and showing color.
Sunflowers
Although these are relatively easy to grow, I put them here for a couple reasons. The first being that they are good practice for succession planting. I plant these in weeks 18, 20 and 22.
Varieties I’m growing this year include the Sunrich series and the Procut series. I grow these each year and then will add in one fun and new variety each year.
You can succession plant sunflowers a couple ways: plant the same variety every 2-3 weeks for 3 successions. OR plant different varieties (that each have a different DTM) at the same time. Then repeat this once or twice.
You can also play with growing them close together to get the perfect sized sunflower for the vase. I space mine 4-6” apart for best results.
Harvest for the vase when petals are just beginning to unfurl but are fully colored.
Space your sunflowers 4-6” apart to create the best size flowers for your vase.
Rudbeckia
I love the Cherokee Sunset, Indian Summer and Prairie Sun varieties.
I start these by seed in week 13. I don’t find it necessary to succession seed as these are cut and come again flowers. You cut them and they keep growing new stems!
Harvest when the stems pass the wiggle test. Simple grab onto a stem and wiggle back and forth. If the bloom wobbles on a floppy stem, wait to cut until the stem has matured further. Once the flowers are fully open I check daily for a nicely rigid stem
Look at this freaking beauty!!!! Rudbeckia is stunning in the cut flower garden.
I hope this gave you new ideas for your home cutting garden this year. Start with 1-5 new varieties and see how they do!
Grow Your Own Cutting Garden: 5 Cut Flowers for the Beginning Gardener
Learn these 5 easy-to-grow for the beginning cut flower grower.
If you’re new to growing flowers for cutting I want to offer you 5 flowers that are fantastic for the beginning grower.
Master these and then you can move on to more difficult ones next year.
#1 Calendula is an easy and prolific flower.
Varieties I love are Orange Button and Ivory Princess. Orange Button is the classic bright orange calendula flower. Ivory Princess is a unique soft yellow.
Strip the petals off for a salad garnish or to dry and then add to salves or use as a natural dye.
You can start these directly in the garden or inside. I’m seeding mine in week 14 and week 17 in order to have 6 weeks of continuous blooms. I also leave the calendula patch clear in the garden because they readily self seed. You could plant these once and then simply let a few plants go to seed each fall. You will then not have to re-seed ever again!
Fun fact: some people feed calendula to their chickens to create a more orange yolk. I’m not sure it changes the nutritional value of the eggs but it does make the yolk beautiful.
Ivory Princess Calendula in the Turnstone Farm garden
#2 Bachelor Buttons are one of the earliest blooming flowers in the annual garden.
Blue Boy, Classic Magic and Black Button are fantastic varieties. I plant these once in week 14. You could definitely plan for at least two plantings for continuous blooms all season. I opt not to since cutting these small flowers is very time consuming on a large scale. They are valuable to me in the early season though, since they are one of the first to bloom in my garden.
Fun fact: Bachelor Button flowers are edible. They make for a great garnish.
Bachelor Buttons in the Turnstone Farm Garden
#3 Marigolds are one of my absolute favorite flowers.
Every year I grow Giant Orange. It is the best for cutting and produces loads of big, fragrant blooms.
I’m planting two successions: one in week 14 and one in week 16.
Make sure to pinch marigolds back when they are 4-6 inches tall. If you don’t pinch, you will only get 1 flower per plant. If you pinch, you will get many, many blooms.
Most cut flowers, including marigolds benefit from being supported by netting (shown below). This helps support them in a heavy rain or wind storm. It’s easy to lose an entire crop in one storm if you fail to do so.
Fun fact: Marigolds dry great hung upside down. They hold their vibrant color well and make for fantastic fall dried arrangements.
Giant Orange Marigolds
Be sure to net your flowers so you don’t lose them in a storm.
#4 Poppies are one of the most cheerful additions to the garden.
My favorite varieties include any Breadseed variety (they are the best for pod production) and any Shirley variety. They both come in many colors! Pick a few to start with and have fun.
Don’t forget to save your own seed as it is very easy to do so. I usually just let poppies self seed in the garden from the pods of the previous year. If I’m starting a new variety, I’ll start these indoors in week 20 and week 22.
The only way you’ll ever get poppies in an arrangement is if you grow your own or buy from a local farmer. Since they have a short vase life, they do not transport well. Even with the short vase life they are so worth the effort.
Harvest for the vase right when the bud is about to pop open and you can just start to see the color of the bloom.
Fun fact: poppy pods are fabulous dried and made into fall arrangements or popped into a bud vase.
Shirley poppy in the Turnstone Farm garden.
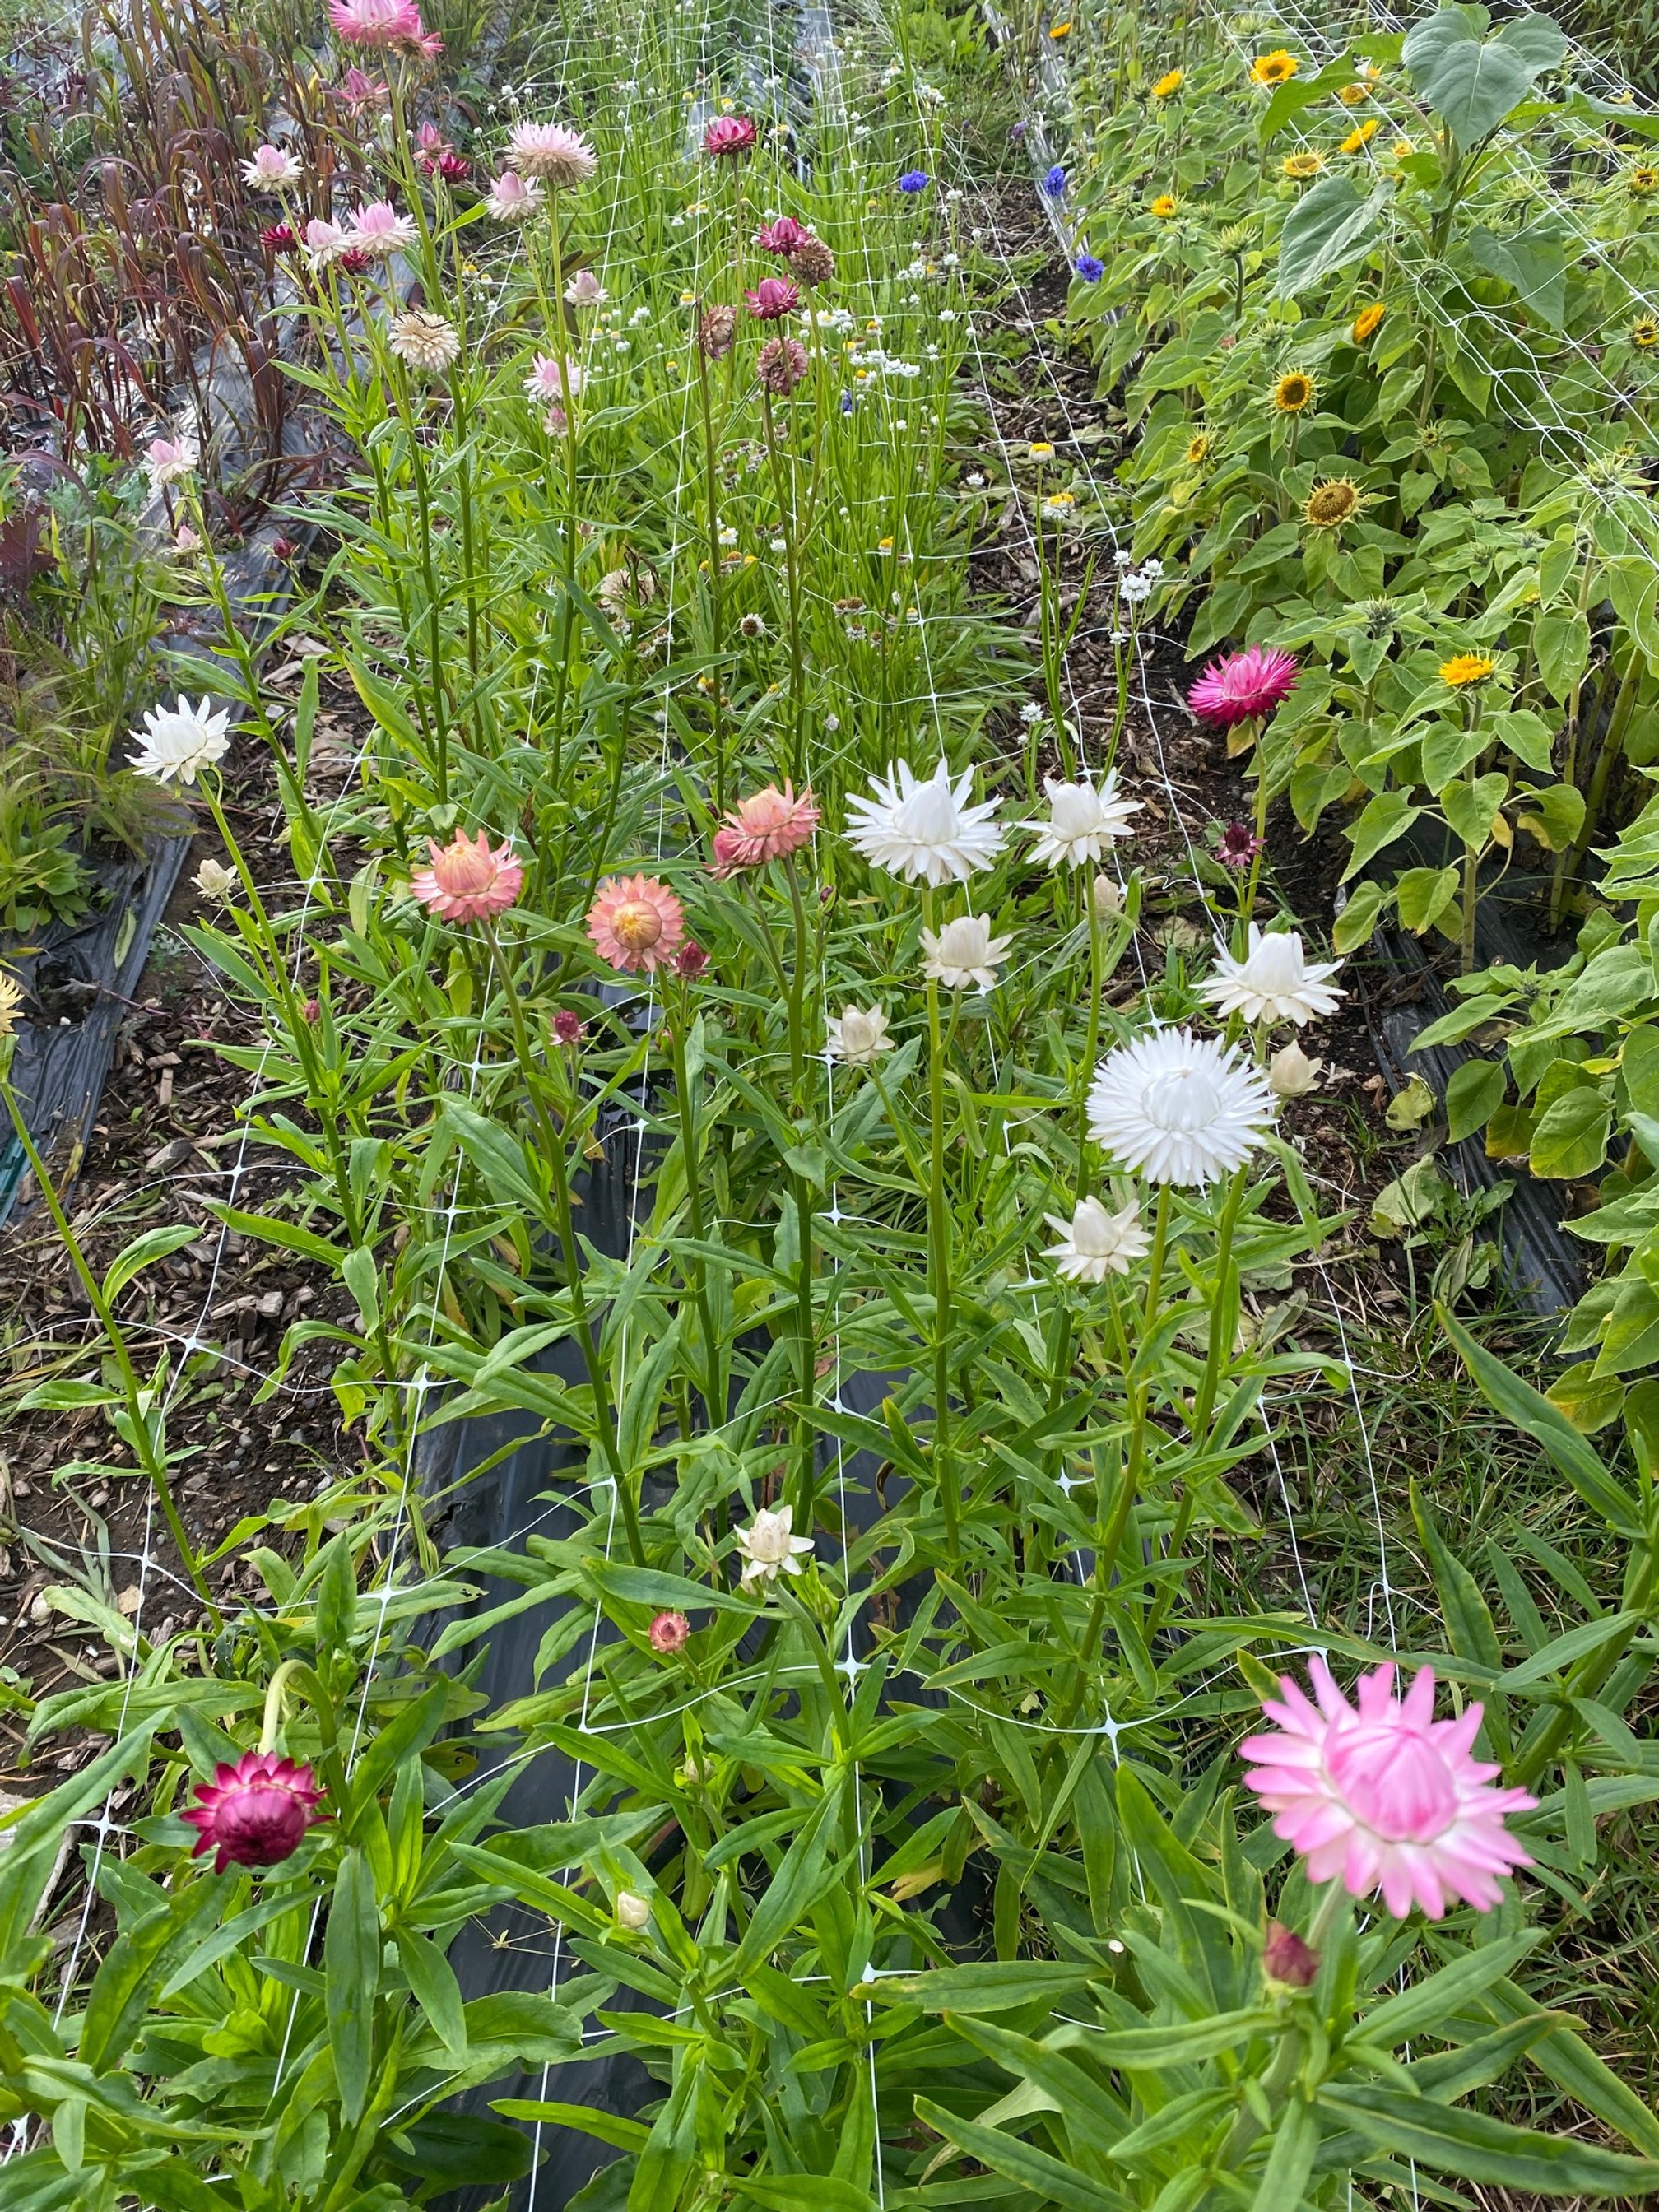
#5 Strawflowers are an easy and whimsical addition to your garden.
Copper Red, Purple Red and Apricot are my favorites. Although there are so many kinds, so you can’t go wrong.
Strawflowers benefit from pinching. If you don’t, you will get one flower on one very thick stem.
I’m seeding my strawflowers in week 14 and week 17.
Fun fact: harvest at different stages of bloom to get different looking elements in your arrangements: bud stage, just about to open, and fully open.
A dried Turnstone Farm arrangement with strawflowers.
10 Steps to Planning your Dream Garden
Get ready for the best garden ever by following these simple steps.
If you haven’t planned your 2023 garden yet, put it on your schedule!
Get your planning done now so that when planting time comes, it’s smooth sailing through the busy and exciting spring season.
Spring will be here soon.
Here are the 10 steps to planning your dream garden:
Put it in your schedule.
Give yourself ample time to plan. Take care of yourself by giving yourself quiet time to sit, think, and plan. I like to give myself 60-90 minutes of “focus time” for projects like this. After 60-90 minutes I need a break!
Write out all the plants you’d like to grow.
How do you decide? If growing veggies and herbs, grow ones your family already loves to eat. If growing flowers, choose ones that complement where you are expereince-wise. Grow beginner flowers (link to blog) if you’re newer to gardening. Grow harder ones if you want more challenge.
Get real about what you will be growing this season.
Now it’s time to whittle down the above list into a manageable “Core Crop” list. For starters go for 5 veggies, 5 flowers and 2-3 herbs.
Pick your varieties.
Now is the fun time! Once you have your “Core Crop” list, you can dig out those gorgeous seed catalogues and get specific about what you’re growing. Pick varieties that do well in your climate and growing location. Read the descriptions carefully so you get all the information.
Plan your seeding dates.
This is the most challenging part of your planning. I like to create a spreadsheet for this. That way each year I can make adjustments or just do what I did last year.
Need more guidance on this, GET ON MY EMAIL LIST to get notified when The IncrEdible Garden Course opens again - this is my signature online course that teaches you everything you need to know to grow a highly successful backyard oasis filled with food and flowers your family will love.
Plan for succession planting.
In other words, don’t plant all your broccoli seeds at once! Plan to seed accordingly so that you have crops continuously all season.
Draw your gardens.
Use grid paper to draw all your gardens.
Draw in your crops.
I like to make note of all my planned seeding dates (if direct seeding) or all my transplant dates (if seeding indoors) right there on my garden drawing (or map).
Put your first seeding date in your planner or calendar.
Plan for success by having all your tools and supplies ready to go so on your first seeding day, you can get right to work.
Start your garden journal.
This can be a note on your phone (I use Evernote) or a paper journal where you write down everything you notice, see, or experience in your garden. It’s where you write down your failures and your successes. There’s nothing worse than failing at the same thing twice because you forgot to take note of it. This is how you become a better garden!
Don't Start Your Seeds too Early!
It’s January and I know very soon, I’m going to be itching to plant my seeds indoors. This is such a joyful time of hope and anticipation.
I know, you’re itching to start your garden too. But hold on to your horses…
One of the most common mistakes you can make is starting crops too early inside.
Why is this a problem?
Nothing stresses a plant more than being confined for too long.
They deplete resources from the potting mix and they start to grow their roots in circles, becoming root-bound in their tiny pots.
Unless you have A LOT of space and plenty of lights, it’s best to practice restraint and start your seeds a bit later.
Here’s how to figure out planting dates for your garden plants.
Figure out your last frost date.
Read the back of your seed packet or look up your specific variety in a seed catalog. It should give recommendations on when to plant indoors. They will say something like: plant 6-8 weeks before the last frost. For this specific example, I’d go with the 6-week start date.
If they recommend to direct seed, start indoors only 2 weeks before planting out OR just direct seed. These plants usually don’t appreciate root disturbance.
Write down on your calendar what you’re starting and when.
Take notes as you go, throughout the growing season. If something gets really root-bound and is sluggish to grow after you pop it in the garden, make a note. You might try to start a week later the following year. Your garden journal is your biggest friend. If you don’t have one, start one NOW.
So, you might be wondering what I’m starting first?
By the way, I’m starting seeding a full week later than last year.
In 2022, all my cool season crops were spot on in regard to planting time. But all my warm loving crops could have benefited from getting started a week (or two) later.
Just for you, here’s a sneak peek at my first week of seed starting, which is coming up fast folks!
Turnstone Farm seed starting the week of March 12th:
Oregano
Sage
Rosemary
Thyme
Snapdragon - Potomac Varieties. These guys grow relatively slow and love the cool spring temps. I try to start these as early as I can because they can be planted before the last frost.
If I was starting perennials that I may want to bloom the first year, I’d start them now too.
Thats it for my first week of planting.
Happy garden planning!
Best of 2022: My Favorite Flowers from the Cutting Garden
Fall is time to dig out all the garden notes you’ve been taking and put that data to good use.
I’ve been reviewing my notes and I’m here to tell you what I absolutely LOVED in my cutting garden this year.
These are all annuals, grown specifically for my cutting garden.
I will follow this post with a blog on perennials. As they become a bigger part of my cutting garden, they deserve their very own article.
So without further ado, here are my top 9 Cutting Annuals for 2022:
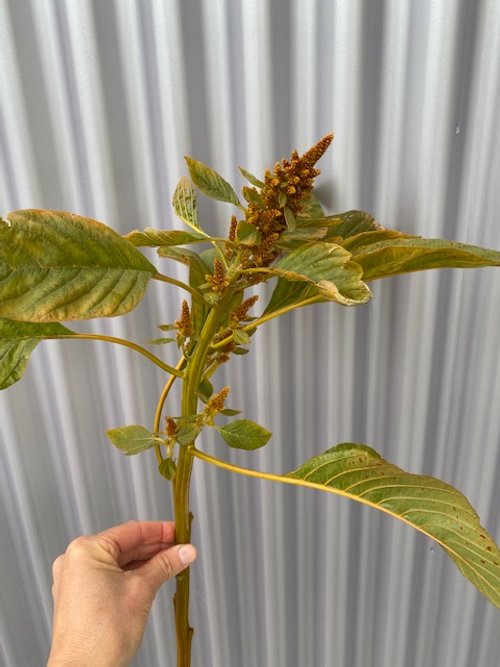
Hot Biscuits Amaranth
Amaranth is a beautiful grain that has gorgeous foliage and stunning inflorescence.
Hot biscuits consistently out-produced all the other Amaranth varieties I grew in height and size. It was such an amazing fall-colored addition to bouquets.
I looks full and interesting in the garden and does amazing in the vase. I consistently had it in the vase for 2 + weeks.
In addition, you can hang it to dry for an everlasting bouquet.
Campanula
These are fun and delicate blooms that look fabulous in the garden.
I also used them consistently in wedding work this year. See above bridal bouquets!
In the vase they also lasted a good 1-2 weeks in good condition.
This is an all round excellent flower.
Cut these for the vase when the first flower opens up as the other buds will continue to open in the vase.
Vintage Brown and Iron Varieties Stock
Stock is an early season bloomer and helps fill the gap between tulips and all the other garden varieties.
Its smell cannot be beat.
The flowers are edible.
It lasts for a solid week + in the vase.
It comes in a variety of colors: white, apricot, purple, light and bright pink and yellow.
While a more challenging flower to grow as it must be started earlier, dislikes dry conditions (spring 2022 anyone!), and dislikes heat, it is well worth the challenge.
Salmon Frosted Breadseed Poppy
This one was a show stopper this year.
These were like little explosions in the vase. I cut them just as they start opening up and then they poof out into big fluffy balls of color.
While all poppies have a short vase life, this one did a little better than most. I got a solid 3+ days of blooming time in the vase.
That’s good news y’all!
Some flowers are more ephemeral than others.
Giant Orange Marigold
This flower makes my favorites list every year.
Here’s why:
It has a stunning and cheery color.
It smells heavenly.
It dries well.
It can last up to 3 weeks in the vase.
One plant pumps out blooms almost all summer long.
It’s easy to grow.
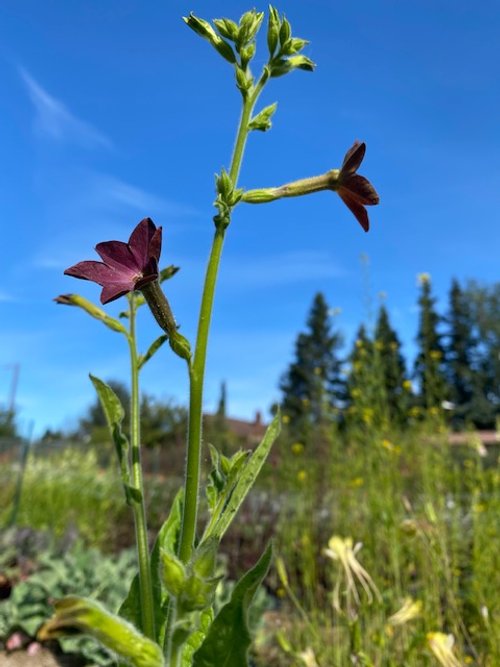
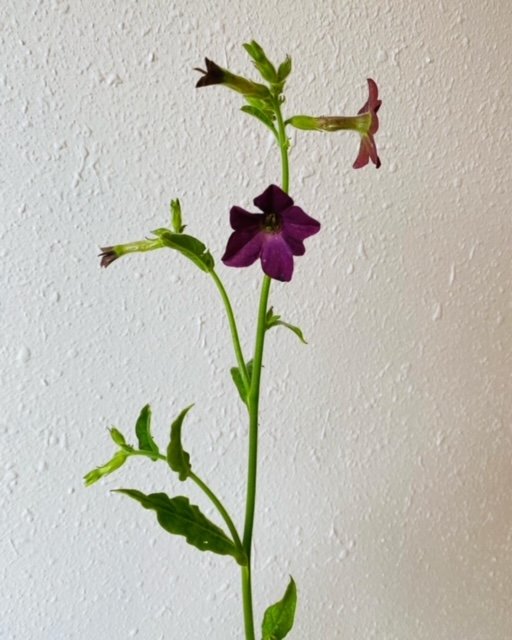
Bronze Queen Nicotiana
I LOVED this flower. It is delicate and whimsical and was the perfect addition to most of my bouquets.
As a garden flower it adds interest and texture but is a little sparse. It is not big, showy or bright.
In the vase is really where it shines.
It has a long vase life and it is so fun to look at those delicate little trumpet flowers!
Godetia
While this one didn’t make my initial “best of” list I’m listing it here for the home gardener.
I have not decided if I’m growing it again next year for my cutting garden but I would highly recommend it as an addition to any flower gardeners repertoire.
The pros: it lasts forever in the garden and in the vase - florets just keep opening up. It is short and sturdy for garden beds. It does well in shorter vases.
The cons: it is too short to use in most bouquets. The petals are easily damaged by rain.
Try it and see if you like it!
Rubenza Cosmos
Cosmos is a staple of mine every year.
These flowers are delicate and ephemeral. They look stunning and full in the garden and marvelous in the vase.
Part of their joy is that they can’t be shipped since they are so delicate.
You can only have these in your vase if you grow them yourself or buy from a local farm.
Rubenza is a magical deep maroon color with a vibrant yellow center. I find myself marveling at it’s beauty EVERY time I see it.
Oxford Blue Scabiosa
This is a tall plant with long strong stems.
It looks gorgeous and lively in the garden or you can cut it just when the first florets begin to open. When cut at this time it will last a solid 1-2 weeks in the vase.
Scabiosa loves cooler temperatures so does better in our cooler Alaskan summers.
How to harden off your plants
One of the most important parts of growing a successful garden is getting your plats hardened off.
What plants do you need to harden off?
Not all plants need hardening.
If you’re growing in a greenhouse, any plants going in there don’t need to go through this process.
Direct seeded plants don’t need hardening (maybe this is obvious). If you’re seeding directly into your garden beds, your seedlings will pop up all ready to deal head-on with the elements. This is a big benefit of direct seeding.
ALL other plants will need some hardening off.
Stock, snapdragons and other cool-hardy flowers getting hardened off under shade cloth.
Plants need some sort of gradual adjustment to outdoor conditions. After being cozy and warm indoors for their entire lives, it can be stressful to get popped directly outdoors.
The first plants I harden off in the spring are all the “cool-hardy’s”. These are plants that can survive a light frost and include the following:
Most salad greens
Spinach
Kale
Broccoli
Peas
Onions
Snapdragons
Bupleurum
Poppies
Rudbeckia
Calendula
Ammi
Strawflower
Campanula
Nigella
Most perennial flowers that are suited to your zone.
In general, to get fully hardened off, plants need about 3-5 days in the shade.
When nighttime temps are steadily in the 30s, the above varieties can be set out in a shady spot. In previous years I was moving my plants all over the place, from shady spot to shady spot.
This year I finally streamlined my process and started using hoops (made of thick wire and then stuck in the ground) and draping 30% shade cloth over the top.
My cool loving plants go in here and in 3-5 days we’re good for planting!
For warm-season plants, I’m a little more cautious. Ideally, before hardening these crops, our night temperatures would be in the 45 + zone. In Alaska, this can be a tall order!
So for these, I watch the weather and put them in their shade hoop when temps are in the 40s or higher. Using past last frost dates can work but since each spring is so different sometimes it’s hard to predict.
To help any early-planting anxiety you may have about cold temps, you can always add extra protection by putting a layer of Agribon over the hoop as well.
In fact, this would have helped me this season as I pushed it a little with a few varieties and killed off a few trays during a spotty frost that struck our neighborhood last week.
(sigh)
I guess it’s just a good reminder that a good fail is always the best way to be successful in the end!
30% shade cloth hooped over my cool-hardy flowers.
7 aromatic herbs that also look great in a vase!
I grow lots of herbs. Most are easy to grow and have many multi-purpose benefits for the home gardener and flower farmer.
In this blog, I want to introduce you to 7 herbs I grow every year that not only do culinary wonders but also look great in a vase.
In addition to being a fun addition to the vase, here are some additional benefits of growing herbs:
If you have a tiny garden, growing herbs maximizes your space since you’ll be growing a plant for both culinary and cut flower purposes. I’m all about the multi-purpose plant!
If you don’t have much space to grow, most herbs do great in planters on your porch. In fact, since I like to keep mine close at hand I often grow them in pots just so I can quickly pop out to the porch to pick them.
Once gone to flower, herbs attract and nourish beneficial insects which help keep away the insects you don’t want around.
Fresh herbs are often hard to find and can be expensive at the grocery store. Lucky for you, they are best from the garden anyway!
Picking herbs and keeping a small jar of herbs on your kitchen counter is the best way to keep them once harvested (don’t let them rot in the crisper). My husband and I joke that the crisper is where veggies go to die. This will give you super easy access to them the next time you cook and will bring a nice pop of greenery into your kitchen.
So here are 7 herbs you must add to your home garden.
Chive: Chives, while not easy to start from seed are easy to grow once established. They spread steadily, so every few years you’ll have to dig and replant or give away a clump. The flowers on chives are SO delicious and do great in a vase.
Cilantro: Calypso is a slow to bolt variety great for growing in any northern climate. Use this culinary herb in your favorite dishes. I love a good homemade salsa with lots of cilantro.
Once it has gone to flower, harvest for an aromatic bouquet. The seed heads are also a lovely and fun addition in a bouquet.
Dill: Bouquet variety is specifically for the cutting garden but is also edible so it’s a win-win! This is a super fast grower. You can use the flower or seed head once fully open. The seed heads are also great for drying.
Fennel: Bronze leaf is a beautiful variety. It produces gorgeous flowers and seed heads. Harvest flowers once they are beginning to bloom or use foliage to add texture and a unique color.
Mint: both Common and Mountain varieties are fantastic. Common mint is a rapid spreader so make sure to plant in pots or be prepared to cut it back every year.
Mountain mint is not a spreading variety but in my experience, is very slow to grow and doesn’t always come back year after year. If I plant 10 plants I may get 2-3 to come back again the following year.
Oregano: Greek variety is a best bet. My oregano comes back year after year but even so, I usually start a few plants every spring just in case.
I love letting these go to flower before I cut for the vase. They are long lasting in the vase and fill in an arrangement nicely. Oregano leaves dry well for later use.
Sage: Common sage is a perennial that will flower the second year. Use foliage in culinary dishes, dry for use all winter or use foliage or flowers as greenery in a bouquet.
In my garden, sage will come back for 2 to 3 years and then die out. Because of this, I start a few new plants each spring to keep my garden well stocked.
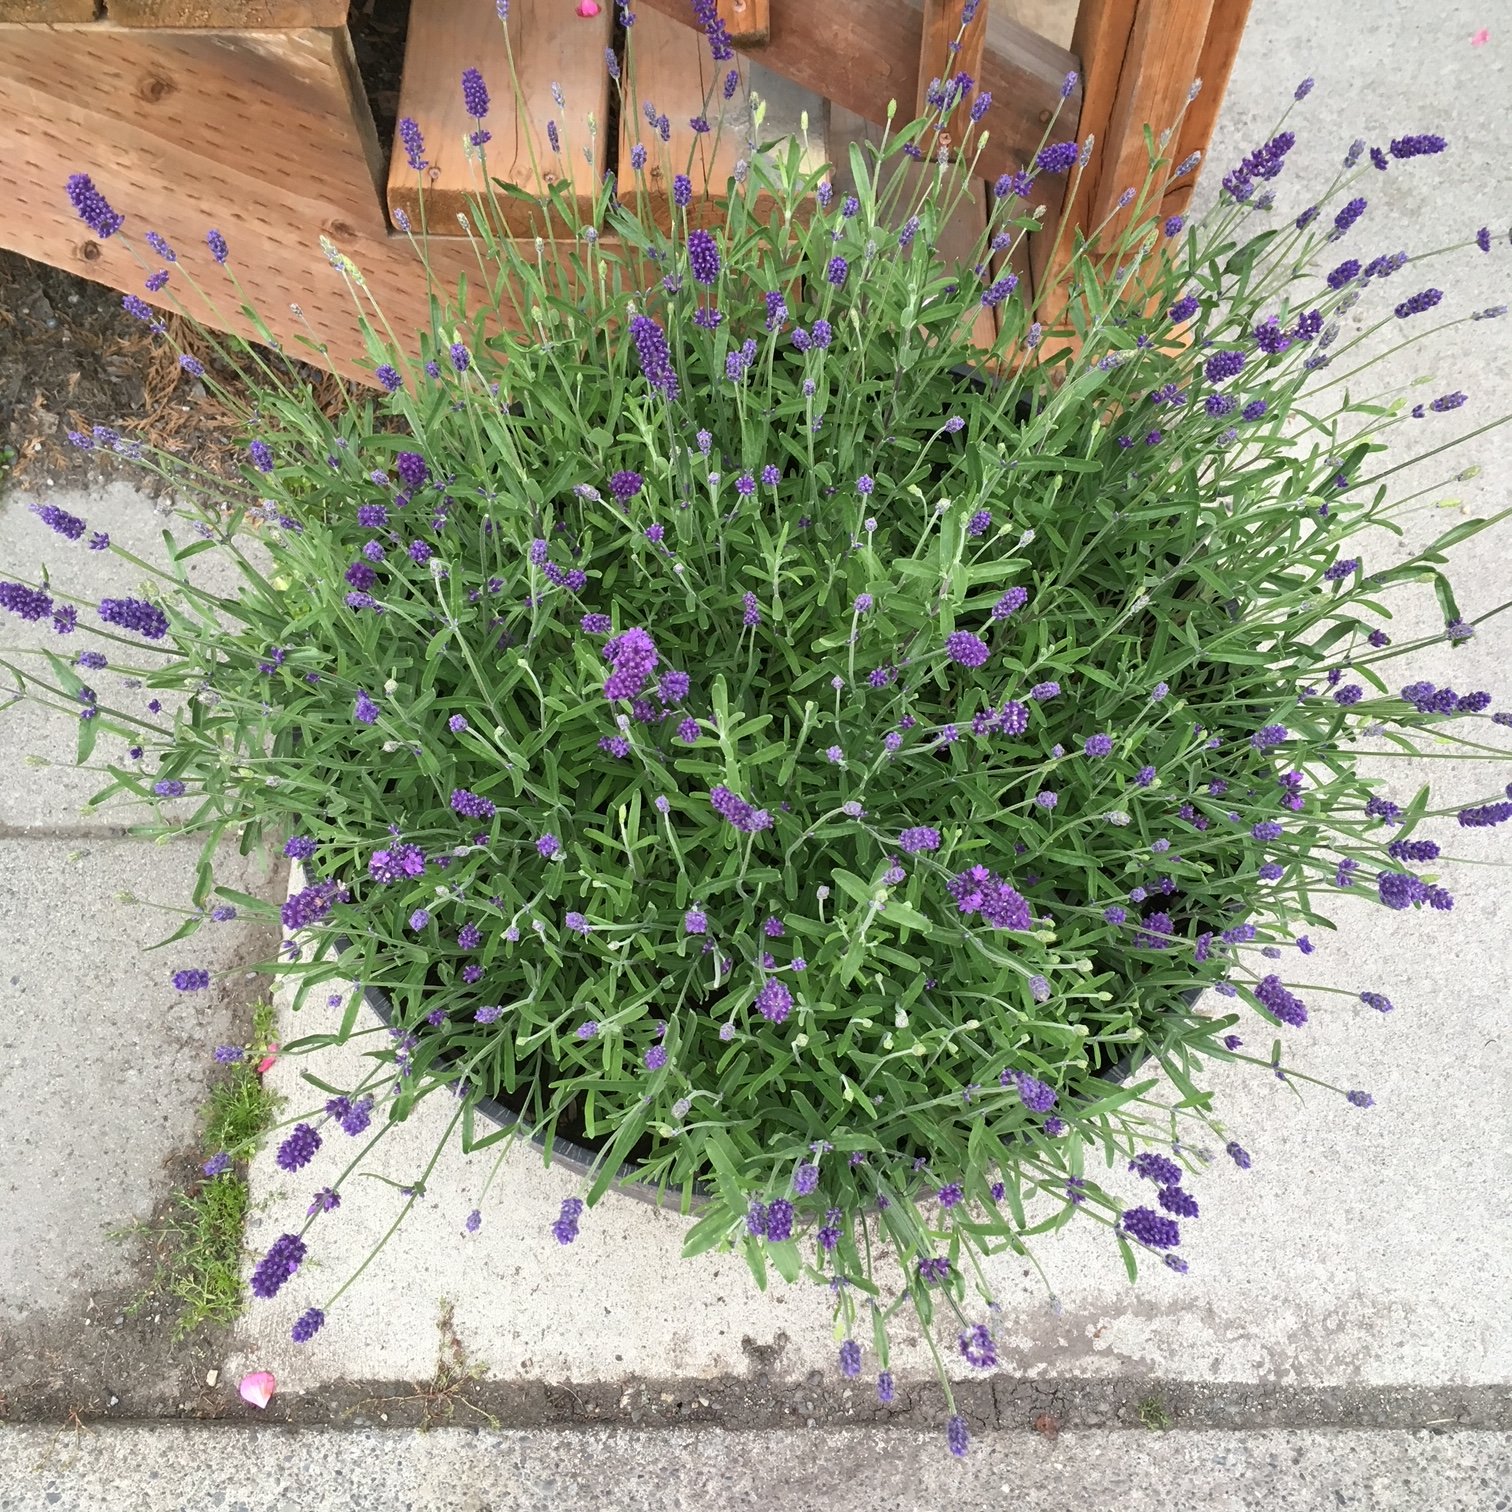
Left to right: Lavender thriving in a planter, Chive flowers - my mouth is watering just looking at these, Sage flowering big time in my home garden.
Plus a bonus herb I encourage you to try!
In addition to these fabulous and relatively easy-to-grow culinary herbs I also want to mention another favorite flower/herb: Lavender. I grow the Elegance variety.
Lavender is more challenging to grow in my northern climate. It is a slow grower and thrives in warmer temps.
This is one of the earliest plants I start by seed. I then make sure to plant it in a warm, sheltered environment which usually means in a pot on my super sunny front porch.
Harvest mature flowers for the vase or harvest each stem when flowers are budding if you want to hang for drying. Lavender keeps its aroma and color well after drying.
If you’re up for a challenge, try this amazing herb. The beauty, aroma, and happiness you will enjoy from this plant are priceless and well worth the difficulty!
How to Grow Ranunculus
One of the most popular flowers right now in the modern florist and wedding flowers world has to be ranunculus.
And for good reason! These beauties are amazing. They have this multi-petaled rose-like quality and they last forever in the vase, especially when grown locally (like in your backyard).
Plus, as garden flowers, they are so bright and beautiful! I want to see these growing in more gardens around town.
I do consider these a more advanced flower to grow, mainly because the process of starting these is a bit different than other cut flowers.
But do not fear! I am here to walk you through the entire process. From ordering corms to harvesting blooms for the vase.
So let’s jump right in.
Where do I get ranunculus corms?
Since ranunculus is started by corms (root matter saved from the previous year’s growth), you must first source and order these.
I sell a mixed bag of 20 corms each spring. Be sure to hop on my email list HERE in order to get first dibs on all my sales. For 2023 I am selling Picotee varieties in purple, orange, and pink. I order hundreds of corms each fall and save my own varieties from year to year, so I end up with plenty to share.
If you’re looking for other varieties check out Ferna Farms. They are another small farm offering these awesome corms to home growers.
When do I start ranunculus corms?
I start all my ranunculus about 2 weeks before planting out.
My plant-out date will be early May, so I’m starting all my corms the 3rd week of April.
Once sprouted, these guys grow fast! Plus, they do well in cooler temps, so if covered, they can weather a few touches of frost.
How do I start them?
First, you’ll need to soak your corms.
What the heck does this mean? It simply means, popping your corms in a bucket, adding cool water, and letting them sit for about 4 hours.
Some farmers recommend gently agitating the water while they are soaking (using a fish tank bubbler or leaving a stream of water running). I’m here to say, I’ve done it without any agitation and everything turns out OK.
Once properly soaked, they will look relatively plump. Now you’re ready to pre-sprout.
Pre-sprouting consists of layering a grow flat with potting mix. I use ProMix seed starting mix (ideally organic if I can find it locally).
Once a layer of the mix is in the flat, place your corms root-side down in the tray. If you think of your corms as little octopuses, the “tentacles” go down.
You can place them pretty close - I do about 2 finger-widths apart. Then, cover them with soil.
Lightly water (err on the side of too dry than too wet otherwise your precious corms may rot) and place somewhere dark at room temp.
Check these daily. Once they have started to grow green shoots out of the soil, it’s time to place them under lights at about 16 hours/day or if your garden beds are ready for them, it’s time to plant.
Planting soaked corms in seed starting mix for pre-sprouting.
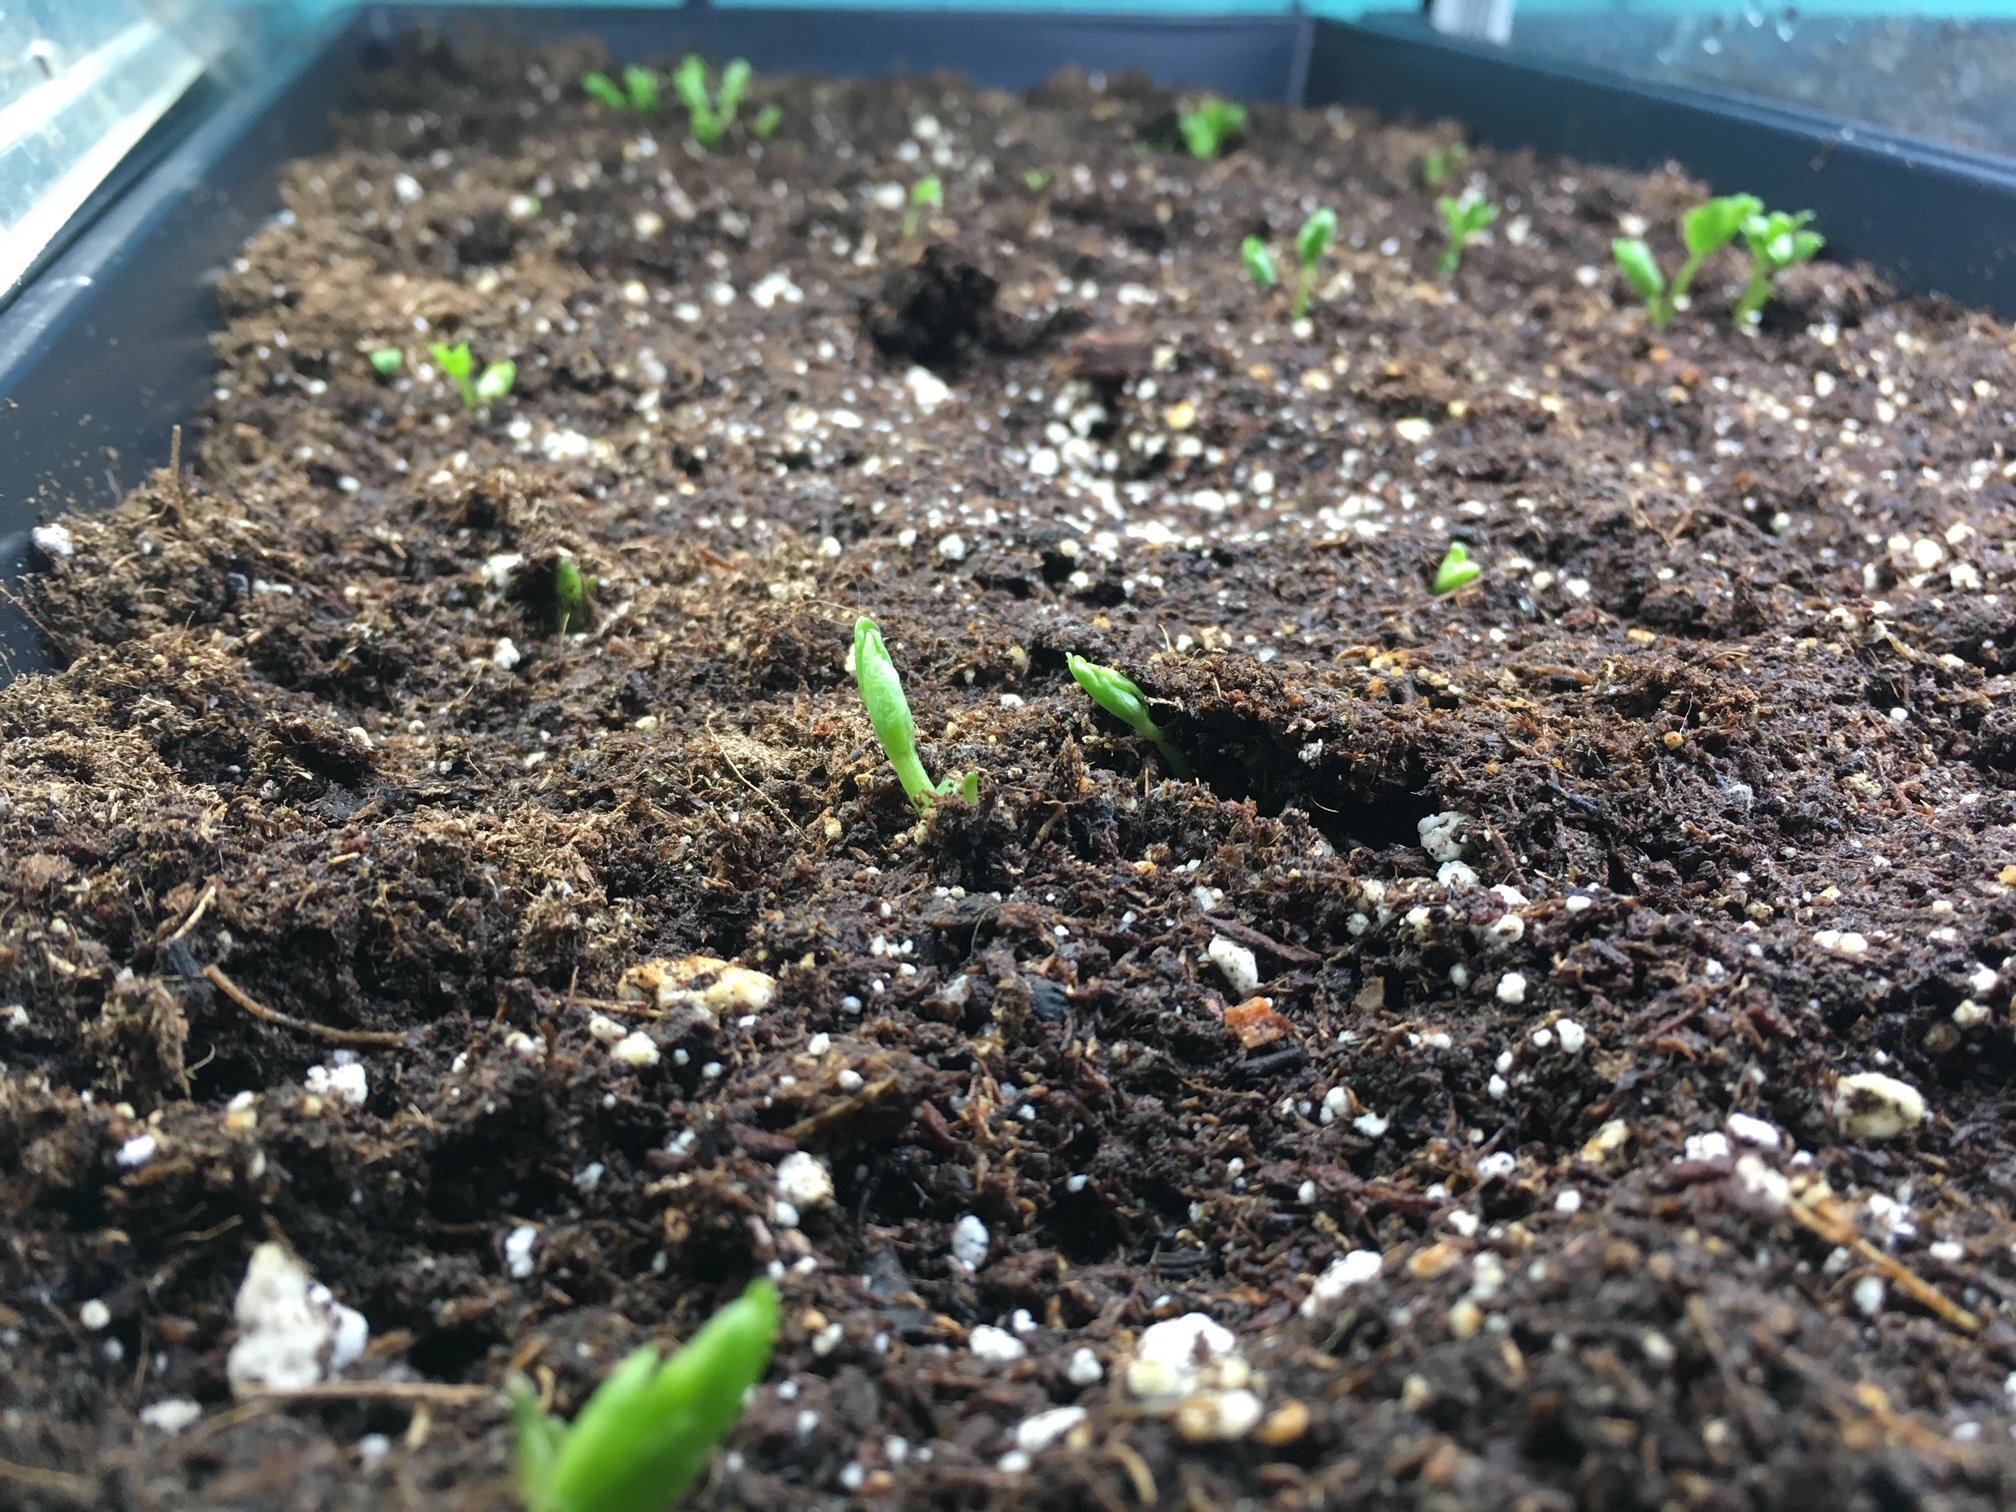
Ranunculus beginning to sprout and grow under lights.
How do I plant ranunculus in the garden?
After pre-sprouting your ranunculus, they are ready to plant in the garden. Gently loosen each corm from the potting mix, dig a shallow hole, and place them in your garden bed. I plant mine about 9'“ apart.
They will benefit from a general-purpose organic fertilizer and bone meal application at planting time.
How do I tend my ranunculus plants?
Ranunculus care is similar to other cut flower care. As they can grow taller, they will be susceptible to wind and heavy rain. I suggest staking or netting them in your garden. Or at least, planting them in a sheltered location, out of any spring or summer winds.
How do I cut my ranunculus for the vase?
Ranunculus is cut as soon as the flowers reach the “soft marshmallow” stage. If harvested too soon, they will not open. You can wait until they are fully open to harvest but their vase life will be diminished slightly.
Please know that you don’t have to cut for the vase. Ranunculus looks gorgeous in the garden! And they bloom prolifically until the heat of the summer comes on strong.
SPECIAL NOTE ON GROWING A FALL RANUNCULUS CROP:
I learned this technique from a farming friend in Norther Alberta who has similar summers to where I grow.
Since the first planting of ranunculus will most likely peter out in late July, I loved the thought of a second planting. Last year I tried it for the first time.
Here’s what I did:
I saved about half my corms (you can just hold them at room temperature in a paper bag).
Go through the same steps of soaking and pre-sprouting starting in mid-June.
Plant in the garden once they have pre-sprouted and tend normally.
If you live in an area with cooler summers, you will be blessed with a late crop that will bloom until the first frost!
10 reasons to grow a garden
Whether you’re a newbie to gardening, a wanna-be gardener, or an intermediate gardener who just needs a reminder, I’m here to…
1) offer a little inspiration for why we all need to tend a garden
and
2) show you how to be successful in any garden endeavor (CLICK HERE to check out my online gardening class, which goes on sale again in March of 2023)
Now for the inspiration part…
Here’s why to garden:
You’ll get regular low-intensity exercise: Here’s what your body does when your gardening: standing, squatting, bending over, walking all over, reaching, stretching, hauling, lifting, pulling, carrying, etc. Science tells us that longer periods of low-intensity exercise may offer more benefits than shorter periods of intense exercise. I’m not advocating you stop running or going to the gym but I am advocating that you create more enjoyable activities in your life that keep you moving and standing (just pretty much anything besides sitting on your duff).
You’ll feel a sense of accomplishment: In a fast-paced world loaded with tech, creating something with your hands that YOU can harvest for your family is truly sacred.
You’ll get more outside time: Most people spend their whole days working inside. Being outside is a true balm for the soul. Having a garden to tend to, kind of like having a dog to walk commits to you spending more time outside.
You’ll meet your neighbors: If you garden in your front yard I guarantee you will get to know your neighbors well! This is such a fabulous byproduct of gardening.
You’ll teach your kids solid life skills: Here’s what your kids can learn from a backyard garden: responsibility, love of nature, care of living things, curiosity, cooperation, self-sufficiency, that veggies taste good, just to name a few. Plus, once someone knows how to garden, they’ll know it forever (just like riding a bike). Imagine giving your kids the gift of being able to grow their own food!!
You’ll eat the healthiest food on the planet: If you grow using my methods… organically and with solid soil-building techniques, your vegetables will be loaded with nutrition. The health of the soil directly affects the nutrient density of your food.
You’ll eat the most delicious food on the planet: I’m not surprised why some people don’t like vegetables, especially if their only method of consumption is through frozen or “fresh” veggies from the grocery store. You guys, if you haven’t experienced fresh garden strawberries or fresh garden peas, or fresh garden anything YOU are missing out on a culinary wonder. Veggies were meant to grow, pick and eat immediately. Yes, it is great to learn to store them for later too but let’s face it, if you are growing your own veggies, you will eat way more veggies because they are so damn good. Make eating healthy easy! Start with superb taste by growing your own.
You’ll enjoy beauty every day: Now, technically this is possible to do every day without a garden BUT gardening has the opportunity to enhance our yard so beauty is EVERYWHERE. Plus, if you follow my steps to start growing your own cut flowers, you can fill your home with beauty too. Fresh flowers smiling at you from your kitchen counter is truly a beautiful thing.
You’ll feed pollinators: Bees and butterflies and other beneficial insects love gardens. They love flowering gardens. So let your herbs go to seed, let your mustards and broccoli go to seed (after you’ve harvested some of course), plant flowers, and your yard will be a playground for all the good bugs. Good bugs help pollinate our food crops and they eat other not-so-good bugs.
You’ll have gifts to give: My neighbors grow tons of basil and garlic and every year all of us neighbors on the street get the most amazing jar of pesto. Sharing your garden’s bounty is one of life’s greatest pleasures.
So there you have it.
I hope I’ve convinced you how amazing growing a garden can be.
And now, I want to personally invite you to join my March 2023 launch of The IncrEdible Garden Course - a three-week online course designed to teach you the fundamentals to create a backyard oasis full of food and flowers your family will love.
GO HERE to learn more!
Container Gardening for EVERYONE
I know that for some folks, space is a huge issue when it comes to gardening.
I spent years gardening on my front porch in any vessel that would hold soil. Fortunately, I now own a home with a modest lot and manage an entire vacant lot to grow on - YES, I am blessed.
That being said there are a few reasons I still love growing cut flowers in containers:
1) It increases the amount of space I can cultivate. Even with all my gardening space, I still feel a little greedy in this department - I want more!
2) You can line a porch or patio with them, creating cozy outdoor “rooms”.
3) They are inexpensive to start.
4) They bring your gardens and flowers closer to your home, creating beauty you can view from inside your home (I love positioning all my gardens within view of key windows).
5) If arranged in a sheltered area around your home, you can often plant earlier and harvest later since they are growing in a warmer microclimate (the potted dahlias that I grow on my porch usually get a solid 2 weeks of additional bloom time in the fall.
Grow your dahlias and eat too! Kale planted next to dahlias is both beautiful and utilitarian.
Not sure what to grow in pots?
Here are some of my favorite varieties to pop in a planter:
Calendula
Ammi
Dahlias
mini Sunflowers ( I love growing these en masse in a large container. This is any single stem sunflower, they are simply spaced 4 inches apart in the container. The close proximity will keep them small)
Bachelor buttons
Snapdragons
Cosmos
Borage
Lavender
Nasturtium
Poppies
Sweet Peas
Salad mixes
Greens (kale, collards, etc)
Radishes
Cucumbers
Tomatoes
Pumpkins
Herbs
Space everything a little closer than you would in the garden.
I try to squeeze as many plants into a container as possible. Just remember that overcrowding can lead to less than robust plants. In general, space most plants 6-8 inches apart. If growing dahlias, they need 5 gallons each as a minimum.
So what kinds of planters do you need?
The sky really is the limit, but to get you started here are some ideas. Half whisky barrels, large containers from the garden store. In general anything around 2 gallons and larger. Single herb plants will thrive in a gallon container, but that’s the smallest I ever go.
If using old whisky or wine barrels, ask the garden store if you should line them. Sometimes this is needed if there is alcohol residue in the wood - this will leach into the soil and kill your plants.
Make sure any planters you are using have good drainage. If not, drill small drain holes in the bottom.
Once you’ve got your containers, you’re ready get dirty and fill em up!
Here’s what I fill my containers with: 1/3 garden soil, 1/3 compost, 1/3 potting mix. You can re-use your soil year after year, just treat it like your garden soil and amend it with compost and organic fertilizers every year.
When can you plant?
The great thing about growing in containers is that if you position planters in a warm and sheltered place in your yard (usually close to your house), the soil thaws out quickly each year.
You can often plant earlier than you can in your in-ground beds.
I start my early-season salad mix in April (my last frost date hovers around May 15th). Warmer season crops I still wait until there is no chance of frost.
With this planting schedule, I can easily squeeze two crops into the same container: first my cool-season salad (planted in April and harvested through May), then my warm-season dahlias (planted at the end of May and harvested through September).
Final notes.
The main downside of container growing is the time committed to watering. During a warm summer, when plants are mature, you can plan to water at least once per day, sometimes more.
In addition, any cut flower will grow tall and beautiful. Don’t let a windstorm ruin all your hard work. Stake and support your flowers early. Check them periodically to make sure they’re secure!
Itching to learn more? My online course, The IncrEdible Garden, starts in February 2022!
If you’re not already, YOU MUST GO HERE TO GET ON MY EMAIL LIST FOR FIRST DIBS.
Garden Supply Check-list
Spring will be here faster than you think and with that, it’ll be planting time! So let’s get organized.
I want to get you set up early so you’re ready to break ground, or pop those seeds in the soil, as soon as you can.
With supply chain issues going on this year I also want to make sure you buy anything additional that you need soon so you have EVERYTHING you need for a great growing season.
Here’s my challenge to you: over the next 10 days, grab this checklist and head into your garden shed for an early season inventory!
Seeds - inventory what you have - most seeds are viable for 2-3 years
Potting soil for seed starting
Grow lights
Shelving for your plants and lights
Trays and domes - you can use these again and again just be sure to wash before planting
Heat mats & thermostat
Timer for your lights
4 packs or 6 packs - you can use these again and again just be sure to wash before planting
3 inch pots or 4 inch pots - you can use these again and again just be sure to wash before planting
Gallon pots - you can use these again and again just be sure to wash before planting
Plant labels - buy or make your own
Dish gloves or latex gloves - for seed sowing indoors these help keep my hands from getting all dried out
Watering can - I like a kids specific one for watering indoors
Soil test - DIY kit or identify a lab to send out to
Organic soil amendments per your soil test
Compost - home-made or commercial
Trowel
Weeding tools
Pitch fork or broad fork
Bed prep rake or stiff tined rake
Pots and planters and/or garden beds - I know they’re all covered in snow, just make a plan, especially if you need more
Trellising and staking supplies
Garden journal or calendar
Your garden plan and garden map
Garden gloves - I love having a leather pair and a more waterproof pair
Knee pads or equivalent
Did I forget anything? Comment below to share your must-haves for the season.
Tried & True Garden Varieties
Giant Orange Marigolds.
In order to get you growing an amazing and fail-proof garden, I want to get you started with some of my tried and true varieties.
Since I’m a flower LOVER and flower grower this list will be flower heavy. BUT I also want you to have some of my favorite varieties for your veggie garden.
Over the years I’ve rubbed shoulders with vegetable farmers (quite literally - my husband managed a large vegetable CSA at the same time I started my flower farm) and tested different varieties myself.
Often just choosing the right varieties will set you up for success in the garden. And with SO many fun and beautiful varieties out there - how do you know what to choose?
By putting your ear to the ground and being committed to experimenting!
Wiser growers than I have told me to commit 20% of my farm to new varieties. I’m recommending this to you now too.
Don’t go overboard with new stuff - then you risk wasting too much valuable garden space to varieties that you’re not actually sure will produce well. Stick to tried and true varieties and dip your metaphorical toe into fun and exciting new ones each year.
So now on to my tried and true varieties that I know, you’ll love.
First, for the flower garden:
Ammobiom
Ammobium aka Winged Everlasting.
Centaurea - Classic Magic, Blue Boy OR Black Button
Calendula - Orange Button
Cosmos - any Double Click Variety
Cynoglossum - Chinese Forget-me-not OR Firmament
Dill - Bouquet
Ornamental Grass - Frosted Explosion
Marigold - Giant Orange
Nasturtium - Trailing
Nigella - Albion Black Pod
Poppy - Breadseed OR Shirley
Shirley Poppy.
Rudbeckia - Cherokee Sunset
Saponaria - Pink Beauty
Scabiosa - Black Knight
Snapdragon - Potomoc varieties OR Madame Butterfly varieties
Bunches of Potomac Snapdragons.
Strawflowers - Copper Red OR Purple Red
Sunflowers - Procut varieties OR Sunrich varieties
Now for the veggie patch:
Beets - Touchstone Gold & Chiogga
Broccoli - Belstar
Belstar Broccoli just starting to grow crowns.
Carrot - Yaya
Cilantro - Calypso OR Cruiser
Cucumber - Diva OR Socrates
Kale - Red Russian OR Lacinato (also called Dinosaur or Black)
Red Russian Kale co-housed with Dahlias.
Peas - Sugar Ann OR Sugar Snap
Pumpkin - Cinnamon Girl
Spinach - Corvair
Tomato - Sun Gold
Zucchini - Dunja OR Blck Beauty
There you have it! This is by no means a comprehensive list but it’s meant to get you on the right track to a highly productive garden this season.
So now on to ordering seeds! GO HERE to read all about my favorite places to place your order.
My exact meditation & journaling practice
Over the years I’ve meditated and written in my journal. As a yoga teacher, I dipped my toe into meditation because that was part of the whole picture.
As I’ve traveled through life, I can’t say how many times the importance of meditation has come up for me: from business heroes and mentors, from athletes, from ALL sorts of people.
As an ex-yoga teacher, mom and entrepreneur, I now view meditation as the most important part of any self-care practice. Why? There’s lots of science behind it! I’m not a science writer BUT I’ll get to that later. And from experiencing my own .
Now let’s just clarify - I am not an expert. I am not a guru or even an accomplished meditator! I meditate 10 -15 minutes a day. Anyone can do that. I am not special!
So here are the steps to get you going:
1) Set a time each day that will work for you. Before bed (this is me), when you wake, during your lunch break.
2) Start with 1 minute. Or 2 minutes, if you’re really feeling mighty. Seriously! Do it.
3) Each day, add a minute until you’re up to your desired time limit.
4) After you meditate, pull out your journal and set your timer again. Journal for the same amount of time as you meditate.
5) Start your journal with 3 Good Things (just write down three good things from your day). This gets the pen moving quickly.
6) Next, show appreciation to those in your life, starting with yourself. I know there are lots of people to feel appreciation for, but just choose 3-4 per day, STARTING WITH YOURSELF.
Actually write out: “I appreciate myself for writing and publishing that blog post I’ve been thinking about” OR “I appreciate my husband for serving me a coffee on the couch this morning” (yes, this actually happens to me!).
7) Then just write. About feelings and observations. About epiphanies had during your day or during your meditation. About something you’re working through. About a new belief you want to have about yourself or someone else. Just to give you a few ideas.
8) Tools to make all this easier and more fun? There’s an app for that! Insight Timer. It’s amazing.
9) Insight Timer favorite meditations and content creators to follow:
Dr. Karolien Notebaert. Listen to her TEDx Talk (available on InsightTimer). So this is where I get back to the science part. Listen to this TED Talk to get the low down on what’s really happening in your brain! Then meditate to her “Body Scan to Let Go of Thoughts & Rise & Shine”.
Jack Kornfield. Listen to his “Breathing Meditation” and his “Loving Awareness: Mindfulness of Breath and What is Present”
Sarah Blondin. Listen to her “Loving and Listening to Yourself” and “Remembering Your Worth"
10) Don’t get lost in the app - find and follow a few people (like my favorites above) and stick with it.
11) And finally, anyone can meditate. Everyone’s mind wanders constantly. The practice is acknowledging the wandering and then redirecting it back to your body or your breath.
Ok, now you’re ready to go.
Comment below to let me know how your practice is going. And remember it’s called a practice because it IS a practice.
Some days suck.
Some days you feel amazing.
But I know from experience, this will take you places.
How to be in harmony with the dark
Harmony:
noun
An orderly or pleasing combination of elements in a whole.
A relationship in which various components exist together without destroying one another.
A relationship characterized by a lack of conflict or by agreement, as of opinion or interest.
Well, let’s be honest, it’s dark out.
It’s cold out too.
I was thankful to be on a zoom meeting with some parents from my son’s school recently as we labored together through a meeting.
The best part of the meeting? Folks were given the opportunity to share what’s been nurturing them through the darkness of winter.
I’m sharing this in hopes that you will love these ideas as much as I did. And be inspired to find a way to be harmonious with the dark as opposed to fighting it or dreading it, or complaining about it (as I have been guilty of).
Here’s what came up:
Reach out and call friends and family.
Cook and then have a dance party.
Go to bed early.
Check-in with friends.
Slow down.
Light candles have fires.
Practice the 4-7-8 breathing exercise (inhale for 4, hold for 7, exhale for 8). Oh man, do this ONCE and you’ll feel a difference.
Enjoy lots of coffee and cats.
Do some yoga. This woman specified doing yoga online with a dear friend who had moved away (which I thought was so lovely)
Go to the Russian Jack greenhouse aka Mann Leiser Greenhouse (or if you’re outside Anchorage, your local botanical garden greenhouse - most larger cities have them!)
Journal about feelings and observations (Here’s what I journal about every night: I start with 3 good things from the day, then give appreciation to people in my life - starting with myself. I literally write out: I appreciate myself for….. OR I appreciate my husband for…..
Get outside in the light.
Walk.
Run.
Get your nails done.
Find a place in the woods to sit and draw and write.
Meditate and write. I have a daily practice of a 10-15 minute meditation and 10-15 minutes of journalingl. It’s amazing and I’m sharing my exact practice HERE.
Until then, comment below to tell us how YOU get through the winter in harmony with the dark and cold.
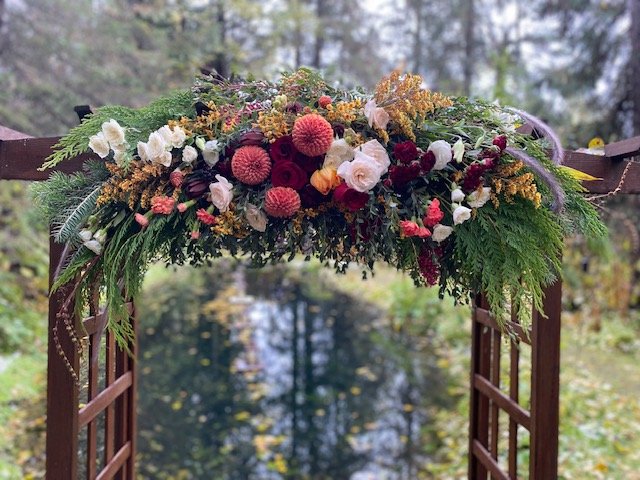
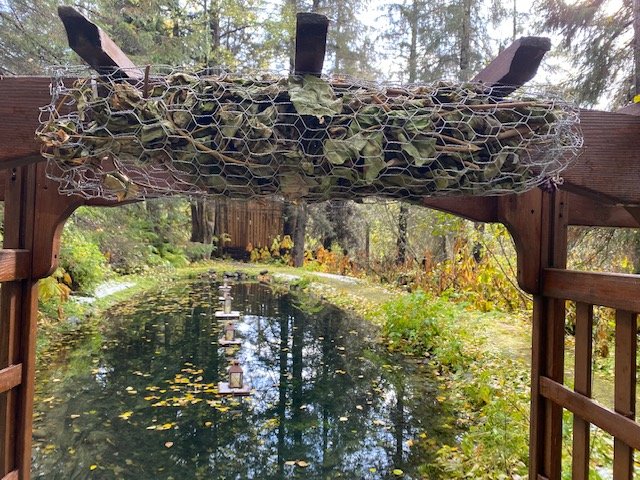
Foam Free Floral Arch at Raven Glacier Lodge
Creating wedding florals in the most earth-friendly way is important to me. This summer I had the amazing opportunity to create two arches at the lovely Raven Glacier Lodge. In both arches, I used completely renewable materials (chicken wire and floral water tubes) to create the form in which to hold the flowers and foliage.
Here are the steps to creating a beautiful foam-free arch:
Create a cage. Cut chicken wire the length you need to hold your installation. Gather branches with leaves attached and lie the branches inside the chicken wire. Be sure to size your cage so it’s big enough to hold all your stems and water tubes but not too big so it’s hanging way far off your structure.
I recommend creating the cages at your studio and then adjusting them as needed once you get to your event space.
Wrap the chicken wire around the leafy branches and secure it with bits of wire. This is the foundation of your installation. The leaves will eventually dry, and if you are able to take the installation down after the event (or get your clients to return it), you can use this again and again.
Attach your cage to your arch. I use zip ties for this. Cut your zip ties close once it is secured.
Begin designing with foliage. Use foliage to begin creating your shape.
Add in focal flowers. If these need a water source, be sure to cut stems and put them in water tubes.
Add supporting flowers and small bunches. Bunches of flowers can be made, stems cut, and wrapped in wet paper towels. These can then be wrapped in a bit of plastic and stuck in the chicken wire. If the bunches are bigger than the chicken wire holes, you can snip it to make a larger opening.
gently pull back on flowers once they are secured or gently shake the structure to make sure everything is solid!
Add additional foliage.
Add final flowers to round out your design.
Hide all mechanics with any final foliage and floral bits. Don’t neglect the back-side of your installation! Pop in some foliage or leftover supporting flowers to add a special touch.
Let the party begin!
I source all my flowers first from my urban flower farm, then from other Alaskan flower farmers and and finally from Mayesh Wholesale, who guarantees that everything I order from them is American Grown.
Local and seasonal flowers are more fresh, more beautiful and more earth-friendly!


